from beginning to end!"Project: Big Nell"(11/1/07)
Moderator: FORDification
- dablack00
- Blue Oval Fan

- Posts: 695
- Joined: Wed Jan 12, 2005 7:32 am
- Location: Texas, Lufkin
re: from beginning to end!
I didn't read your whole thread but please, bag and tag everything that comes off the truck. YOU WON'T REMEMBER! When I was your age, so many of my friends would work on an old Jeep or truck. They would take them apart to fix whatever, and then couldn't put them back together again because they didn't know which bolts went where.
Also, you have a digital camera, take lots of shots as you are dissassembling so you can go back and look at them later.
Short beds are the best. Have fun and learn.
Also, you have a digital camera, take lots of shots as you are dissassembling so you can go back and look at them later.
Short beds are the best. Have fun and learn.
-
layedout72
- Blue Oval Guru

- Posts: 1280
- Joined: Fri Apr 21, 2006 5:11 pm
- Location: Mississippi, Hattiesburg
re: from beginning to end!
I couldnt find my tape, so thats why the cables arent labeled, but thats basic knowledge on that, and will be ran to the back of the truck anyways later. All my batteries are going into the bed. Im pulling the driveshaft today probably, and the transmission sunday, if my dad is home. He wants to be there JUST in case........i guess I can't blame him  .
.
-
layedout72
- Blue Oval Guru

- Posts: 1280
- Joined: Fri Apr 21, 2006 5:11 pm
- Location: Mississippi, Hattiesburg
re: from beginning to end!
well, not only do i get a dirty stiff sock, but i get a wasp nest on the driveshaft!!! pics tomorrow morning.
-
layedout72
- Blue Oval Guru

- Posts: 1280
- Joined: Fri Apr 21, 2006 5:11 pm
- Location: Mississippi, Hattiesburg
re: from beginning to end!
well, you know hell froze over when I update this thing with encouraging news! haha
I ordered my fel-pro gasket set from summit along with my ARP intake manifold bolts. (stainless
 ) Motor should come out pretty soon, just gotta take apart the front end and all that good stuff, find some boxes and load it into the attic for the time being. THEN! the work begins. If anyone has any tips/rules to follow when pulling the motor....PLEASE chime in.
The intake is not on, some im thinking I should use the STOCK intake bolts, some thick washers, and chain to lift the motor...is this correct? put the washer on the bolt, and then get em in the block fairly well and lift? Any other suggestions? Have two chains, one for each side on its own, and loop it around the hook and pull it out? put it close to the floor, unbolt the tranny and use those bolts on the engine stand?
If im completely wrong PLEASE PLEASE PLEASE let me know how to do it.
Also, I think I have the gaskets under control, but the rear main seal I think is going to be my biggest problem. If anyone can (in lamen terms) tell me how to do this it would be awesome. I have the haynes/chilton book for the motor but any help is good!
I ordered my fel-pro gasket set from summit along with my ARP intake manifold bolts. (stainless
The intake is not on, some im thinking I should use the STOCK intake bolts, some thick washers, and chain to lift the motor...is this correct? put the washer on the bolt, and then get em in the block fairly well and lift? Any other suggestions? Have two chains, one for each side on its own, and loop it around the hook and pull it out? put it close to the floor, unbolt the tranny and use those bolts on the engine stand?
If im completely wrong PLEASE PLEASE PLEASE let me know how to do it.
Also, I think I have the gaskets under control, but the rear main seal I think is going to be my biggest problem. If anyone can (in lamen terms) tell me how to do this it would be awesome. I have the haynes/chilton book for the motor but any help is good!
-
Levi W. Kring
- New Member

- Posts: 64
- Joined: Fri Oct 13, 2006 1:19 am
- Location: Arizona, Tucson
re: from beginning to end!
Looks like a good project. I've got a spare parts truck if you need some odds and ends.
I love my "67
-
layedout72
- Blue Oval Guru

- Posts: 1280
- Joined: Fri Apr 21, 2006 5:11 pm
- Location: Mississippi, Hattiesburg
re: from beginning to end!
dont think im going to need one, as the truck is pretty solid. anyways....if someone can verify my method of pulling the motor/tranny at the same time it would be greatly appreciated.
-
layedout72
- Blue Oval Guru

- Posts: 1280
- Joined: Fri Apr 21, 2006 5:11 pm
- Location: Mississippi, Hattiesburg
re: from beginning to end!


little bit got done today, but as the saying goes. "It gets tougher to live at home, as both generations get older" so it looks like the new years is my time to go back to what i know best....orlando florida. away from my parents, but ill miss my mom dearly.
-
layedout72
- Blue Oval Guru

- Posts: 1280
- Joined: Fri Apr 21, 2006 5:11 pm
- Location: Mississippi, Hattiesburg
re: from beginning to end!
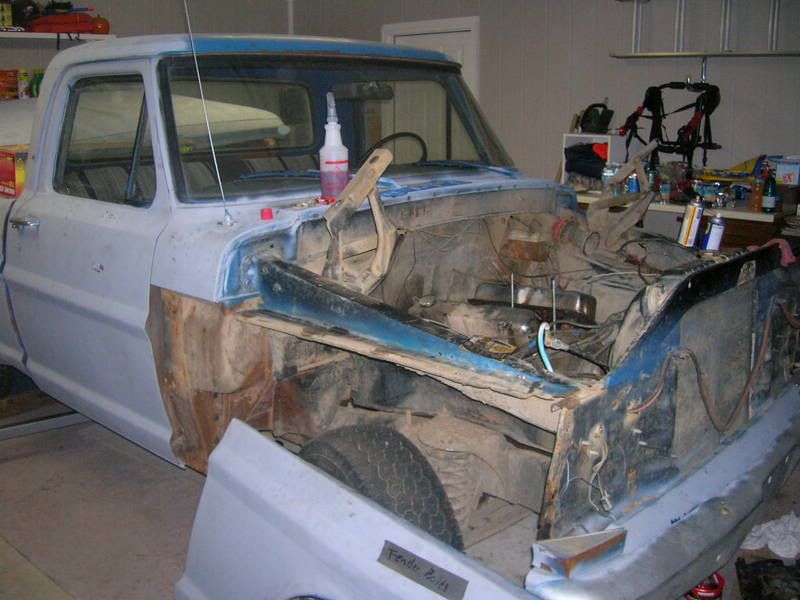
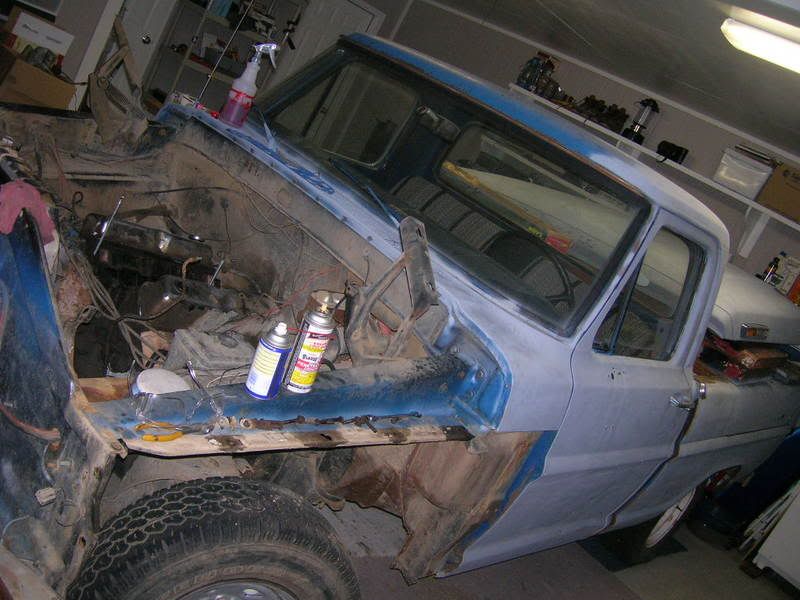
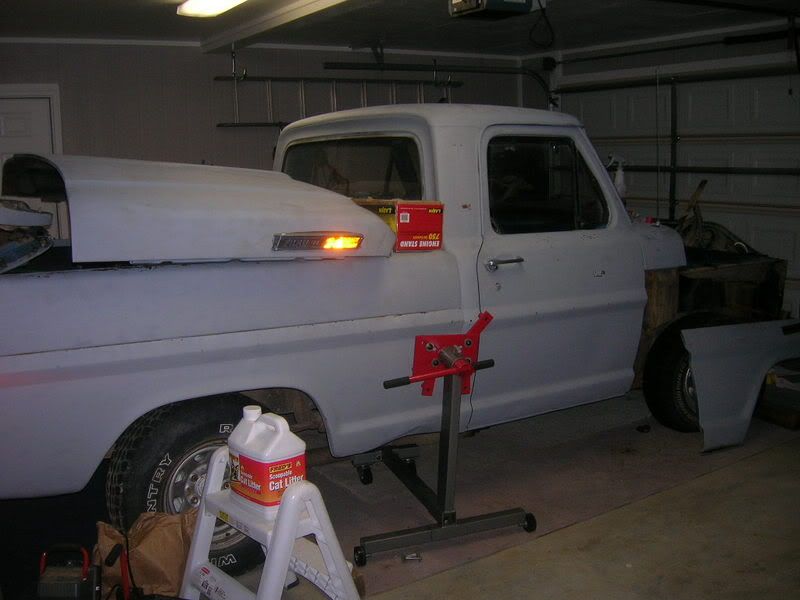
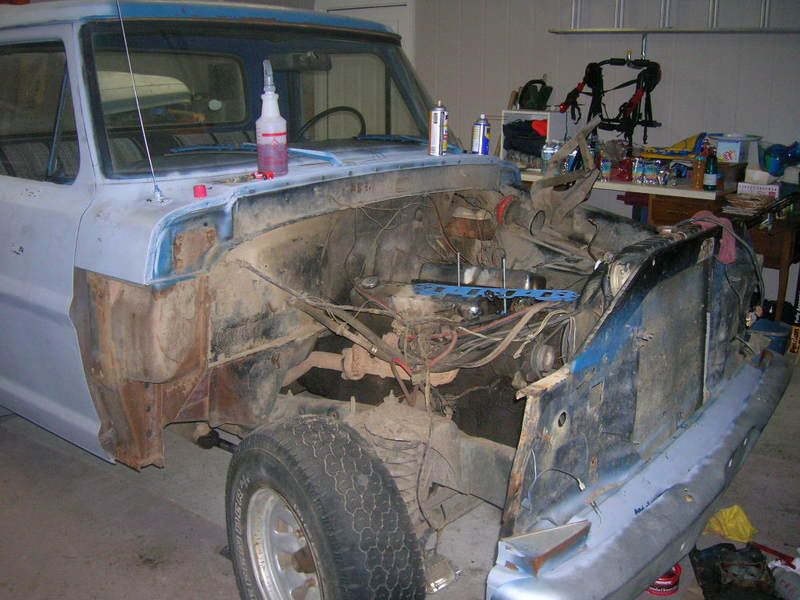
what ive been up to. Its not much, but its progress. the other side will come over either later tonite, or tomorrow, depending.


-
dcbullet
- Blue Oval Fan

- Posts: 698
- Joined: Fri Apr 01, 2005 6:28 pm
- Location: Oceanside, CA
re: from beginning to end!
How long did that take you to remove one side, fender and inner fender? I'm looking to do that too at some point.
-
layedout72
- Blue Oval Guru

- Posts: 1280
- Joined: Fri Apr 21, 2006 5:11 pm
- Location: Mississippi, Hattiesburg
re: from beginning to end!
not long once i found out where the bolts were! both fenders are being replaced, so that kinda eased up the removal. when you do it though, just make sure your get the bolt at the VERY TOP POINT of the fender. It attaches the fender and grill together, and that was my biggest problem. Its just a lot of upside down work. The inner fendes took all of maybe 45 minutes?
-
layedout72
- Blue Oval Guru

- Posts: 1280
- Joined: Fri Apr 21, 2006 5:11 pm
- Location: Mississippi, Hattiesburg
-
layedout72
- Blue Oval Guru

- Posts: 1280
- Joined: Fri Apr 21, 2006 5:11 pm
- Location: Mississippi, Hattiesburg
http://i2.photobucket.com/albums/y18/sa ... CF1838.jpg
SOMEONE STOLE MY FRONT END!!! hahaha, motor should be out this week.
SOMEONE STOLE MY FRONT END!!! hahaha, motor should be out this week.
-
layedout72
- Blue Oval Guru

- Posts: 1280
- Joined: Fri Apr 21, 2006 5:11 pm
- Location: Mississippi, Hattiesburg
-
layedout72
- Blue Oval Guru

- Posts: 1280
- Joined: Fri Apr 21, 2006 5:11 pm
- Location: Mississippi, Hattiesburg
- marz68
- Blue Oval Guru

- Posts: 1387
- Joined: Sat Dec 03, 2005 2:25 am
- Location: California, Northridge
- Contact:
