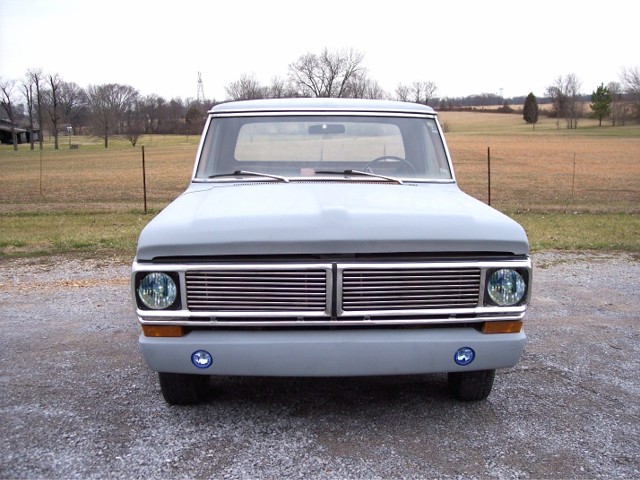
Getting started on the choptop truck...

Post progress reports on your project truck(s)

Moderator: FORDification

Post Reply
User avatar
Thunderfoot
100% FORDified!
100% FORDified!
Posts: 2207
Joined: Tue Apr 17, 2007 2:34 pm
Location: Idaho, Boise

re: Getting started on the choptop truck...

Post by Thunderfoot »

Hey Keith looking good!
Grate idea for the roll pan :thup:
Another thought on the tailgate mount... You could screw a stud into the lower bolt hole just about flush with the mount, then tack weld it in and weld a large washer to the top of that. Then just slot open the bottom hole in the mount so that all you have to do is just slide it on to the lower stud and bolt it on the top side.
This way you could make the roll pan fit nice and tight all around... Just my thought anyways. :2cents:
Shayne
I'm not "Brand Loyal" Ford-Chevy-Dodge-Toyota I have them all, one even cross mixed...
If it Looks good and Works good then it's ok by me. Everything has its issues from time to time...

69 SWB (project) & 69 Highboy (driver/project)
http://s197.photobucket.com/albums/aa29 ... d%20truck/
http://www.fordification.com/galleries/ ... ?cat=10399
Robert
New Member
New Member
Posts: 33
Joined: Fri Dec 29, 2006 12:34 am
Location: Oklahoma

re: Getting started on the choptop truck...

Post by Robert »

hey keith thanks for the info and the pics :fr:
User avatar
rjewkes
100% FORDified!
100% FORDified!
Posts: 3711
Joined: Sun Apr 17, 2005 1:09 am
Location: Missouri, Webb City
Contact:

Post by rjewkes »

I know your not there yet but did you ever figure out how to mount the unity spotlight?

i only ask cuase i just picked one up for 23.00 bucks.
"It is better to keep your mouth shut and appear stupid than to open it and remove all doubt." - Mark Twain
'70 f250 4x4 Crew cab 460/C6 '72 F100 390/C6 9.8 MPG AVG. '89 Mercury Cougar LS Dual Exh. V6 . 18.9 MPG AVG. In Town.
Image
I don't want to give em a heart-attack. That is what would happen if I answered the door in the buff. Heck it almost scares me to death when I step out of the shower and look in the mirror.~Mancar1~
fuelly.com
User avatar
customcrewcab
Blue Oval Fanatic
Blue Oval Fanatic
Posts: 830
Joined: Wed Feb 02, 2005 6:43 pm
Location: Queen Creek Arizona
Contact:

re: Getting started on the choptop truck...

Post by customcrewcab »

paint updates????????? :?
http://www.fordification.com/galleries/ ... ?cat=10106
Image
if theres a new way, i'll be the first in line. it better work this time

1970 crewcab 393w afr heads, 6 speed, turbocharged, 6 piston calipers 13" rotors on all 4 corners
User avatar
FORDification
Site & Forum Admin
Site & Forum Admin
Posts: 8050
Joined: Sun Jul 11, 2004 12:52 am
Location: Kansas, Wellsville
Contact:

re: Getting started on the choptop truck...

Post by FORDification »

I'm ALMOST ready to finish the painting....had to finish up the installation of the rear rollpan first though, and I got 99.9% of that done today. :woohoo:

Here's a shot after trimming it down to the proper size and mocking it up for the first time:

Image

I kinda impressed myself with how well it fit. 8) It took a while, and I had some problems getting it to this stage, but I finally got it. (I'll elaborate on a project update page.) And here's a shot after it was welded in, the welds ground down and then stripping it down to bare metal:

Image

...and here's a final shot taken as I was leaving this evening, after applying the body filler to smooth out the joints a little. Although it wasn't really needed, I also put a thin layer across the top, just to smooth it out a little too, after using a BFH earlier to help get things lined up. :evil: I say it wasn't needed since the top layer will be hidden by the tailgate anyway, but I figured I might as well...a few extra minutes of sanding ain't gonna kill me, and it WILL make it more presentable if I ever have the tailgate removed.

Image

So all I have left to do now is sand down the rollpan filler, and the box will be ready to paint. That will be done on my next day at the shop.

I'm getting started on a project update page and will hopefully get that posted this evening. I'll have a few more pictures and a complete play-by-play of the day's activities. :D What a fun way for a guy to spend Father's Day...AND his birthday! :thup:
____| \__
-O-----O- Keith
'67 F-100 2WD SWB ~ '69 F-100 4WD SWB w/7" chop ~ 1975 F-250 Ranger XLT Supercab Camper Special
ImageImageImage
My '67 restoration video
-> Posting and you! <-a MUST watch for all!!
User avatar
wt4speed#2
Blue Oval Guru
Blue Oval Guru
Posts: 1064
Joined: Fri Mar 25, 2005 9:21 pm
Location: Texas, Ft. Worth

Post by wt4speed#2 »

Looking good there "Old man" Happy B/day and Fathers day too
Tony B.Image
DFW Area
Image
"Someday...
I hope you to get the chance,
to live like you are dying"
Member#'s 236 & 403
Úlf the Comedy Sidekick
'69 F-100 "Stepper"(currently in a bigillion pieces )
wt's ride
thebucket
User avatar
FORDification
Site & Forum Admin
Site & Forum Admin
Posts: 8050
Joined: Sun Jul 11, 2004 12:52 am
Location: Kansas, Wellsville
Contact:

re: Getting started on the choptop truck...

Post by FORDification »

Whew...it's after 1AM and I just finished putting together the project update page, showing how I constructed and installed the rollpan.

Constructing a Home-made Rear Rollpan
____| \__
-O-----O- Keith
'67 F-100 2WD SWB ~ '69 F-100 4WD SWB w/7" chop ~ 1975 F-250 Ranger XLT Supercab Camper Special
ImageImageImage
My '67 restoration video
-> Posting and you! <-a MUST watch for all!!
RTG_RACING
Preferred User
Preferred User
Posts: 406
Joined: Thu Apr 05, 2007 8:35 am
Location: Indiana

re: Getting started on the choptop truck...

Post by RTG_RACING »

OK so here is somthing for you to try. Somthing I want to do but want to watch someone else figure it out. :D Use the same thing to build one for the front. That valance is begging to be filled and smoothed.
User avatar
jzjames
100% FORDified!
100% FORDified!
Posts: 1780
Joined: Sun Jan 09, 2005 2:59 pm
Location: Washington, Windy Point

re: Getting started on the choptop truck...

Post by jzjames »

NICE Kieth! That turned out beauty! Get that thing fired up!!! :D
jzjames
User avatar
flyboy2610
100% FORDified!
100% FORDified!
Posts: 4901
Joined: Sun Oct 03, 2004 6:42 pm
Location: Nebraska, Lincoln

Post by flyboy2610 »

Keith, the mark of a craftsman is how ell he treats the parts nobody will ever see.
Ya done good!!
"If the women don't find you handsome, they should at least find you handy."
Red Green

If you're going to live like there's no hell...............
you'd better be right.
http://theworldasiseeit-flyboy2610.blog ... ee-it.html
User avatar
FORDification
Site & Forum Admin
Site & Forum Admin
Posts: 8050
Joined: Sun Jul 11, 2004 12:52 am
Location: Kansas, Wellsville
Contact:

Re: re: Getting started on the choptop truck...

Post by FORDification »

Thanks for the compliments. Yeah, I was actually kinda surprised on how easy this was and how well it turned out. Not all my endeavors have a happy ending. ;)
RTG_RACING wrote:OK so here is somthing for you to try. Somthing I want to do but want to watch someone else figure it out. :D Use the same thing to build one for the front. That valance is begging to be filled and smoothed.
I gave that some thought a while back, but decided against it, at least for now. I'm under a serious time crunch here...I have to get this truck finished up and out of the shop so I can get back to work on my '67. I'm losing my shop in a few months, and I've got a LOT to do and very little time to do it. :(
____| \__
-O-----O- Keith
'67 F-100 2WD SWB ~ '69 F-100 4WD SWB w/7" chop ~ 1975 F-250 Ranger XLT Supercab Camper Special
ImageImageImage
My '67 restoration video
-> Posting and you! <-a MUST watch for all!!
RTG_RACING
Preferred User
Preferred User
Posts: 406
Joined: Thu Apr 05, 2007 8:35 am
Location: Indiana

Re: re: Getting started on the choptop truck...

Post by RTG_RACING »

I gave that some thought a while back, but decided against it, at least for now. I'm under a serious time crunch here...I have to get this truck finished up and out of the shop so I can get back to work on my '67. I'm losing my shop in a few months, and I've got a LOT to do and very little time to do it. :([/quote]

Thats a bad deal. Sorry to hear that. OK let me ask you this. Do you have a piece of scrap that you could compare to the front? I just want to know if it lines up like the back did. I think it should but I want to go check before I go to the yard and drag everything out to get a pice.
User avatar
rjewkes
100% FORDified!
100% FORDified!
Posts: 3711
Joined: Sun Apr 17, 2005 1:09 am
Location: Missouri, Webb City
Contact:

Post by rjewkes »

rtg, another member i'll look up the name later actualy use a bed side top rail for a bumper and filler panel replacement. it even has driving lights in it.

ok here is the pick it is member randle's truck.

Image

IIRC it is a bedside top welded to the stock filler pannel.
"It is better to keep your mouth shut and appear stupid than to open it and remove all doubt." - Mark Twain
'70 f250 4x4 Crew cab 460/C6 '72 F100 390/C6 9.8 MPG AVG. '89 Mercury Cougar LS Dual Exh. V6 . 18.9 MPG AVG. In Town.
Image
I don't want to give em a heart-attack. That is what would happen if I answered the door in the buff. Heck it almost scares me to death when I step out of the shower and look in the mirror.~Mancar1~
fuelly.com
User avatar
FORDification
Site & Forum Admin
Site & Forum Admin
Posts: 8050
Joined: Sun Jul 11, 2004 12:52 am
Location: Kansas, Wellsville
Contact:

re: Getting started on the choptop truck...

Post by FORDification »

Well, I got to spend today in the shop...got some good progress done, but then hit a major brick wall.

I finished up the installation of the rear rollpan by sanding down the filler at the joints. Here's a shot of the finished rollpan with the tailgate installed, just to make a final check that there was no interference between the two.

Image

Then I spent a good part of the afternoon getting the bed painted....same drill as before, two coats of POR-15 and then several very heavy coats of Krylon Flat black. Here's a view of the finished product:

Image

I then rolled it outside into the driveway so I could get the shop cleaned up a little bit, since I'm basically done with all welding and bodywork. Here's a couple shots taken outside:

Image

Image

Don't mind the splotchy paint. I mentioned earlier in this thread that the whole truck is going to be sprayed with John Deere Blitz Black very soon. But at least now you'll have a better idea of what it's actually going to look like.

Anyway, since the bodywork is 99% done (still have to paint the tailgate and hood) I decided to get to work on the engine. The 390 I was going to use is one I bought several years ago as a rebuilder core for my '67. I've been stockpiling some parts for it, including a rear-sump 4WD oil pan, which I decided to go ahead and install today. So, I dropped the oil pan and got a bad surprise. There were some presents for me down in the bottom of the pan:

Image

There's a small oil gallery plug, as well as what appears to be a couple piston wristpin keepers...which pretty much means that at least one piston is toasted. :cry: :x I hadn't heard this engine run when I bought it, but was told it did...and was really hoping it was in good shape. However, it's now appearing that the 390 is going to be going through a complete teardown to inspect the internal carnage.

So much for the project picking up momentum! I was thinking I was seeing the light at the end of the tunnel, but it just took several LARGE steps back. :(
____| \__
-O-----O- Keith
'67 F-100 2WD SWB ~ '69 F-100 4WD SWB w/7" chop ~ 1975 F-250 Ranger XLT Supercab Camper Special
ImageImageImage
My '67 restoration video
-> Posting and you! <-a MUST watch for all!!
User avatar
Blue Cloud
Preferred User
Preferred User
Posts: 404
Joined: Sun Jun 25, 2006 10:12 pm
Location: Wyoming

re: Getting started on the choptop truck...

Post by Blue Cloud »

That's a bummer! :cry: Maybe you should go with the other engine, or is it as much work and time as this ones going to be?
Post Reply