RustBullet on #50's frame and I-Beams.
Moderator: FORDification
- robroy
- 100% FORDified!
- Posts: 3768
- Joined: Sun Jul 06, 2008 4:36 pm
- Location: California, Salinas
RustBullet on #50's frame and I-Beams.
'Afternoon,
After three weekends of cleaning, wirebrushing and sandblasting I finally sprayed two coats of Rust Bullet Automotive on #50's frame, I-Beams and spindles! (#50 is my truck's nickname)
Tomorrow it's getting a coat of "Black Shell" (black paint from the Rust Bullet company designed to go over their regular silver stuff).
Before:
After Cleaning:
After two coats of Rust Bullet:
I'll post more pictures after a coat of "Black Shell."
-Robroy
- robroy
- 100% FORDified!
- Posts: 3768
- Joined: Sun Jul 06, 2008 4:36 pm
- Location: California, Salinas
Hi CO684X4, thanks!
Yes, I sprayed it using this gun with a 1.8 tip at 85PSI:
http://www.sharpe1.com/sharpe/sharpe.ns ... nex+FX3000
It was the first time I'd ever operated a spray gun, and it went on pretty well after doing some experimentation with air pressure and knob settings.
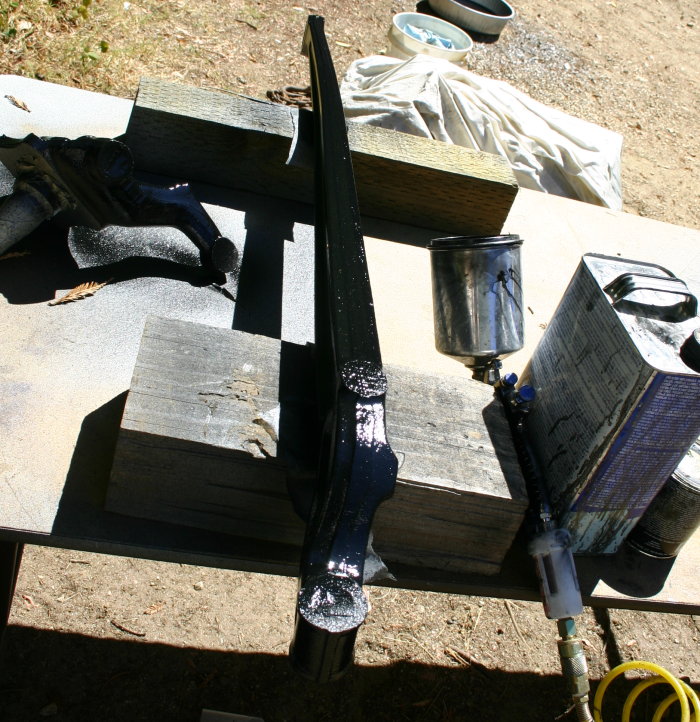
Here's the gun on my table with one of the bare I-beams.
-Robroy
- seattle67
- Blue Oval Fan
- Posts: 739
- Joined: Sun Aug 12, 2007 12:48 am
- Location: Washington, Seattle
re: RustBullet on #50's frame and I-Beams.
That looks excellent!
Dan
"I plan to start procastinating immediately"
- robroy
- 100% FORDified!
- Posts: 3768
- Joined: Sun Jul 06, 2008 4:36 pm
- Location: California, Salinas
- lifted72
- New Member
- Posts: 93
- Joined: Wed May 03, 2006 11:48 pm
- Location: Oregon, Lebanon
re: RustBullet on #50's frame and I-Beams.
Thats a pretty good gun for the money, i have the same one. It'll be great for you to practice with on the stuff your doing now, and it will still be a good gun to shoot the body with. Make sure you keep it real clean, I didn't completely clean under the cap one time and almost glued it on with clear coat.
POLISH EVERYTHING
- robroy
- 100% FORDified!
- Posts: 3768
- Joined: Sun Jul 06, 2008 4:36 pm
- Location: California, Salinas
Good morning Lifted72,
Thanks for the advice on the gun! It did seem to work well, although I needed to use much higher pressure (95 pounds) to spray on the "Black Shell" without any "speckles" in the spray.
I think I should be more careful about cleaning the gun. So far all I've done is spray tons of Xylene through it and wash out the paint filter when I've finished a session. I probably need to take it apart more and soak the parts, but I don't have a good enough setup (cans/trays/brushes) yet for that.
I'd be curious to hear any other tips you may about regarding this gun, since I'm really inexperienced with guns in general!
Thanks Lifted72,
-Robroy
-
- Blue Oval Guru
- Posts: 1341
- Joined: Sun Aug 06, 2006 5:41 pm
- Location: Utah, Springville
- Contact:
- robroy
- 100% FORDified!
- Posts: 3768
- Joined: Sun Jul 06, 2008 4:36 pm
- Location: California, Salinas
Hello Mike!
After putting on a black coat, I think if I had it to do over again I might have stuck with the silver too. The silver looks more distinctive while the black makes it look like every other carriage out there.
Plus, the Black Shell product was more difficult to apply--it was thick, gummy, sticky (like glue!), and took way longer to dry. It required 95 pounds of pressure at my paint gun to go on smoothly, while the Rust Bullet Automotive went on beautifully with only 80-85 pounds of pressure. This took me a while to figure out.
Here's the frame after one coat of Black Shell:
One of the I-beams; you can see that the finish didn't turn out quite as fine as the Rust Bullet Automotive (because it look me quite a while to figure out the right pressure).
Another perspective on the frame:
If anybody would like high resolution versions of these photos just let me know and I'll post links to them--they're large (five megabytes each) so they'll take a while to load.
-Robroy
- CO684X4
- New Member
- Posts: 227
- Joined: Sun Oct 21, 2007 11:17 pm
- Location: Colo Spgs, CO
re: RustBullet on #50's frame and I-Beams.
Looks great I just finished my first coat with the blackshell on the entire frame. I'm using a roller but wish I was spraying it. My HOA didnt like the idea of spraying it
- robroy
- 100% FORDified!
- Posts: 3768
- Joined: Sun Jul 06, 2008 4:36 pm
- Location: California, Salinas
Hey CO684X4, that sounds great! Too bad about not being allowed to use the spray gun, but at least you know your metal is protected.
Did you also find that the Black Shell was super sticky and took a long time to dry?
I naively thought it would be similar to the Rust Bullet Automotive product but it has really different characteristics, at least regarding application.
Thanks!
-Robroy
Did you also find that the Black Shell was super sticky and took a long time to dry?
I naively thought it would be similar to the Rust Bullet Automotive product but it has really different characteristics, at least regarding application.
Thanks!
-Robroy
- robroy
- 100% FORDified!
- Posts: 3768
- Joined: Sun Jul 06, 2008 4:36 pm
- Location: California, Salinas
- robroy
- 100% FORDified!
- Posts: 3768
- Joined: Sun Jul 06, 2008 4:36 pm
- Location: California, Salinas
Happy Saturday morning! Here are some more photos of this job.
After spraying a spray bomb of degreaser all over the frame (one of the first stages):
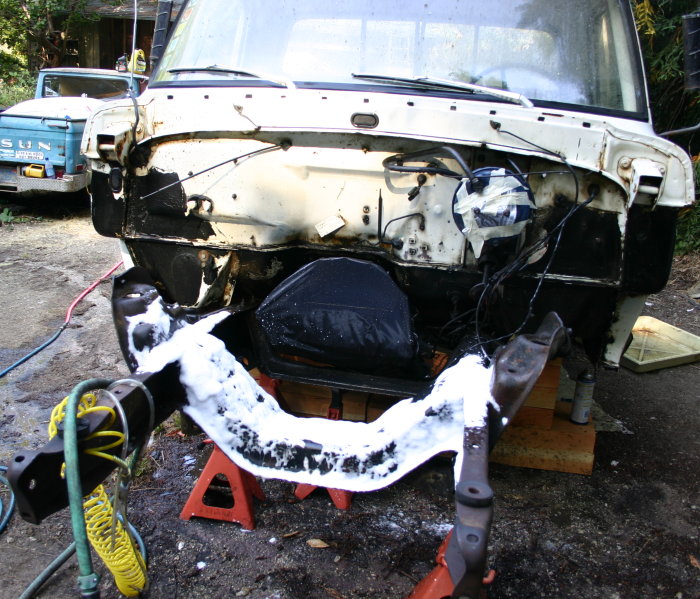
Here's how the frame and I-beams looked after hitting them with the "Metal Blast" product from Rust Bullet. I used a wire wheel to brush all that white stuff off:
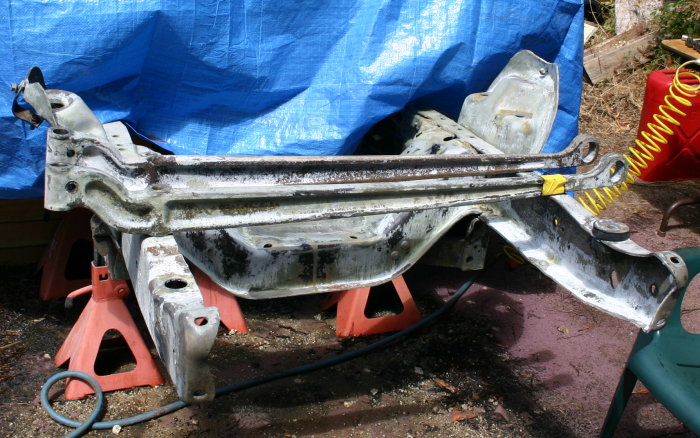
Another shot after two coats of Rust Bullet Automotive:
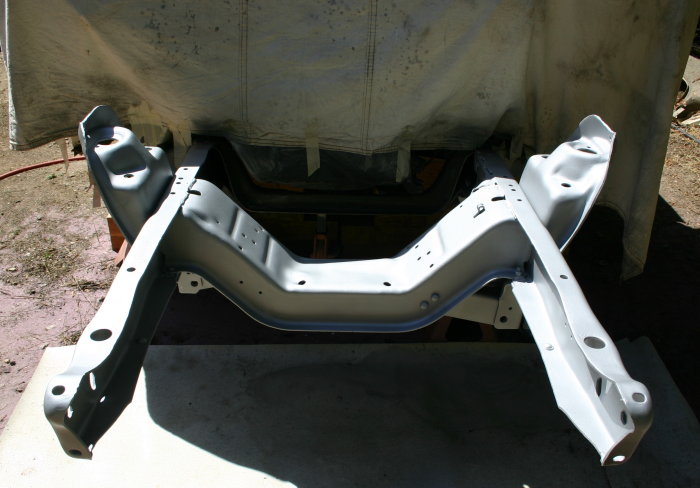
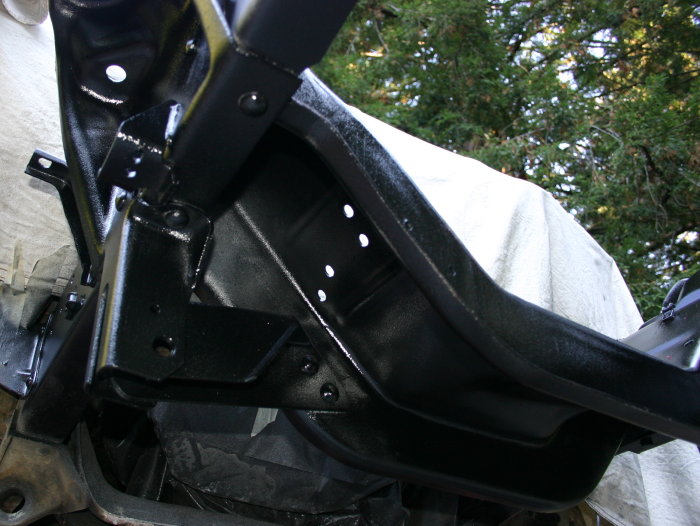
The steering gear area after the final "Black Shell" coat; I'm proud of how clean I got those welds all around the area with the sandblaster. It was pretty hard to get the paint behind the insert that holds the steering box to the frame though.
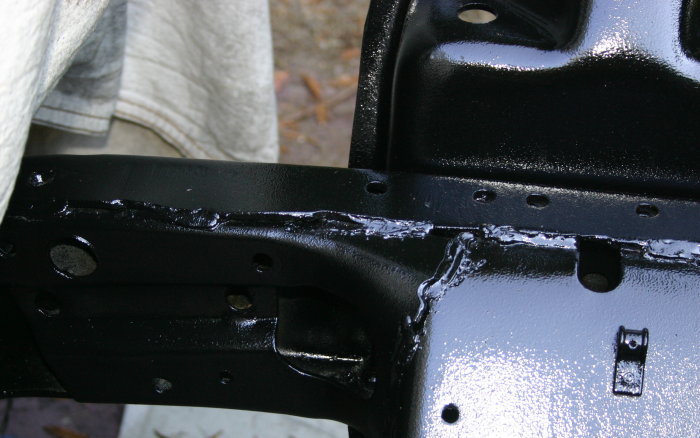
A shot of the bottom side. I got great coverage under there with the silver stuff and OK coverage with the black stuff (I knew the black stuff wasn't as critical so I wasn't as thorough with it in places that didn't show):
Another shot of an I-beam and spindle with a fresh "Black Shell" coat:
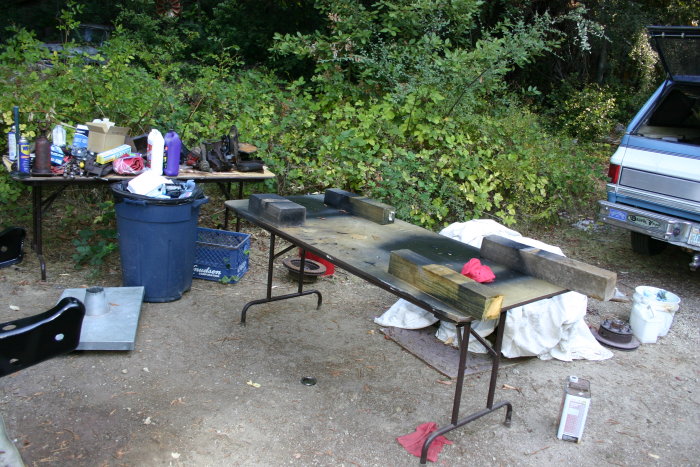
My work area for the I-beams and spindles. I put pieces of wax paper on those wooden blocks to keep the parts from sticking. Yes, that's a 60's Ford hiding in the upper left hand corner.
-Robroy