Good evening Frank and 70_F100, thanks for your most excellent replies!
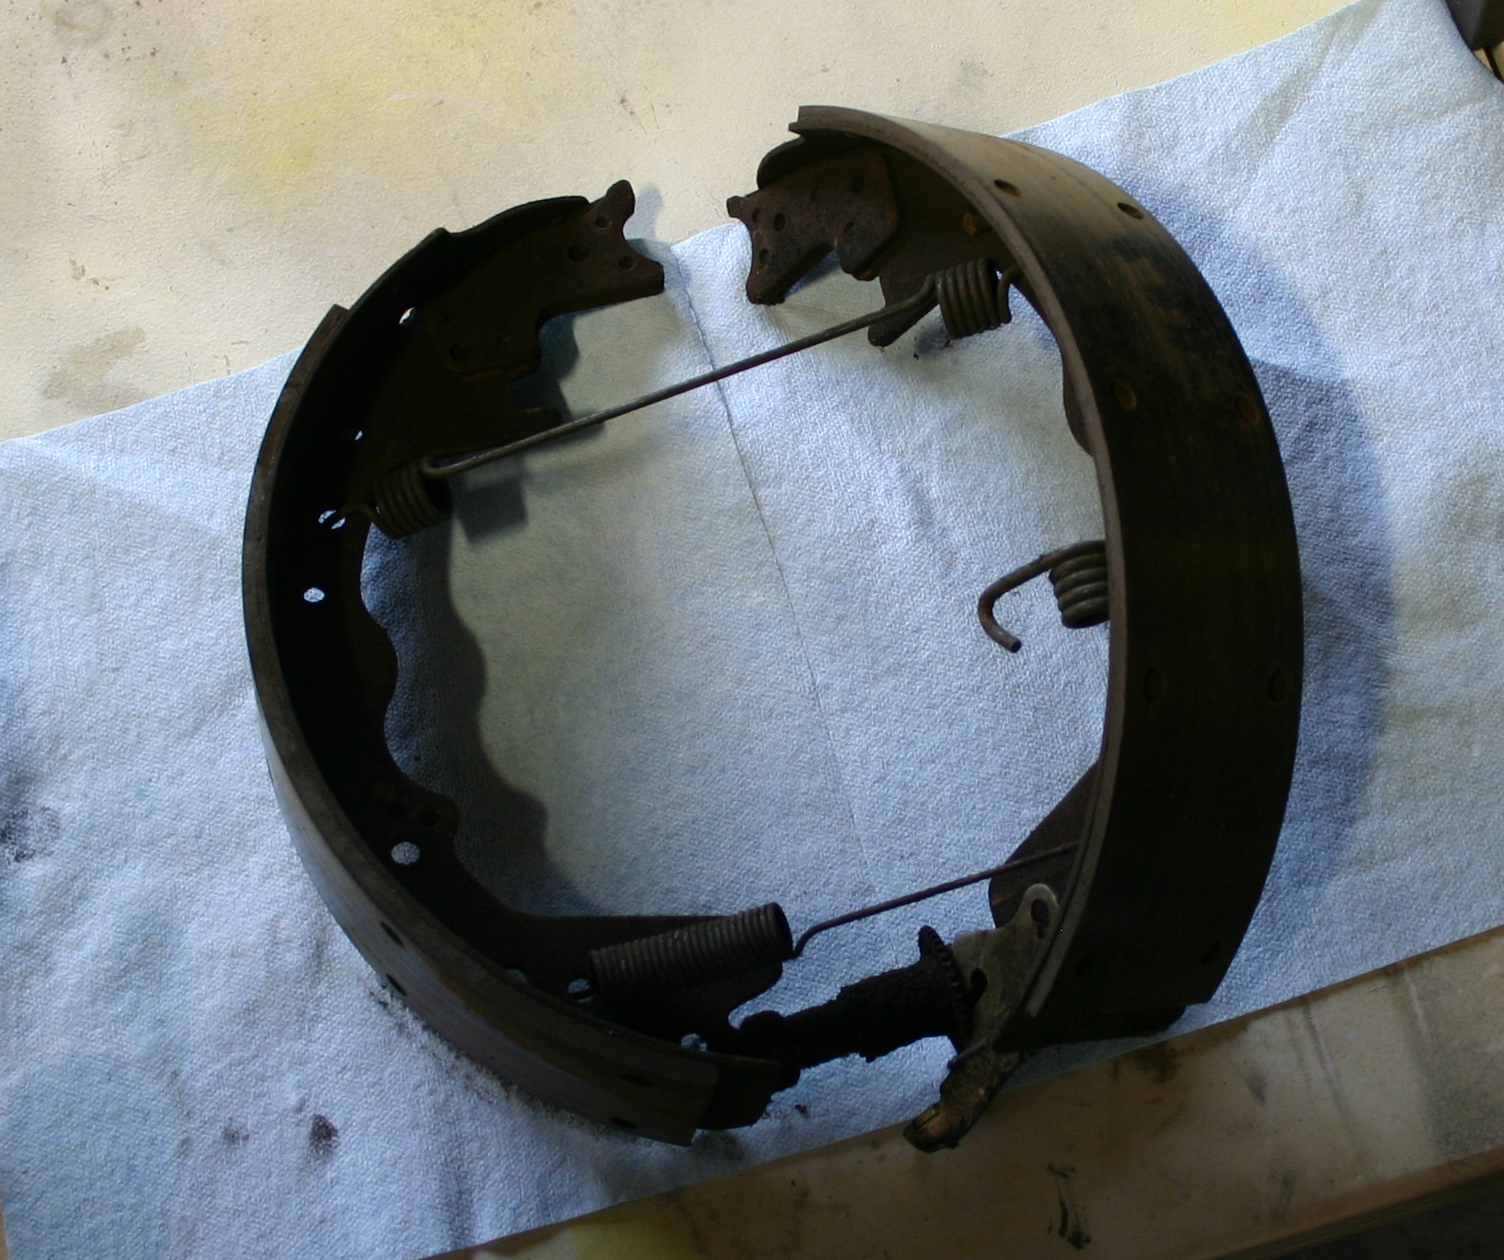
FreakysFords wrote:First off, I personally won't do the brakes and NOT turn the drums as the brakes have to seat to the drum and this takes longer without turning, forces the brakes to wear to any grooves, can glaze the linings. In short, I just wouldn't do it.
Perfect! Thanks for letting me know. I'll definitely have them turned or replace them then (more on that later tonight)!
FreakysFords wrote:I know alot of people do and I have customers wanting me to replace their shoes and not turn the drums, but if the drums are not so close to perfect that I can brake the glaze and have a perfect surface, I refuse the work.
That makes sense. I suppose you'd never want to do a brake repair, then have the repair turn out poorly and have them blame you for it, even though they insisted that you do a partial job!
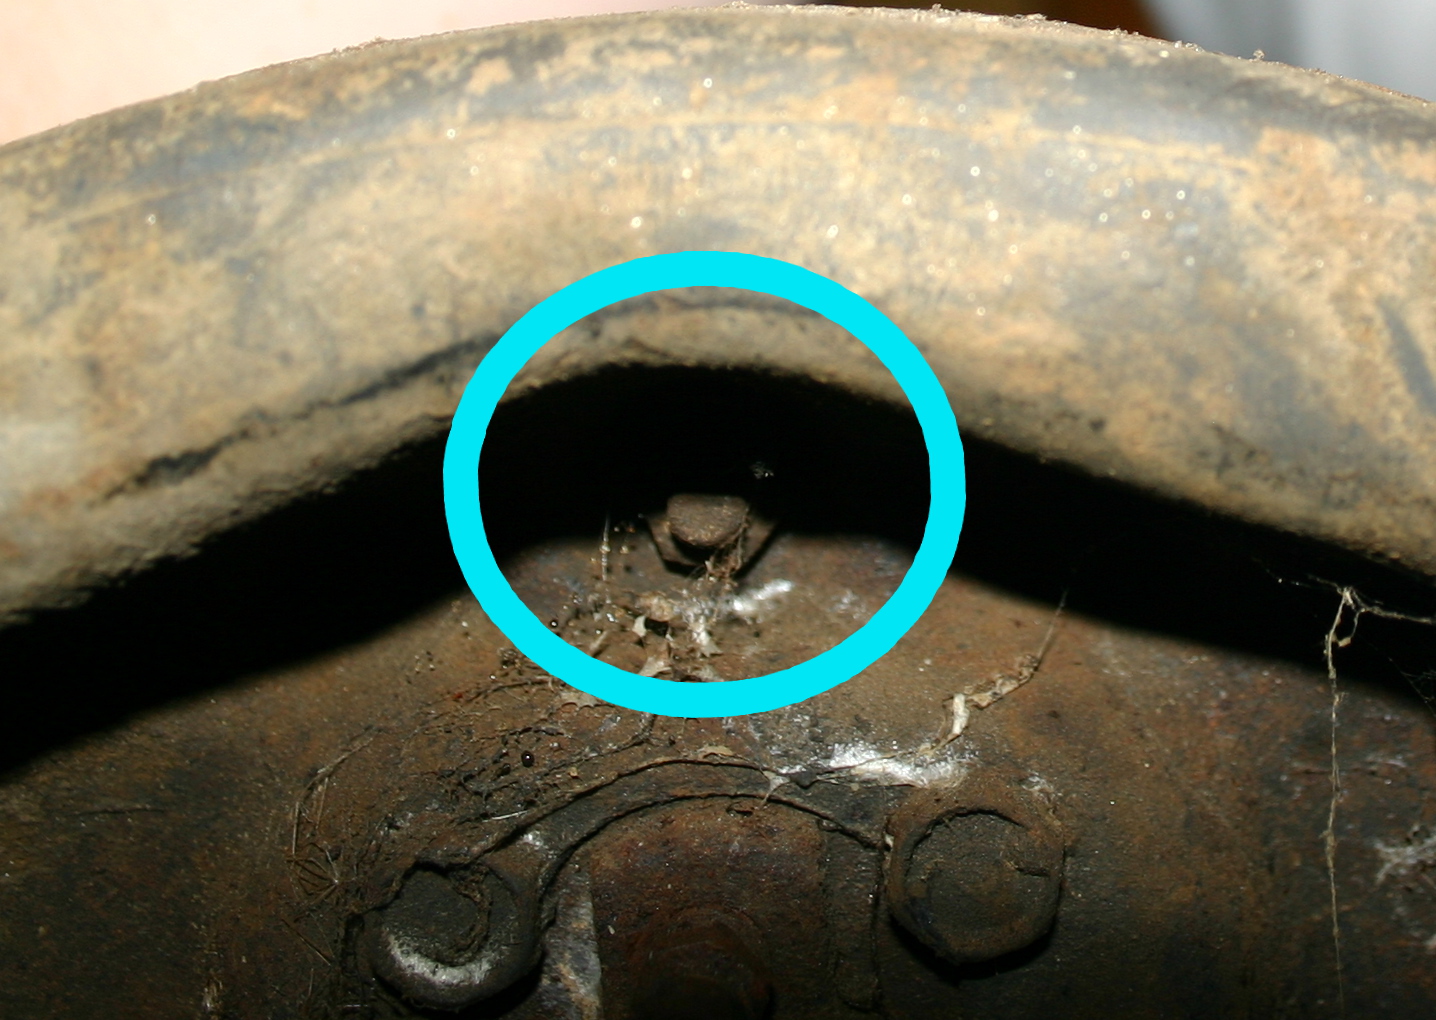
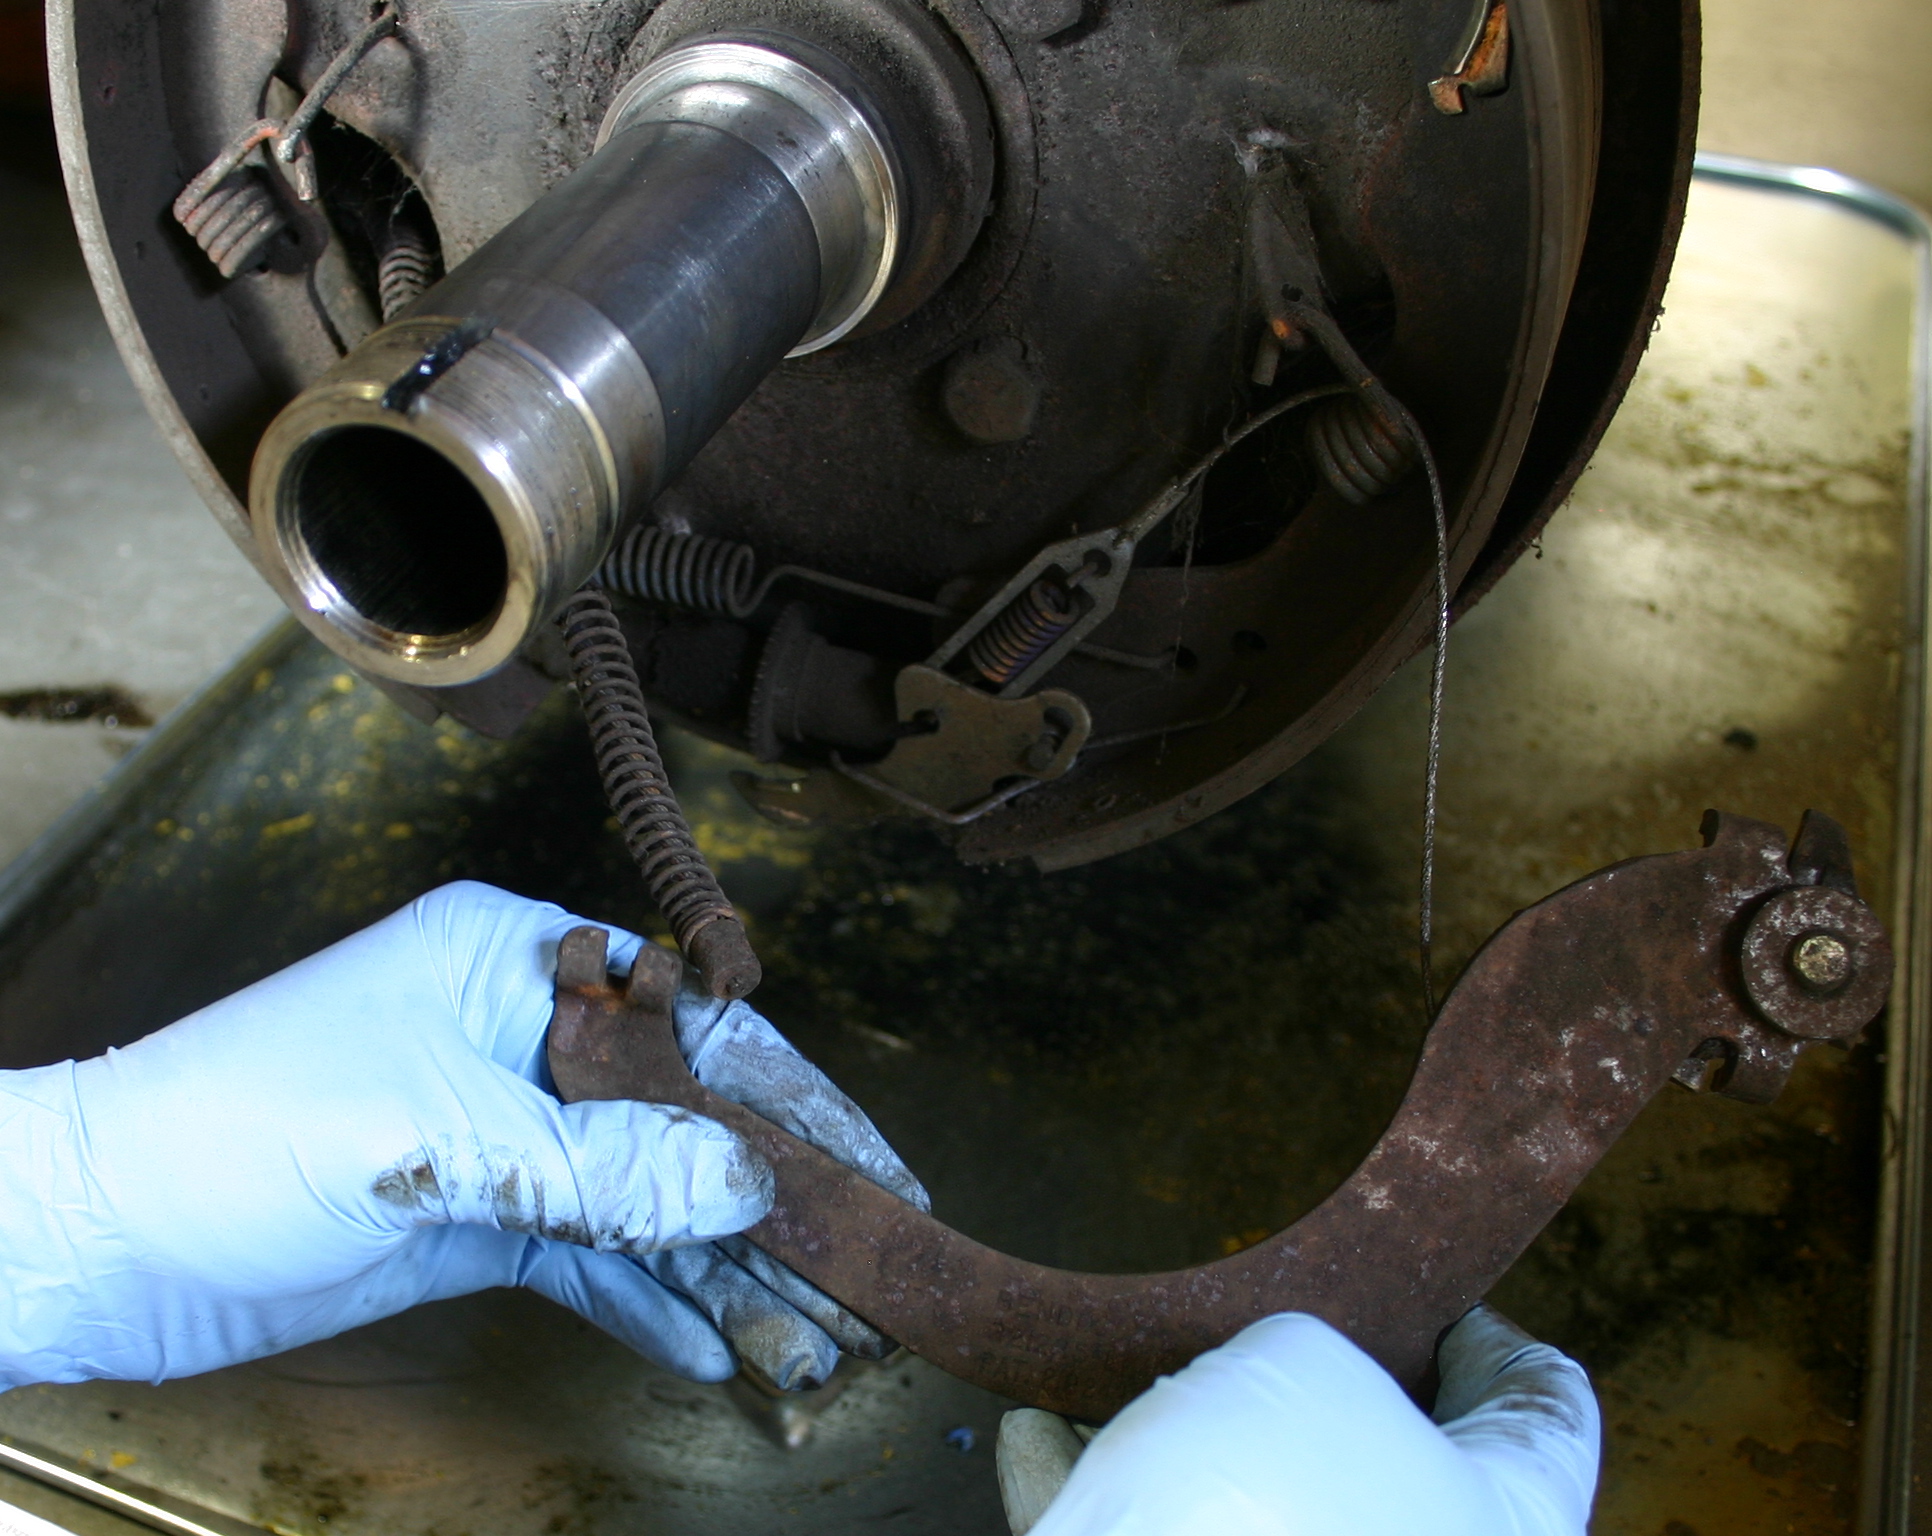
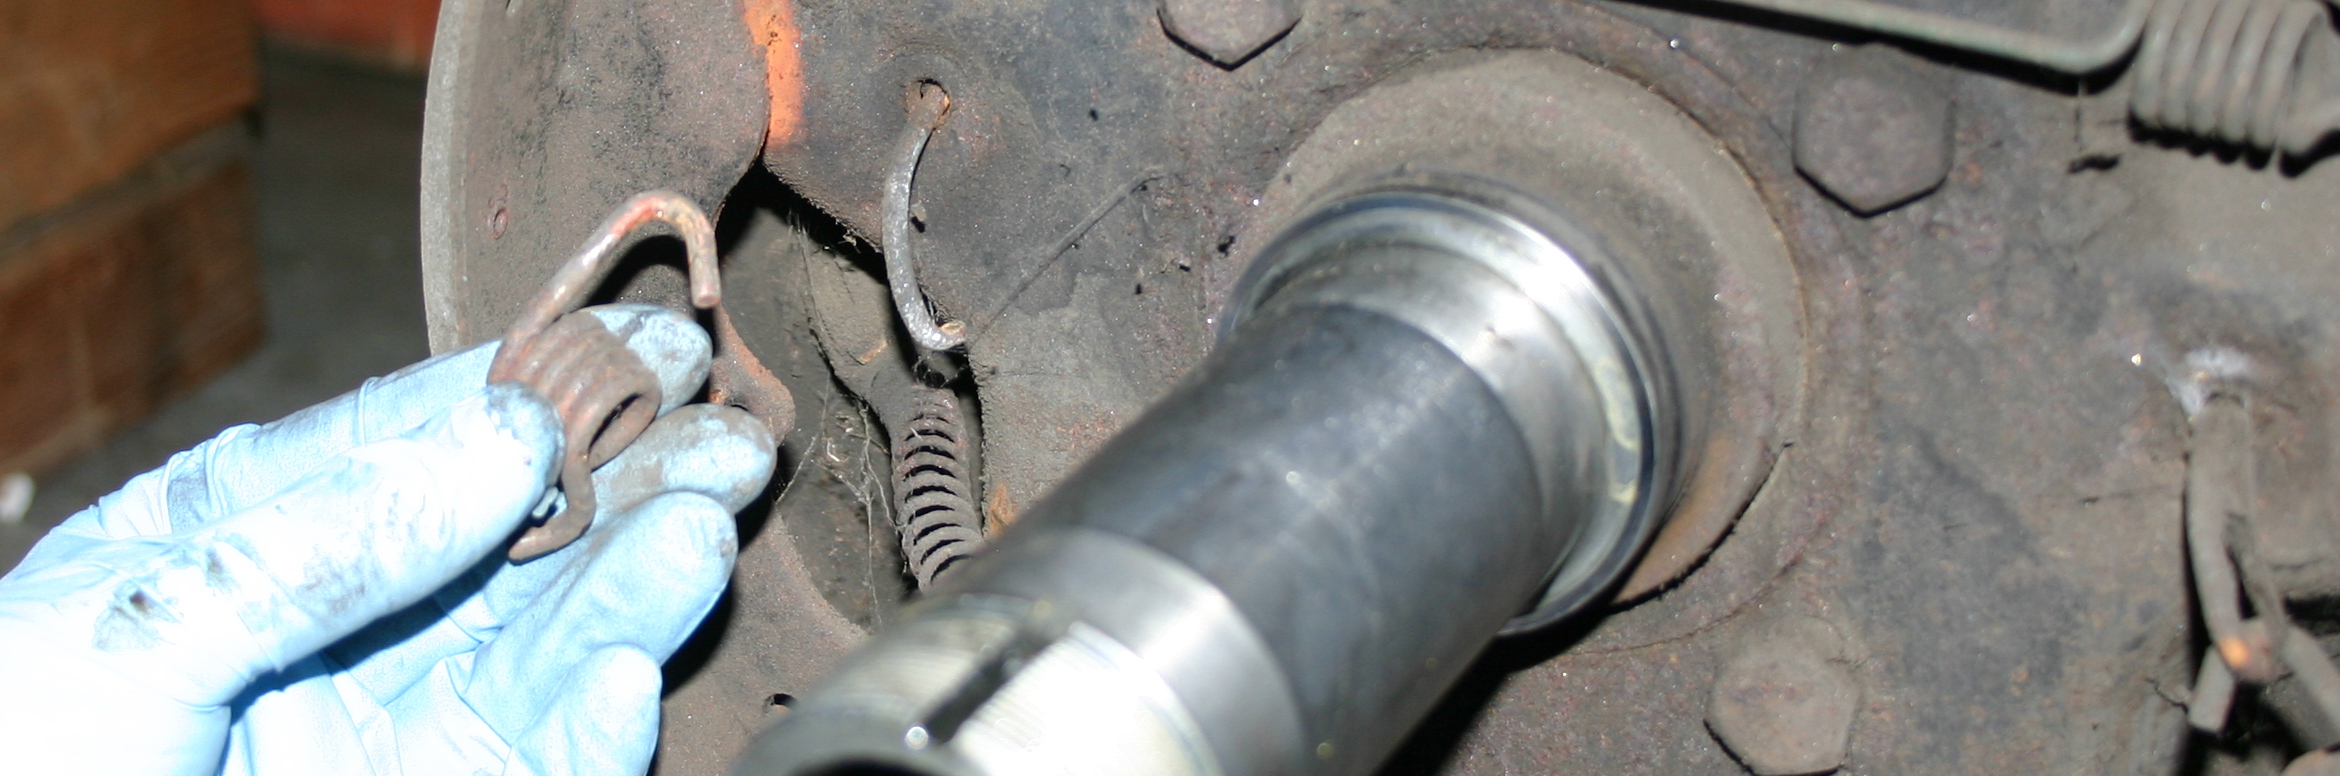
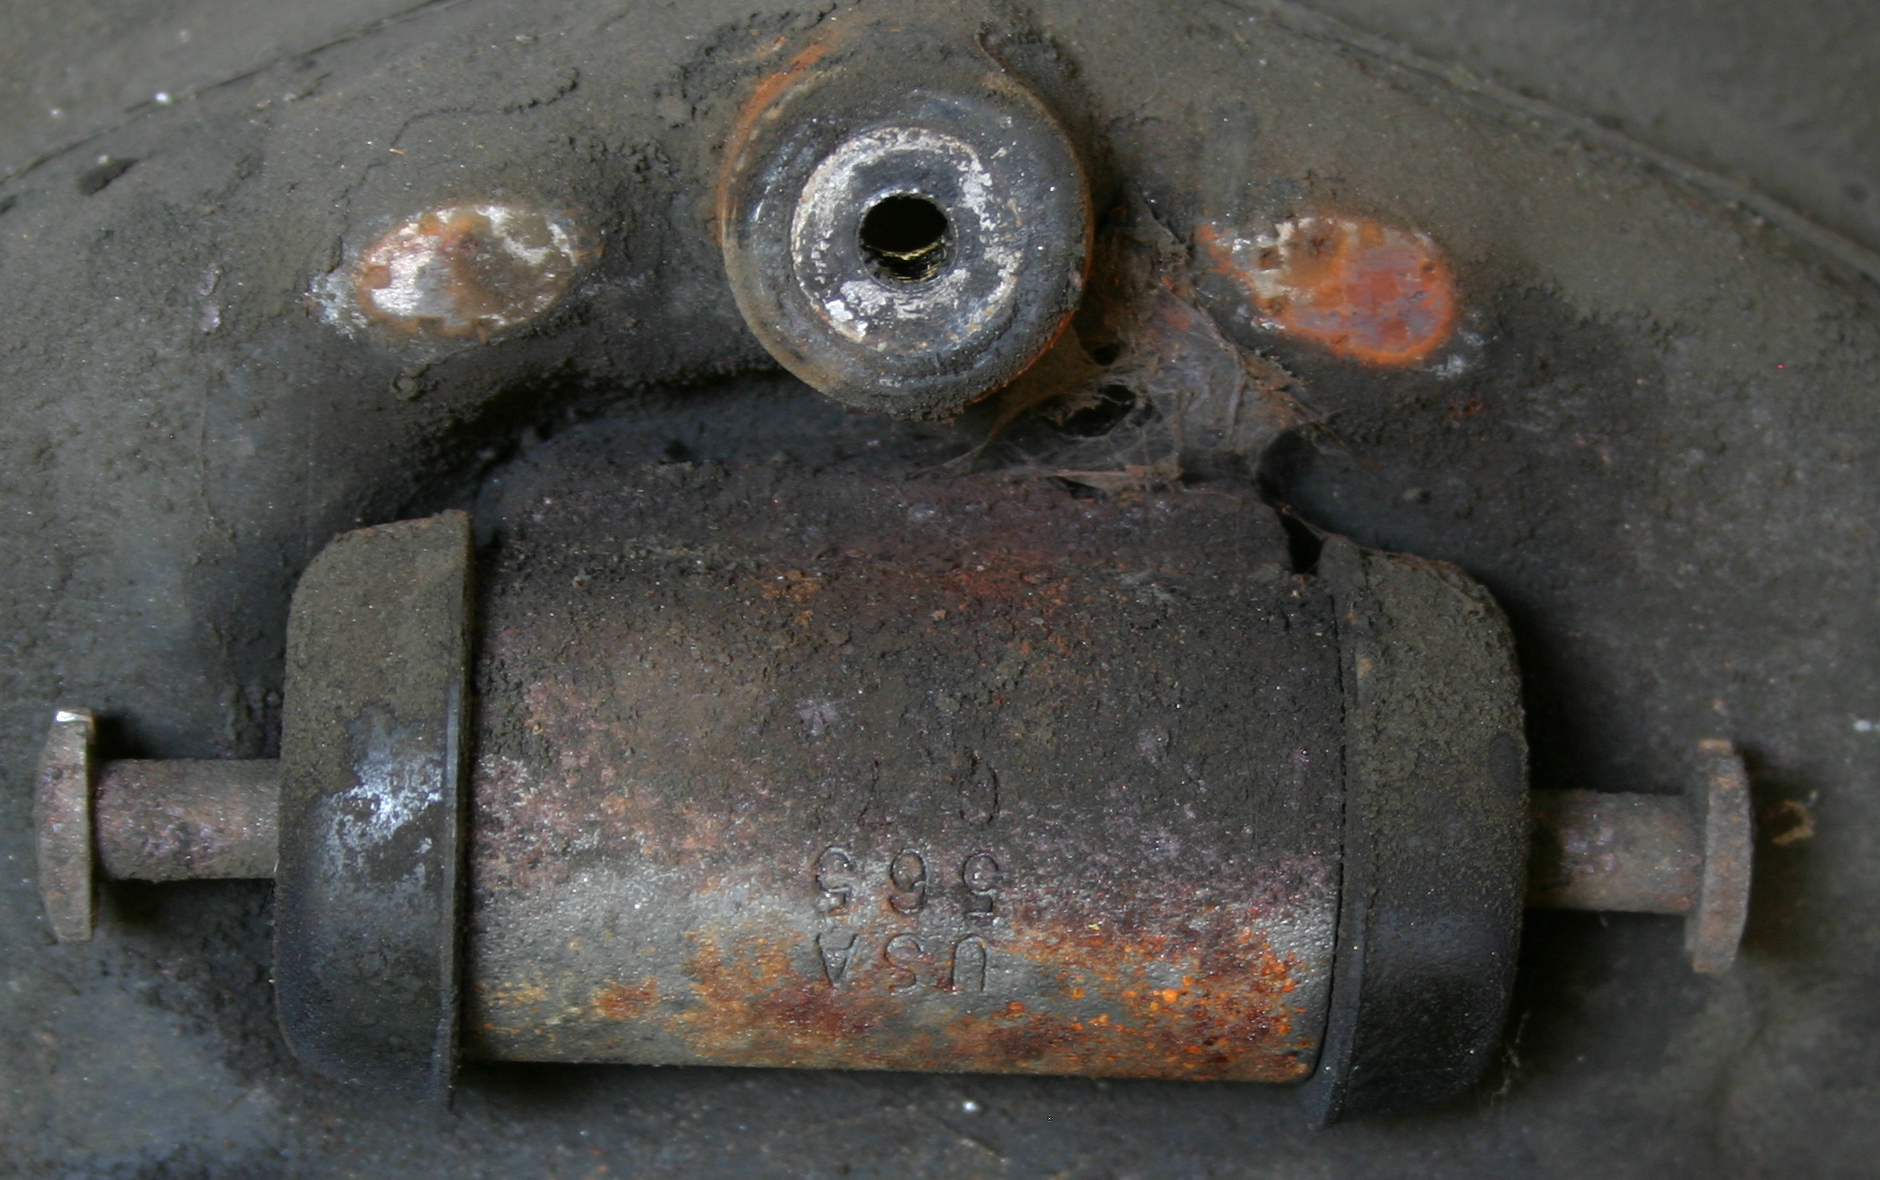
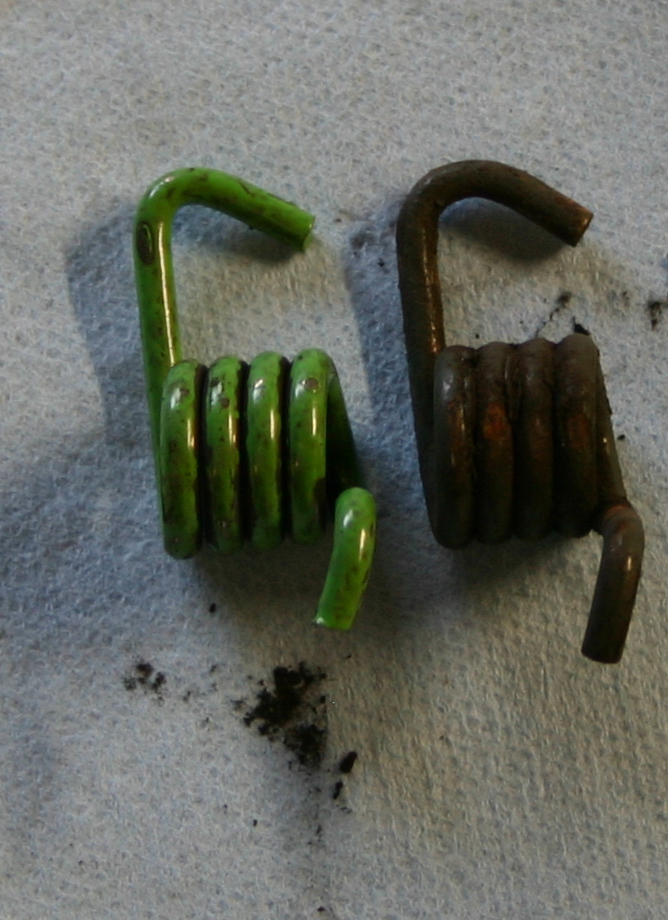
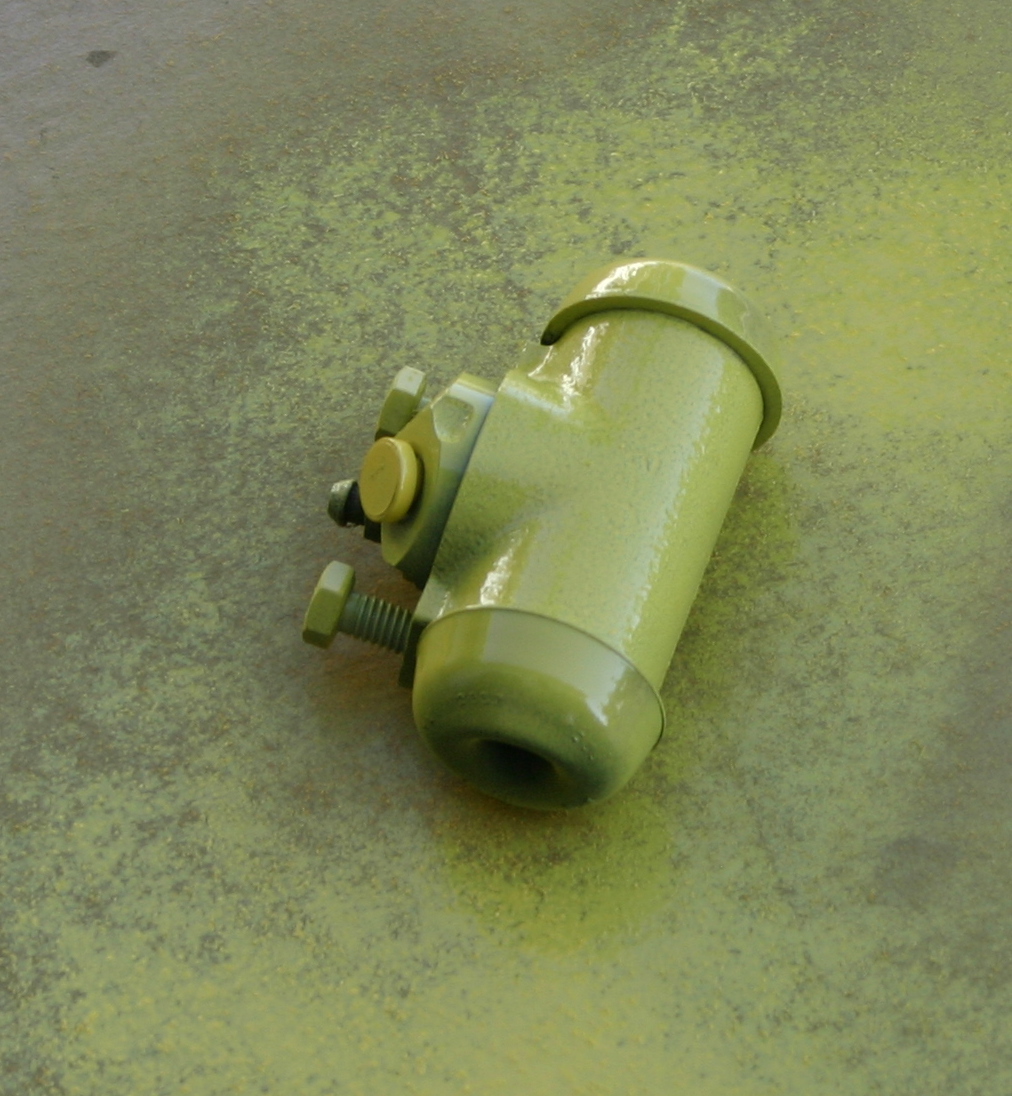
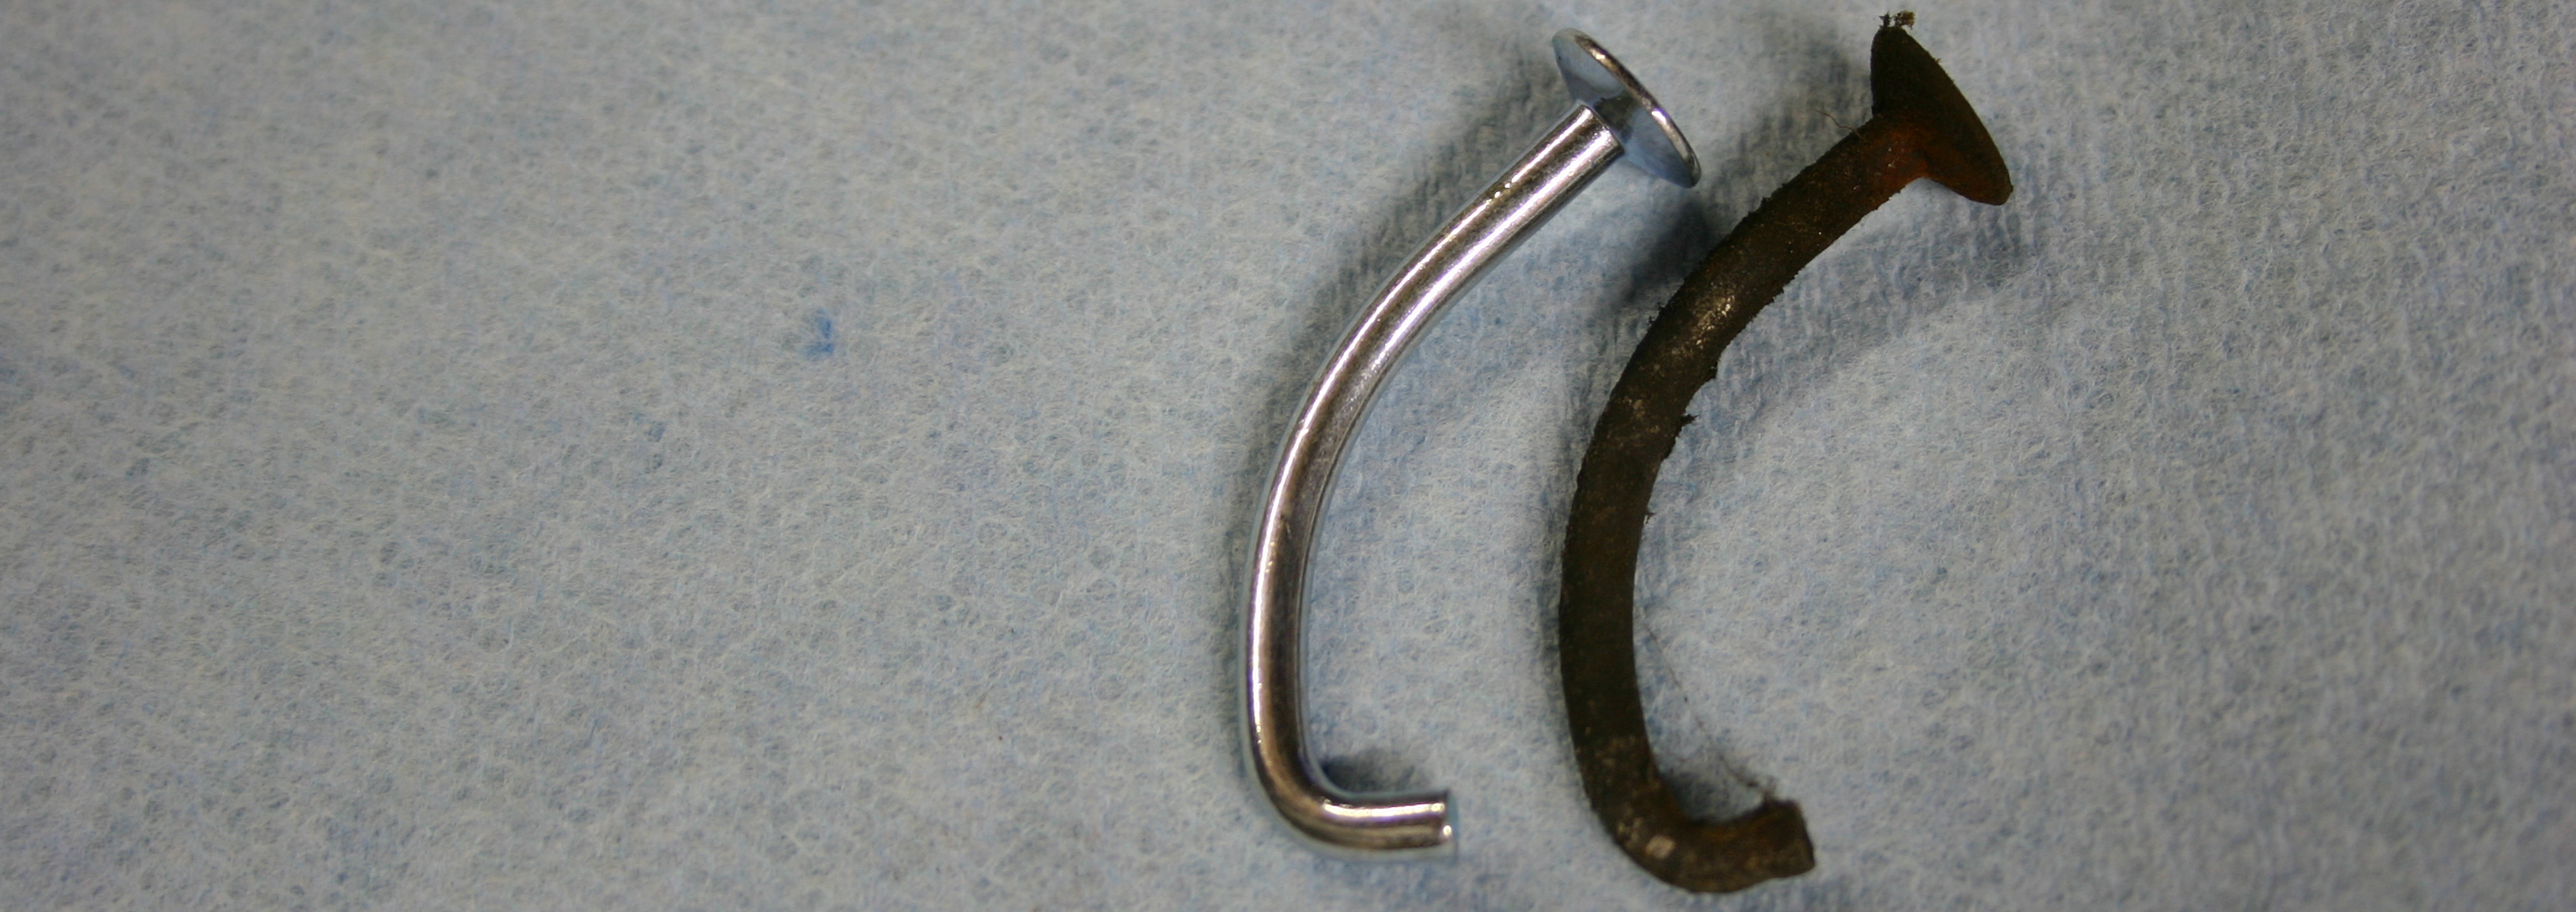
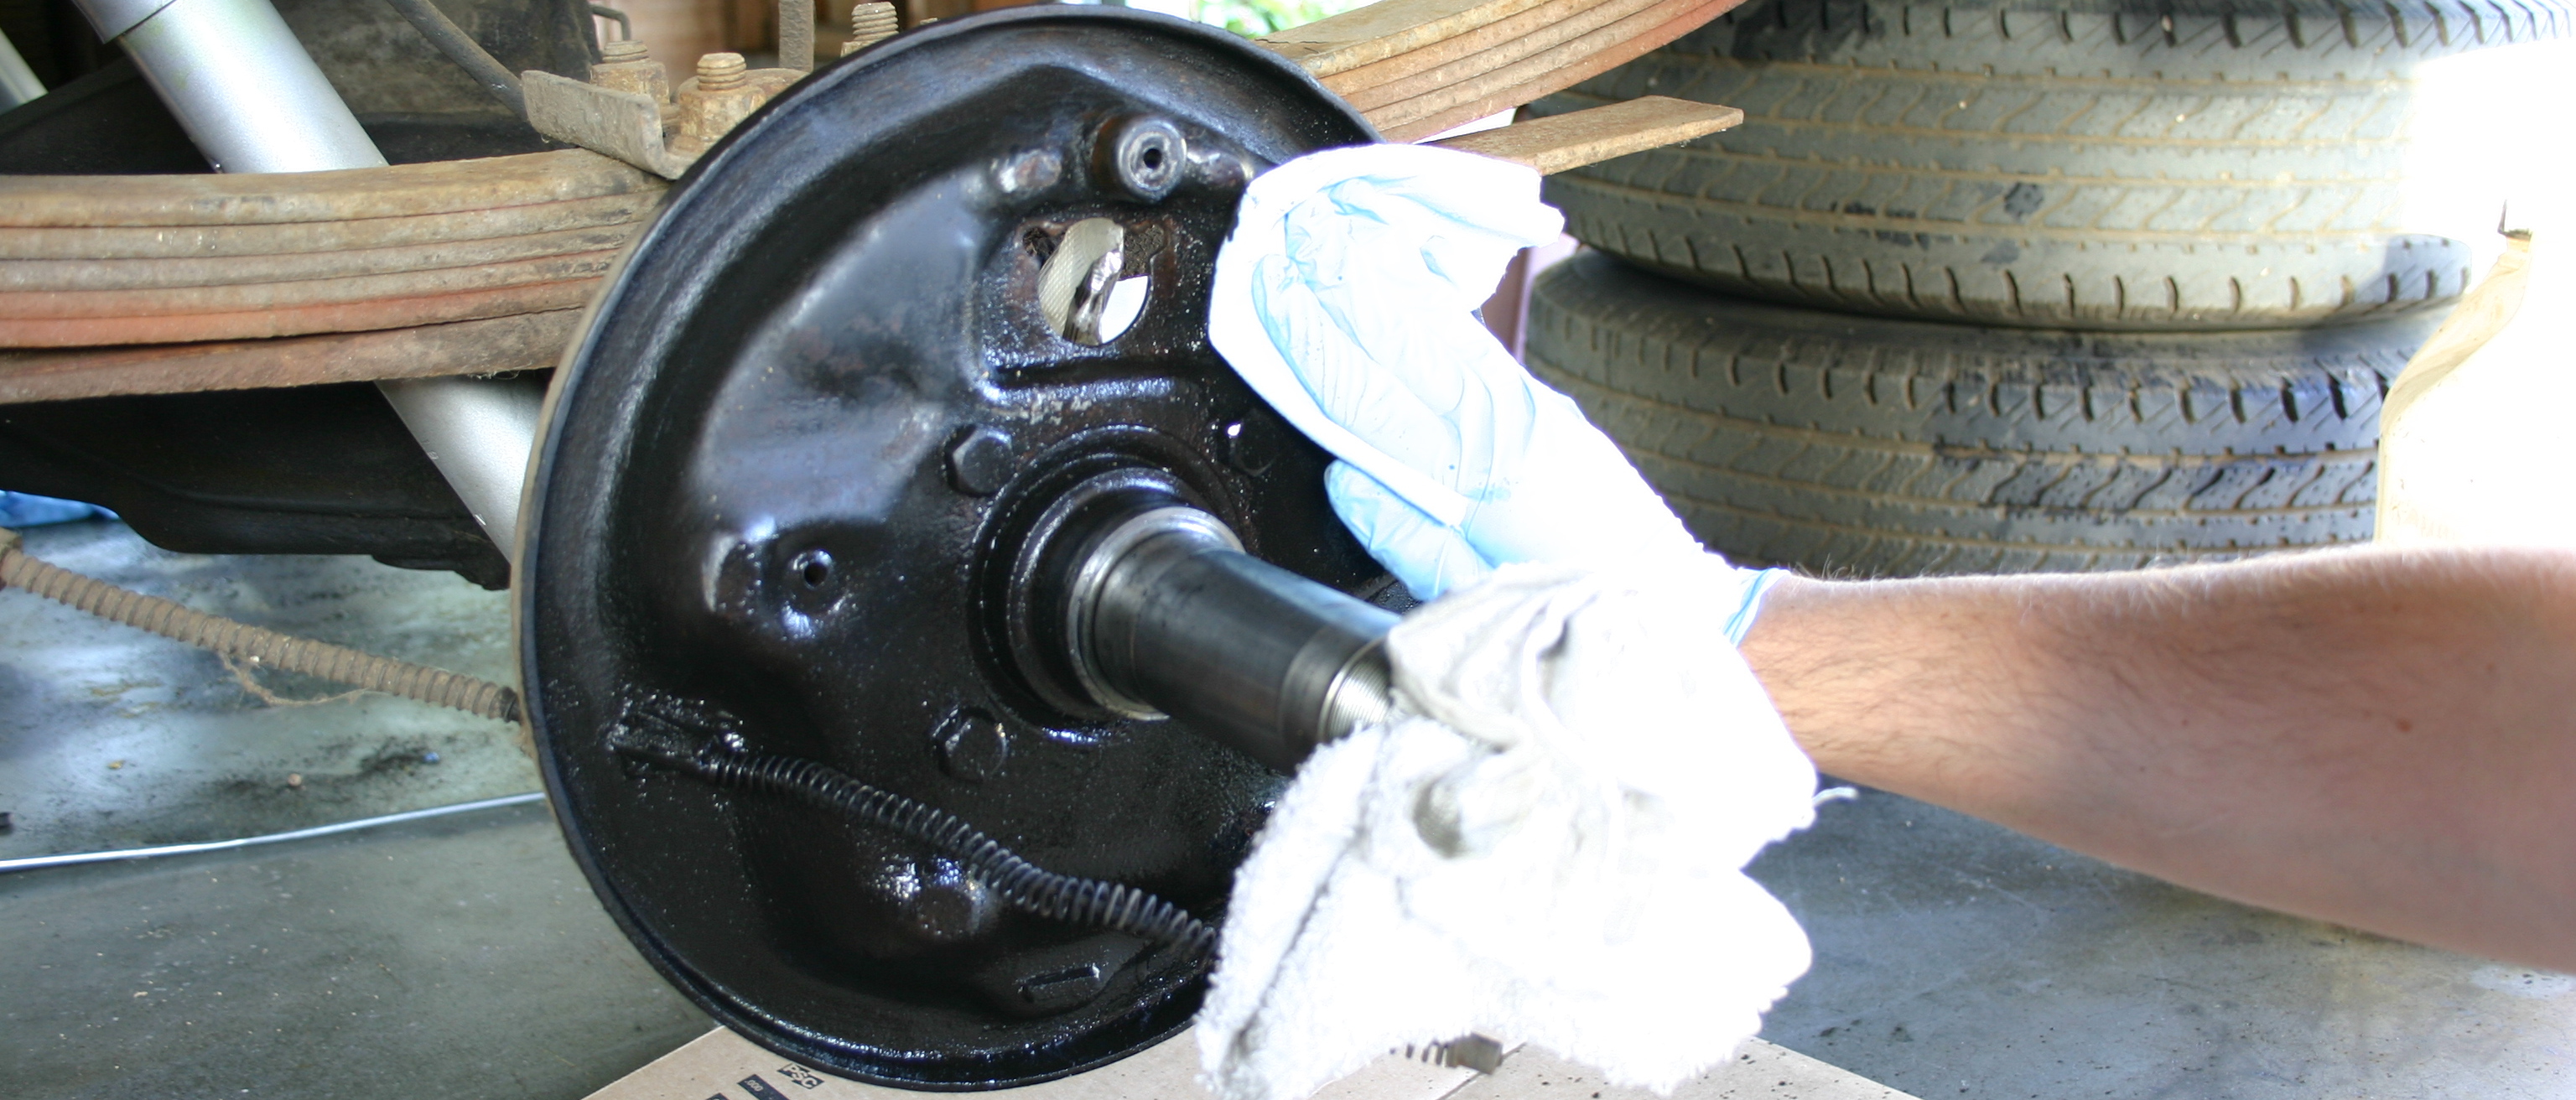
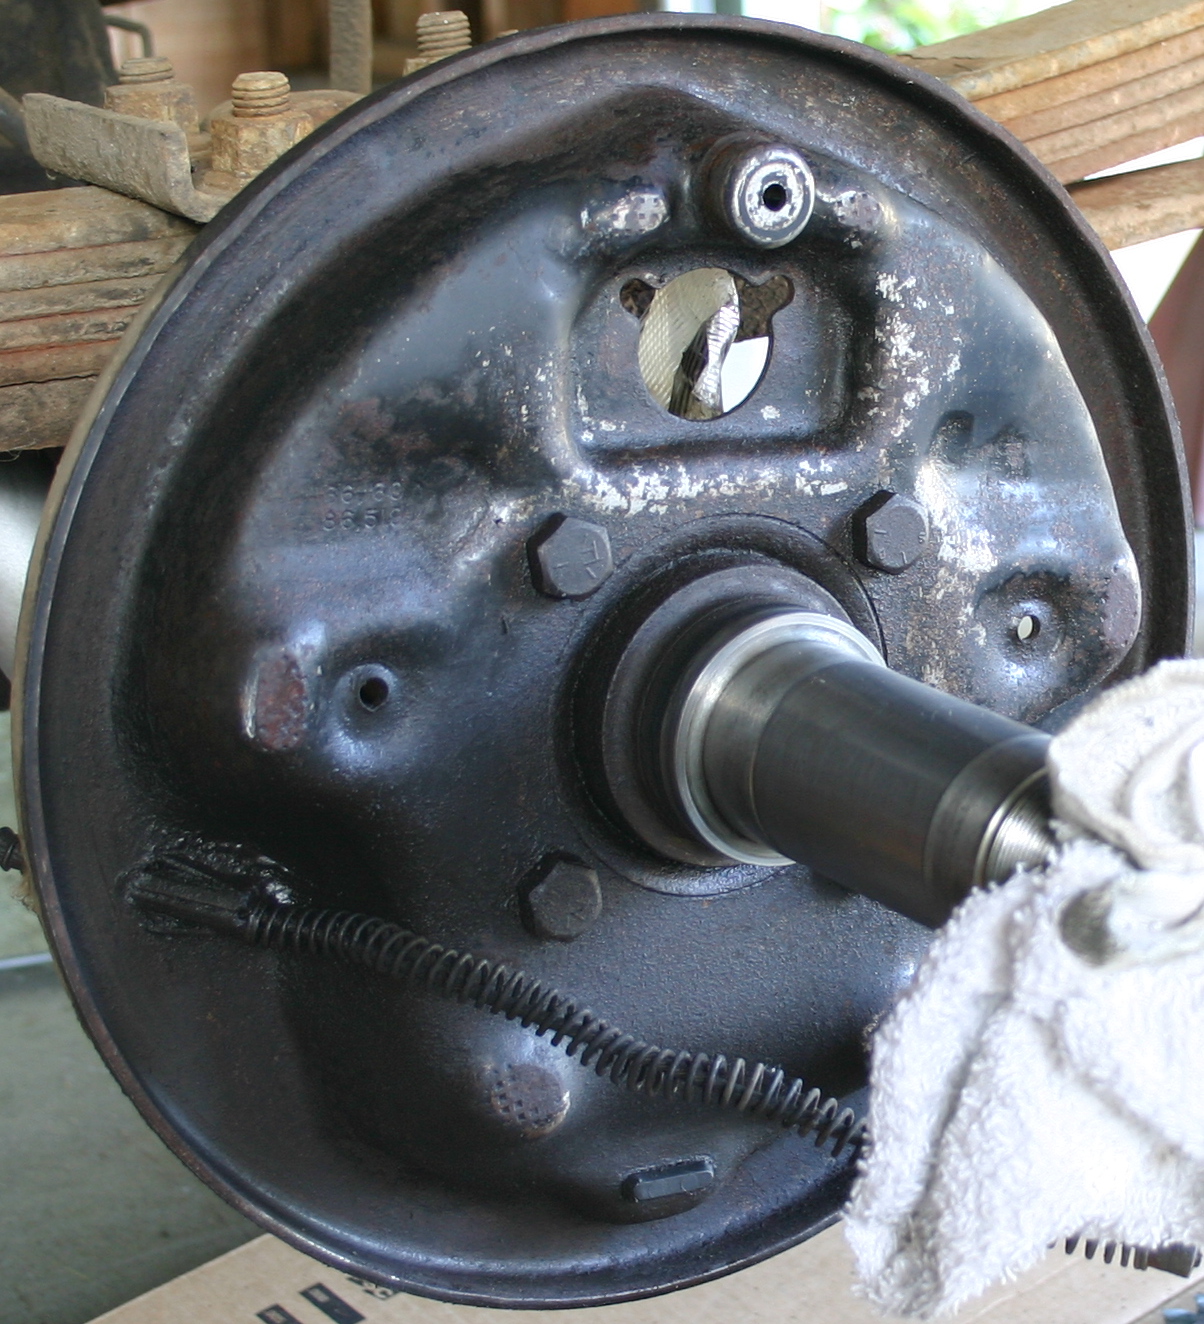
FreakysFords wrote:Then some information for ya. If you'll clean around the outside (usually at the back edge of the braking surface), you should find the maximum diameter for the drum (the max it can be turned to).
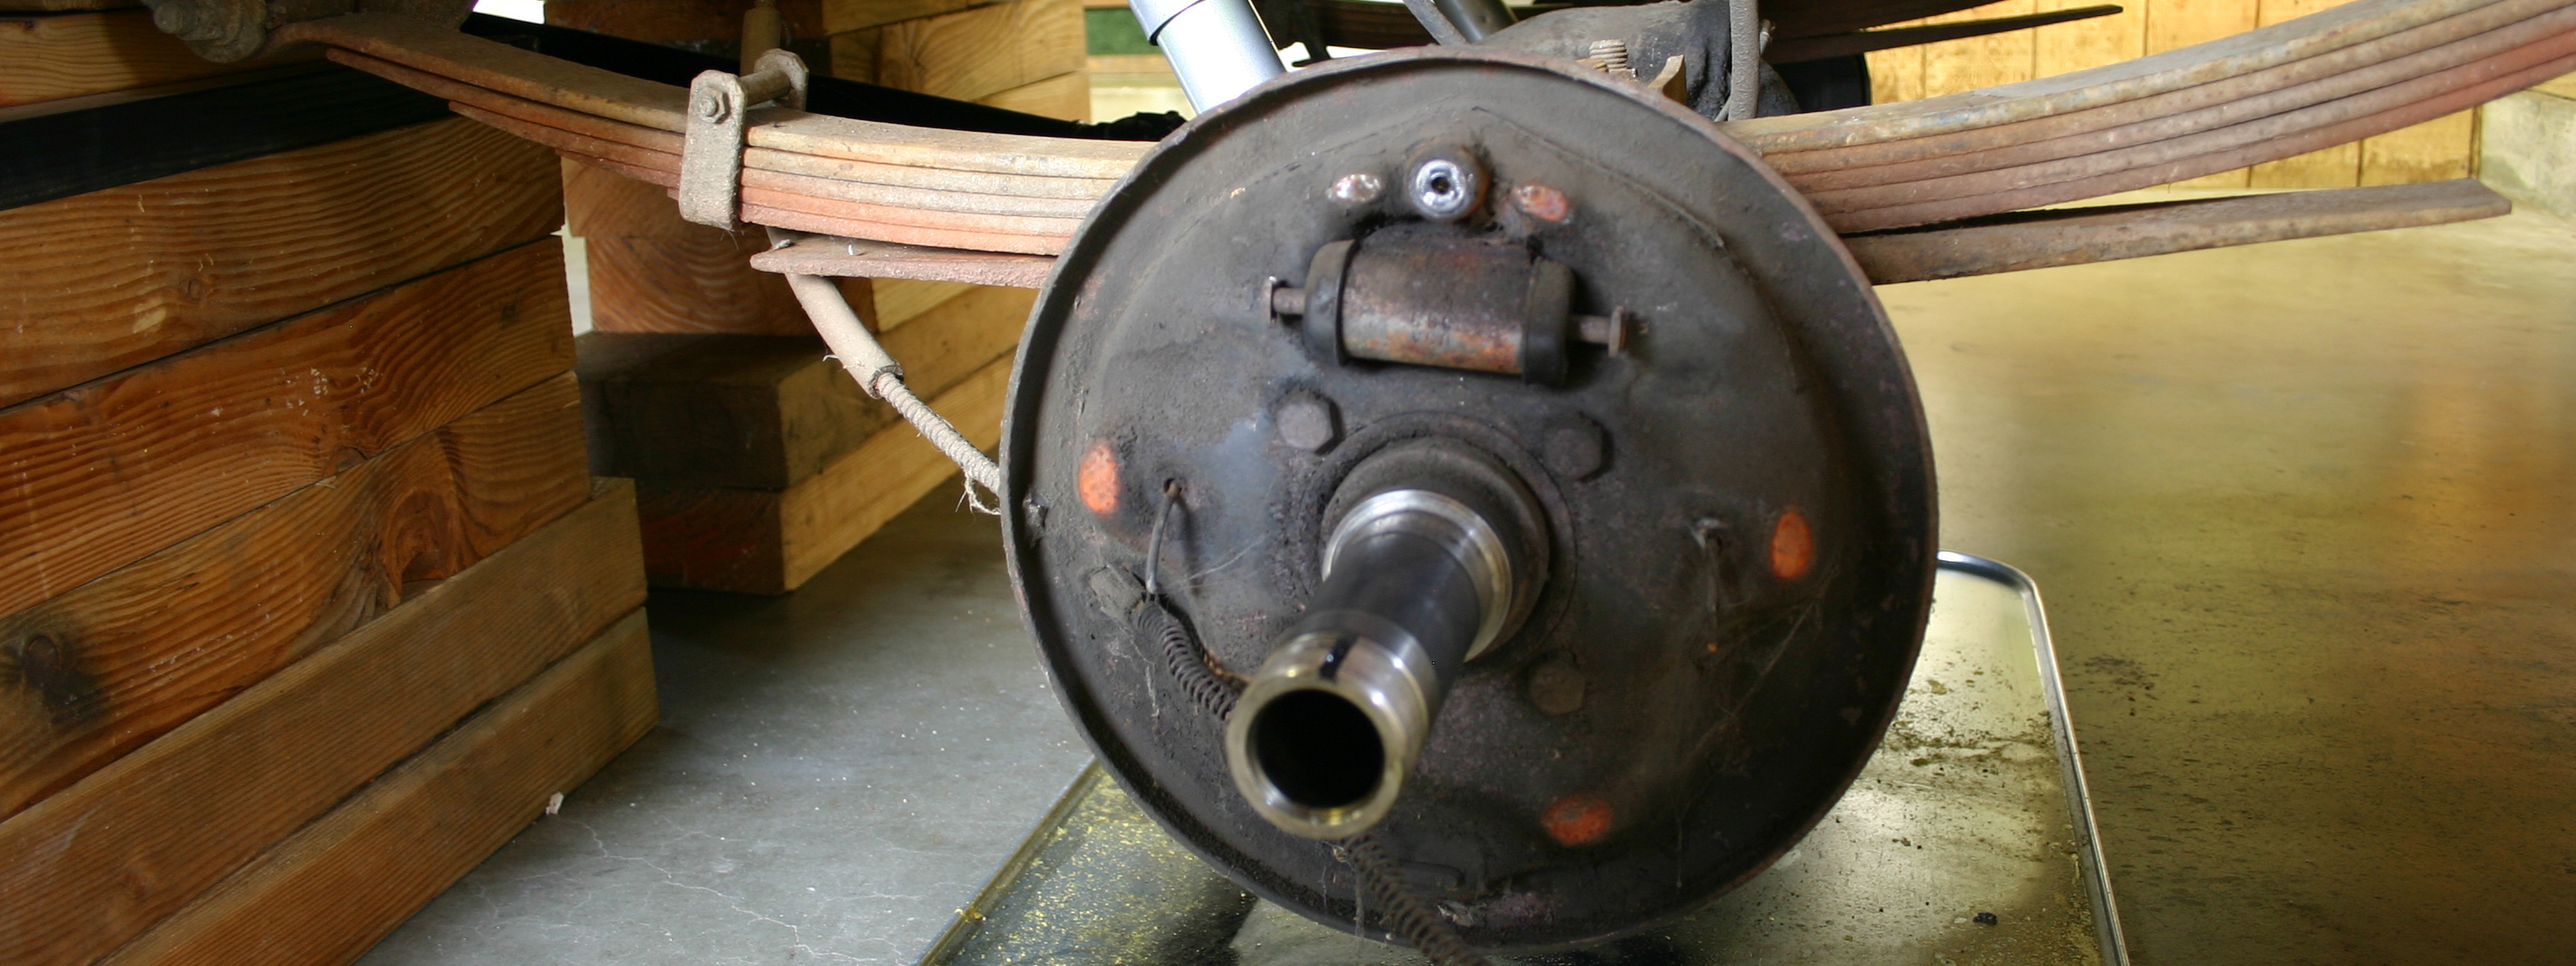
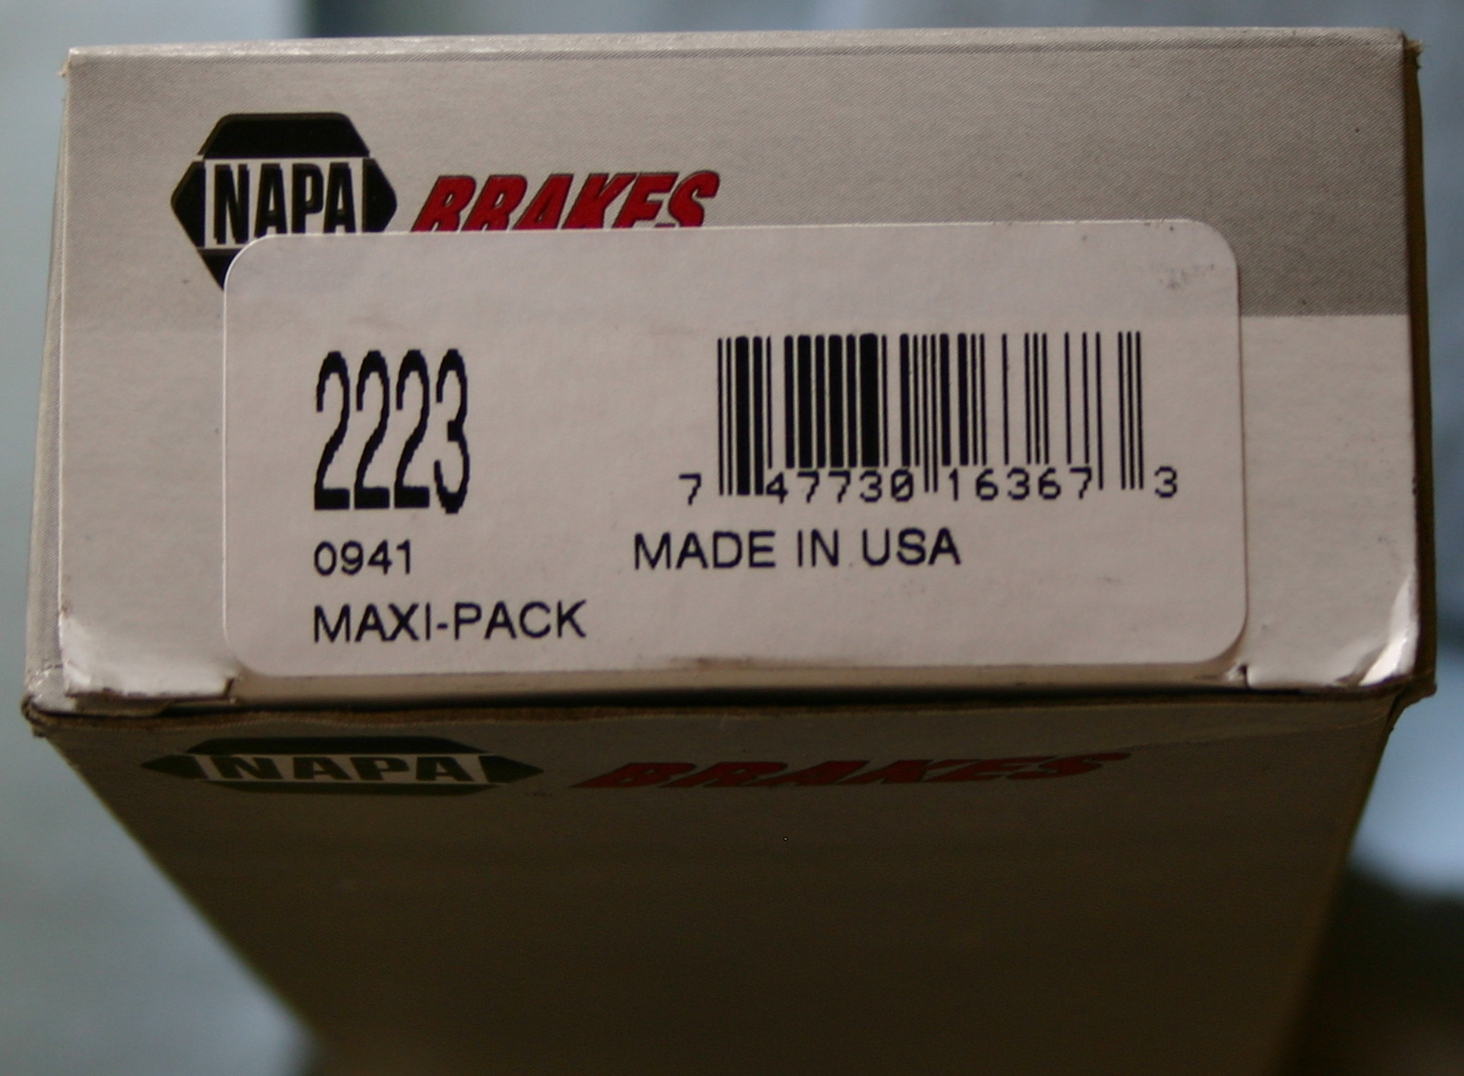
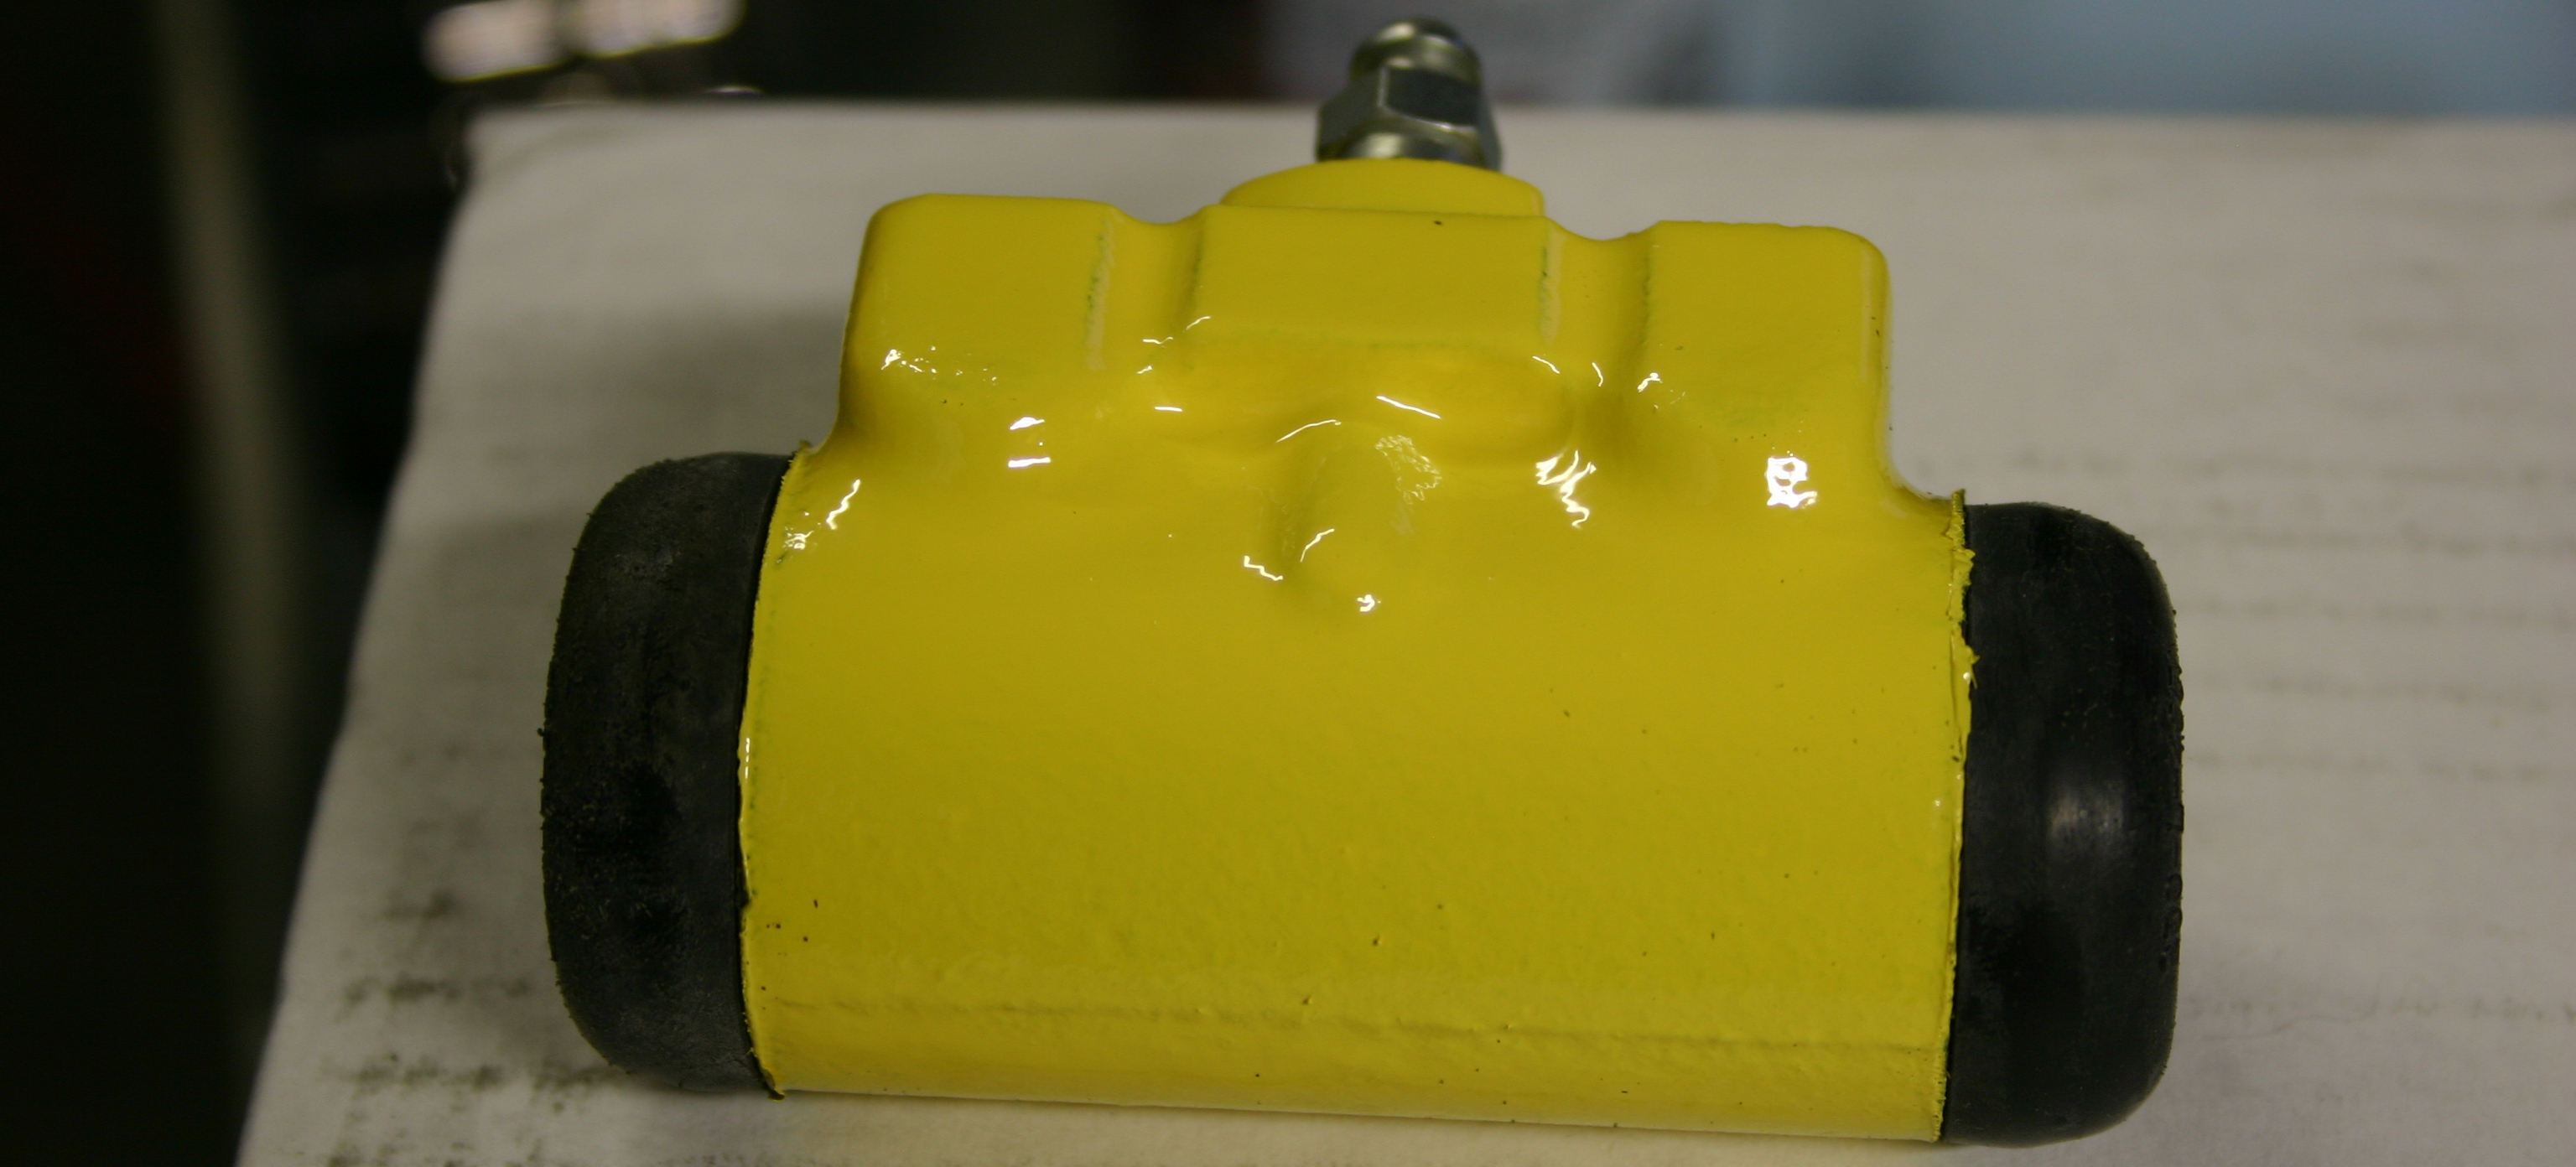
Found it!!! I'll post a photo later on tonight.
FreakysFords wrote:Use a reputible shop so the don't A) over turn the thing and b) try to take off more than 2.5 thou on a pass. A good shop will do it right.
Interesting! I'll ask the shop how much they usually take off in a single pass to see what they say. I'll also let 'em know (very tactfully) that I'm paying attention to the maximum internal diameter!
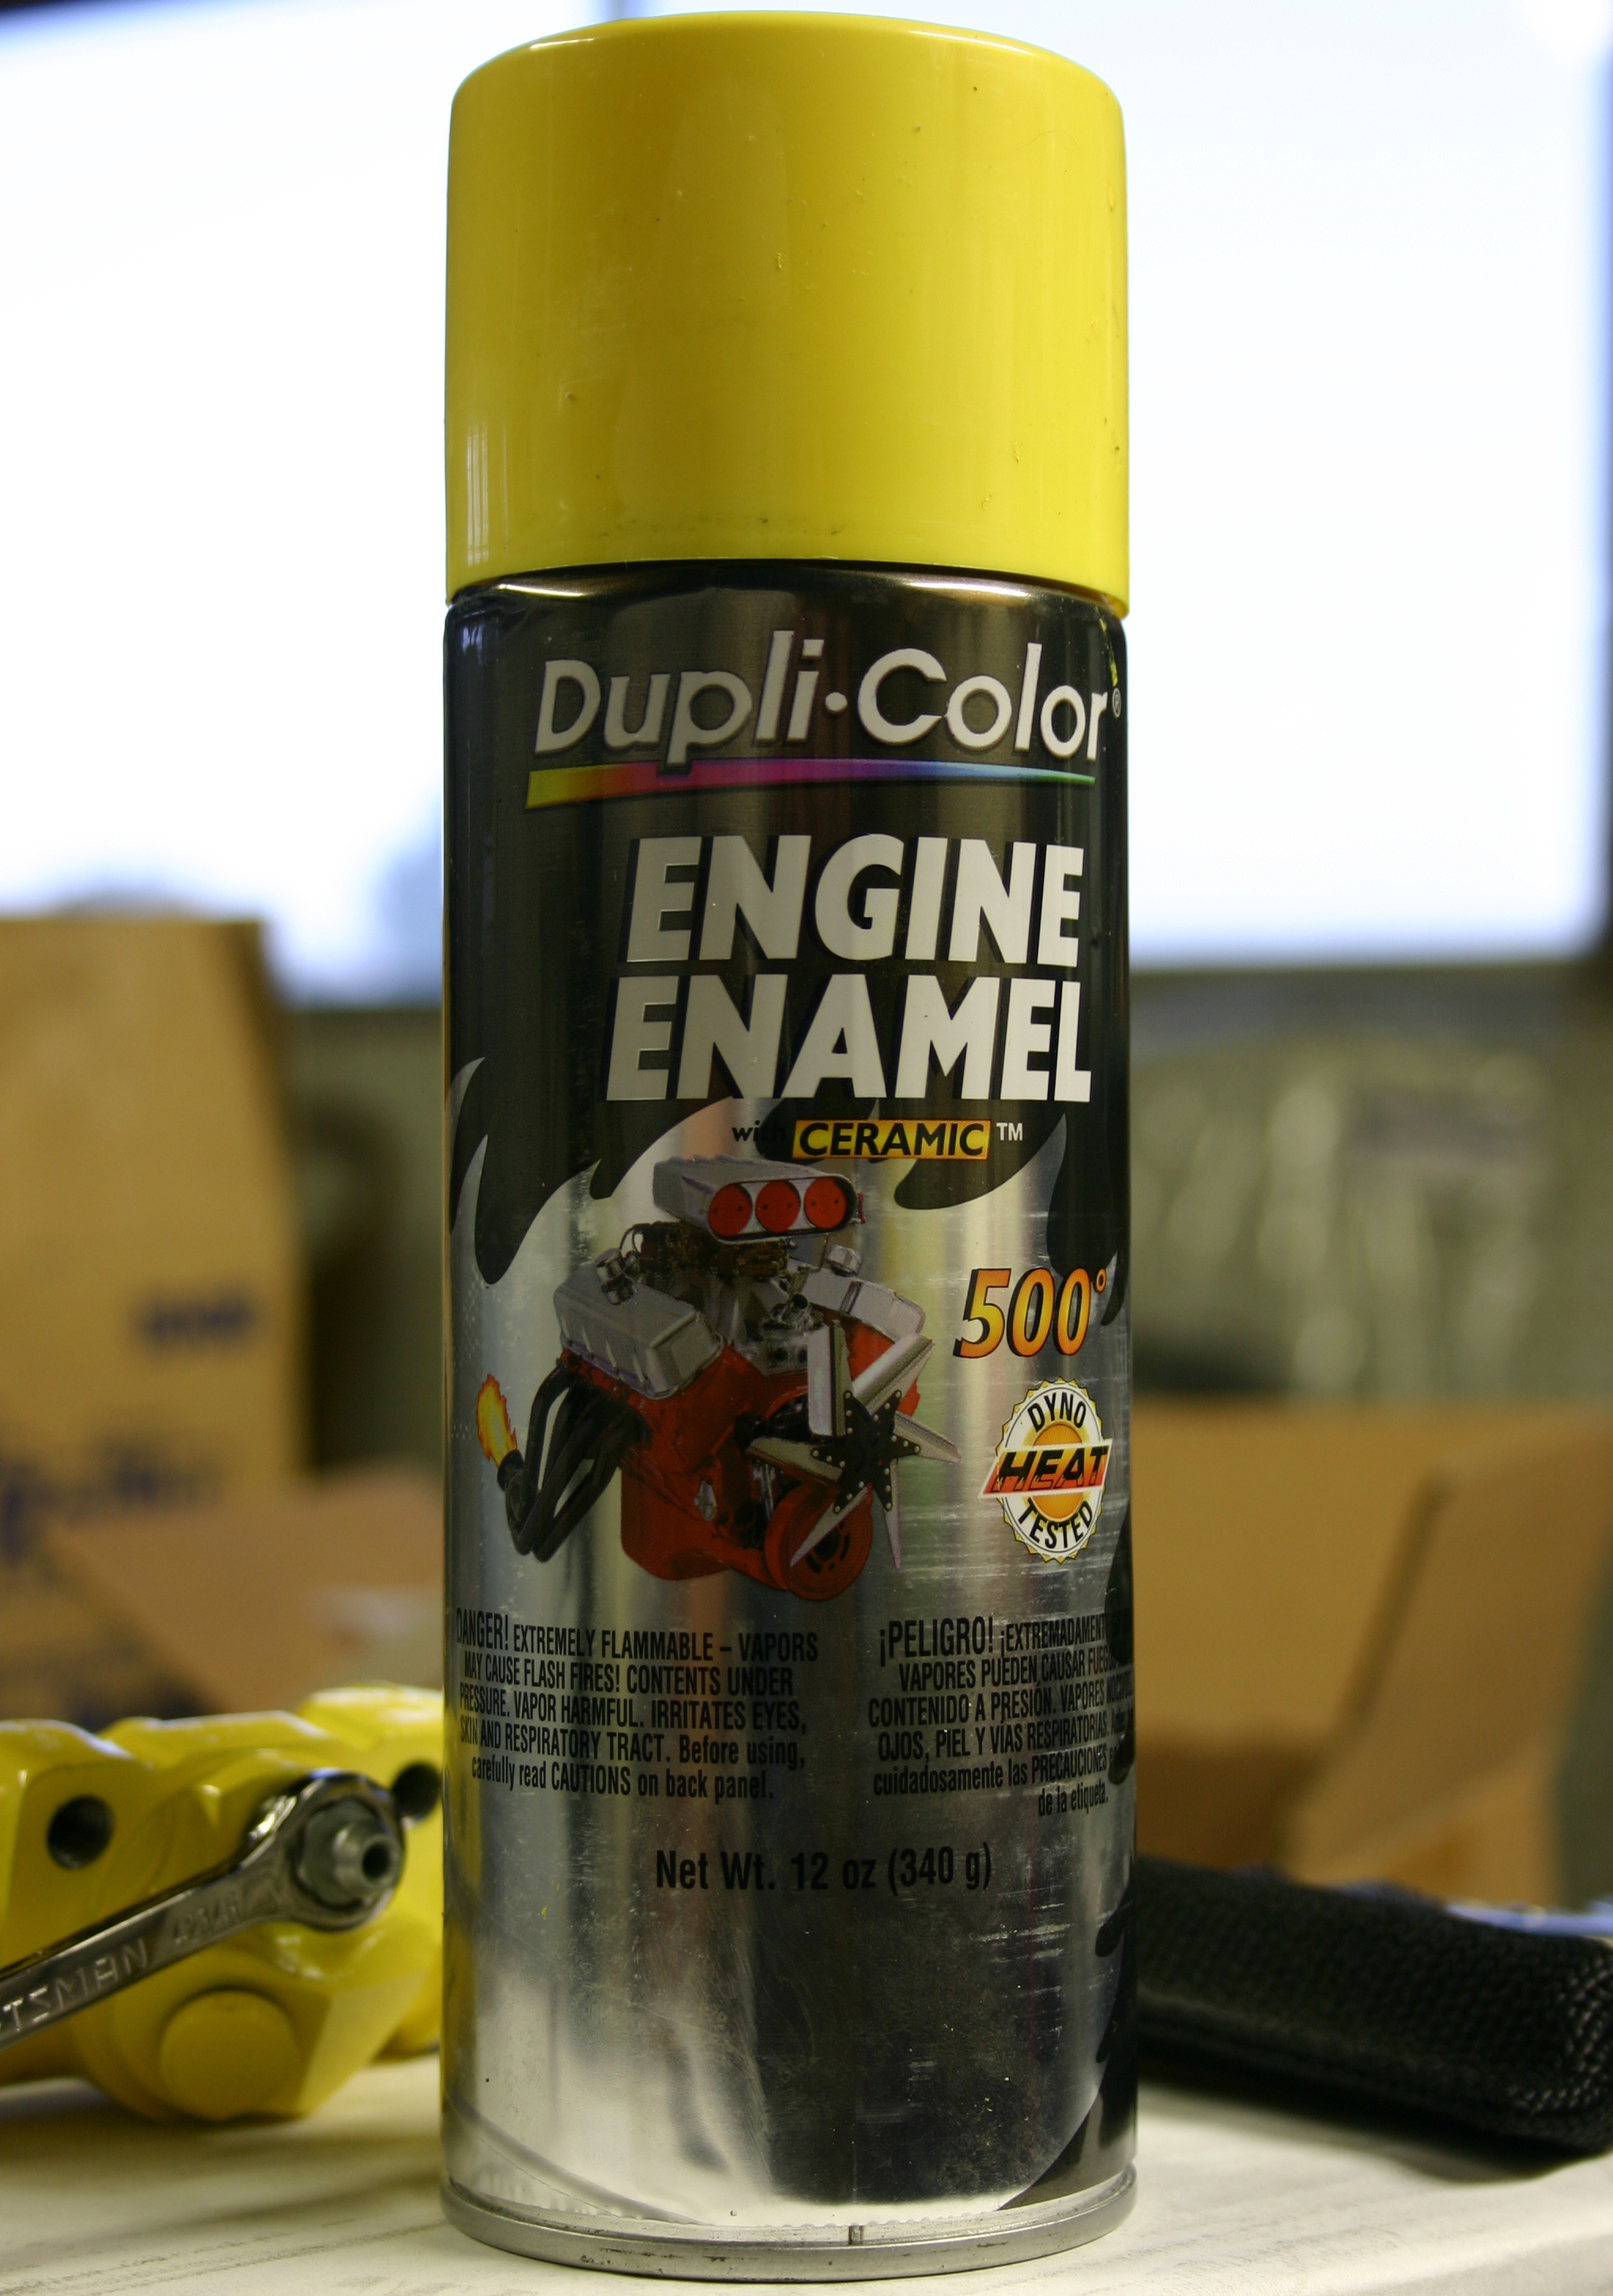
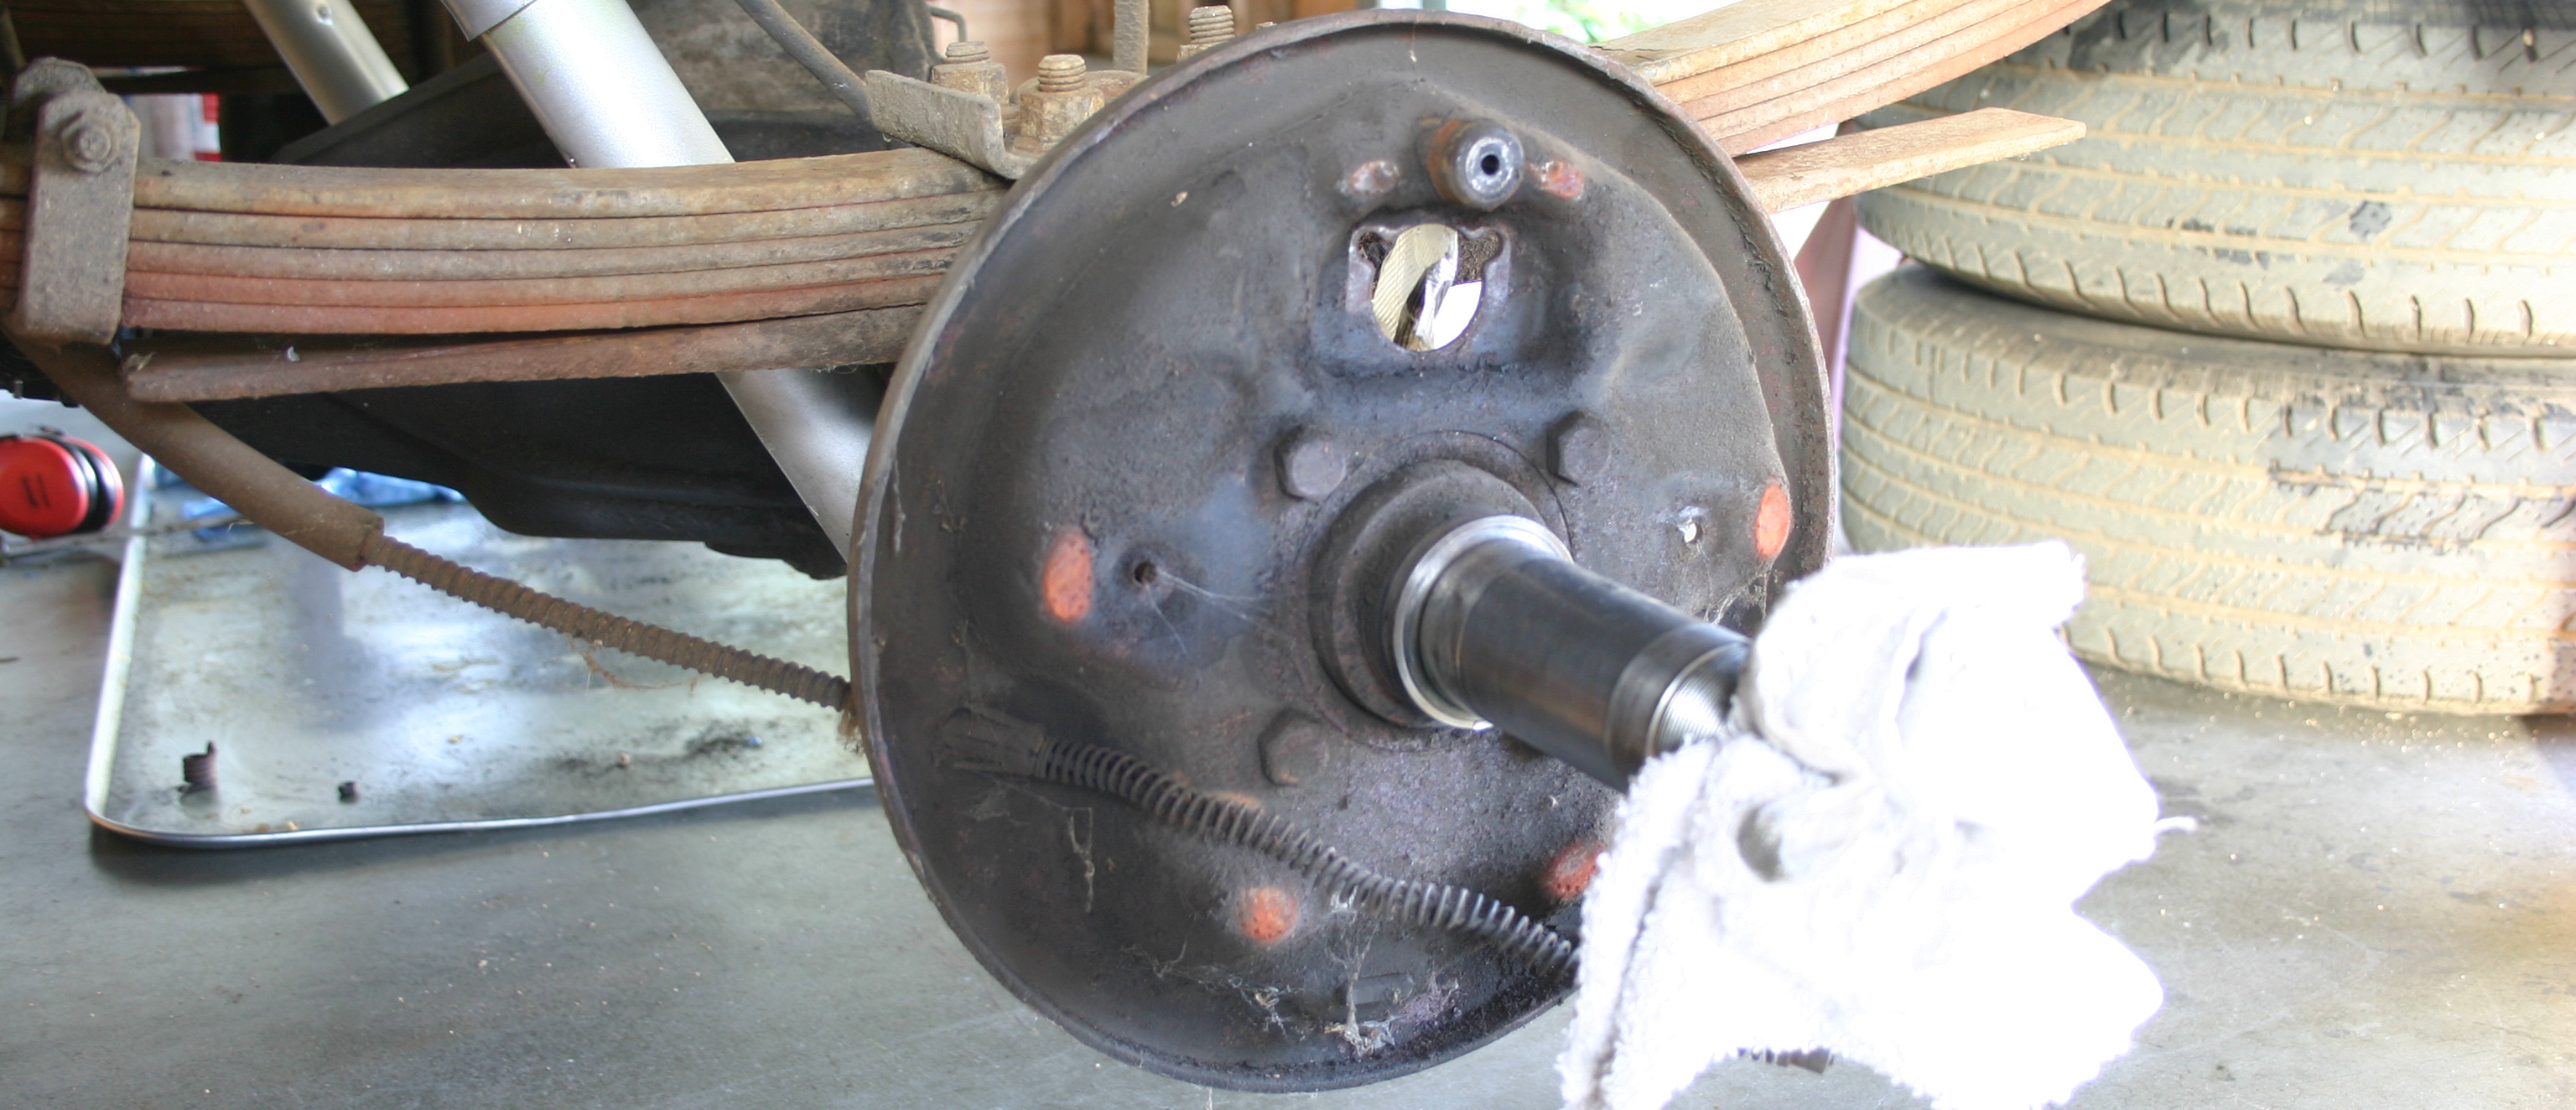
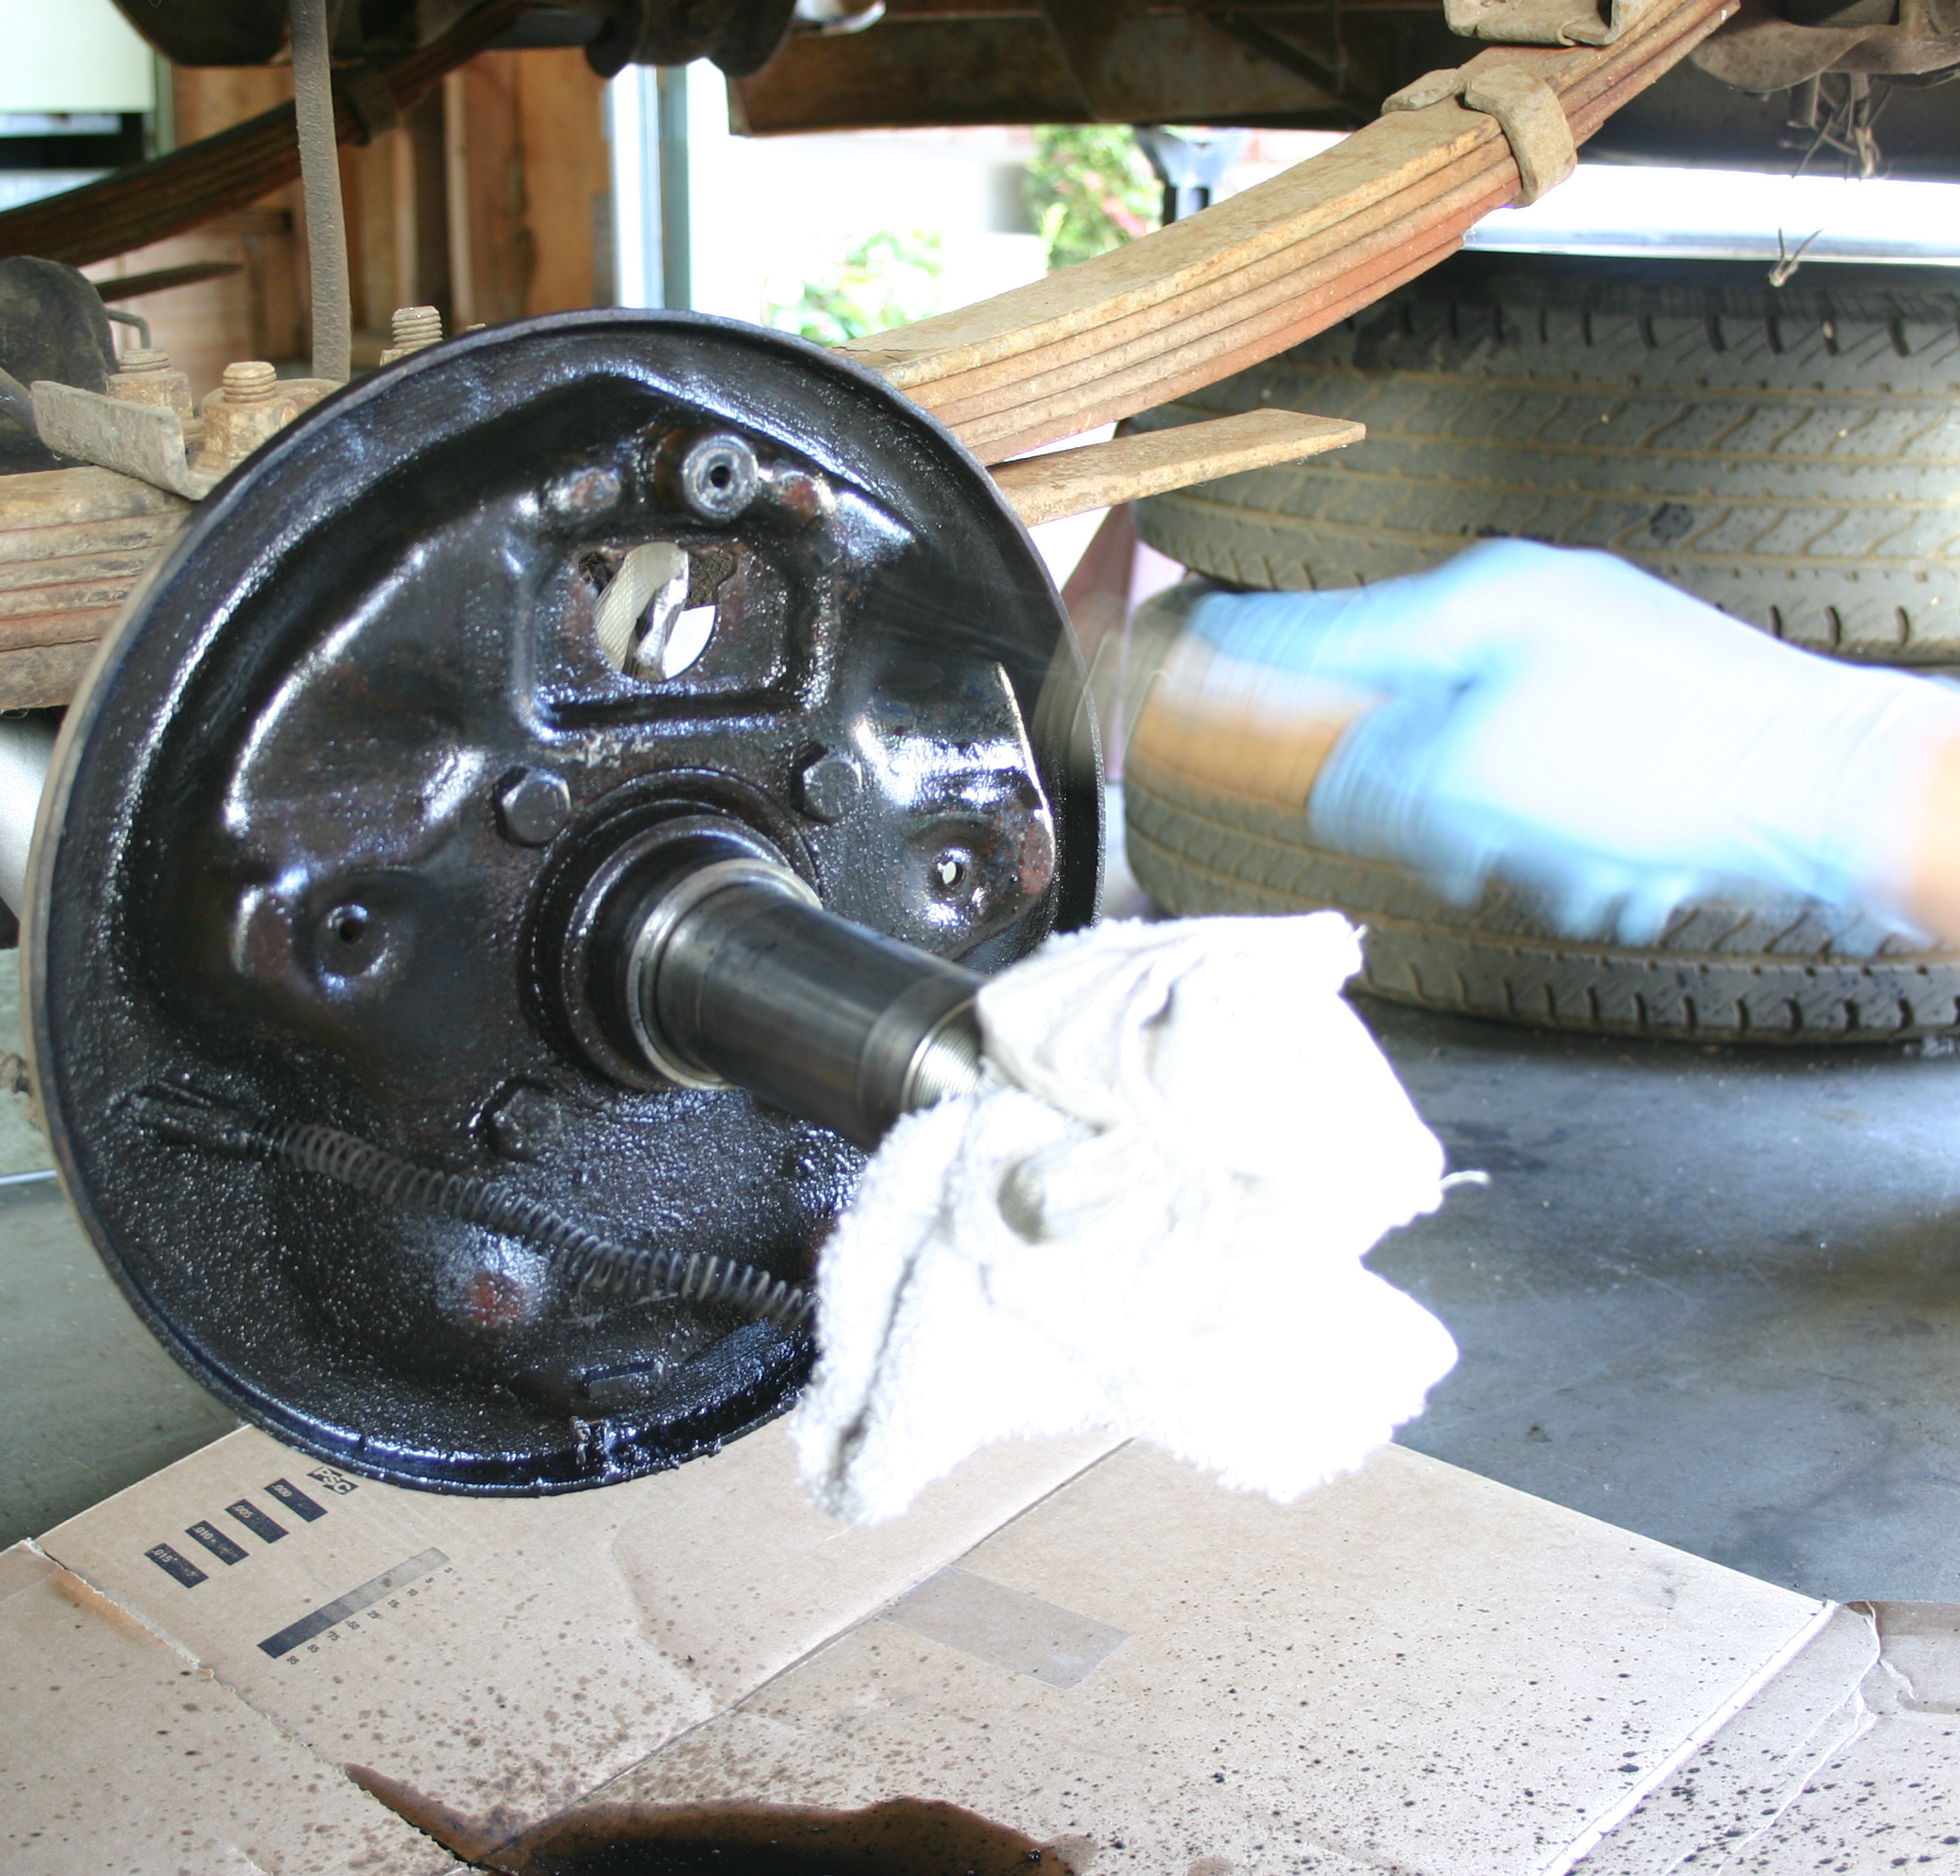
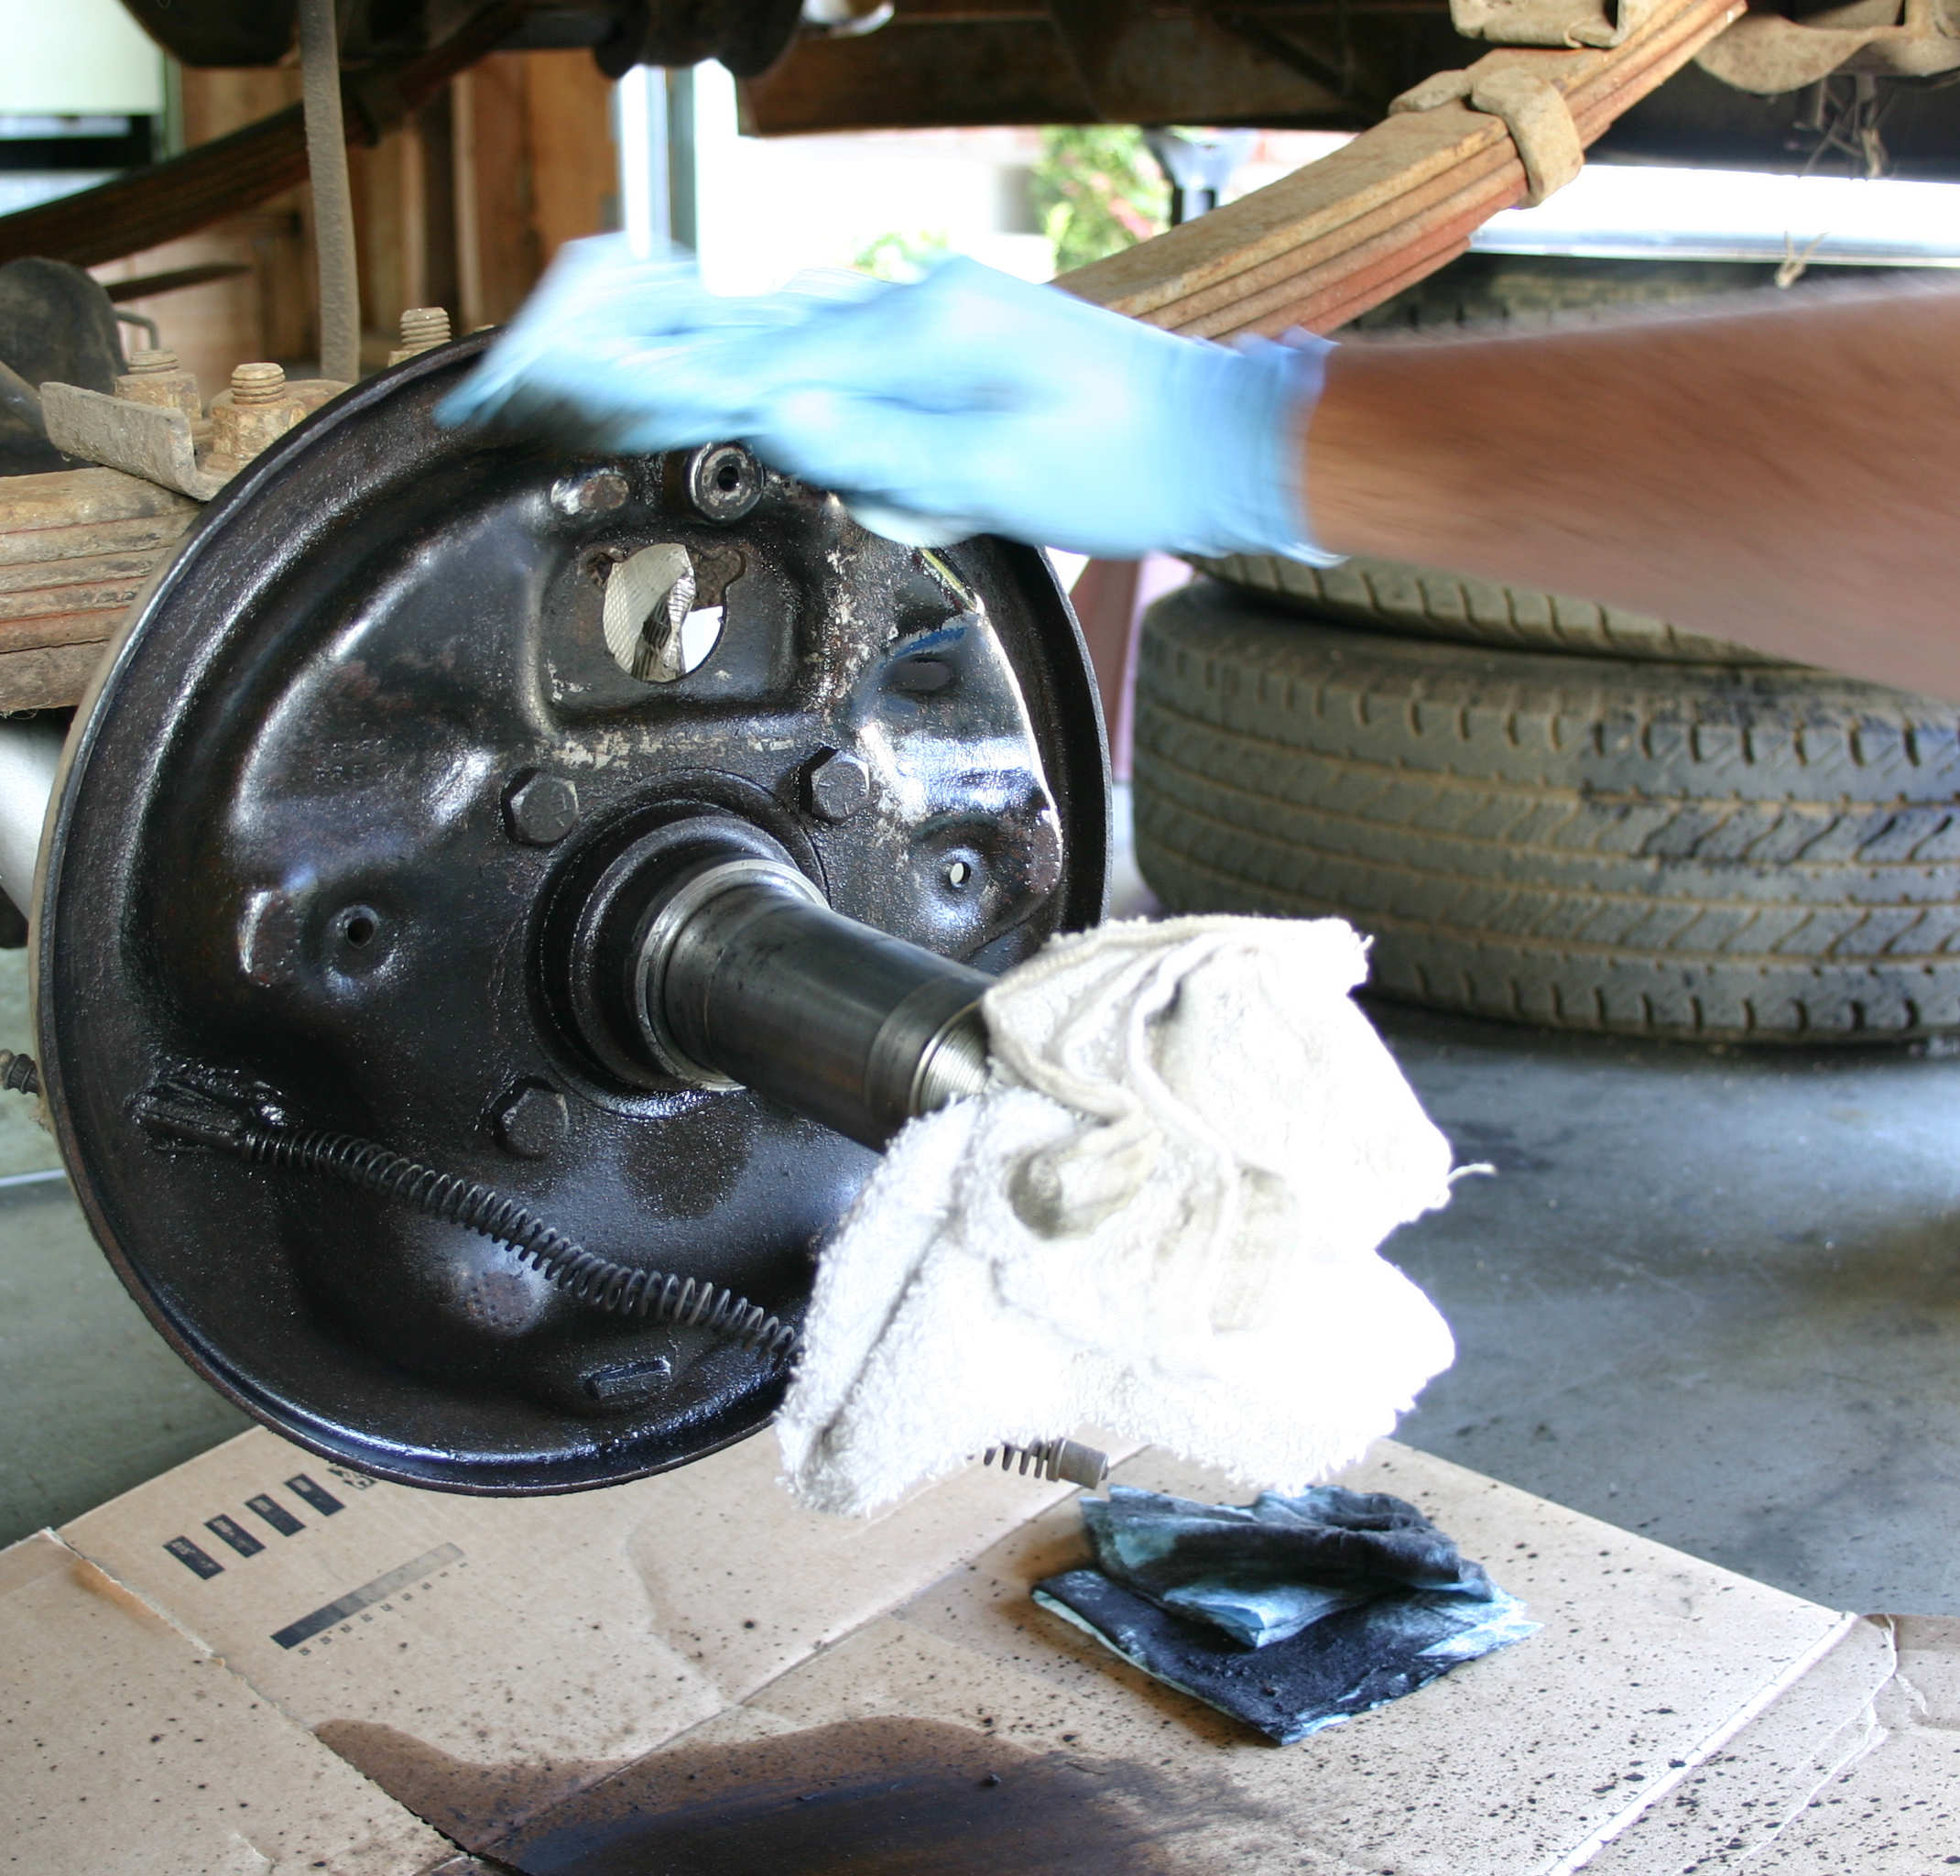
FreakysFords wrote:Were it me, I'd go ahead and pull the backing plate, have it and any other hard surfaces bead blasted (since after all, you do have one heck of a nice detailed build to date). I'd use a VERY hard paint for the backing plate and components, but you don't want anything that's going to be SUPER thick....... I'm guessing in your collection, you already have what you need. You may end up having to scrape some paint out of some of the pivot holes, but no biggie.
I know what you mean Frank! I may wind up doing something like this, despite my intentions to make the rear brakes safe, not to cosmetically restore them.
If I had been doing a frame-up restoration on #50 I'd certainly take time to make the brakes as beautiful as possible, but I'm taking the staged approach. And with that new engine in I'm very eager to get it on the road now! I
almost decided to just leave the rear brakes as-is before starting this thread, since I figured they were probably fine (more on the acute folly of my thinking later on tonight)!
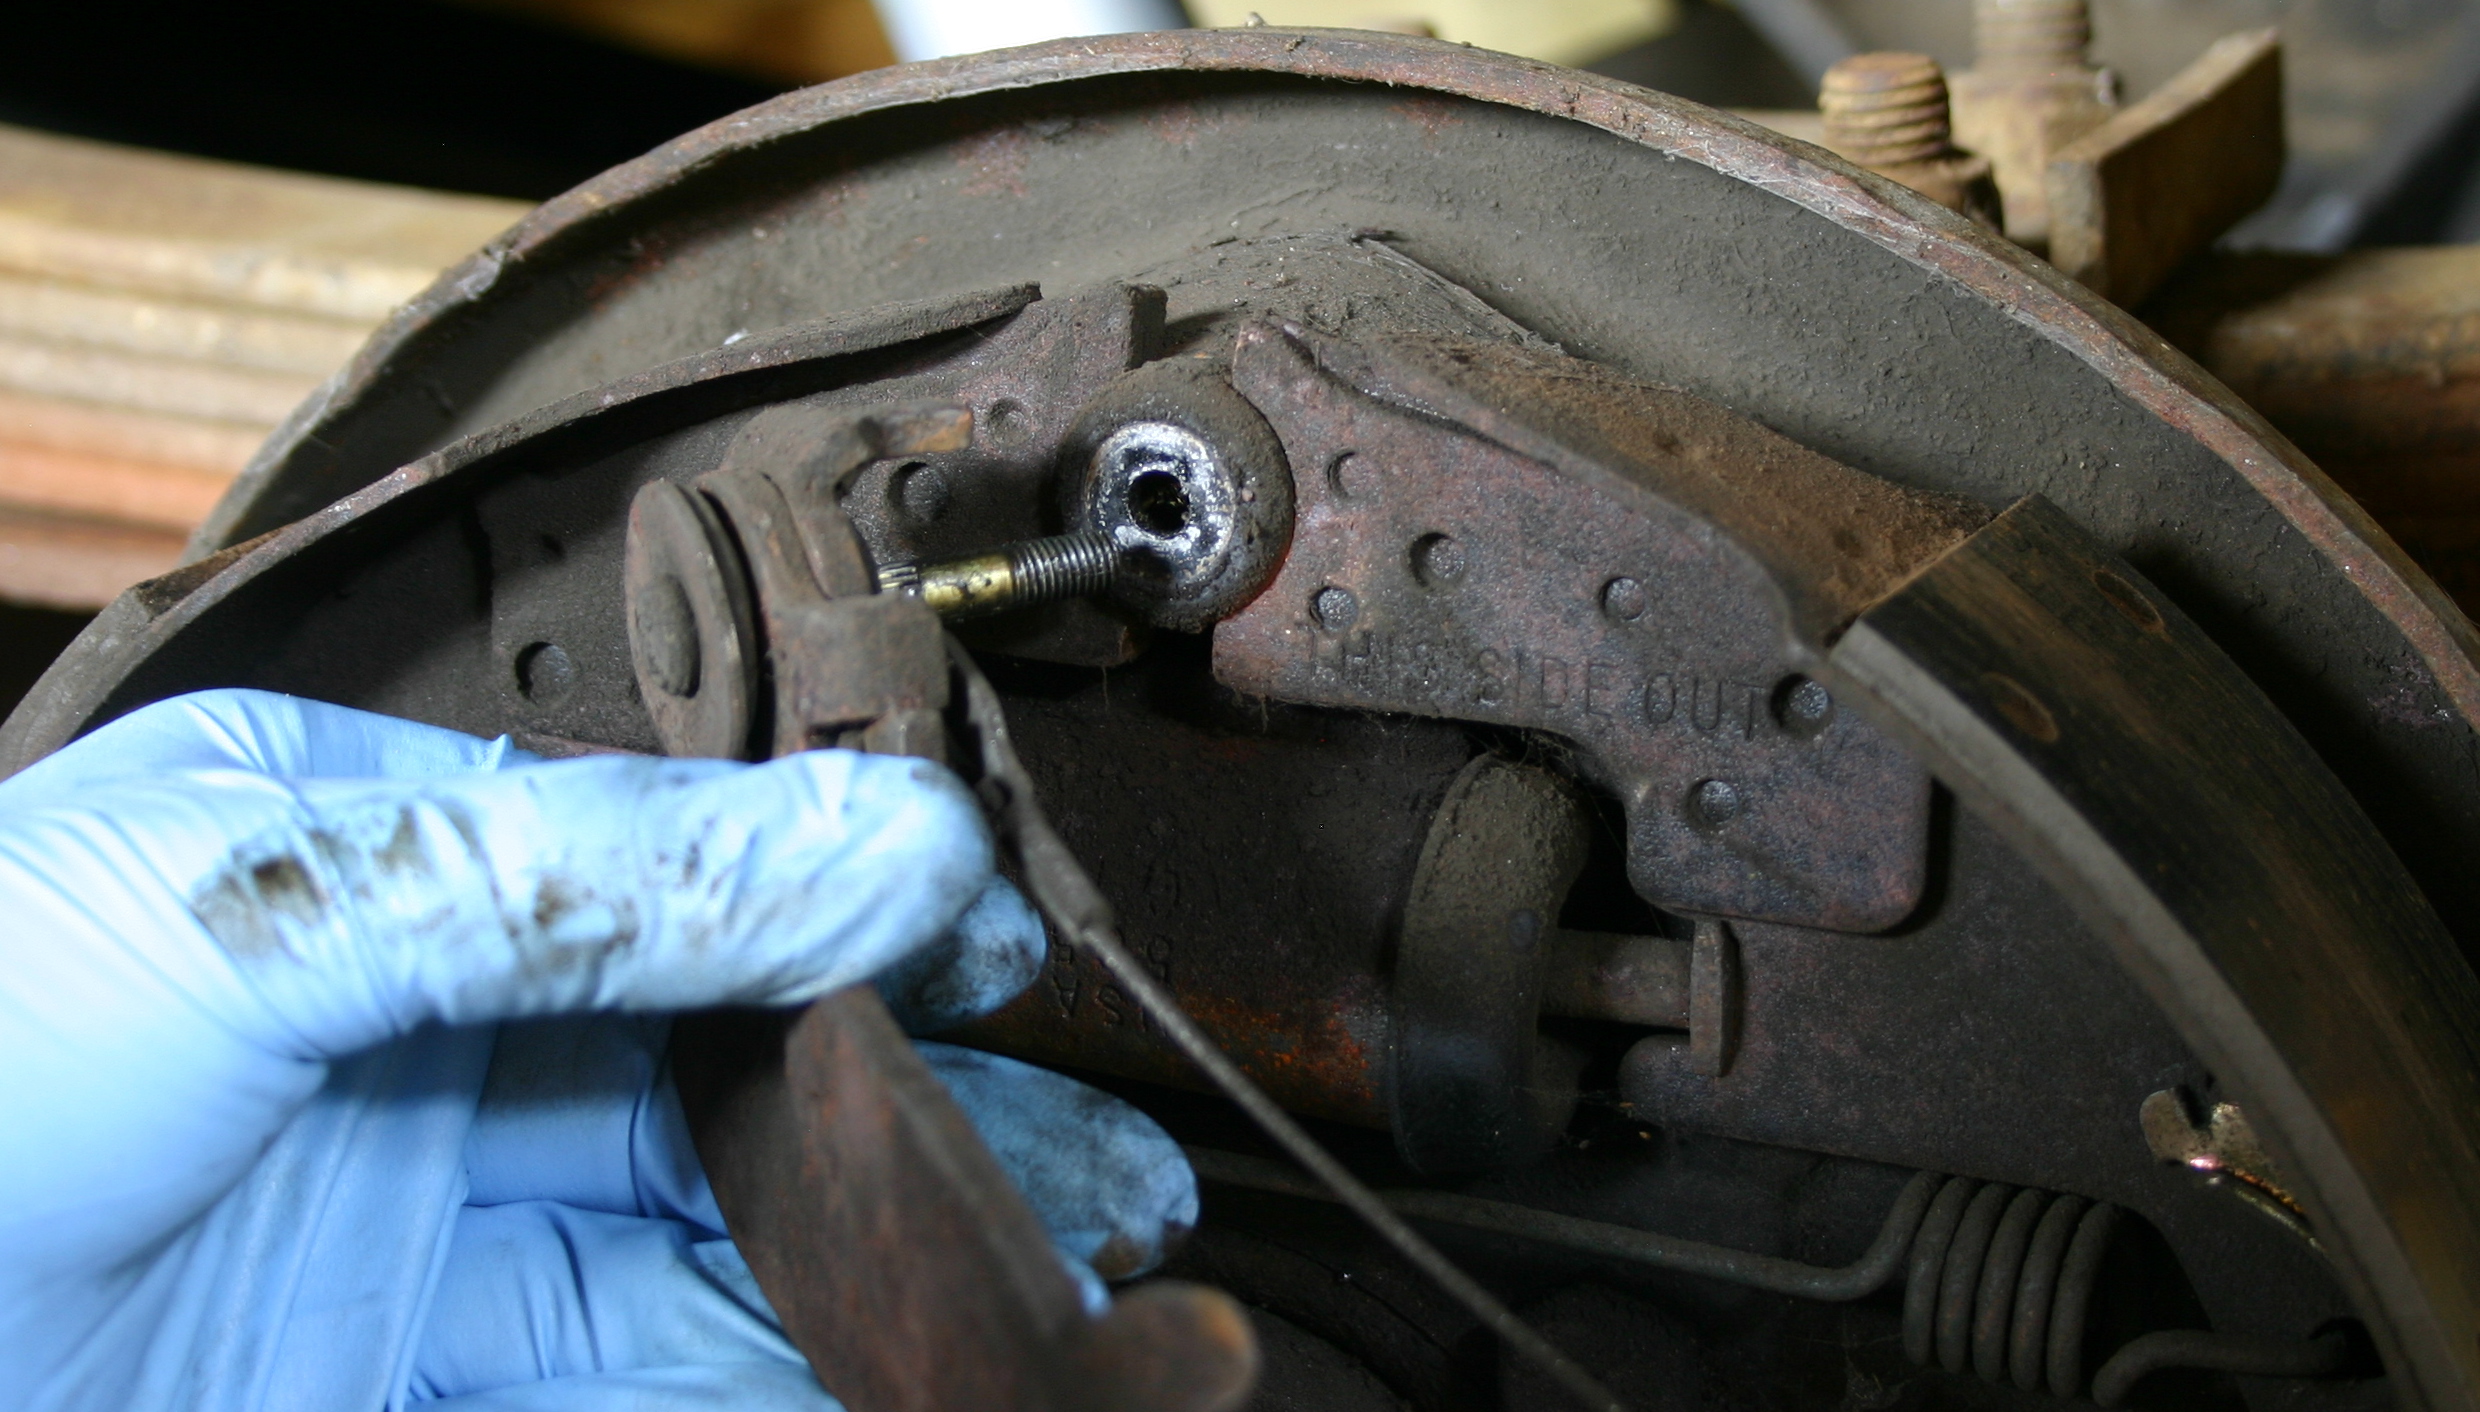
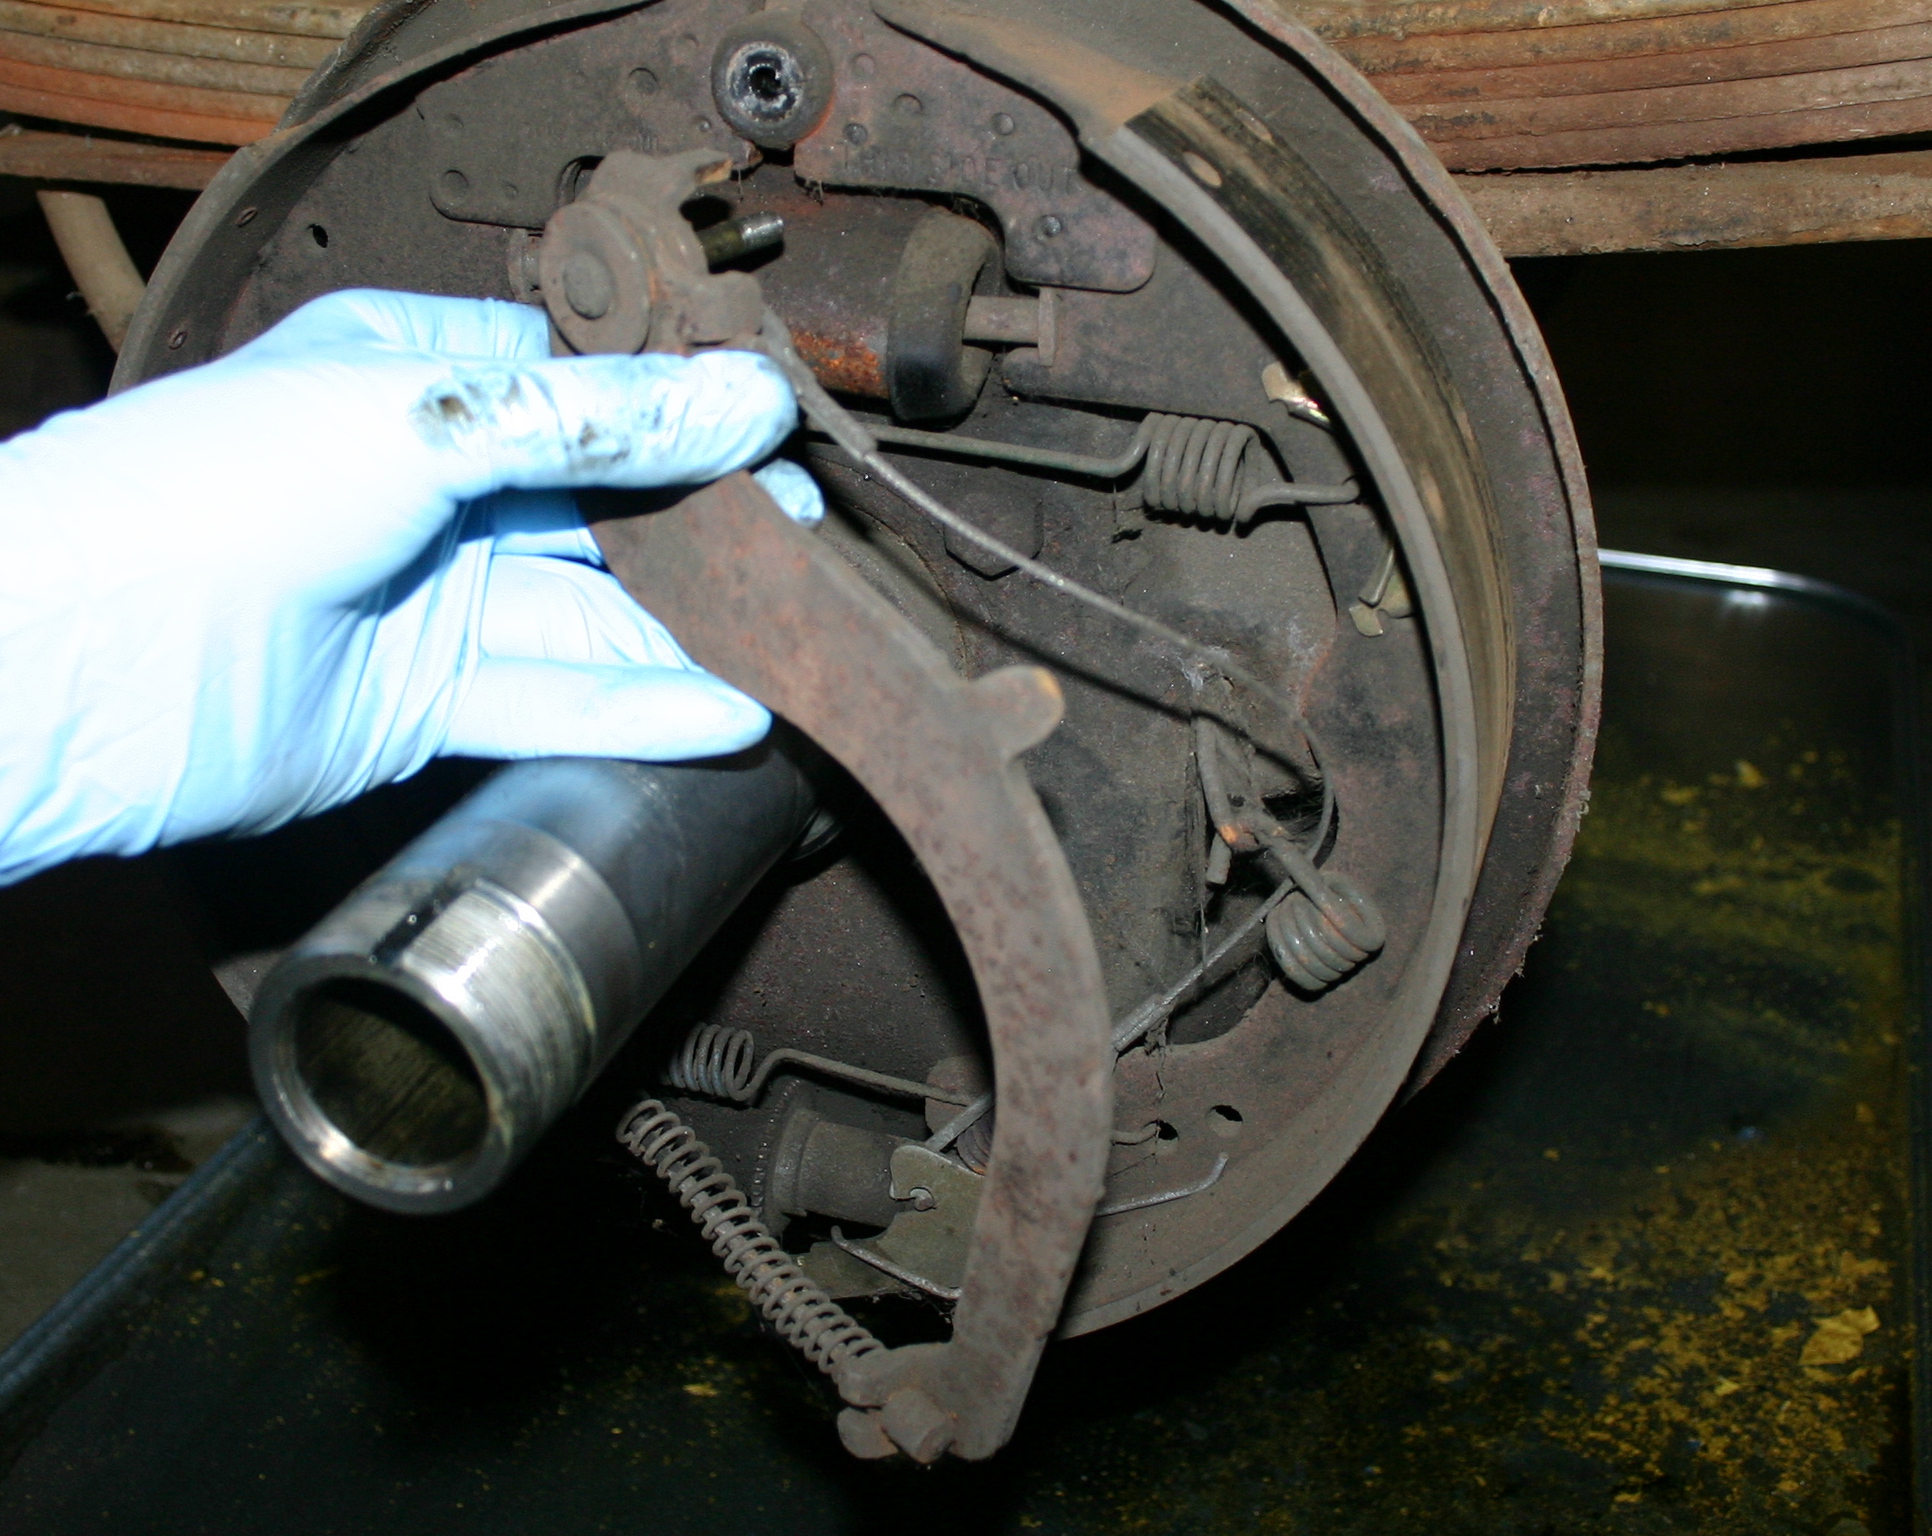
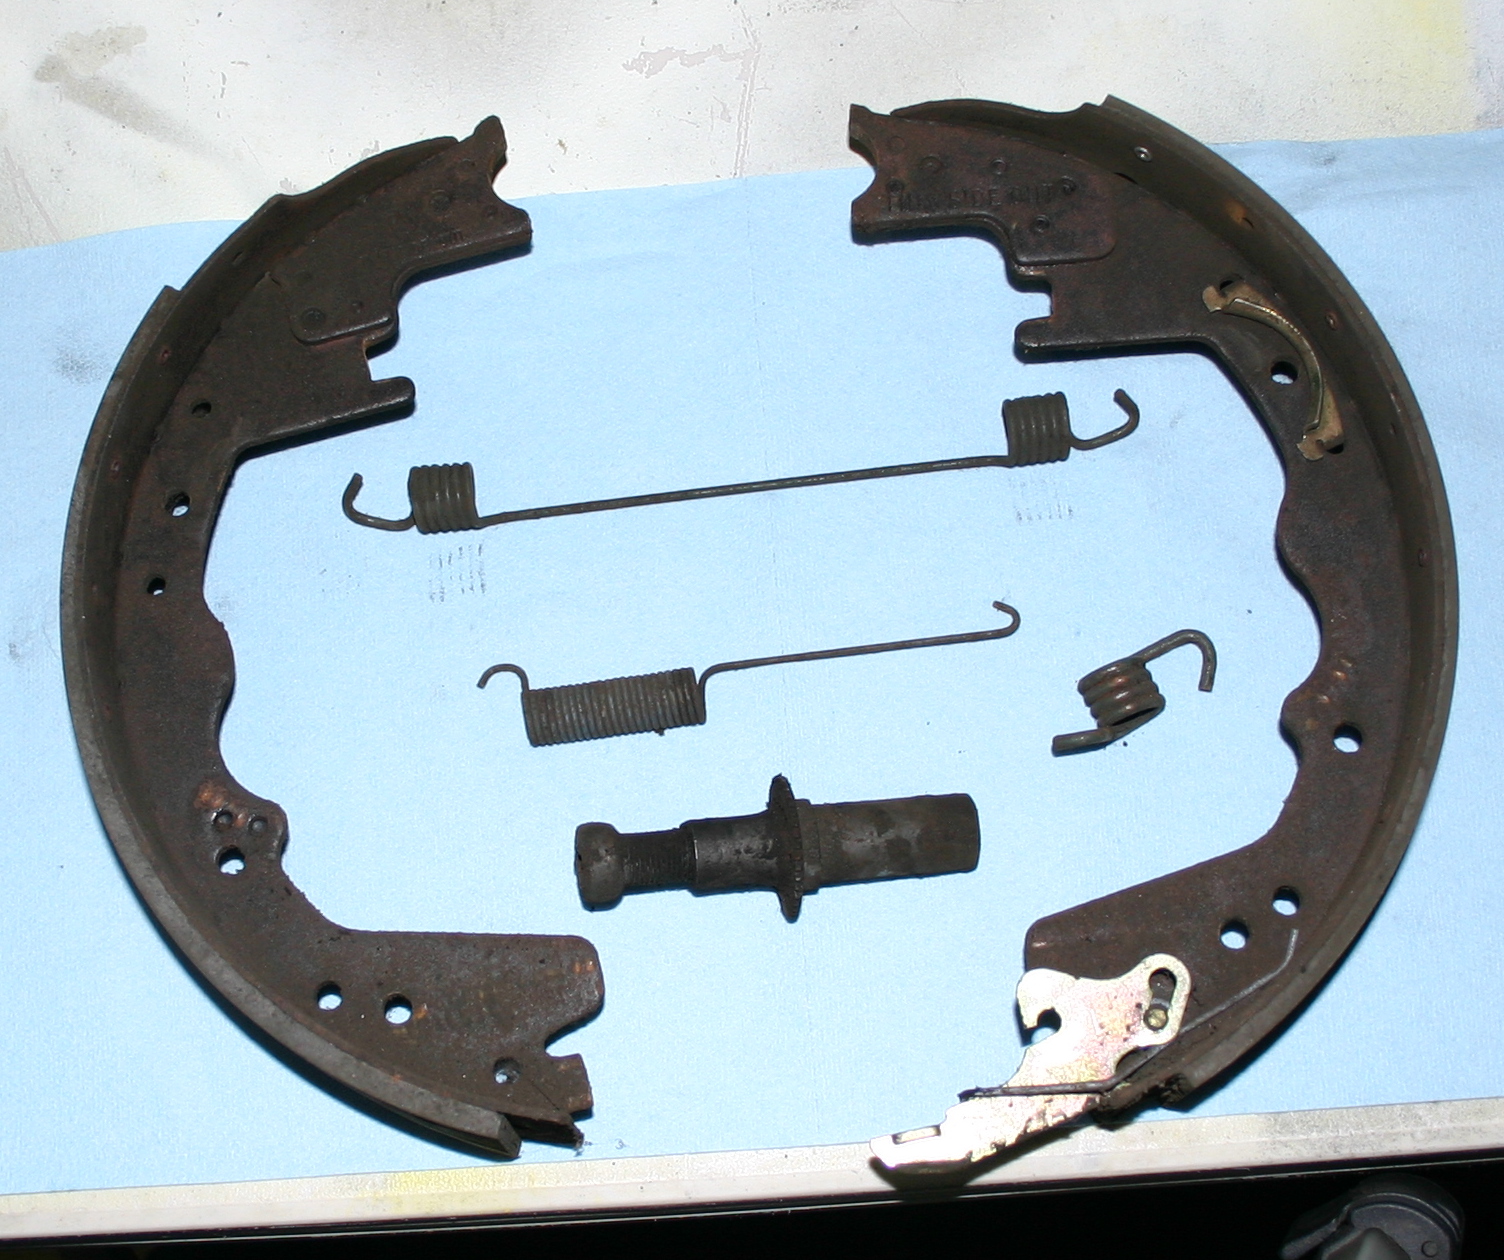
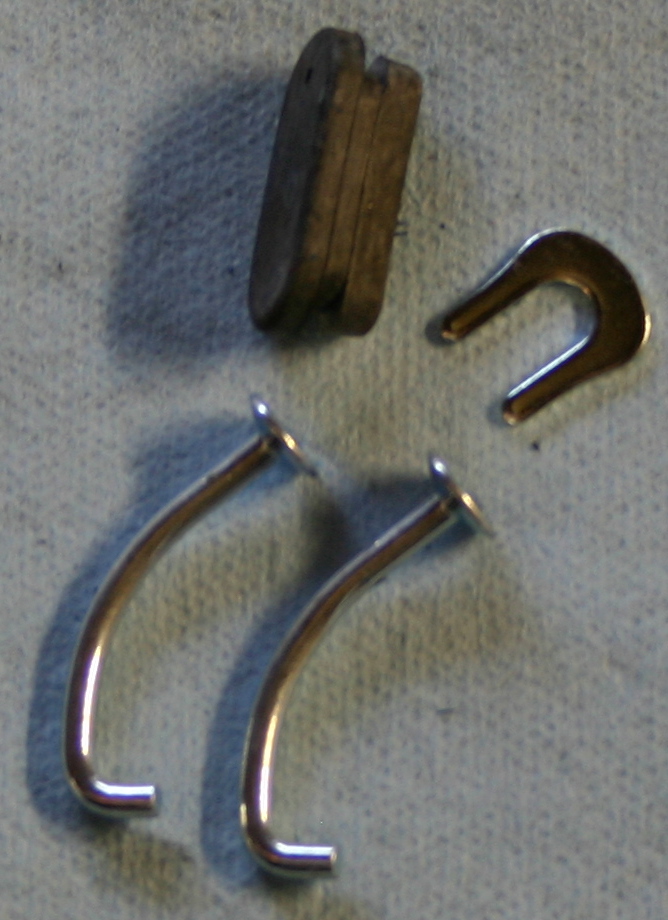
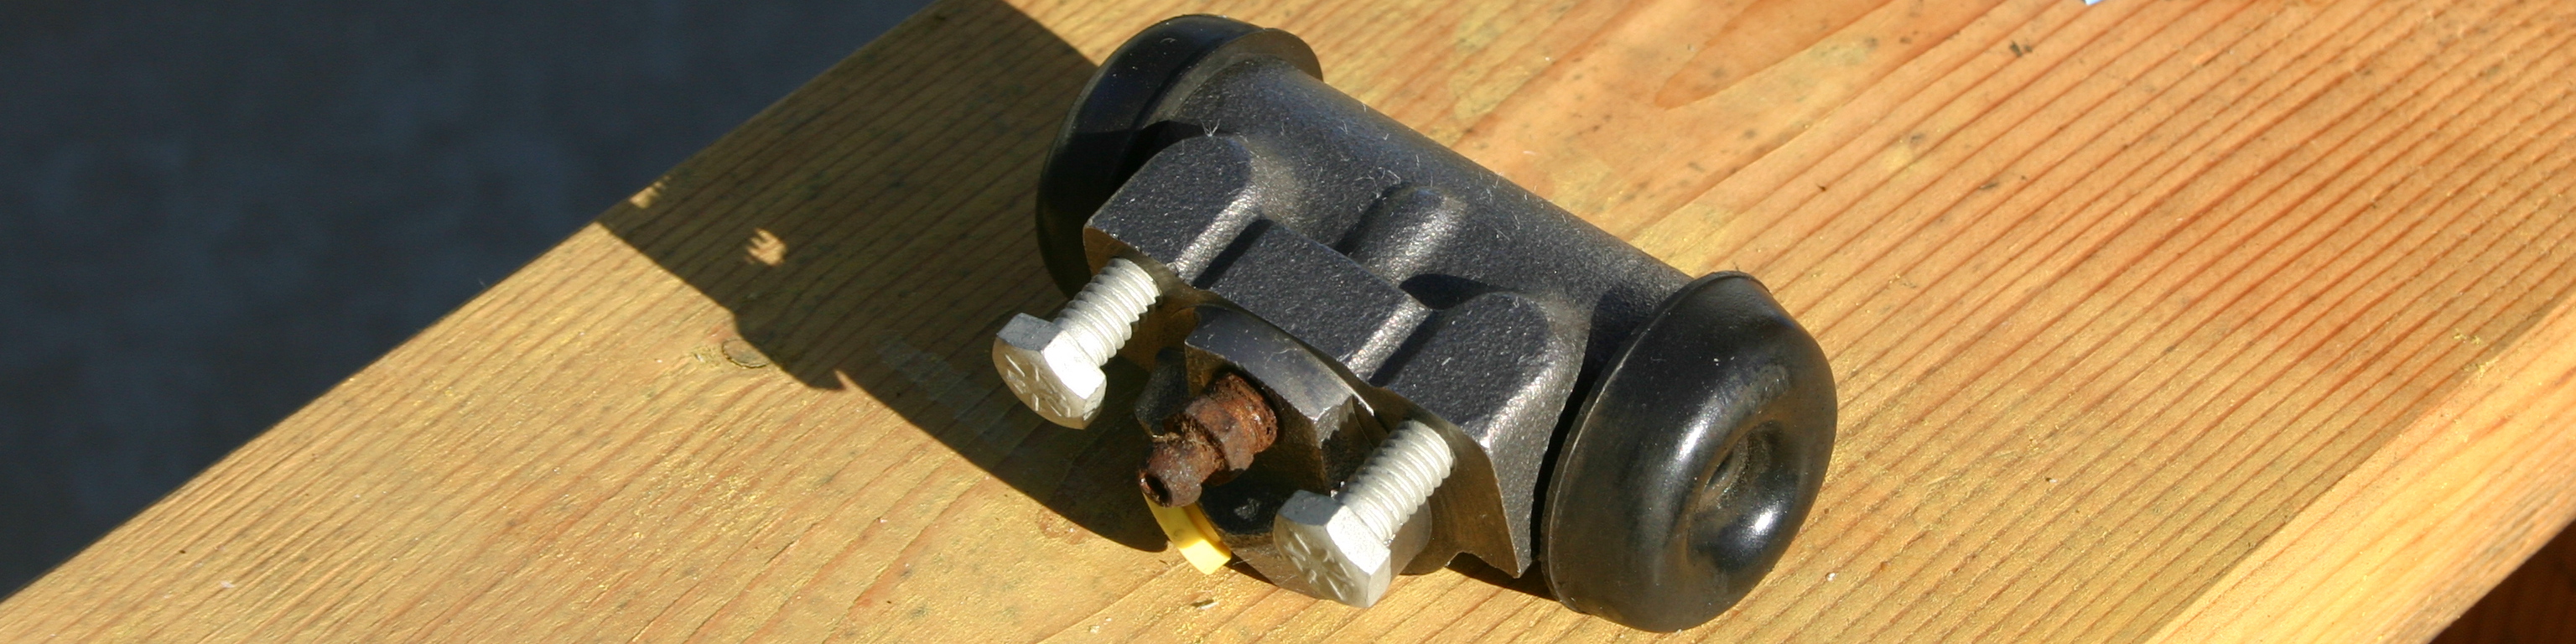
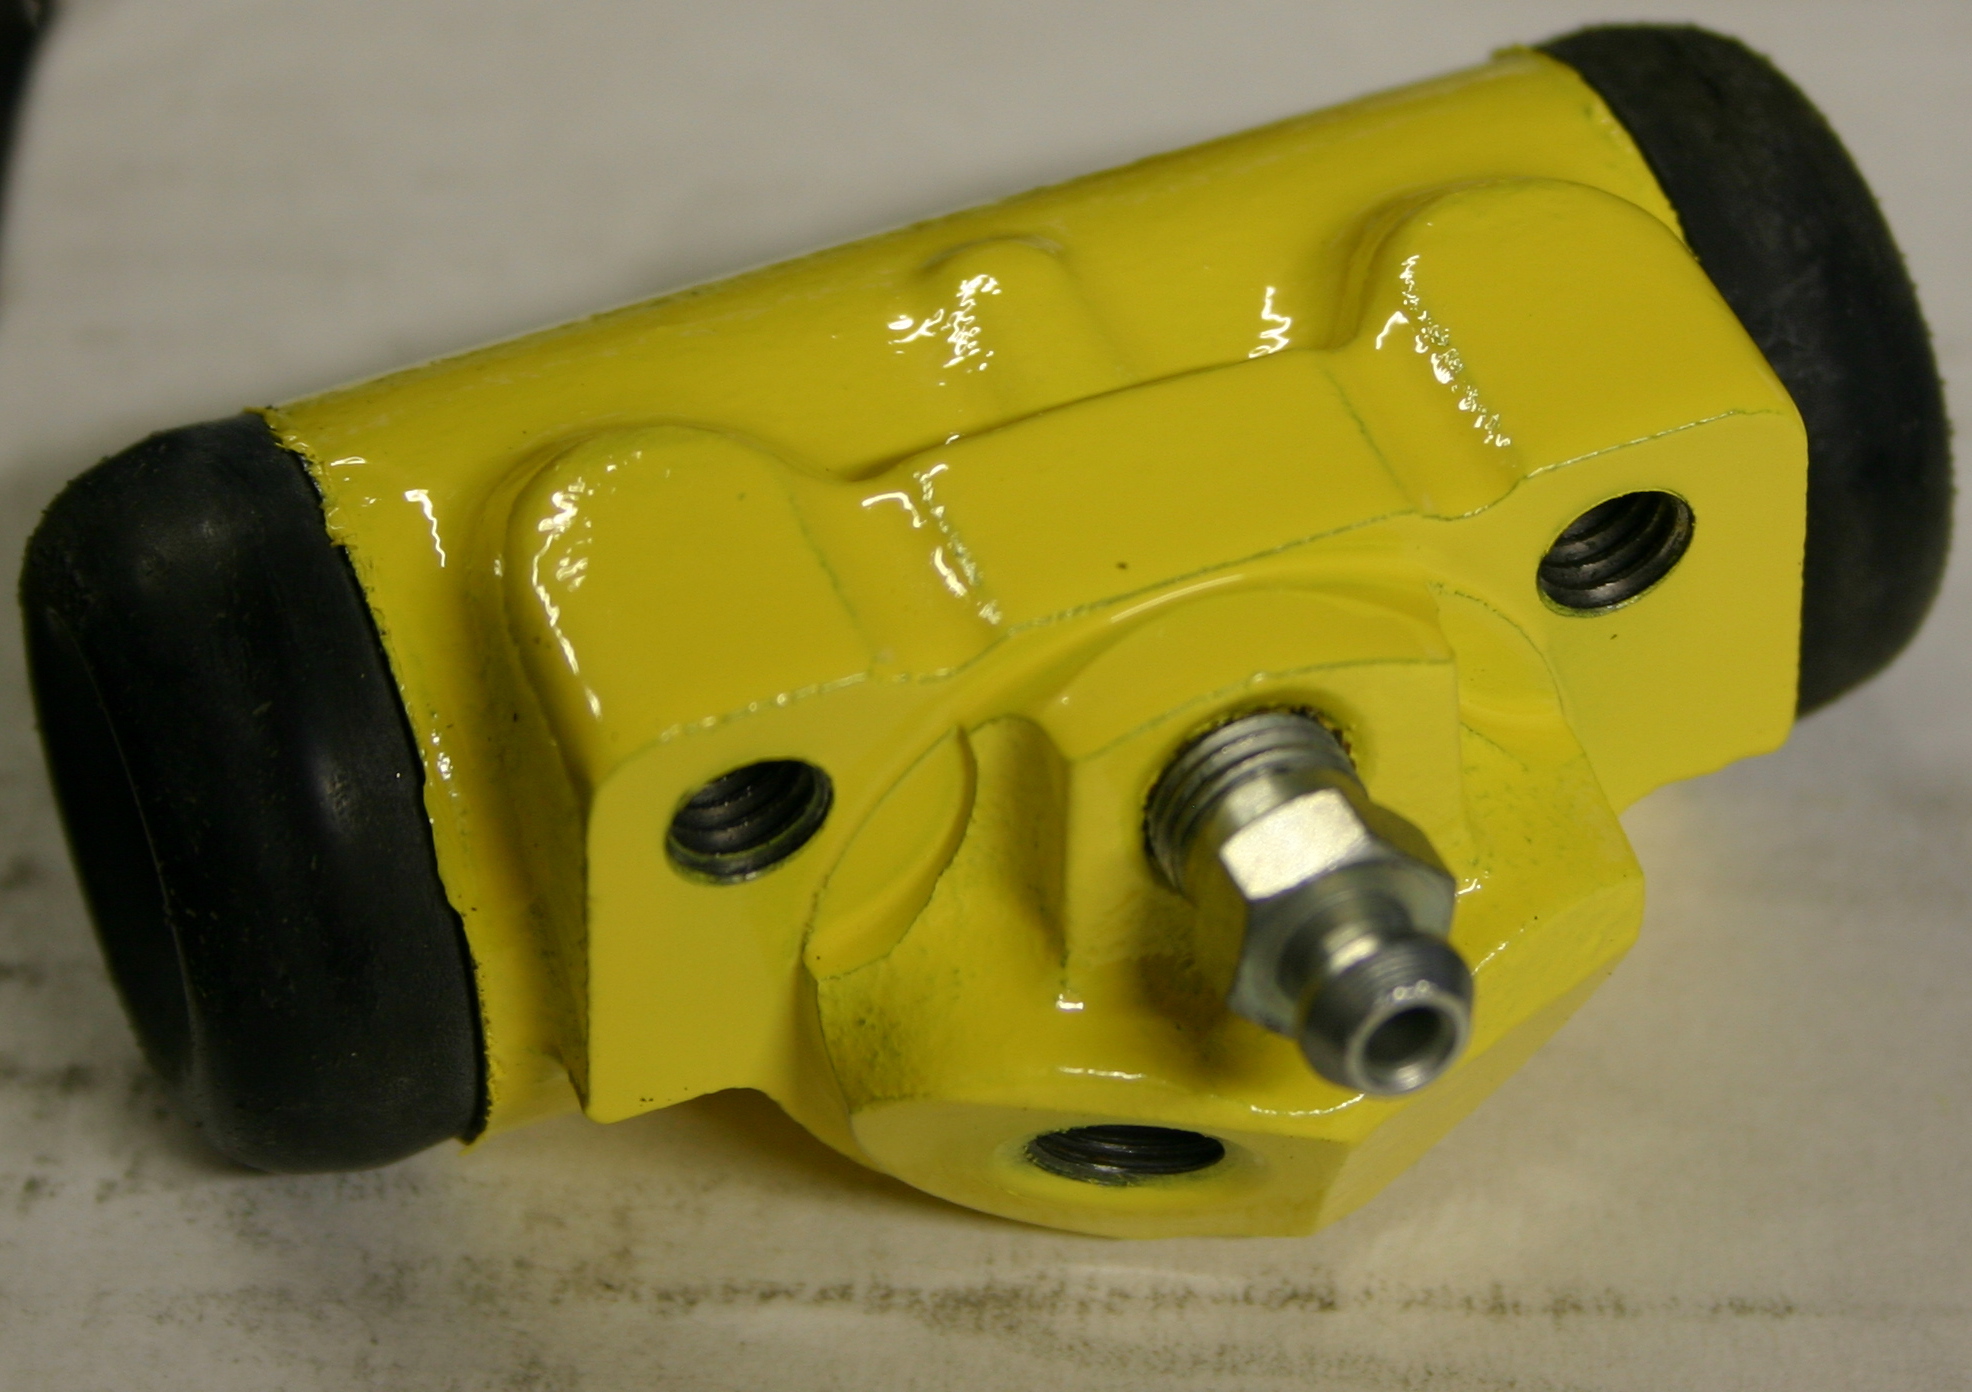
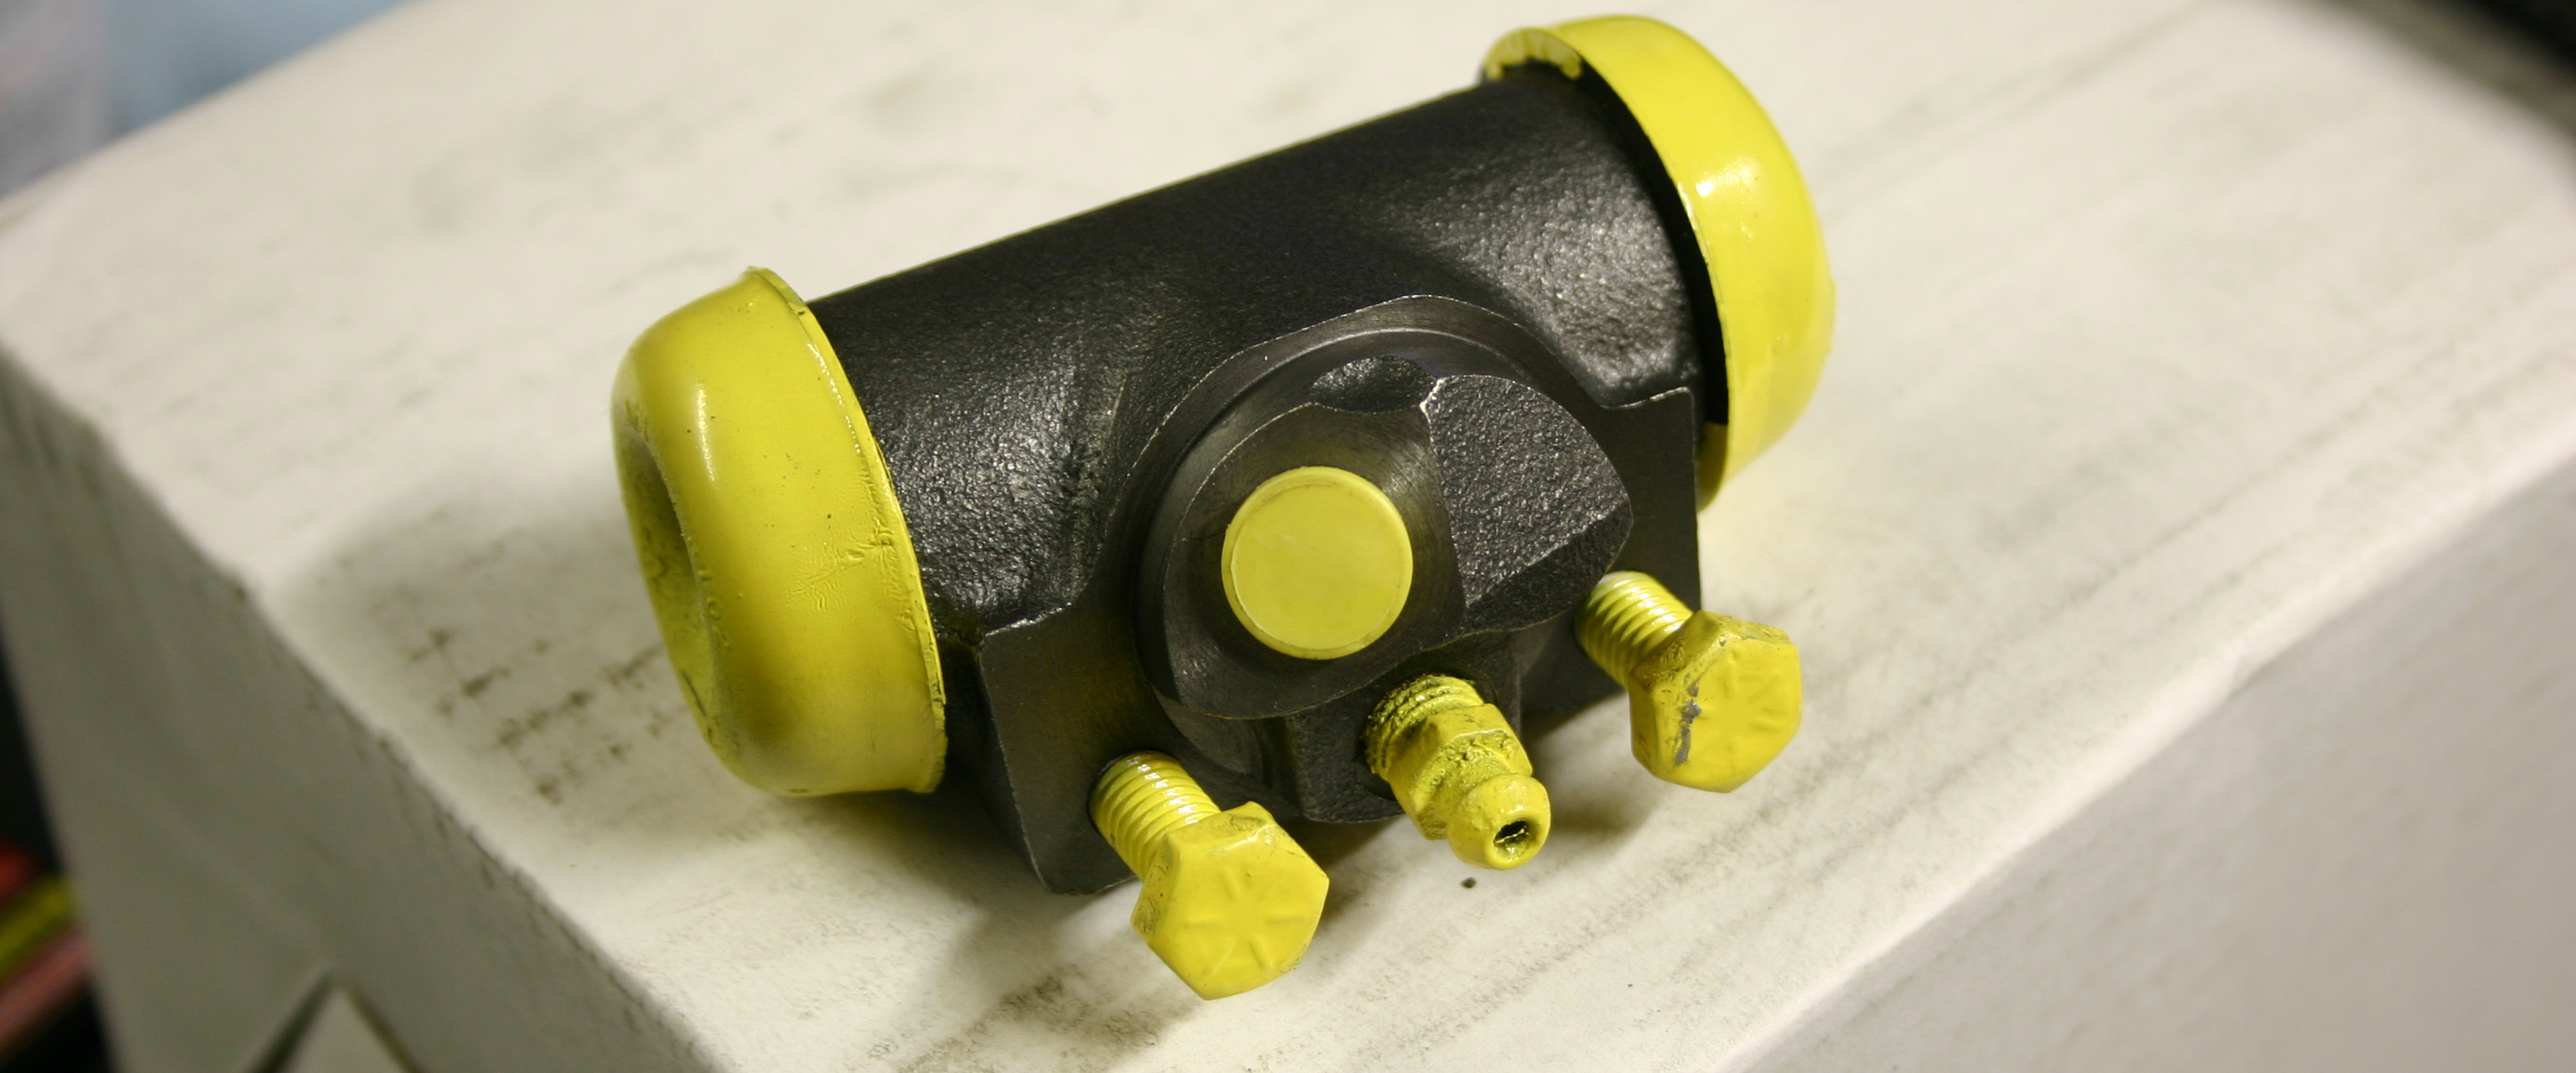
FreakysFords wrote:THEN, again, this is JUST WHAT I'D DO............... THEN, I'd pull the wheel cylinder, pull the rubber boots off of each end. and heavily tape the ends with duct tape (all the way into the boot groove) and have it blasted as well for paint.
If there IS any wheel cylinder leaking, you can rebuild it pretty easy at this point. Just push the "guts" out (easy and will make perfect sense when ya do it if you haven't before). Take the cylinder AND the guts to NAPA for a rebuild kit (rubber parts and easy). Check the new components against your old while you're there. If you're going to hone it and you've never done so before, you'd be ahead to have a machine shop do it rather than buy a hone for one use.
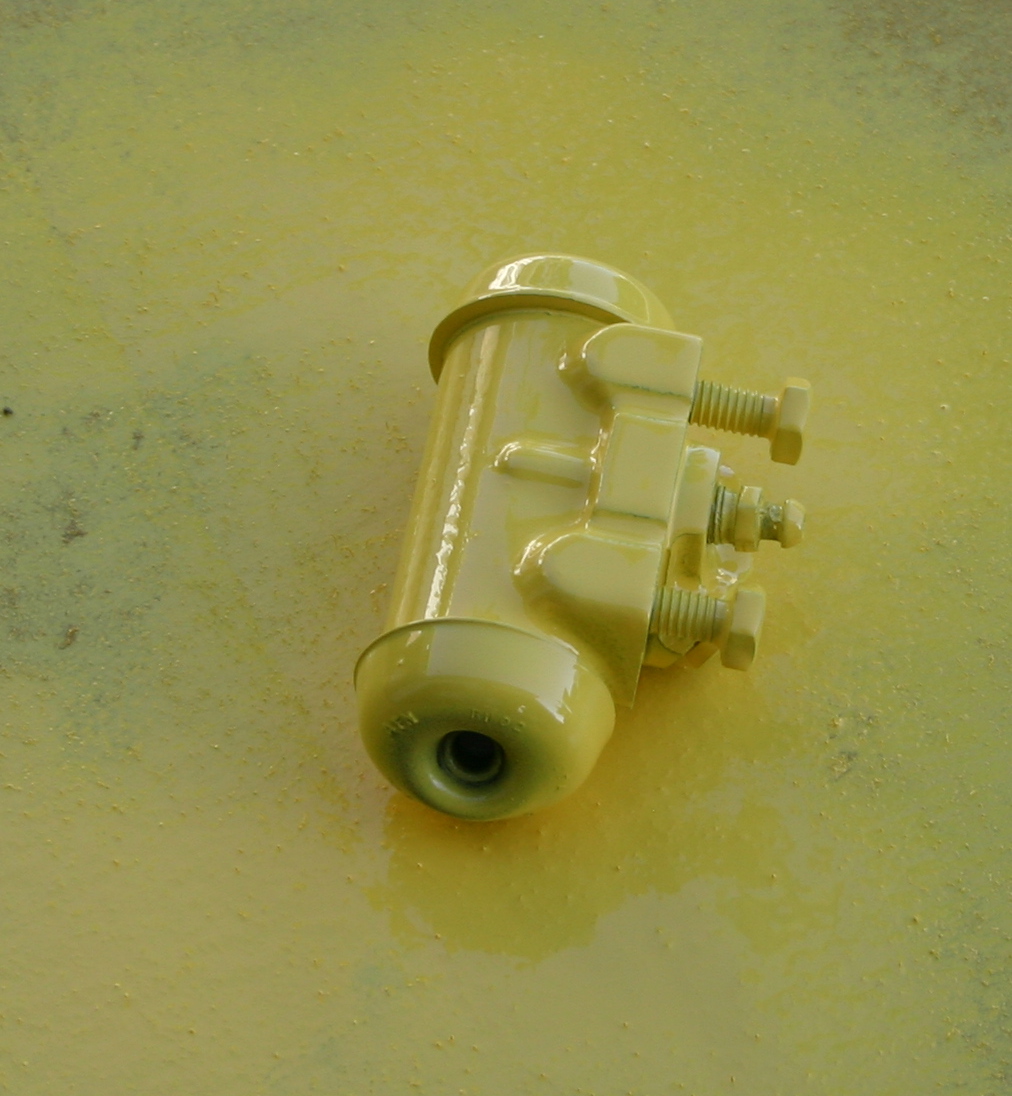
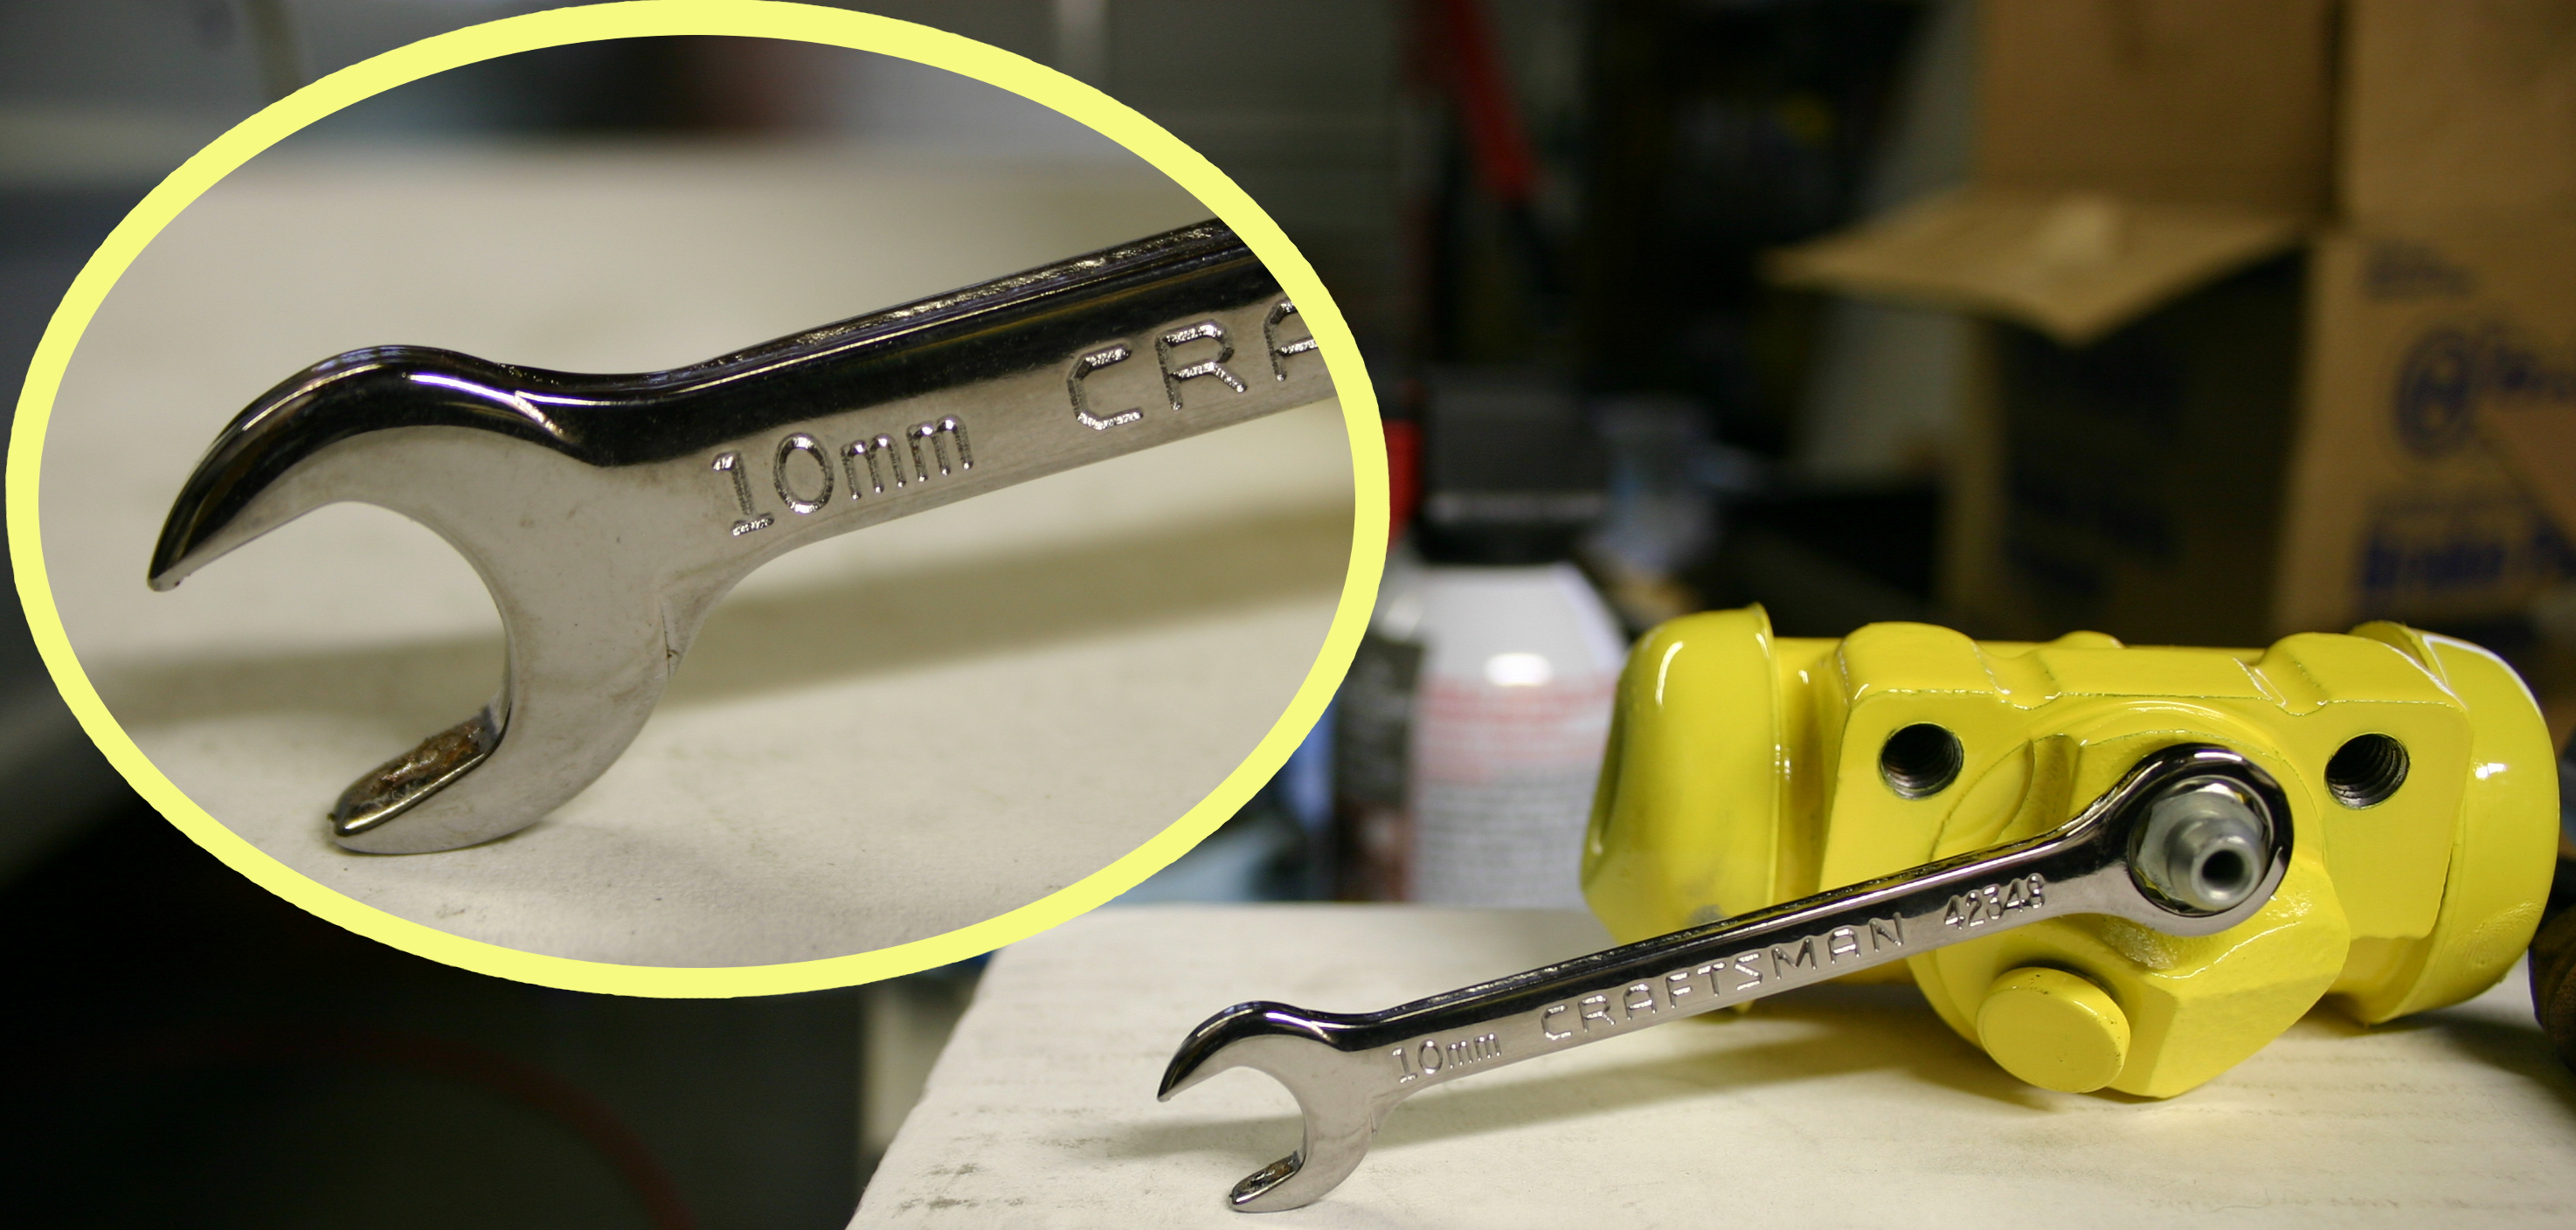
That sounds like a great way to do it, and may have been wiser than the way I wound up with. I found some Wagner wheel cylinders that were made in Italy for $13.28 each, so I went that route instead. (I'll include more details and photos of those Italian cylinders later on tonight!)
FreakysFords wrote:Once again, this is overkill in a big way bud. I just couldn't imagine not doing it on something that's been so detailed thus far.
I know exactly what you mean! And I do have a tremendous urge to make it all clean enough to eat mashed potatoes and gravy off of, yet my urge to test out #50 is stronger at this point. I feel so close to the finish line--at least the finish line to this stage!
That said, I
sure will feel better about driving it with fresh, safe rear brakes!
FreakysFords wrote:On another note, I use mineral spirits to clean everything up and then use the brake cleaner.
Excellent, thanks for that suggestion! I had some paint thinner that I used today and it worked wonders, and probably cost less than 10% of what I spent in brake cleaner on the other drum.
FreakysFords wrote:One method is to dump all the dust into the trash, then put the drum into a bucket large enough to hold it and dump in the mineral spirits (anything that will hold up and has a sealing lid will do fine). Then some brush work and she's clean.
Another way is just dumping the dust as before, and soaking a rag and going that route. For myself, I do enough cleaning of nasty greasy parts to justify a parts cleaner, but the bucket method works well (have one setup just like it at my in-laws for odds and end work I do there), as you can seal it up and tuck it away till next time.
Thanks for these excellent ideas Frank!
FreakysFords wrote:Something else to consider is asking whatever truckstop is nearest (if they have a truck wash service) if they'd sell some undiluted truck degreaser for the same purpose (don't leave aluminum parts in it for too long!) This stuff is crazy good. It's what I run in my parts cleaner and for soft stripping paint on small parts (takes leaving it in over night, but it's a clean method for stripping paint). This stuff is also an excellent over night rust remover for small parts.
That's fantastic to know about! There are plenty of truck service places around here so maybe I'll check that out when I'm ready to clean some more parts!
FreakysFords wrote:
yet another bloated reply, sorry.
I appreciate the time you invest in giving me such great advice Frank, and I've really been paying attention and learning a lot from your responses. So no need to shorten them up by any means!
70_F100 wrote:Robroy, looks like you're on the right track!!!

Excellent, thanks 70_F100!!!
70_F100 wrote:All of the advice, so far, has been close to perfect!!!
Perfect! I've really enjoying putting the advice in to use, and it has been dramatically helpful.
70_F100 wrote:I have only two comments, which are actually corrections to what you've been told.
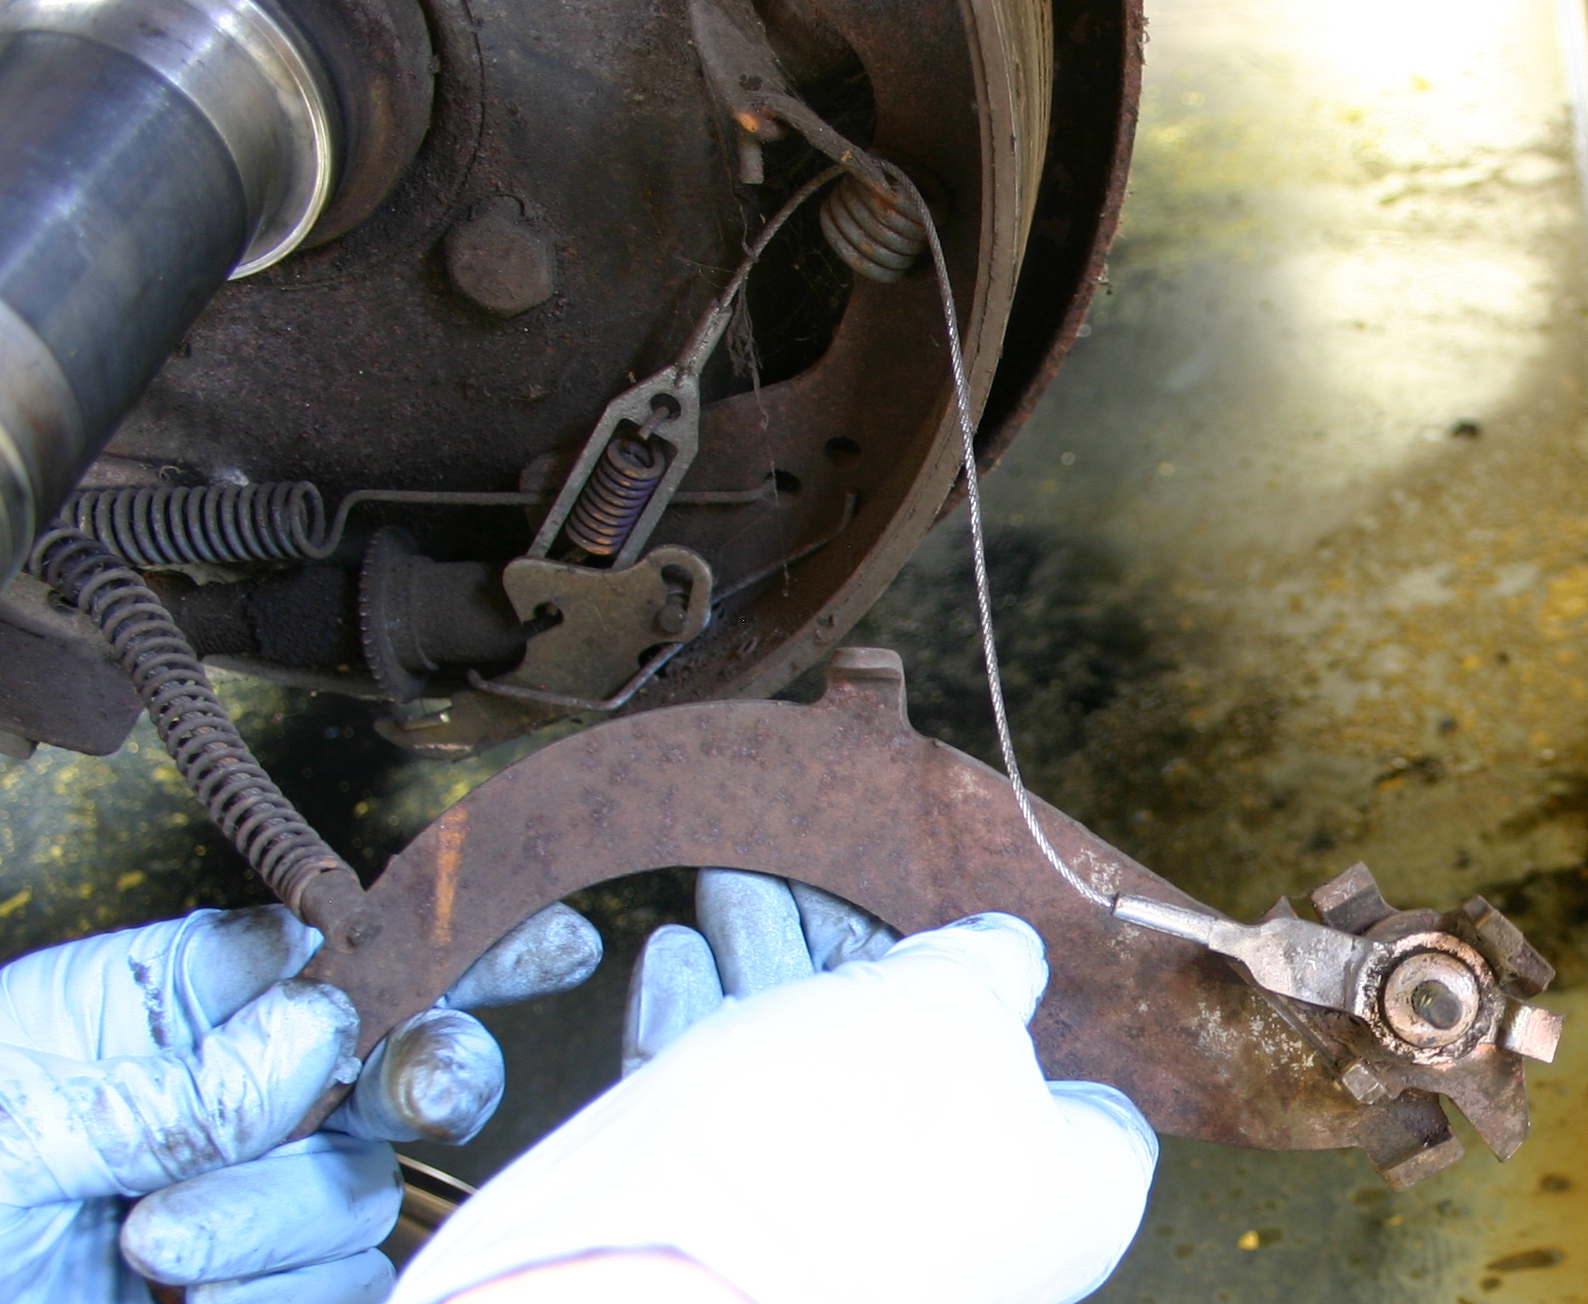
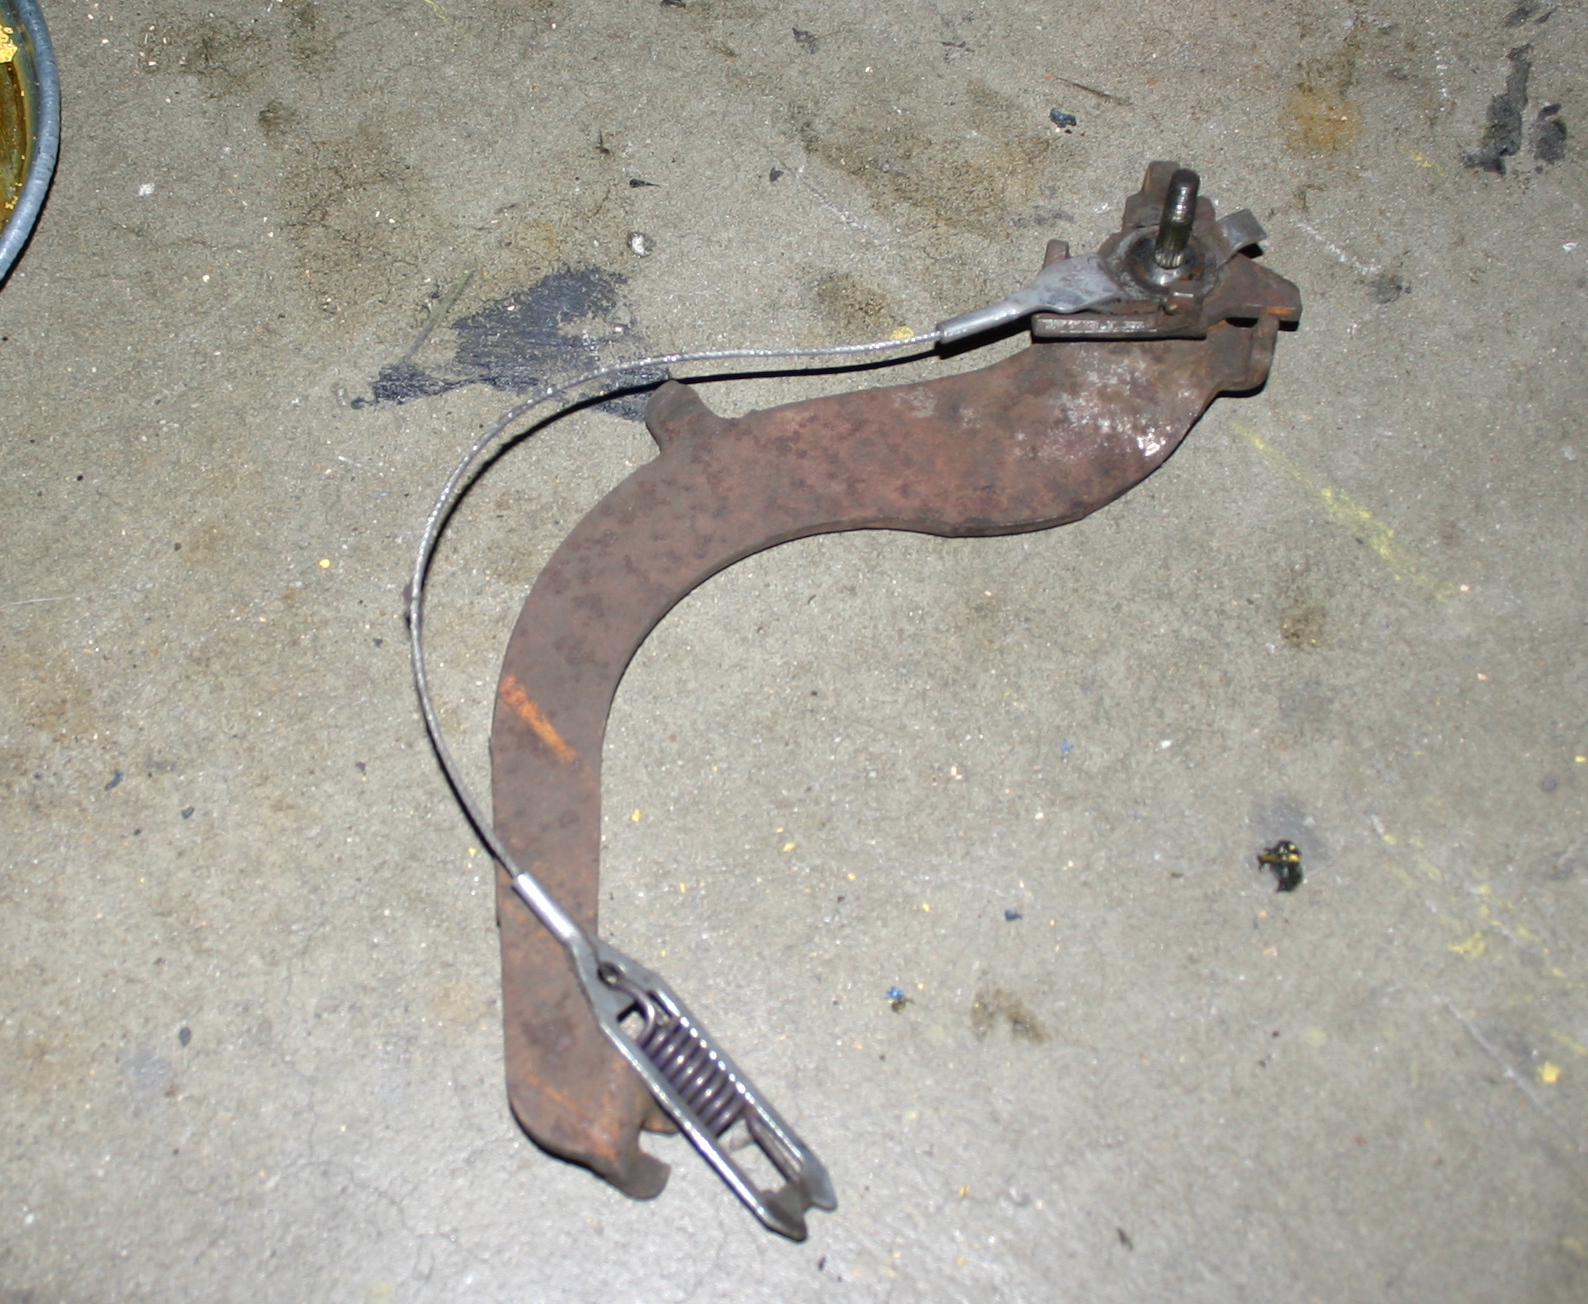
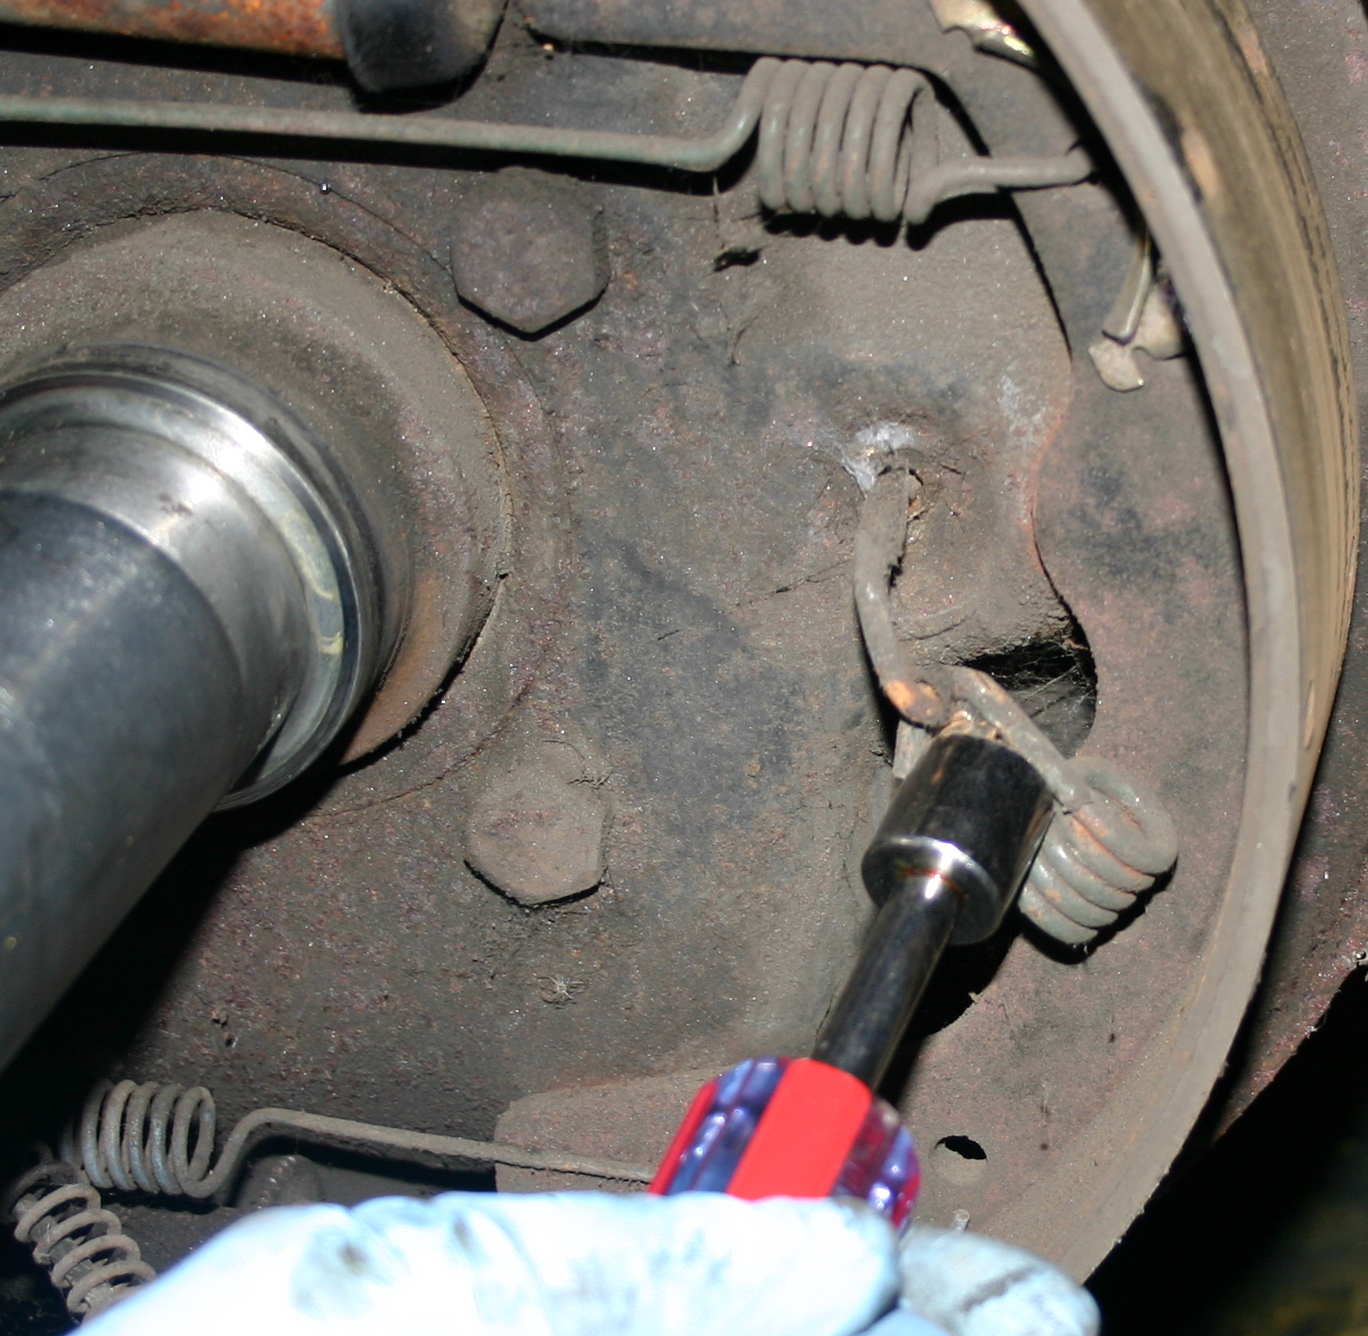
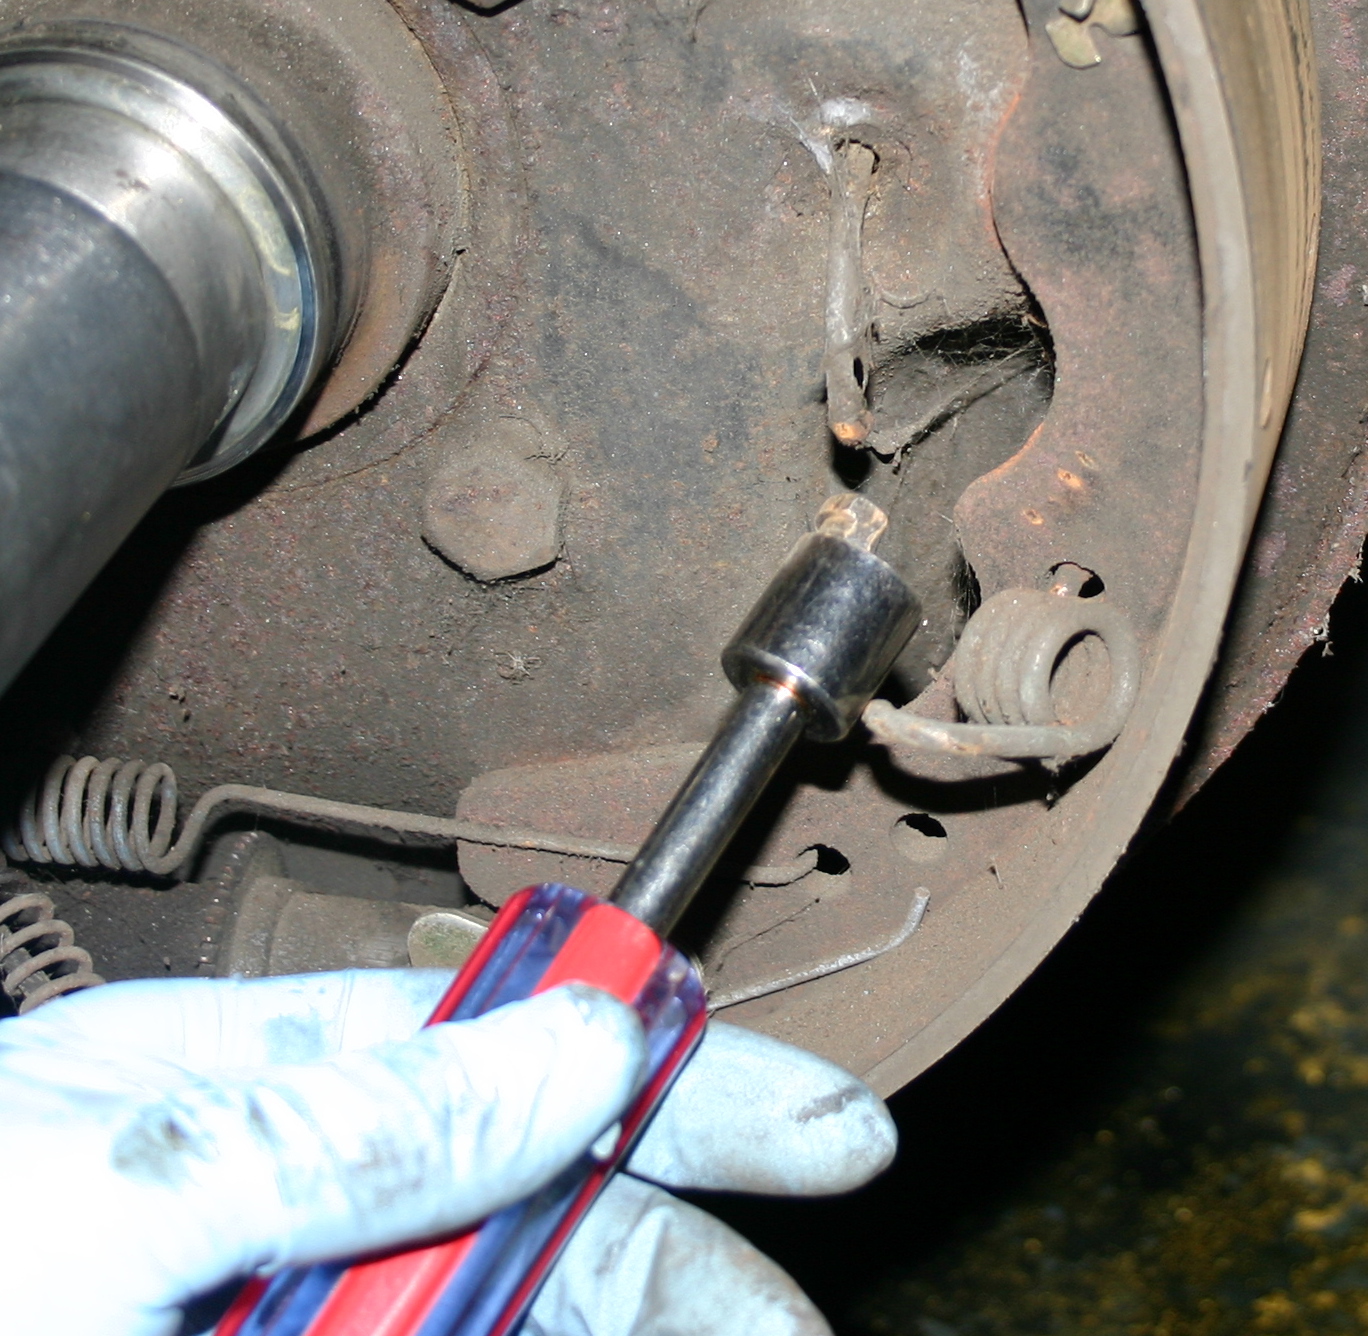
1) In checking to see if the self-adjusters are working correctly, when you pull on the cable/link, the adjusting lever should come UP, turning the star wheel toward the axle housing. On F100's and other light duty vehicles, the adjusters work opposite from those on your truck.
Oh! Well thanks very much for letting me know. When I get to that stage, I'll definitely return here and review your method!
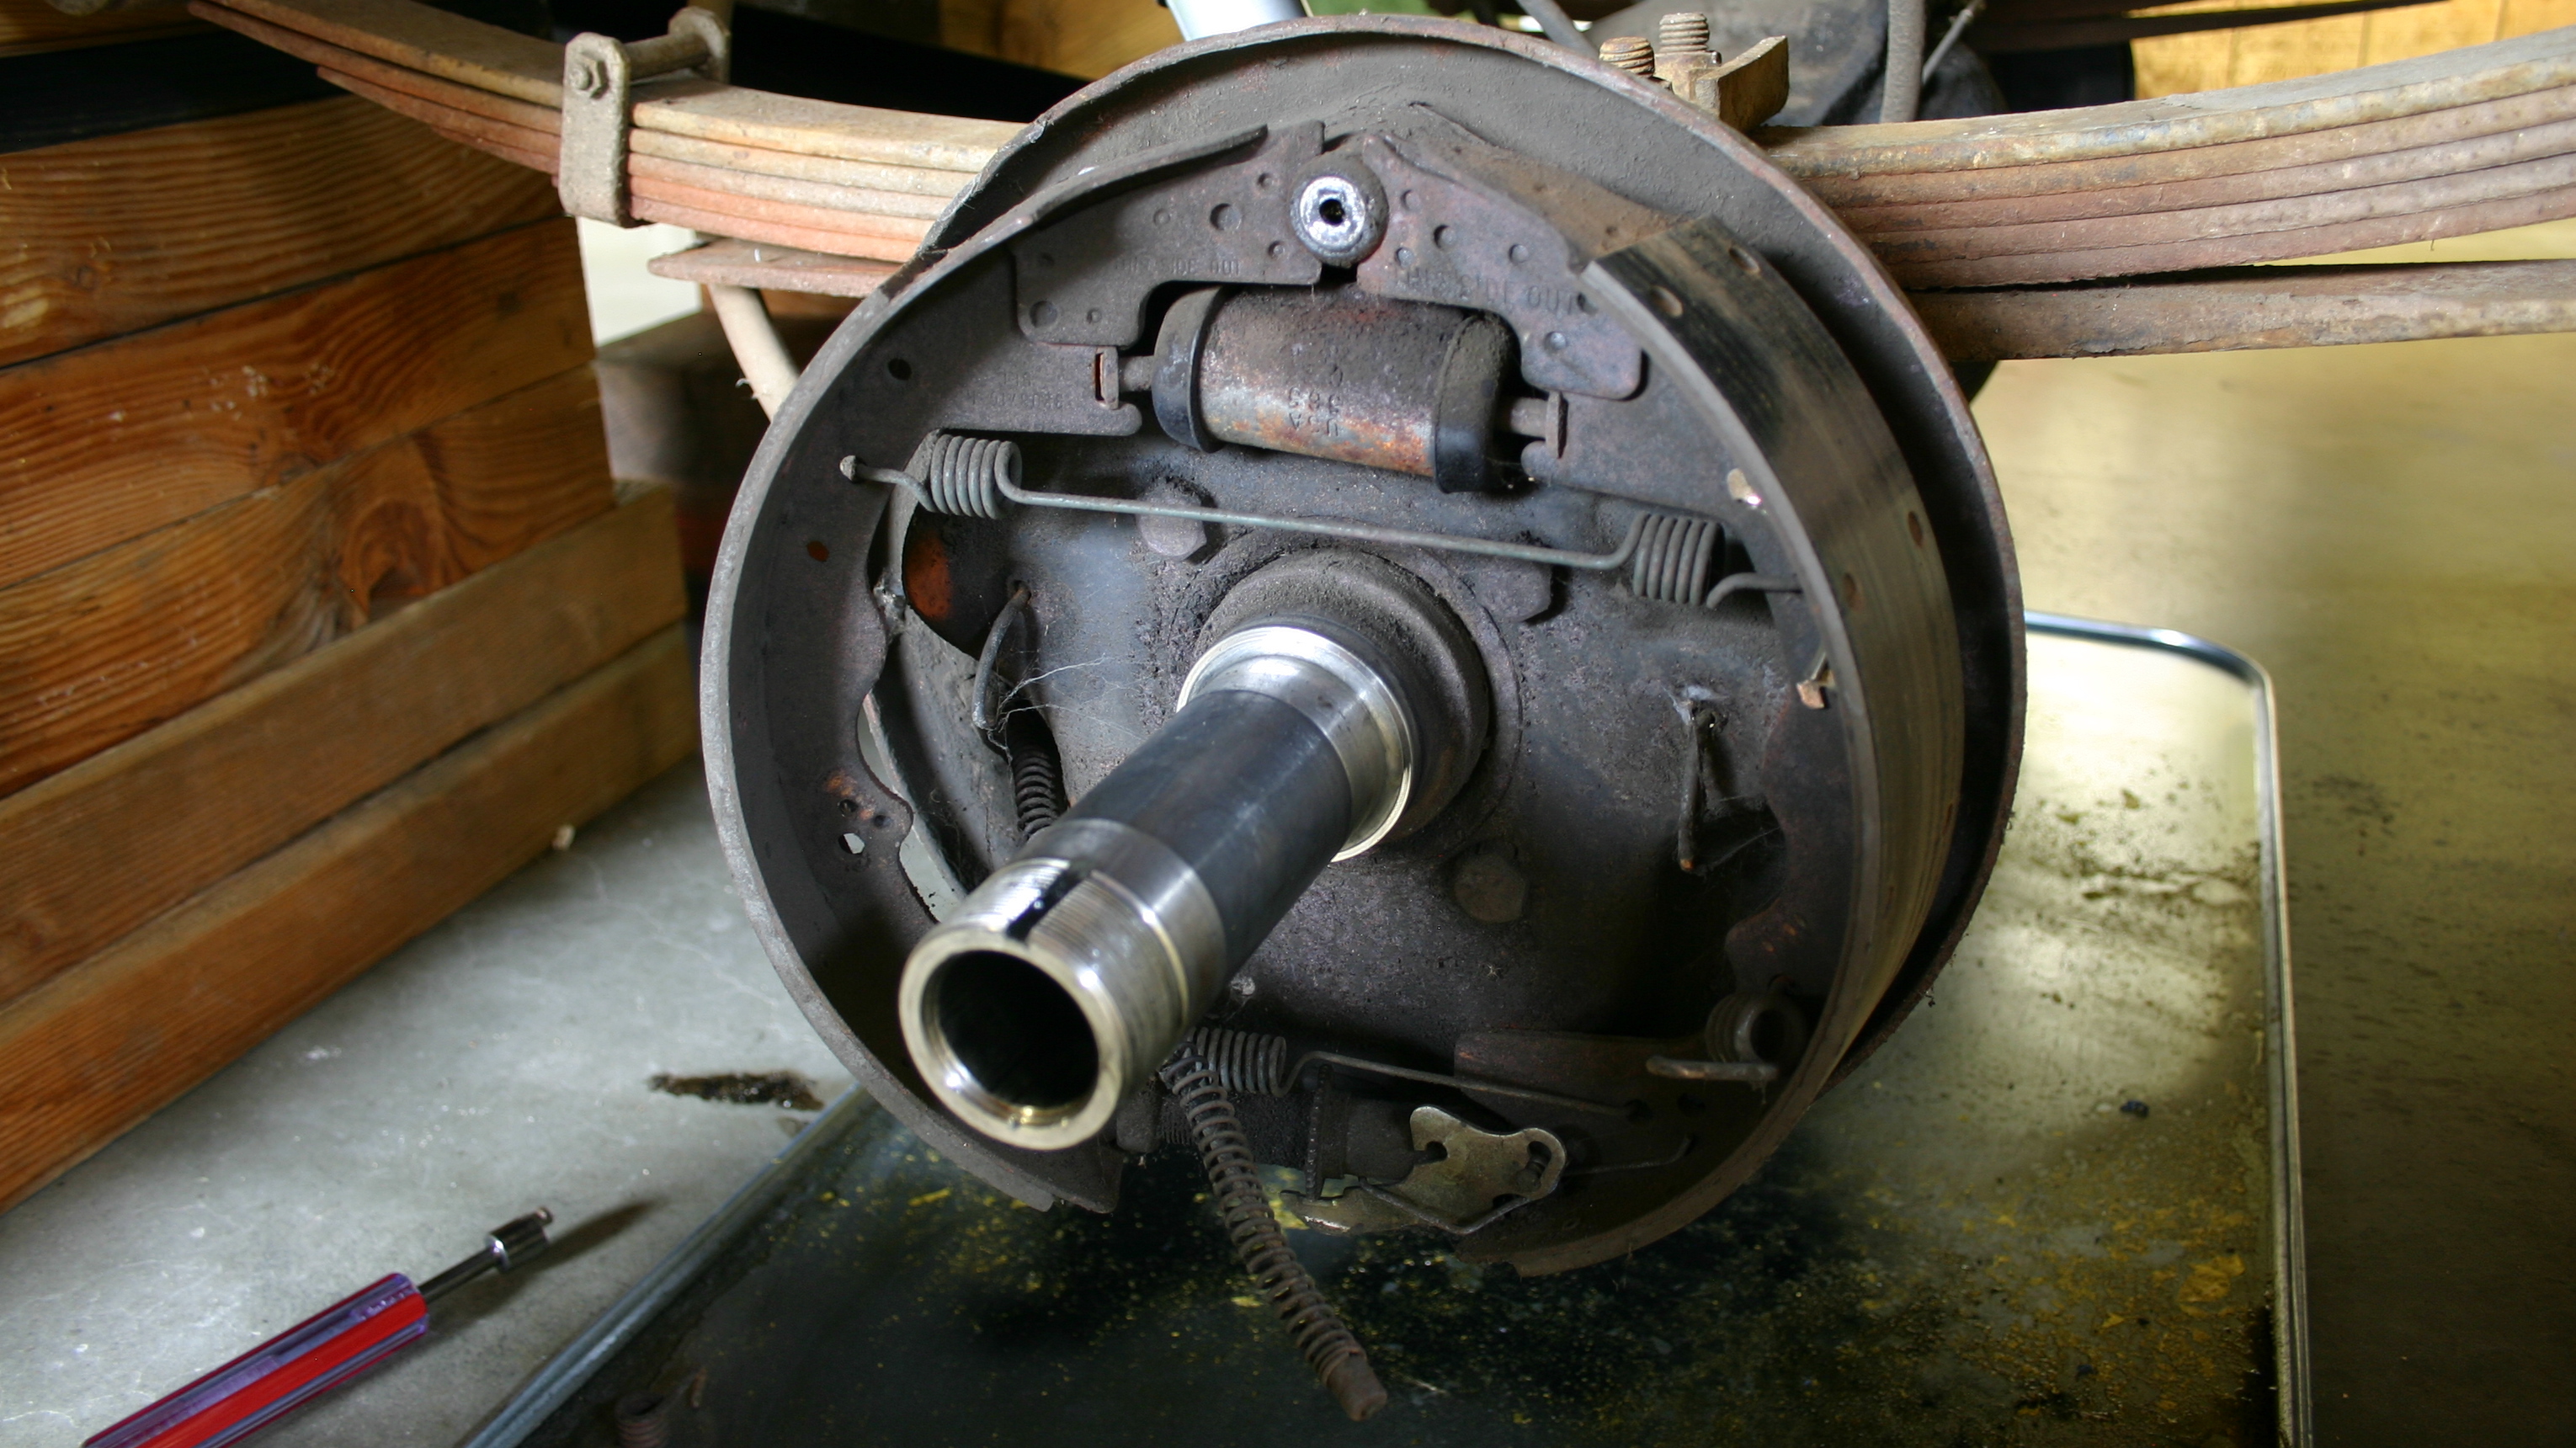
70_F100 wrote:2) When reassembling, pack the bearings with wheel bearing grease, not axle grease.
Okay! I have some black, high temperature disc brake bearing grease that I was planning on using--I take it that will work fine?
70_F100 wrote:That may have been what Fordman had in mind, but I just wanted to make sure you're clear on that.
Thank you very much!
70_F100 wrote:Pack them just as you would a front wheel bearing. This provides initial lubrication until the gear oil migrates into the hub cavities.
That I will do! I wasn't actually aware that the gear oil actually lubricated the bearings, but now that you mention it, I suppose they were saturated in gear oil when I removed them--it makes sense.
70_F100 wrote:GREAT JOB of detailing this for everyone!!!

Thanks!
70_F100 wrote:PS: Do yourself a favor, and go buy yourself a floor jack. You'll be GLAD you did, and it's not a large investment, probably less than $100.

You're right--I should really do this. I've been postponing it a little bit because I'll want to buy a USA-made one for around $400, but I know I need one if I'm going to keep fiddling around in the garage!
70_F100 wrote:PPS: Also, you would be working much more safely if you had the jack stands under the axle, instead of supporting the truck with the timbers under the frame. Not only that, but the stands are much easier to move around than those big, heavy chunks of wood!!!
Thanks for pointing that out! I was actually under the impression that because the wood blocks were so wide and deep, and contacted a relatively large amount of surface area on the frame, that they'd be safer than jack-stands. But maybe their flexible and wobbly wood nature cancels those benefits out in abundance!
I'll have to keep my eye out for some USA-made jack-stands that are short enough to fit under there.
There was a little bit of rain today with some dramatic clouds!

Frank and 70_F100, thanks for your marvelous replies and generous guidance! I'll post another photographic update later tonight.
Robroy