1969 Ranger - Project Glory Days!
Moderator: FORDification
- tybob81
- Blue Oval Fanatic

- Posts: 840
- Joined: Thu Mar 23, 2006 2:53 am
- Location: Murphysboro IL
- Contact:
Re: 1969 Ranger - Project Glory Days!
I had to sell it to pay off some bills back in 08 when my job layed us off for a while. It was a 95 with 47k mi.
1968 swb hydroboost, ididit tilt column, Saginaw p/s pump with F series serpentine, all led lights, Vintage Air and painless wiring. 393w, tko600. CV front suspension w/c5 calipers and gt500 rotors. Stock Flexomatic leaf springs with 01 CV 8.8, 3.90 gears and Auburn locker. Custom wood bed floor. Full frame off resto-mod.
- sargentrs
- 100% FORDified!

- Posts: 9866
- Joined: Fri Jun 22, 2007 9:30 am
- Location: Georgia, Jasper
Re: 1969 Ranger - Project Glory Days!
Hmmmmm.....  ......Hide it with rusty bed sections?
Randy
1970 F100 Sport Custom Limited LWB, 302cid, 3 on the tree. NO A/C, NO P/S, NO P/B. Currently in 1000 pcs while rebuilding. Project thread: http://www.fordification.com/forum/view ... 22&t=59995 Plan: 351w, C4, LSD, pwr front disc, p/s, a/c, bucket seats, new interior and paint.
1987 F-150 XLT Lariat, 5.0/C6 auto.
- tylerb43
- Preferred User

- Posts: 492
- Joined: Fri Nov 14, 2008 2:54 pm
- Location: Union, MO
Re: 1969 Ranger - Project Glory Days!
sargentrs wrote:Hmmmmm...........Hide it with rusty bed sections?
- pincheweddo
- Preferred User

- Posts: 363
- Joined: Mon Sep 14, 2009 11:59 pm
- Location: Texas, Fort Worth
- Contact:
Re: 1969 Ranger - Project Glory Days!
Tyler, Dude you have some rockin' talent and good folks in your "brain trust". Just went thru this thread for the first time. Here is your motivation to get'er done... I parked mine 20 years to the month and you sir have accomplished more tedious craftsmanship than I have seen on many sites. I pray to GOD that my loving wife never looks through all of your attention to detail as I will never complete mine.
Hug you wife your wife and son and thank them for the time they have allowed you to work on this. Ignore that new model and complete your first project for the time they have invested in it.
Pinche
Hug you wife your wife and son and thank them for the time they have allowed you to work on this. Ignore that new model and complete your first project for the time they have invested in it.
Pinche
- 460tzilla
- New Member

- Posts: 21
- Joined: Tue Jul 17, 2012 6:41 pm
- Location: PEKIN, INDIANA
Re: 1969 Ranger - Project Glory Days!
I love this I have the same problem, good to see it has a name. Your doing an awesome job, love your attention to detail. I've tried everything to have my " PPFD " treated, I even went to the Henry Ford clinic but it didn't cure me..tylerb43 wrote:Guys - I have a problem. I believe it's called: Priority Project Focus Disorder. You see, my '69 Ranger got a new roommate last weekend, and now everytime I go into the shop to work on Project Glory Days, I get distracted!!
I really need to get this bed to the paint shop, any suggestions on how to cope with PPFD?
[ Image ]
- tylerb43
- Preferred User

- Posts: 492
- Joined: Fri Nov 14, 2008 2:54 pm
- Location: Union, MO
Re: 1969 Ranger - Project Glory Days!
Wow, thank you very much, Pinche! (tip of the hat) Reading your words is indeed motivation, and makes me want to leave work right now and get to the shop.pincheweddo wrote:Tyler, Dude you have some rockin' talent and good folks in your "brain trust". Just went thru this thread for the first time. Here is your motivation to get'er done... I parked mine 20 years to the month and you sir have accomplished more tedious craftsmanship than I have seen on many sites. I pray to GOD that my loving wife never looks through all of your attention to detail as I will never complete mine.
Hug you wife your wife and son and thank them for the time they have allowed you to work on this. Ignore that new model and complete your first project for the time they have invested in it.
Pinche
My wife and son are indeed a huge part of this effort I'm sharing with you guys. We all know projects like this can obviously take a lot of money, but sometimes the bigger mountain to climb is taking so much of your time. My wife is extraordinary in the fact that she is very supportive of my hobby, and knows that it balances me and keeps me sane. This paradox obviously has it's limits, as many of us know, and as I believe I've mentioned before.
The good folks on this site are definitely super helpful. This isn't the biggest online community, but it's one of the best I've been a part of. Guys that are respectful and interested in learning from each other. Randy, Jerry, Tyson, Patrick, Stephen, the Ricks...and several more - you guys are great!
I started this thread 2 years ago, last Friday. Thank you guys for hanging in there with me!
- tylerb43
- Preferred User

- Posts: 492
- Joined: Fri Nov 14, 2008 2:54 pm
- Location: Union, MO
Re: 1969 Ranger - Project Glory Days!
Ha! Thank you Sir! I'm coping with the disorder better than I thought I would, I gotta say. I changed the fluids in the Lightning, got it inspected and licensed and that's about it. If I had another place to park it, I'd seriously move it there. The "outta-sight-outta-mind" has been very successful in the past. (works great on laundry and recycling).460tzilla wrote:I love this I have the same problem, good to see it has a name. Your doing an awesome job, love your attention to detail. I've tried everything to have my " PPFD " treated, I even went to the Henry Ford clinic but it didn't cure me..
- tylerb43
- Preferred User

- Posts: 492
- Joined: Fri Nov 14, 2008 2:54 pm
- Location: Union, MO
Re: 1969 Ranger - Project Glory Days!
Okay - here's some progress goodness for you guys-
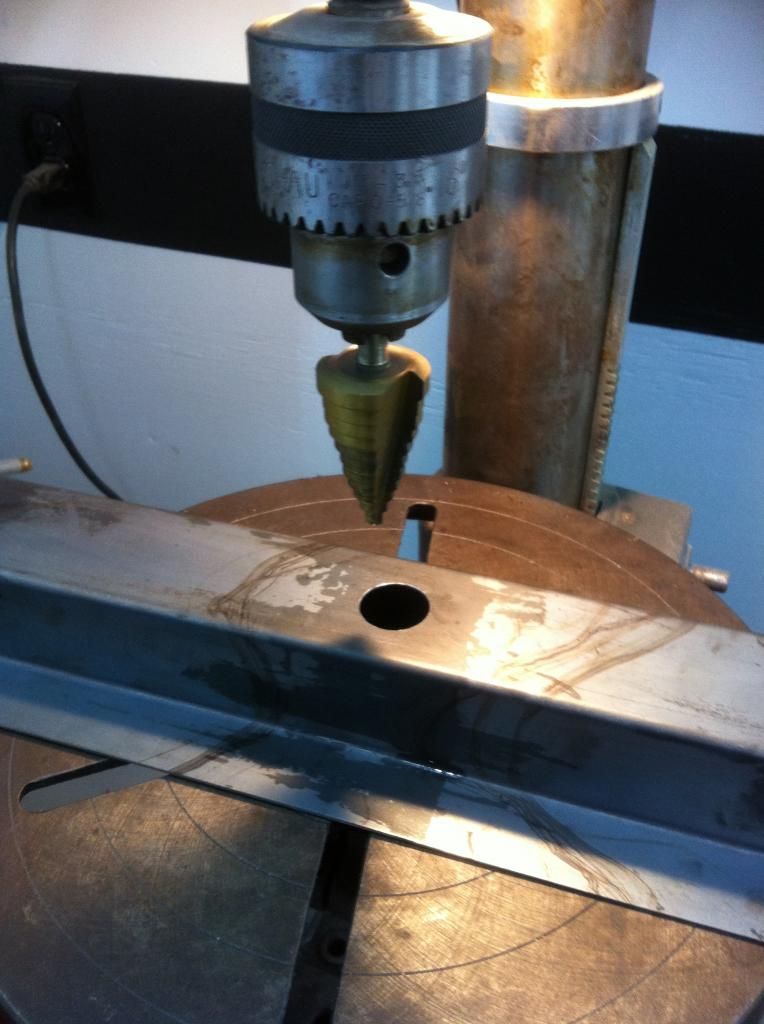
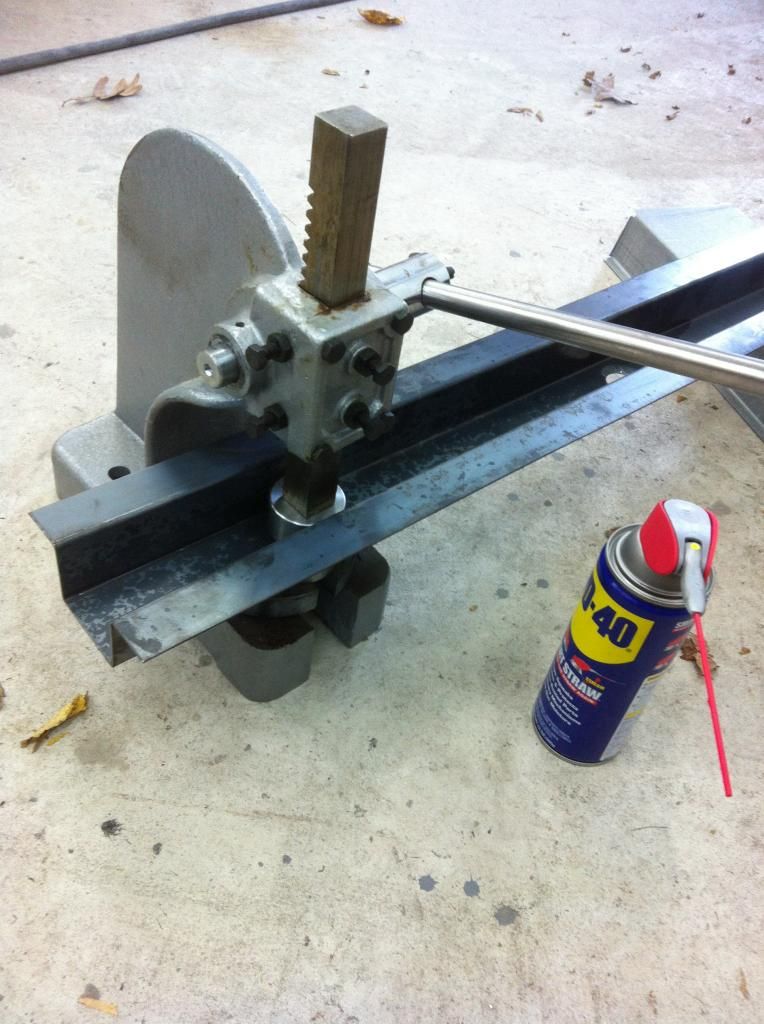
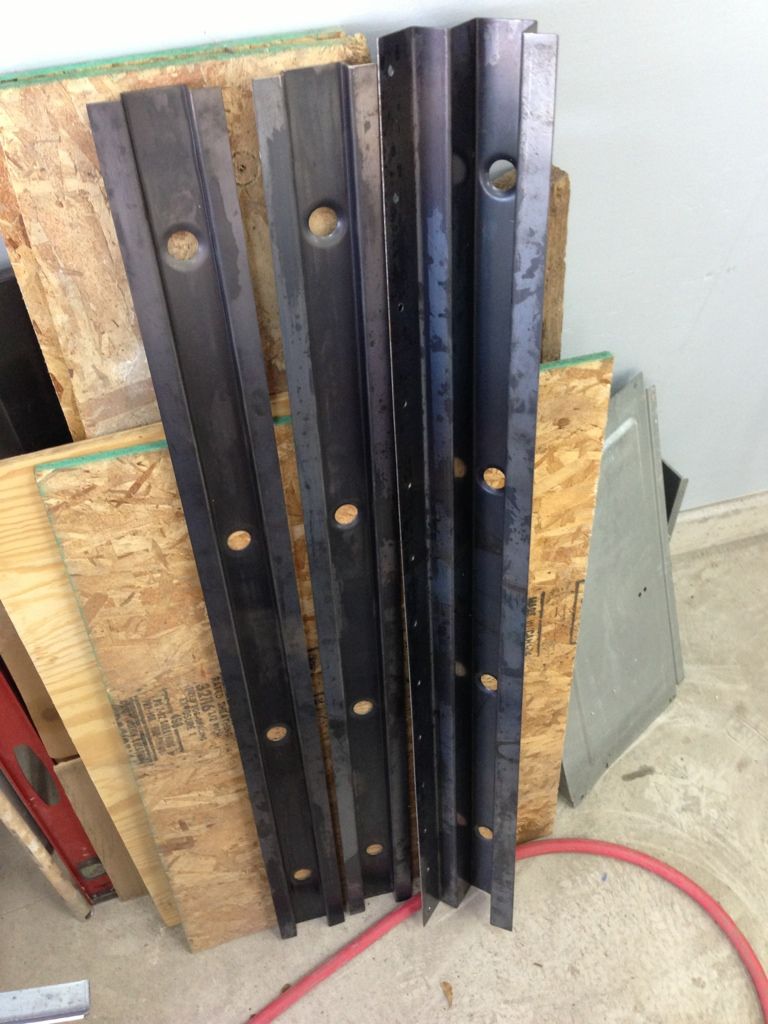
I drilled and dimple-die'd the new crossmembers. This not only looks cool, but provides good drainage for the underfloor channels.
Next, I tacked in the main channels and my buddy Adam helped me test fit the bed on the chassis. Yes, that was pretty exiting to see it sitting on there!
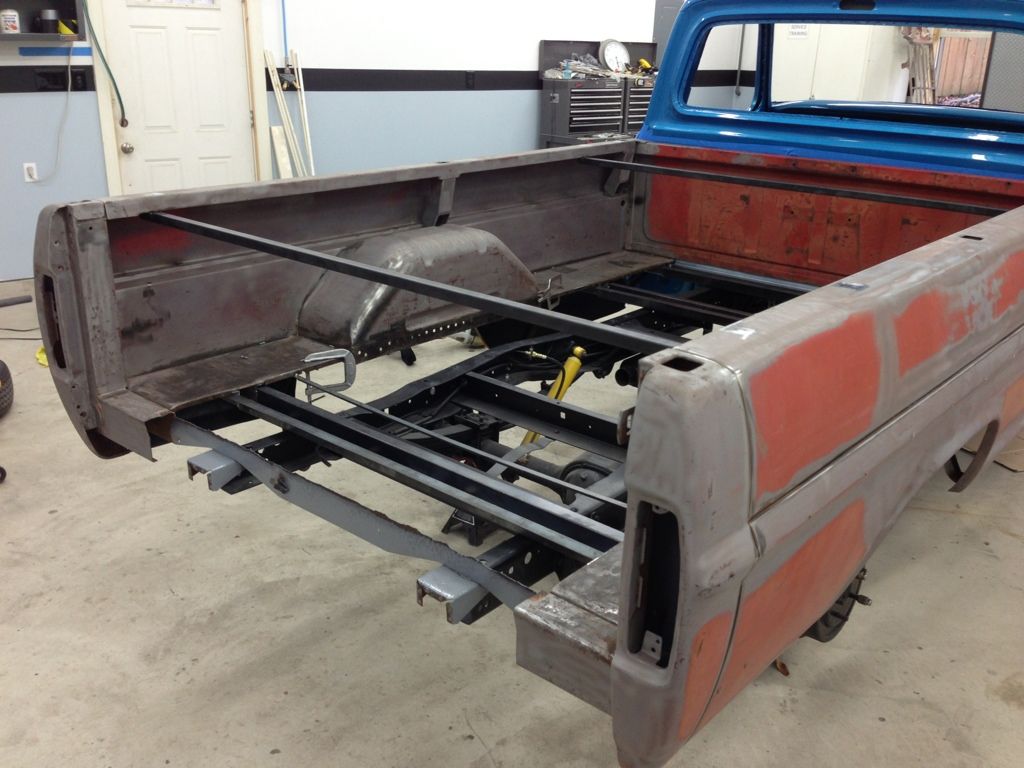
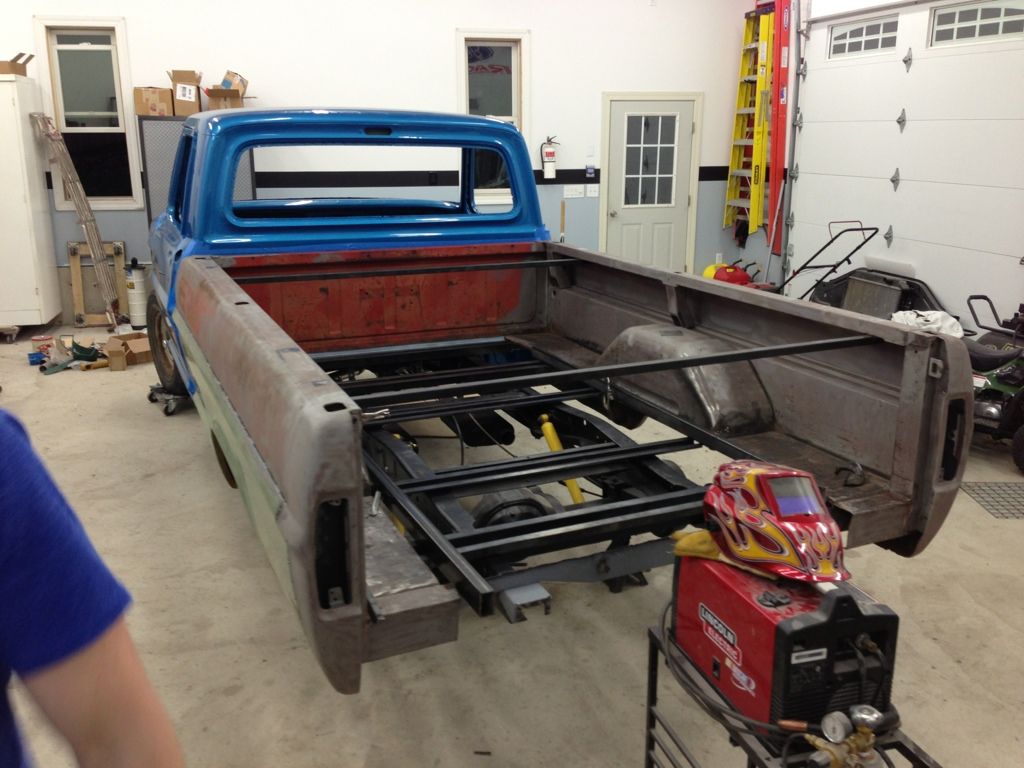
From the test fit, I learned why Ford had the chamfers stamped into the stock channels (to clear the rear shackle under full compression), so I followed their lead.
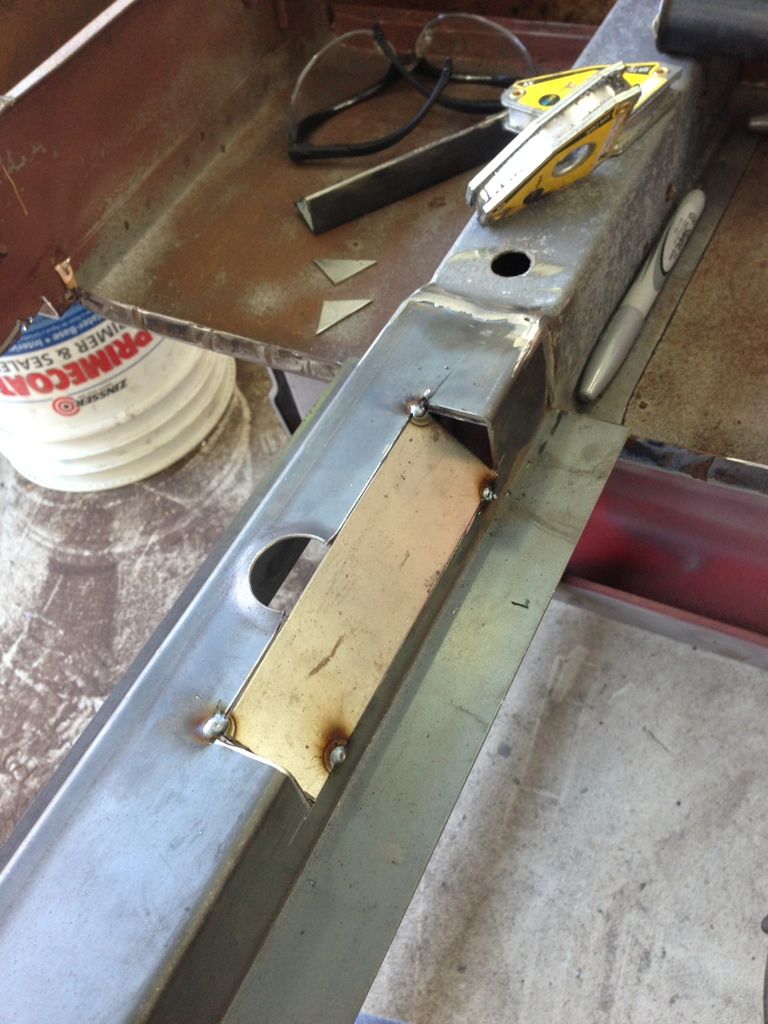
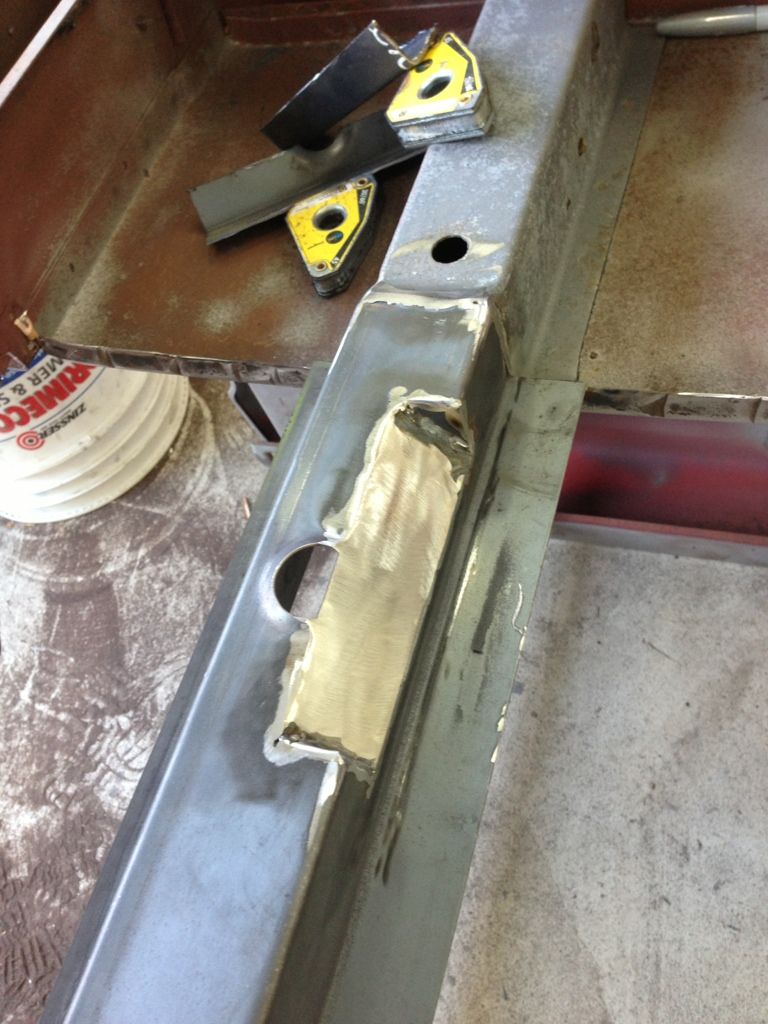
Here she is with all the new channels welded into place (minus the aft-most piece, which I did after I flipped it back over)
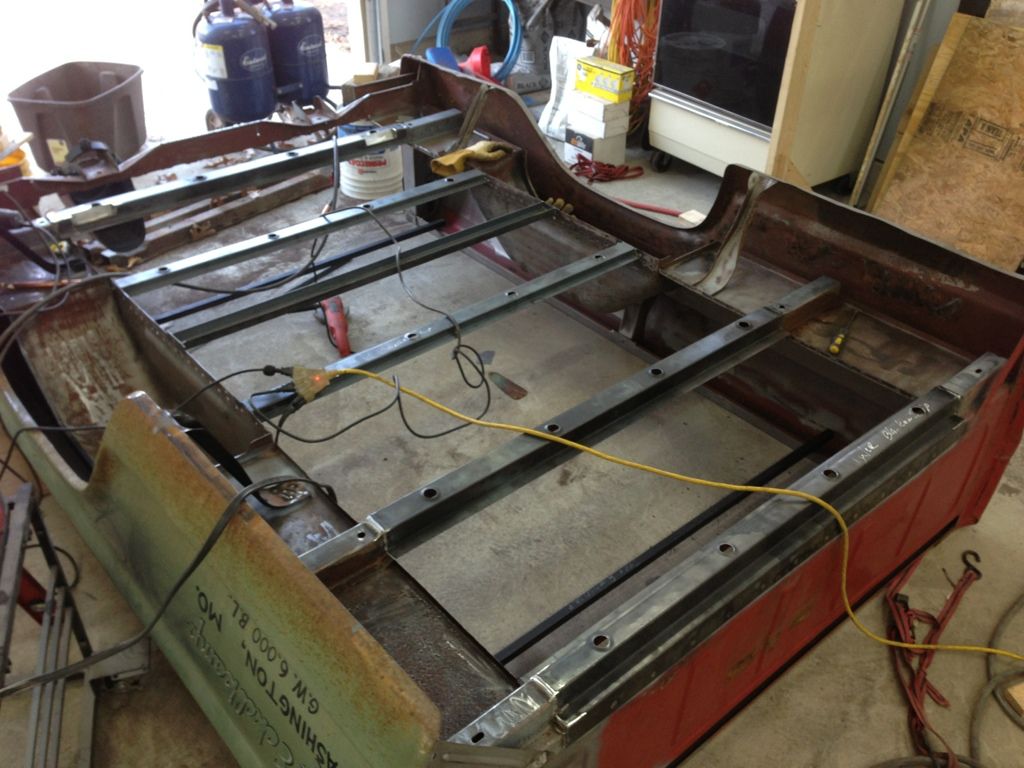
I was then ready to strips both outside bedsides down. I used starblast, soda, and 120 grit on the DA, then I shot 2 coats of epoxy primer. Progress!
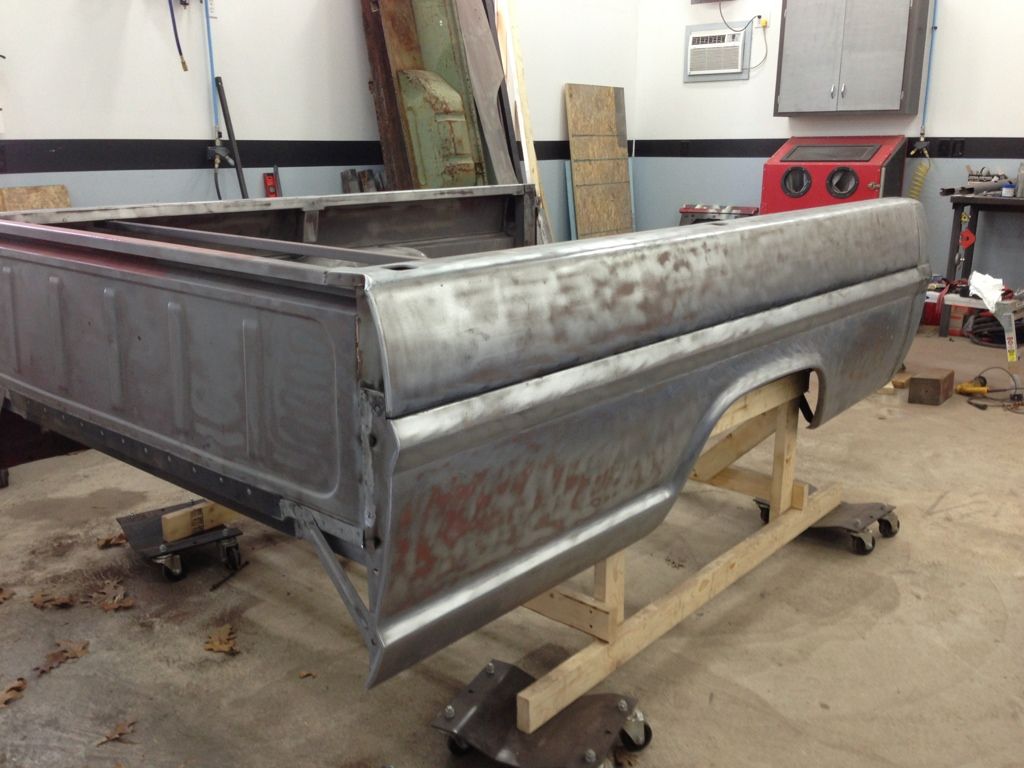
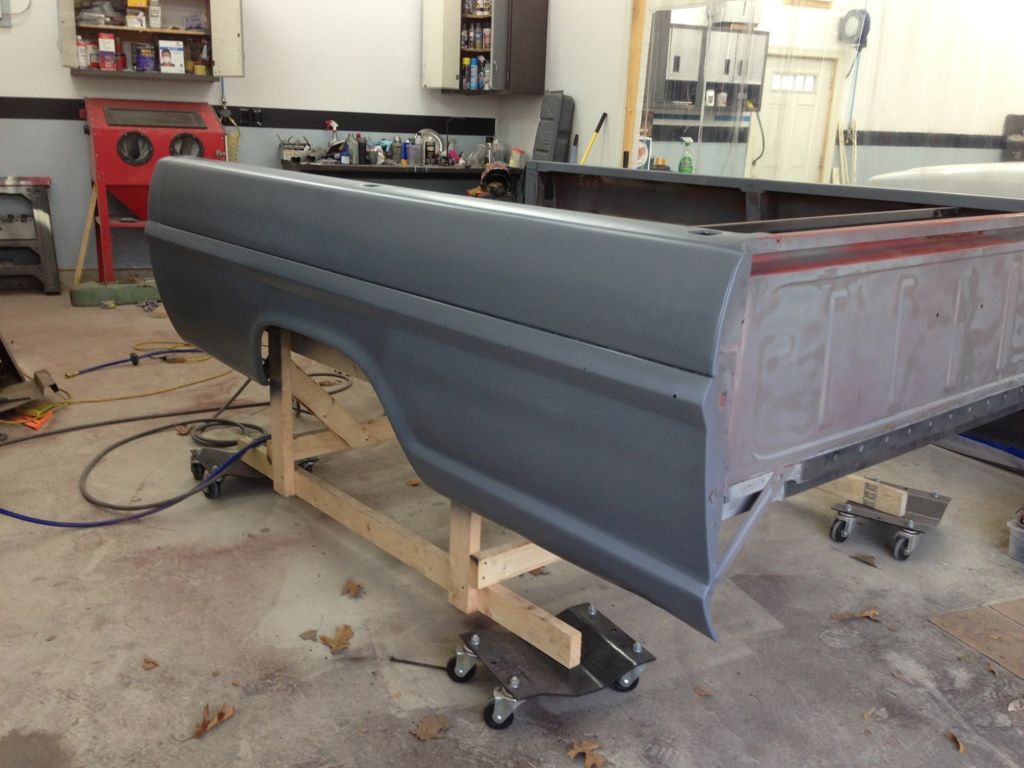
I drilled and dimple-die'd the new crossmembers. This not only looks cool, but provides good drainage for the underfloor channels.


Next, I tacked in the main channels and my buddy Adam helped me test fit the bed on the chassis. Yes, that was pretty exiting to see it sitting on there!


From the test fit, I learned why Ford had the chamfers stamped into the stock channels (to clear the rear shackle under full compression), so I followed their lead.


Here she is with all the new channels welded into place (minus the aft-most piece, which I did after I flipped it back over)

I was then ready to strips both outside bedsides down. I used starblast, soda, and 120 grit on the DA, then I shot 2 coats of epoxy primer. Progress!


-
FordTruck
- Blue Oval Guru

- Posts: 1160
- Joined: Wed Aug 15, 2007 4:47 pm
- Location: The GREAT State Of Missouri
- Contact:
Re: 1969 Ranger - Project Glory Days!
do you remember what x pipe kit you used? im thinking about going that route on my 70 but im not sure what width to buy.
"Flyin High On Caffine And Copenhagen" R.I.P Chris LeDoux
60 Mercury Comet
65 Ford Econoline
72 Ford F100 on 79 4x4 SWB frame
77 Ford F250 "lowboy" 4x4
09 Harley Xl1200c
60 Mercury Comet
65 Ford Econoline
72 Ford F100 on 79 4x4 SWB frame
77 Ford F250 "lowboy" 4x4
09 Harley Xl1200c
- sargentrs
- 100% FORDified!

- Posts: 9866
- Joined: Fri Jun 22, 2007 9:30 am
- Location: Georgia, Jasper
Re: 1969 Ranger - Project Glory Days!
Incredible work Tyler! You never cease to amaze me with your skills. 
Randy
1970 F100 Sport Custom Limited LWB, 302cid, 3 on the tree. NO A/C, NO P/S, NO P/B. Currently in 1000 pcs while rebuilding. Project thread: http://www.fordification.com/forum/view ... 22&t=59995 Plan: 351w, C4, LSD, pwr front disc, p/s, a/c, bucket seats, new interior and paint.
1987 F-150 XLT Lariat, 5.0/C6 auto.
1970 F100 Sport Custom Limited LWB, 302cid, 3 on the tree. NO A/C, NO P/S, NO P/B. Currently in 1000 pcs while rebuilding. Project thread: http://www.fordification.com/forum/view ... 22&t=59995 Plan: 351w, C4, LSD, pwr front disc, p/s, a/c, bucket seats, new interior and paint.
1987 F-150 XLT Lariat, 5.0/C6 auto.
- 68 Ford Stepside
- Blue Oval Guru

- Posts: 1152
- Joined: Thu Sep 27, 2012 8:27 am
- Location: South Carolina
Re: 1969 Ranger - Project Glory Days!
You don't see that quality of work too often these days. I can only respect a person who pays that much attention to detail. Keep on truckin'. Have A Great Ford Day! 
"Have A Great Ford Day"
- tylerb43
- Preferred User

- Posts: 492
- Joined: Fri Nov 14, 2008 2:54 pm
- Location: Union, MO
Re: 1969 Ranger - Project Glory Days!
With the kit, the width is very adjustable. I had to look back a few pages, but the kit I used is from summit, (SUM-642122 - $79), it includes the x and the 4, 45 degree pipes, good luck!!FordTruck wrote:do you remember what x pipe kit you used? im thinking about going that route on my 70 but im not sure what width to buy.
sargentrs wrote:Incredible work Tyler! You never cease to amaze me with your skills.
Thanks so much, guys! I'm both flattered and motivated to keep pushing forward, Thanks!68 Ford Stepside wrote:You don't see that quality of work too often these days. I can only respect a person who pays that much attention to detail. Keep on truckin'. Have A Great Ford Day!
I'd love to have the bed to paint before Christmas, but there's still a lot of metal work to do and some challenges to overcome. I did talk to my friend the carpenter about choosing and machining the wood, and I think we've got a plan! I do have to find time to stop by the showroom he told me about and pick the species that we'll use.
- 67nukeford
- Blue Oval Fan

- Posts: 589
- Joined: Tue Aug 19, 2008 3:20 pm
- Location: Nebraska, Omaha/Elkhorn
Re: 1969 Ranger - Project Glory Days!
Tyler, truck is looking great! I'm considering having to the the same with my bed, splitting the bedsides. I"ve hear horror stories about that seam running down the length of the bed, corrosion-wise . How much of a pain was it to get that upper section of the bedside off? Are you going to weld in the long seam, or just seal it?
Again, wonderful work, man!
Again, wonderful work, man!
- FoPAR
- Preferred User

- Posts: 272
- Joined: Mon Jun 08, 2009 10:08 pm
- Location: Washington
Re: 1969 Ranger - Project Glory Days!
Truck is looking awesome Tyler! I've been so busy I've missed out on all your progress. Looks dam good man 
"FoPar" because I love Fords and Mopars so just call me FoPar... 
- tylerb43
- Preferred User

- Posts: 492
- Joined: Fri Nov 14, 2008 2:54 pm
- Location: Union, MO
Re: 1969 Ranger - Project Glory Days!
What you've heard is correct, Pat. That seem can look pretty decent from the outside, but packed full of scale rust down in there. I changed the lower sections, as the upper section is part of the inner box. I'm going to skim through this, let me know if it doesn't make sense.67nukeford wrote:Tyler, truck is looking great! I'm considering having to the the same with my bed, splitting the bedsides. I"ve hear horror stories about that seam running down the length of the bed, corrosion-wise . How much of a pain was it to get that upper section of the bedside off? Are you going to weld in the long seam, or just seal it?
Again, wonderful work, man!
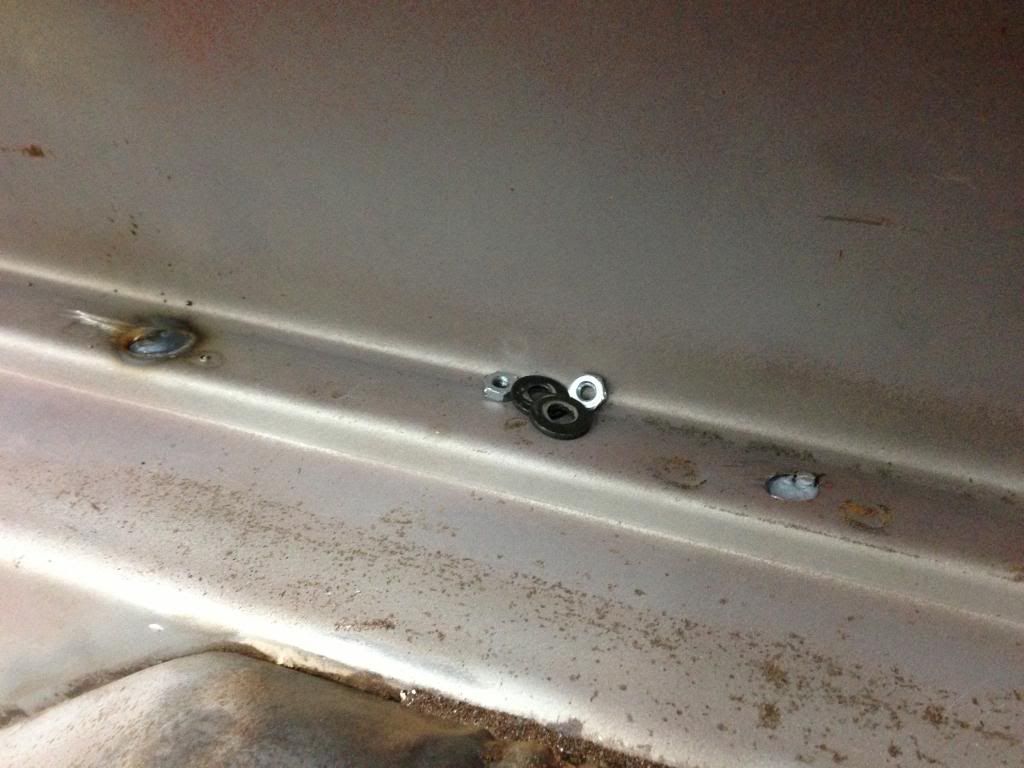
Once I had both lowers separated, I welded 12 threaded studs to the new lower, and drill corresponding holes in the existing upper. I then coated the flange on the lower with 3M 8115 panel bond. Then (with help) I installed the lower panel to the upper, with washers and nuts on the studs from inside the bed, this squeezed the flanges together, filled the entire seam with the panel bond. After 48 hours, I removed the nuts, cut off the studs, and button welded the holes. - see pic below. the hole on the left is welded, one on right just had it's stud cut off.
So the seam is fully sealed from the inside, and welded at the "buttons" down the seam, and obviously fully welded at each end.
