1969 Ranger - Project Glory Days!

Post progress reports on your project truck(s)

Moderator: FORDification

Post Reply
User avatar
tylerb43
Preferred User
Preferred User
Posts: 492
Joined: Fri Nov 14, 2008 2:54 pm
Location: Union, MO

Re: 1969 Ranger - Project Glory Days!

Post by tylerb43 »

FoPAR wrote:Truck is looking awesome Tyler! I've been so busy I've missed out on all your progress. Looks dam good man :thup:

Thank you Sir!! I'm looking forward to seeing YOUR progress too! :thup:
User avatar
tylerb43
Preferred User
Preferred User
Posts: 492
Joined: Fri Nov 14, 2008 2:54 pm
Location: Union, MO

Re: 1969 Ranger - Project Glory Days!

Post by tylerb43 »

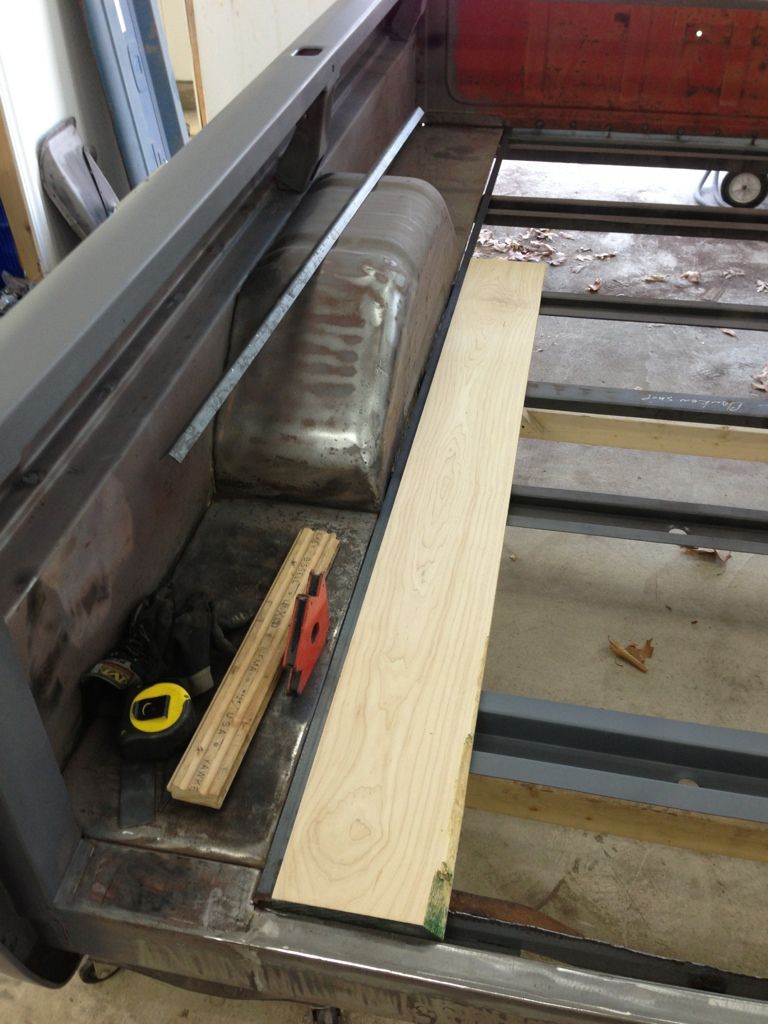
I stopped by St. Charles Hardwoods the other day to look at my wood choices. It was really between Ash and Hard Maple. I ended buying a short piece of 5/4 Hard Maple (they didn't have any shorts of Ash and I was driving my car). I really like it! What do you guys think? I'm planning on 7 boards across the floor, with 6 non-polished stainless strips in between to hold them down. These strips will be custom and ordered from Mar-K Quality Parts in Oklahoma City.

Image

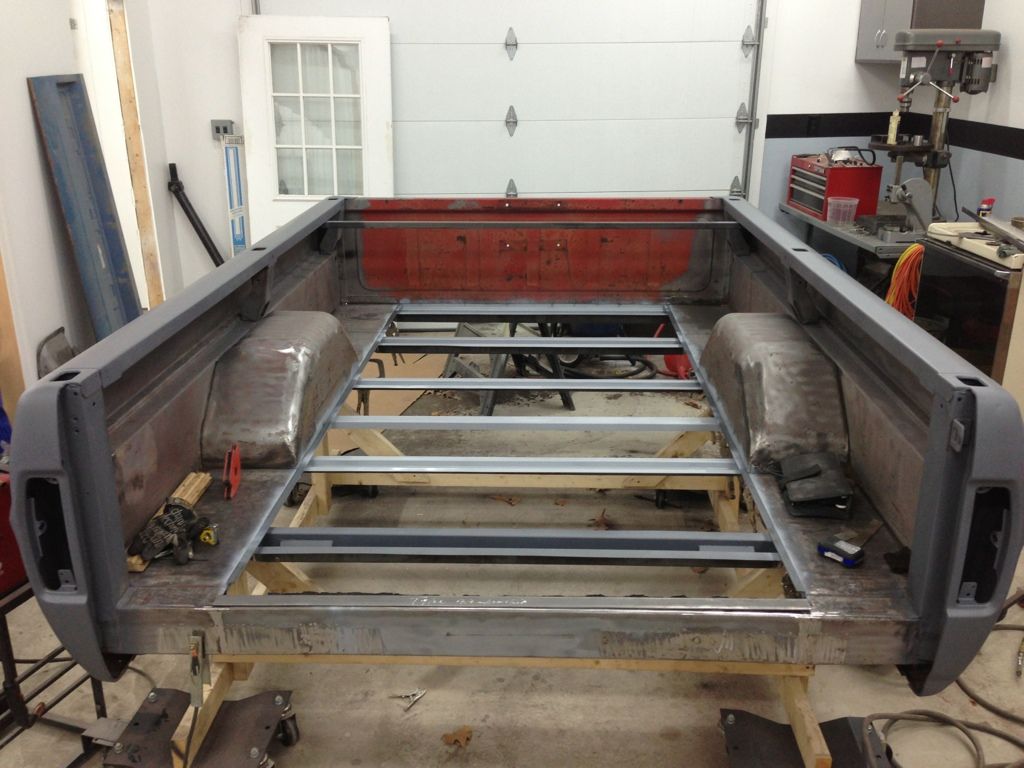
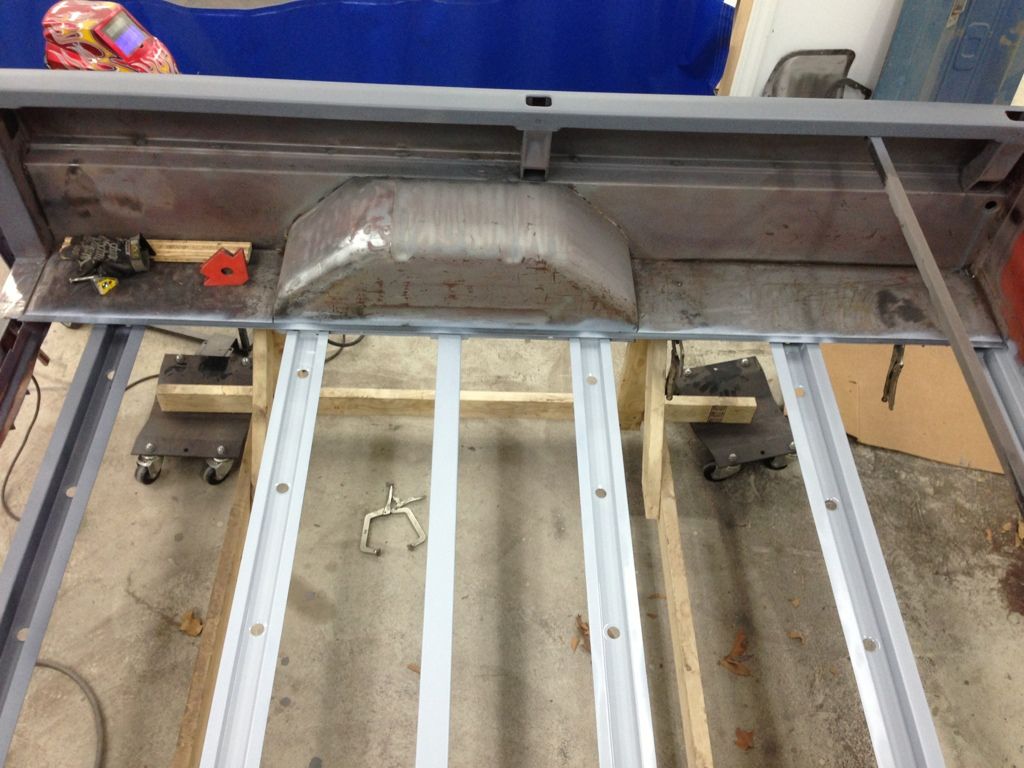
Here's a pic with all the new cross-members in, and primed. Down the sides are 3/4" angle iron which will hole the outside board edge. As you can see I also got the new rear cross-member welded in too. Then my tank ran out of gas. I'll go get a refill tomorrow and hopefully finish the remaining welding on Saturday. (Someone remind me I said that on Monday, please :lol: )

Image

Image
User avatar
sargentrs
100% FORDified!
100% FORDified!
Posts: 9866
Joined: Fri Jun 22, 2007 9:30 am
Location: Georgia, Jasper

Re: 1969 Ranger - Project Glory Days!

Post by sargentrs »

Amazing work Tyler! Can't wait to see the with all the wood in it.
Randy
1970 F100 Sport Custom Limited LWB, 302cid, 3 on the tree. NO A/C, NO P/S, NO P/B. Currently in 1000 pcs while rebuilding. Project thread: http://www.fordification.com/forum/view ... 22&t=59995 Plan: 351w, C4, LSD, pwr front disc, p/s, a/c, bucket seats, new interior and paint.
1987 F-150 XLT Lariat, 5.0/C6 auto.
User avatar
Cipher43
New Member
New Member
Posts: 227
Joined: Wed Oct 17, 2012 7:31 am
Location: Storm Lake IA

Re: 1969 Ranger - Project Glory Days!

Post by Cipher43 »

Looking awesome! :thup:
Greg
My Toys
Image...... Image......Image......Image
......1969 F-100................1968 F-250...........................57 S-100 IHC................71 CL350, 73CL450

original 360, T18 tranny, 9" with 3.25s

Project Rejuvenate Bill
http://www.fordification.com/forum/view ... 22&t=69060
User avatar
67nukeford
Blue Oval Fan
Blue Oval Fan
Posts: 589
Joined: Tue Aug 19, 2008 3:20 pm
Location: Nebraska, Omaha/Elkhorn

Re: 1969 Ranger - Project Glory Days!

Post by 67nukeford »

tylerb43 wrote:
67nukeford wrote:Tyler, truck is looking great! I'm considering having to the the same with my bed, splitting the bedsides. I"ve hear horror stories about that seam running down the length of the bed, corrosion-wise . How much of a pain was it to get that upper section of the bedside off? Are you going to weld in the long seam, or just seal it?

Again, wonderful work, man!
What you've heard is correct, Pat. That seem can look pretty decent from the outside, but packed full of scale rust down in there. I changed the lower sections, as the upper section is part of the inner box. I'm going to skim through this, let me know if it doesn't make sense.

Once I had both lowers separated, I welded 12 threaded studs to the new lower, and drill corresponding holes in the existing upper. I then coated the flange on the lower with 3M 8115 panel bond. Then (with help) I installed the lower panel to the upper, with washers and nuts on the studs from inside the bed, this squeezed the flanges together, filled the entire seam with the panel bond. After 48 hours, I removed the nuts, cut off the studs, and button welded the holes. - see pic below. the hole on the left is welded, one on right just had it's stud cut off.

So the seam is fully sealed from the inside, and welded at the "buttons" down the seam, and obviously fully welded at each end.

Image
I went back and forth, looking at the pics of when you took it apart, and I have it now! Well, that settles that, I'm going to go ahead and separate that lower section to seal that seam. Thanks Tyler!
Pat 1967 F100 4WD
LINK TO PROJECT THREAD
:http://www.fordification.com/forum/view ... &sk=t&sd=a
User avatar
67mann
100% FORDified!
100% FORDified!
Posts: 1705
Joined: Thu Feb 07, 2008 7:19 am
Location: NY..Mt.Morris 3rdgen. homestead

Re: 1969 Ranger - Project Glory Days!

Post by 67mann »

:eek: Holy chit...had to go all the way back to pg1 :lol: to see that you've got the Flex-O-matic shackle....hence the reason for your chamfer cut(nice job,by the way)on your bed rail. I got my nice 67 bed for my truck and need to do what you've done to make it sit right....in 67 ford had not yet designed the flexomatic...so no chamfer :wink: I also vote for the Maple bed....personel fav :2cents: So hurry up and get this truck done....so ya can come to NY and help me build my shop :P :D
I've had enough and I'm not alone
http://s267.photobucket.com/albums/ii304/67mann/
User avatar
snake
Preferred User
Preferred User
Posts: 254
Joined: Fri Sep 30, 2005 12:20 pm
Location: Eastern Iowa

Re: 1969 Ranger - Project Glory Days!

Post by snake »

Great work Tyler! And thanks for sharing all the progress info and pictures!

One quick question for you - it appears the engine perches are mounted in the I-6 location on the frame rather than the FE location??? I'm just going by the factory location- maybe you have this all figured out and moved it forward for a specific reason.....

Edit - oh never mind - that was based on the early pictures of the painted bare frame. I see in a later photo with the engine in that you moved it back.
"It's better to be hated for who you are than loved for who you're not....." Van Zant
"If you can't say something good then there's nothing good to say...." Big and Rich
User avatar
tylerb43
Preferred User
Preferred User
Posts: 492
Joined: Fri Nov 14, 2008 2:54 pm
Location: Union, MO

Re: 1969 Ranger - Project Glory Days!

Post by tylerb43 »

67nukeford wrote: I went back and forth, looking at the pics of when you took it apart, and I have it now! Well, that settles that, I'm going to go ahead and separate that lower section to seal that seam. Thanks Tyler!
You got it Pat! Glad I could help, (or confuse, whatever the case may be, ha!)

Jerry- I am going with the Hard Maple, I think it looks great. And I'd be stoked to help you on your shop! :D

Snake- you're exactly right, I picked the wrong set of holes after I coated the mounts, but quickly noticed the goof!
User avatar
tylerb43
Preferred User
Preferred User
Posts: 492
Joined: Fri Nov 14, 2008 2:54 pm
Location: Union, MO

Re: 1969 Ranger - Project Glory Days!

Post by tylerb43 »

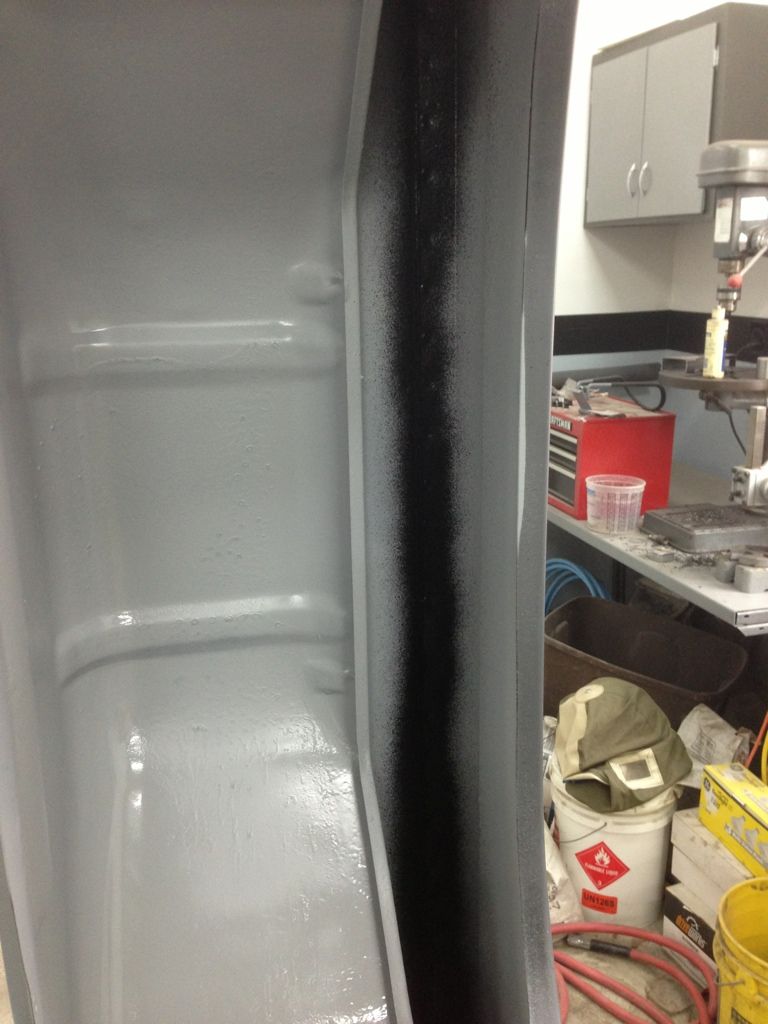
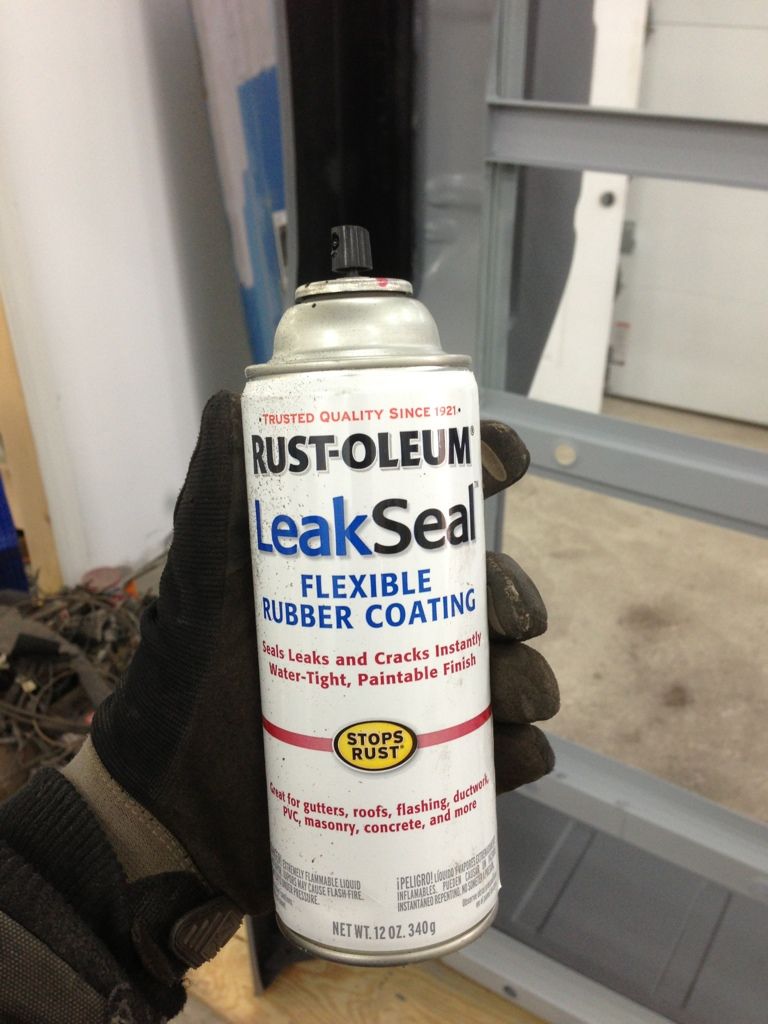
Here's what I did to seal the bed seam from the underside. This stuff is relatively new and marketed for tons of stuff, like gutters and roof flashing. It sprays on great, covers well and builds fast. :thup:

Image

Image

My brother came over and helped me load up the bed and haul it to the paint shop, woohoo! (It's actually a huge milestone in my mind)

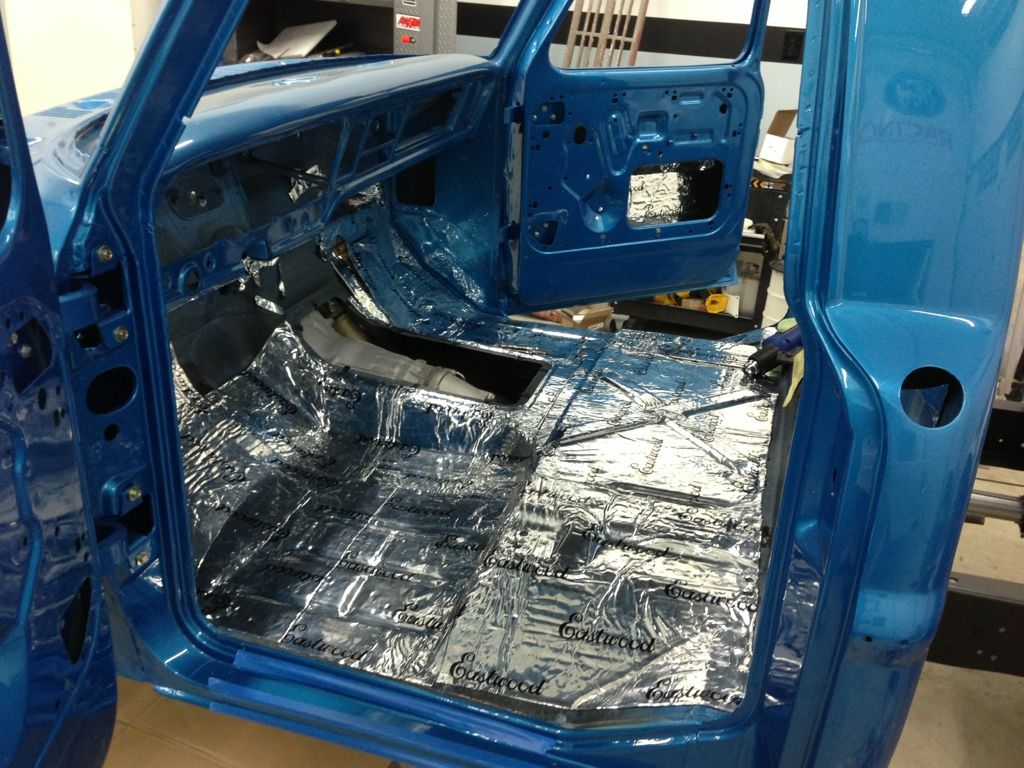
Then I got to work on the cab floor.

Image
User avatar
sargentrs
100% FORDified!
100% FORDified!
Posts: 9866
Joined: Fri Jun 22, 2007 9:30 am
Location: Georgia, Jasper

Re: 1969 Ranger - Project Glory Days!

Post by sargentrs »

Another milestone reached! Great work Tyler! I'm pretty much at a standstill so I'm watching yours to keep me motivated.
Randy
1970 F100 Sport Custom Limited LWB, 302cid, 3 on the tree. NO A/C, NO P/S, NO P/B. Currently in 1000 pcs while rebuilding. Project thread: http://www.fordification.com/forum/view ... 22&t=59995 Plan: 351w, C4, LSD, pwr front disc, p/s, a/c, bucket seats, new interior and paint.
1987 F-150 XLT Lariat, 5.0/C6 auto.
User avatar
Coupe5oh
New Member
New Member
Posts: 134
Joined: Sun Nov 13, 2011 3:10 pm
Location: Rolla, MO

Re: 1969 Ranger - Project Glory Days!

Post by Coupe5oh »

I dig the wood floor, it's gonna look awesome. The truck is really coming together. Is the Eastwoods stuff on the cab floor similar to dynamat? I'd like to maybe layer something over the fatmat I've got on mine but don't know if its necessary. Whatever carpet I get should have jute padding anyway.

That lightning is sweet too. Ive always wanted one, a friend of mine had a white one that I should've bought about 5 yrs ago. It was a really nice, fun to drive.
-1993 Cobra #121, Black/ Grey leather
-1968 Mustang GT Fastback, Gulfstream Aqua
-1967 f100 pile of parts...
User avatar
tylerb43
Preferred User
Preferred User
Posts: 492
Joined: Fri Nov 14, 2008 2:54 pm
Location: Union, MO

Re: 1969 Ranger - Project Glory Days!

Post by tylerb43 »

Coupe5oh wrote:I dig the wood floor, it's gonna look awesome. The truck is really coming together. Is the Eastwoods stuff on the cab floor similar to dynamat? I'd like to maybe layer something over the fatmat I've got on mine but don't know if its necessary. Whatever carpet I get should have jute padding anyway.

That lightning is sweet too. Ive always wanted one, a friend of mine had a white one that I should've bought about 5 yrs ago. It was a really nice, fun to drive.

Thanks, man. Yes, the Eastwood sound deadener is similar to Fatmat/Dynamat/etc. I haven't used any others, but I'm very impressed with this stuff, a world of difference! I to ordered my carpet with the extra jute padding, hopefully this thing will be a lot quieter than it was back in the day. I'd think the bedliner and fatmat you have on yours would be plenty with jute on top of it?

Lightning - thanks! I bought this one from down around West Plains, just south of you. Well, quite a bit south of you I guess.
User avatar
tylerb43
Preferred User
Preferred User
Posts: 492
Joined: Fri Nov 14, 2008 2:54 pm
Location: Union, MO

Re: 1969 Ranger - Project Glory Days!

Post by tylerb43 »

Hey guys - need a little help.

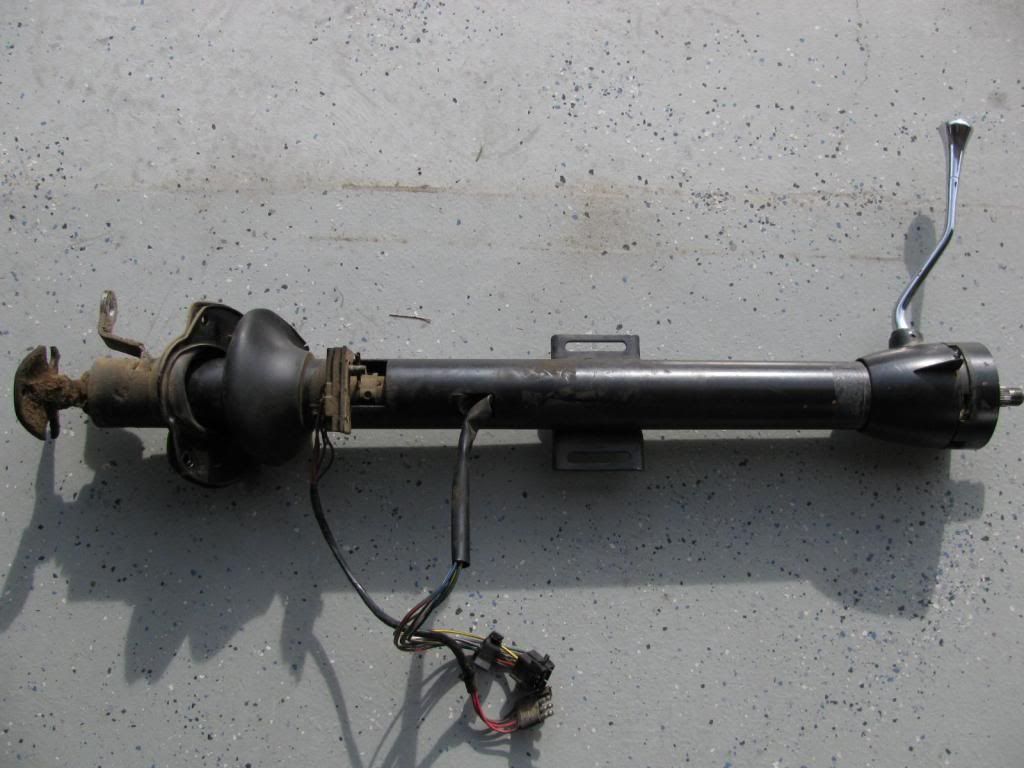
I've got the carpet and firewall cover installed. But on the steering column, I'm struggling to remember what goes where. :doh:

See diagram in this link. http://www.fordification.com/tech/image ... column.jpg

Now - the column rubber gasket (3513) goes right against the firewall, and the metal gasket retainer (3B633) holds that in place, right? So then the firewall cover goes over them both? That correct? :hmm:

If I'm right, then what about the thick rubber boot? I believe it was originally around the column and against the cover. Why don't I see it on the diagram? Does anyone reproduce it? (see pic)

Image

Thanks! :thup:
User avatar
tylerb43
Preferred User
Preferred User
Posts: 492
Joined: Fri Nov 14, 2008 2:54 pm
Location: Union, MO

Re: 1969 Ranger - Project Glory Days!

Post by tylerb43 »

Okay, so no one knows about "the boot" got it. :wink:

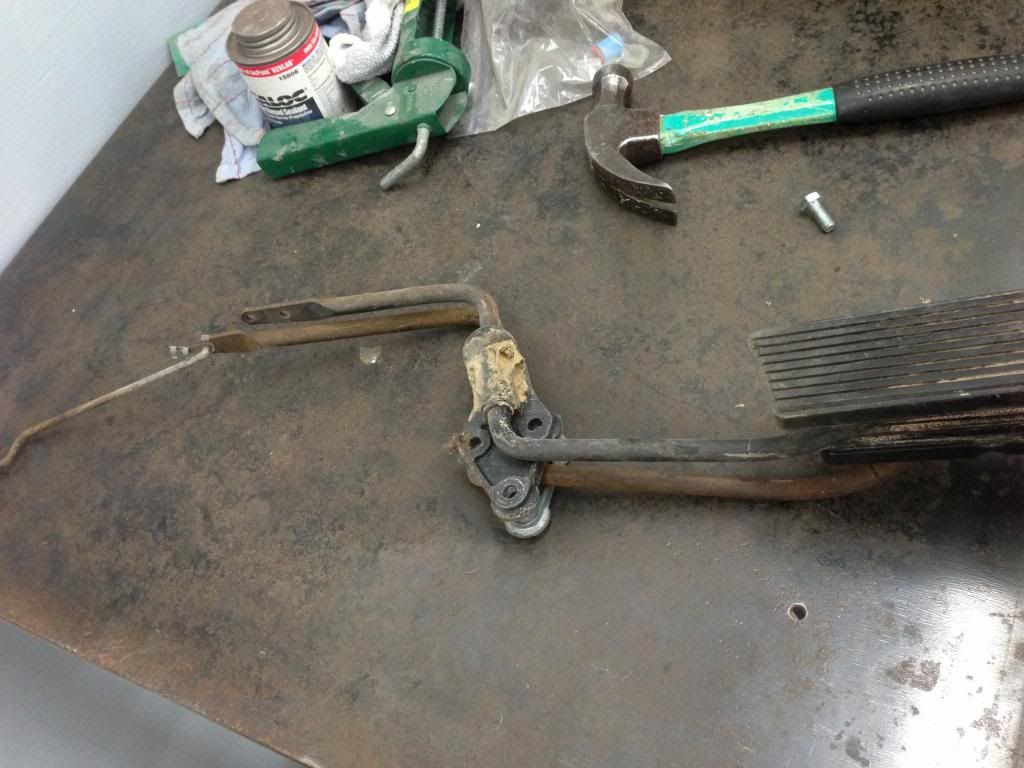
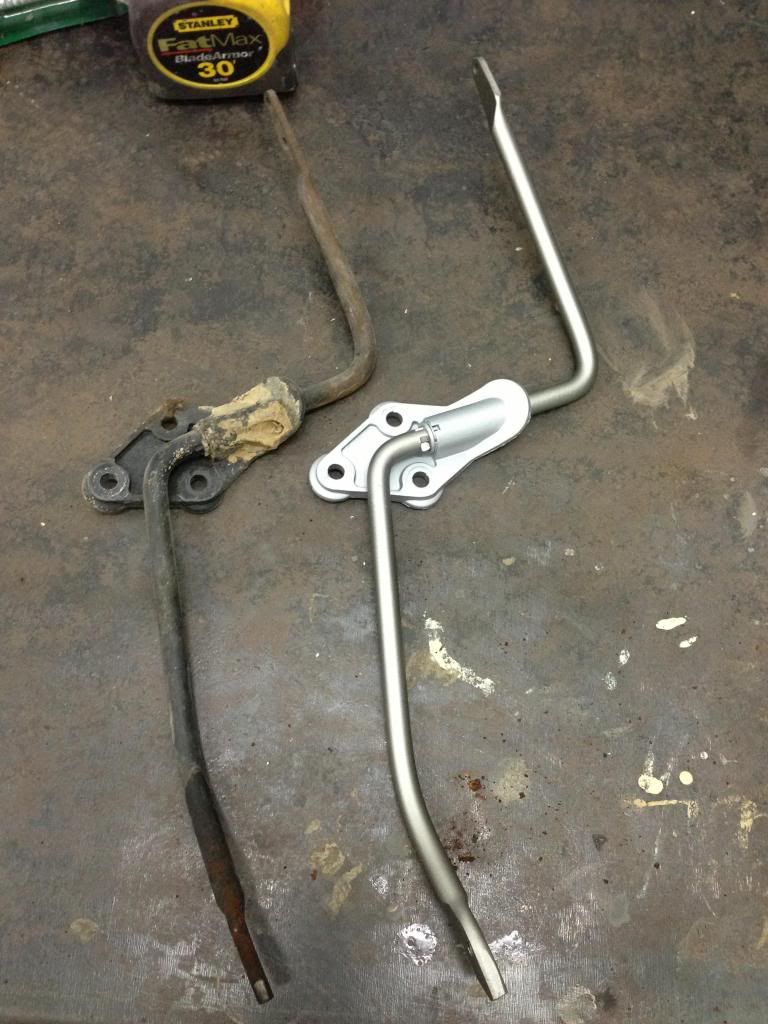
Here's another one; I know several have found issue with the gas pedal linkage, and just bypassed the firewall bracket and connected the pedal bar right to the carb or some sort of trapeze linkage. My thought, why not use a '73 gas pedal bar? It's longer (taller) and hooks directly to the carb, like I'd want for my Holley anyway, so I grabbed it.

Here you can see the length difference, '73 pedal bar on bottom, '69 on top.

Image

So I cleaned it up a little.

Image
cole71
Preferred User
Preferred User
Posts: 442
Joined: Tue Aug 02, 2011 11:27 pm
Location: Tallapoosa, Georgia

Re: 1969 Ranger - Project Glory Days!

Post by cole71 »

I just installed my column the other day. I have the same boot on mine as in the picture and i just put the boot to the outside of the firewall pad. Luckily, the one that was on the column I bought was still in good shape so I'm not sure on any repro's?
Post Reply