1967 F100 Father and Son Project - Starting Final Assembly
Moderator: FORDification
-
- New Member
- Posts: 103
- Joined: Sat Jan 22, 2011 3:29 pm
- Location: Hudsonville, MI
Re: 1967 F100 Father and Son Project - Back from paint!!
Here are more pictures of the truck:
My Dad decided to build a barrier in his three car garage to protect the truck from everything else.
Inside of the door, planning on black door panels.
The parents wanted to protect the tailgate so it is up in the spare bedroom. Went with a silver paint on the letters, I think it turned out pretty nice.
- marvin2
- Blue Oval Fan
- Posts: 536
- Joined: Fri Jan 23, 2009 11:25 am
Re: 1967 F100 Father and Son Project - Back from paint!!
The silver looks great against the red....good thinking!!
- 72stepside
- Blue Oval Fan
- Posts: 537
- Joined: Tue May 09, 2006 10:31 pm
- Location: Florida, Milton
- Contact:
Re: 1967 F100 Father and Son Project - Back from paint!!
That tailgate looks really great! Awesome idea with the silver.
Chris
72 F100 Stepside w/ 78 300 CID
Hedman Headers
Disc Brakes
Power Steering with 3 STILL on the tree
Comfy Crown Vic Seats
71 F250 PS, PB, AC, Auto, 390
Loooong way to go on this one!
72 F100 Stepside w/ 78 300 CID
Hedman Headers
Disc Brakes
Power Steering with 3 STILL on the tree
Comfy Crown Vic Seats
71 F250 PS, PB, AC, Auto, 390
Loooong way to go on this one!
-
- New Member
- Posts: 103
- Joined: Sat Jan 22, 2011 3:29 pm
- Location: Hudsonville, MI
Re: 1967 F100 Father and Son Project - Back from paint!!
Thanks. I can't take full credit for the silver. The painter suggested painting the letters a different color. I thought about doing white and then he had some bolts that he had just painted the silver color and he suggest that instead. I think it turned out pretty good and will go well with the chrome on the truck. Hoping to get it mounted over Christmas....I think my Mom wants it off her spare bed.
- cowbay
- Preferred User
- Posts: 447
- Joined: Fri Mar 18, 2011 5:04 am
- Location: Westbury NY
Re: 1967 F100 Father and Son Project - Back from paint!!
truck looks great!!!!!!!!
"If it can't be fixed with a hammer, then it is an electrical problem"
69 Ford F100 Ranger 390 3spd with overdrive
63 Chevy Impala 327 with 4spd. In the family since brand new. Over 280,00 miles
69 Ford F100 Ranger 390 3spd with overdrive
63 Chevy Impala 327 with 4spd. In the family since brand new. Over 280,00 miles
-
- New Member
- Posts: 103
- Joined: Sat Jan 22, 2011 3:29 pm
- Location: Hudsonville, MI
Re: 1967 F100 Father and Son Project - Starting Final Assembly
I was finally able to see the truck in person when I came home for Christmas. Very happy with how the paint looks. I made a large order from LMC and started some assembly. My Dad and I got the tailgate installed. Hopefully will have more time at the end of the week to get more parts installed.
- stephen44
- Blue Oval Fan
- Posts: 655
- Joined: Thu Jun 11, 2009 3:28 pm
- Location: Danville, VA
Re: 1967 F100 Father and Son Project - Starting Final Assembly
Love that color - what is it ?
thanks
Stephen
(1967 F100, FE352, 2wd, 3 on the tree, flareside)
Stephen
(1967 F100, FE352, 2wd, 3 on the tree, flareside)
- jimmy828
- 100% FORDified!
- Posts: 1611
- Joined: Thu Dec 23, 2010 6:47 pm
- Location: asheville,NC
Re: 1967 F100 Father and Son Project - Starting Final Assembly
That is a great looking ride. I also love the color! I'm working on SWB and sure do wish i was that far along.
- sargentrs
- 100% FORDified!
- Posts: 9866
- Joined: Fri Jun 22, 2007 9:30 am
- Location: Georgia, Jasper
Re: 1967 F100 Father and Son Project - Starting Final Assembly
Great job! The silver on the tailgate really sets it off.
Randy
1970 F100 Sport Custom Limited LWB, 302cid, 3 on the tree. NO A/C, NO P/S, NO P/B. Currently in 1000 pcs while rebuilding. Project thread: http://www.fordification.com/forum/view ... 22&t=59995 Plan: 351w, C4, LSD, pwr front disc, p/s, a/c, bucket seats, new interior and paint.
1987 F-150 XLT Lariat, 5.0/C6 auto.
-
- New Member
- Posts: 103
- Joined: Sat Jan 22, 2011 3:29 pm
- Location: Hudsonville, MI
Re: 1967 F100 Father and Son Project - Starting Final Assembly
Thanks again everyone. The color is torch red (Chevy color). It was so hard picking out from the different shades of red but the painter had shot this color previously and was happy with it so I decided to go with it.
Tomorrow I plan on installing the pedal assemblies and getting the steering wheel installed. I want to test the fit with the bucket seats. We might also try installing the windshield.
- sargentrs
- 100% FORDified!
- Posts: 9866
- Joined: Fri Jun 22, 2007 9:30 am
- Location: Georgia, Jasper
Re: 1967 F100 Father and Son Project - Starting Final Assembly
Keep the updates coming! I'm enjoying following your build.
Randy
1970 F100 Sport Custom Limited LWB, 302cid, 3 on the tree. NO A/C, NO P/S, NO P/B. Currently in 1000 pcs while rebuilding. Project thread: http://www.fordification.com/forum/view ... 22&t=59995 Plan: 351w, C4, LSD, pwr front disc, p/s, a/c, bucket seats, new interior and paint.
1987 F-150 XLT Lariat, 5.0/C6 auto.
1970 F100 Sport Custom Limited LWB, 302cid, 3 on the tree. NO A/C, NO P/S, NO P/B. Currently in 1000 pcs while rebuilding. Project thread: http://www.fordification.com/forum/view ... 22&t=59995 Plan: 351w, C4, LSD, pwr front disc, p/s, a/c, bucket seats, new interior and paint.
1987 F-150 XLT Lariat, 5.0/C6 auto.
-
- New Member
- Posts: 103
- Joined: Sat Jan 22, 2011 3:29 pm
- Location: Hudsonville, MI
Re: 1967 F100 Father and Son Project - Starting Final Assembly
Managed to get a few days to work on the truck while I was home for Christmas. Here is a quick list of what we were able to get done:
-Installed rear window
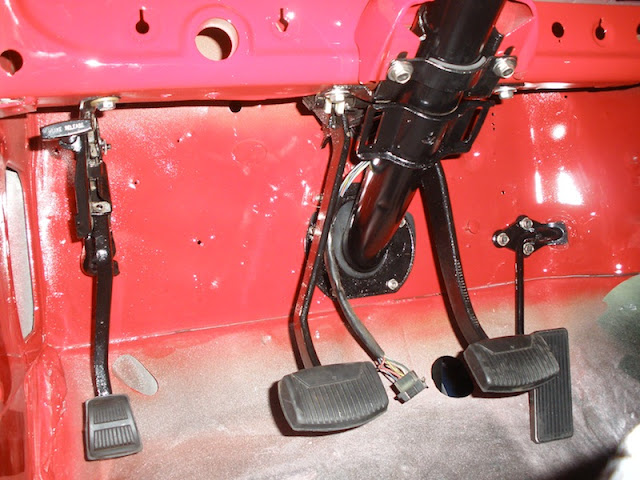
-Installed brake, clutch, gas and parking brake pedals
-Installed master cylinder
-Installed steering column
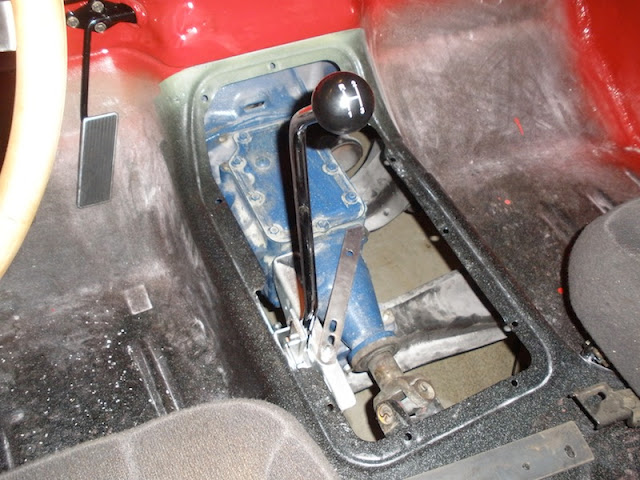
-Installed new shifter
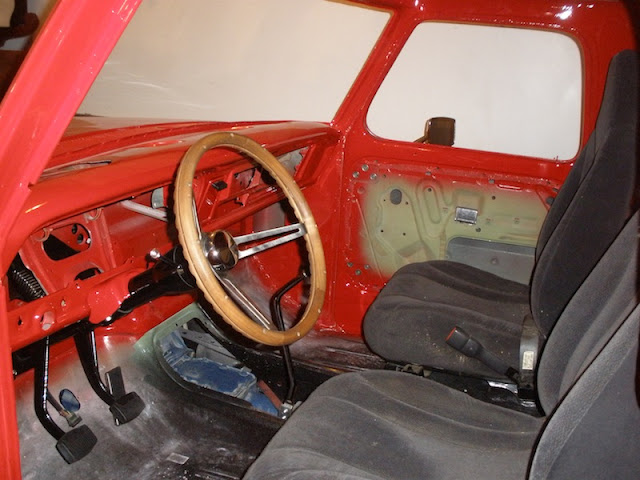
-Installed seats to final fit them with steering wheel
-Installed tailgate
-Installed clutch pivot/linkage assembly
-Finished bolting the bed down with new bolt set
-Installed door latch in drivers side door and exterior door handles on both
-Installed new side mirrors
-Installed FORD letters on hood
We ran into a couple issues...
Clutch spring - this is more of a question than an issue but thought someone could help. We installed the rods and pivots for the clutch pedal. In the diagram it looks like there is supposed to be a spring on the fork coming out of the transmission and there is a hole for it. The issue is that I don't know where the spring would attach to, it is a pretty long spring and I didn't see where it went. Anyone have any pictures of this spring for a 3-speed transmission?
Steering column - when we started the project we had a 67 cab with a manual transmission but had a steering column with an automatic shifter for some reason. The new cab we ended up getting was I think a 71 camper special that must of had power steering with the longer steering box. We rebuilt and went to install the column from that cab and the mount didn't line up I think because our manual steering box being shorter. We ended up just adding a bracket to hold the column in place. Not a big deal just looks a little weird because we kept the old bracket on there too. Might fix this later.
Doors - like I said the truck is a 67 but because the cab was in rough shape we found a 71 cab that we are using. We also bought from the same guy a set of doors. I also assumed these were the same year, 71. Turns out one of the replacement doors was in poor shape so I bought another replacement before the truck was painted that was a non-67 door to match the other. I went to install the latch in one of the doors though this weekend and realized it is a 67 door. This was the door we had bought with the new cab so not sure why he had a 71 cab and 67 doors. Long story short, our doors don't match. Not sure what I can do at this point. I have a new door panel set from LMC for the 68-72 cab so I will install that on the passenger side and then paint the metal 67 door panel black to match on the drivers side.
Sorry for that long post but wanted to go through some of what we went through during the weekend....here comes the pictures.
-
- New Member
- Posts: 103
- Joined: Sat Jan 22, 2011 3:29 pm
- Location: Hudsonville, MI
Re: 1967 F100 Father and Son Project - Starting Final Assembly
This is from awhile back but I never posted the finished picture.
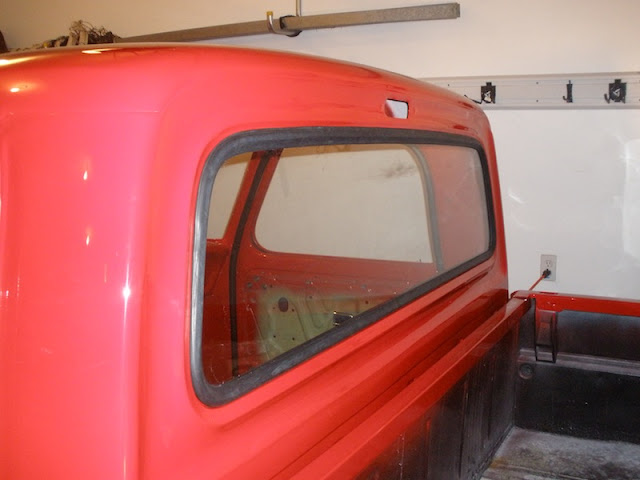
Rear window installed with new seals.
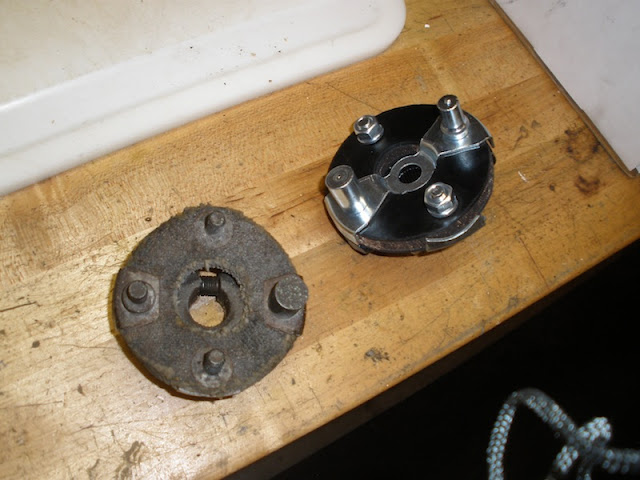
New and old steering coupler.
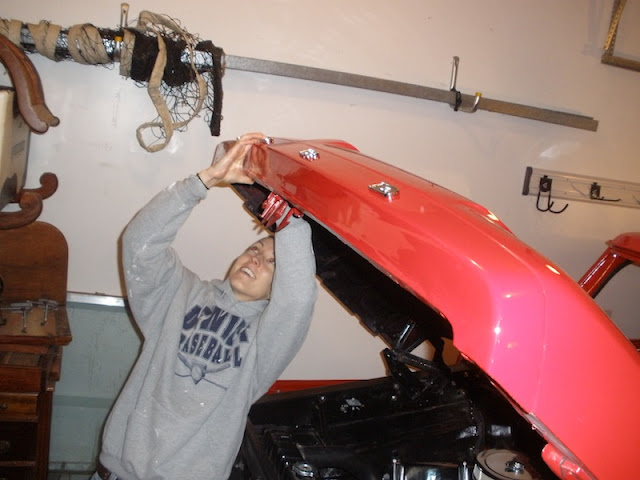
My wife getting into the action installing the hood emblems.
Door handles.
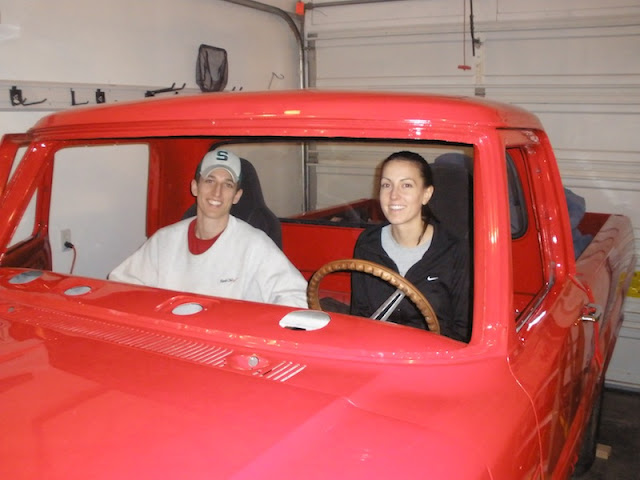
My wife and me on the first test 'drive'.
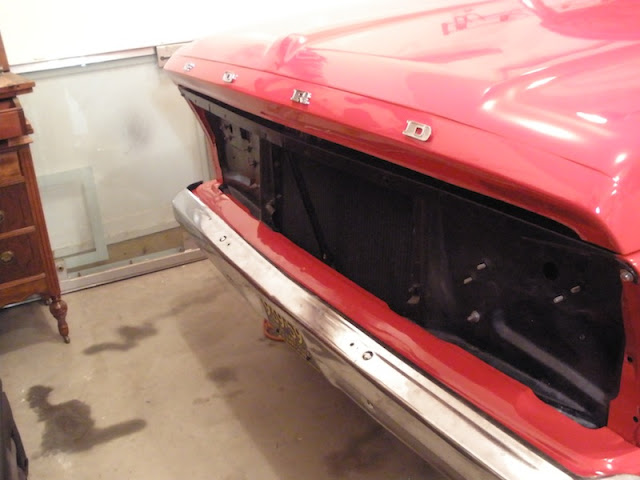
Bumper and emblems installed. I need a new bumper for the rear and might replace the front as well.
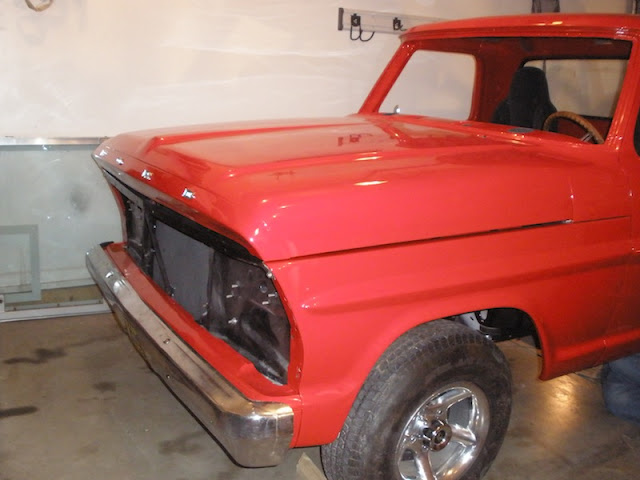
Front end.
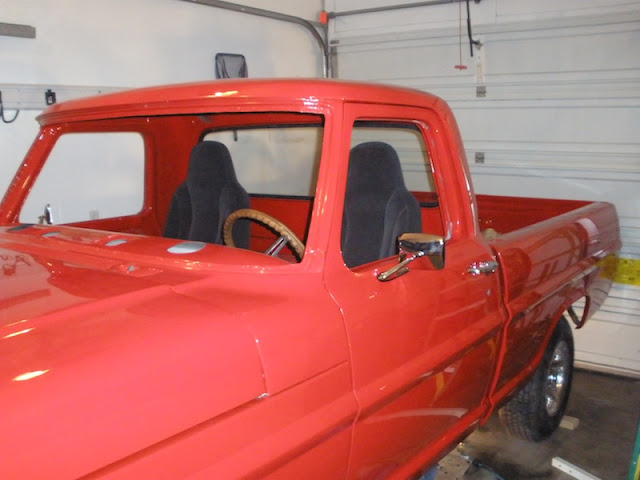
Side view showing the new mirrors.
Pedals, here you can see the steering column issue.
Shifter.
Inside cab.
Tailgate. We ended up taking off the hitch because I probably won't use it and didn't like how it looked. New bumper to come.
Engine compartment, new master cylinder.
- sargentrs
- 100% FORDified!
- Posts: 9866
- Joined: Fri Jun 22, 2007 9:30 am
- Location: Georgia, Jasper
Re: 1967 F100 Father and Son Project - Starting Final Assembly
Great progress and looking great! As for the clutch spring, I bought a spring with a long straight end and just bent a hook in the end and hooked it in the front crossmember. In the right center of this diagram vaguely shows the location to hook the spring. http://www.fordification.com/tech/image ... dals02.jpg
Randy
1970 F100 Sport Custom Limited LWB, 302cid, 3 on the tree. NO A/C, NO P/S, NO P/B. Currently in 1000 pcs while rebuilding. Project thread: http://www.fordification.com/forum/view ... 22&t=59995 Plan: 351w, C4, LSD, pwr front disc, p/s, a/c, bucket seats, new interior and paint.
1987 F-150 XLT Lariat, 5.0/C6 auto.
1970 F100 Sport Custom Limited LWB, 302cid, 3 on the tree. NO A/C, NO P/S, NO P/B. Currently in 1000 pcs while rebuilding. Project thread: http://www.fordification.com/forum/view ... 22&t=59995 Plan: 351w, C4, LSD, pwr front disc, p/s, a/c, bucket seats, new interior and paint.
1987 F-150 XLT Lariat, 5.0/C6 auto.
- jimmy828
- 100% FORDified!
- Posts: 1611
- Joined: Thu Dec 23, 2010 6:47 pm
- Location: asheville,NC
Re: 1967 F100 Father and Son Project - Starting Final Assembly
Great work on truck! I like the floor shift mod. Looks like you have the same trans i have. I would like to know the info on the shifter such as part # and the ease of installation. Don't forget to post a pick of interior when done. Again, the project looks really great