1969 Ranger - Project Glory Days!

Post progress reports on your project truck(s)

Moderator: FORDification

Post Reply
User avatar
tylerb43
Preferred User
Preferred User
Posts: 492
Joined: Fri Nov 14, 2008 2:54 pm
Location: Union, MO

Re: 1969 Ranger - Project Glory Days!

Post by tylerb43 »

tybob81 wrote:Tyler, When I did my wood floor conversion it made the bed almost 100# lighter.
Really. Huh. Well, I didn't really calculate anything (which is unlike me) but I just assumed I'd be adding weight. Running some quick numbers, it looks like my wood alone will be approx 120lbs. I could move the cut out steel floor around by myself, but then again, I am super strong :evil:

I guess I'll shelve that concern for now and cross that bridge when I get there. I know there are several options to slightly lower the rear, and will explore more if I decide it's necessary I guess. Thanks!
hvb68
New Member
New Member
Posts: 16
Joined: Sat Dec 08, 2012 7:21 pm

Re: 1969 Ranger - Project Glory Days!

Post by hvb68 »

tylerb43 wrote:Thanks man, I really appreciate the compliments! I'm sure you've seen my pics of the truck during my high school days back on page 1, and it seems we have very similar taste! That's a good looking truck!

That picture of your truck actually brings up a concern that's lurking in the back of my mind. The stock rear ride height has always been "raked" a little bit. Which I loved back in the day, but I think I may like it a little more level now. I obviously don't even know how it will ultimately sit, so this concern is pretty unfounded at this point. I'm thinking the extra weight of the wood bed will lower the rear 1"-1.5" or so, and just sit perfect. :wink: Okay, that's a hope, but I guess we'll see.
Yep that truck was from my high school days as well and that rake was the thing to do. It was compounded by 235/75's in the back and 215/70's up front so normally it would have sat a little more level. Sadly it was written off 9 months after my Dad and I got it back on the road.

My 1970 I picked up recently will hopefully sit near level when done, maybe a 1/2"-1" rake at the most.
User avatar
67mann
100% FORDified!
100% FORDified!
Posts: 1705
Joined: Thu Feb 07, 2008 7:19 am
Location: NY..Mt.Morris 3rdgen. homestead

Re: 1969 Ranger - Project Glory Days!

Post by 67mann »

:pop: :pop:

:hn: tick tock tick tock...pg32 Tyler :P
I've had enough and I'm not alone
http://s267.photobucket.com/albums/ii304/67mann/
User avatar
Heirloom
Blue Oval Fan
Blue Oval Fan
Posts: 549
Joined: Fri Feb 08, 2013 2:33 pm
Location: Paradise

Re: 1969 Ranger - Project Glory Days!

Post by Heirloom »

Coil spacers or new springs take care of that rake. Dual shocking the front with all gas charged shocks helps a bit too. Coil spacers and tabs to weld on the front of the beams can be bought at autofab.com :D
~Heirloom

'68 F250 360, 4 spd Project Thread!
Plans are for a stout 400, C6, 3.54 gears, 33" BFG AT's, bucket seats and custom console. Final assembly, nearing start up...


"Those who hammer their guns into plows will plow for those who do not."
~ Thomas Jefferson

"America will never be destroyed from the outside. If we falter and lose our freedoms, it will be because we destroyed ourselves."
~ Abraham Lincoln
User avatar
tylerb43
Preferred User
Preferred User
Posts: 492
Joined: Fri Nov 14, 2008 2:54 pm
Location: Union, MO

Re: 1969 Ranger - Project Glory Days!

Post by tylerb43 »

67mann wrote: :hn: tick tock tick tock...pg32 Tyler :P
Really? Damn, dude. :lol:

I showed this to my wife and said, "See, now even the guys on the forum are giving me crap about my slow progress!" I felt the need to make this point, as it was my only defense against a rather lengthy honey-do list that has recently surfaced... :wink:

I've got some cool stuff to show you guys, but just not ready to share it all yet, but here's a teaser pic: :D

Image
User avatar
Heirloom
Blue Oval Fan
Blue Oval Fan
Posts: 549
Joined: Fri Feb 08, 2013 2:33 pm
Location: Paradise

Re: 1969 Ranger - Project Glory Days!

Post by Heirloom »

:hmm:


:thup: :D
~Heirloom

'68 F250 360, 4 spd Project Thread!
Plans are for a stout 400, C6, 3.54 gears, 33" BFG AT's, bucket seats and custom console. Final assembly, nearing start up...


"Those who hammer their guns into plows will plow for those who do not."
~ Thomas Jefferson

"America will never be destroyed from the outside. If we falter and lose our freedoms, it will be because we destroyed ourselves."
~ Abraham Lincoln
User avatar
67nukeford
Blue Oval Fan
Blue Oval Fan
Posts: 589
Joined: Tue Aug 19, 2008 3:20 pm
Location: Nebraska, Omaha/Elkhorn

Re: 1969 Ranger - Project Glory Days!

Post by 67nukeford »

Ah, do I spy a custom instrument panel???
Pat 1967 F100 4WD
LINK TO PROJECT THREAD
:http://www.fordification.com/forum/view ... &sk=t&sd=a
User avatar
tylerb43
Preferred User
Preferred User
Posts: 492
Joined: Fri Nov 14, 2008 2:54 pm
Location: Union, MO

Re: 1969 Ranger - Project Glory Days!

Post by tylerb43 »

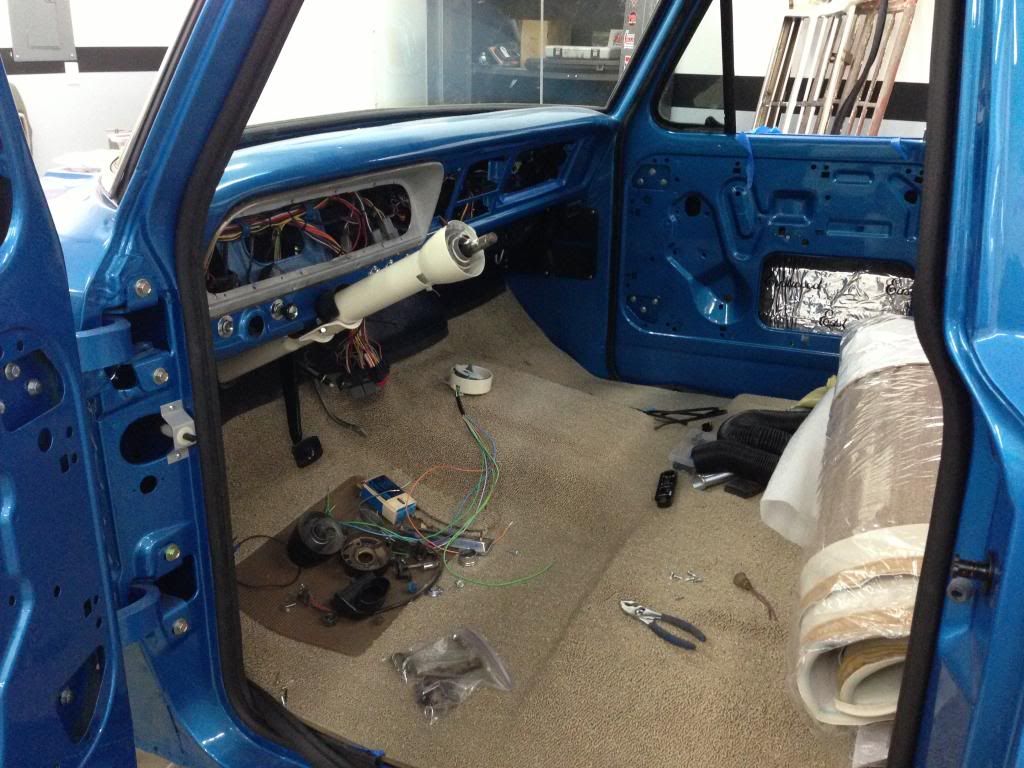
Okay guys - I figured I'd do a "where things are" post. Just in case some have lost track of what stage I'm at and how long of a road I've got to go. Hell, there's so many awesome projects on these boards, most of the time I'd rather watch everyone else work on their trucks than update my own build thread. But - here it goes.

The front half of the truck is painted and home, slowly being assembled. The details of putting together the details have REALLY slowed me down. If I was building a stock truck, it would be finished by now. But all the little decisions I've made to "make it mine" have slowed the project considerably. Not that I regret those decisions, but sometimes I just have to remind myself that the goal is to finish and drive this truck, not just tinker with the damn build! :lol:
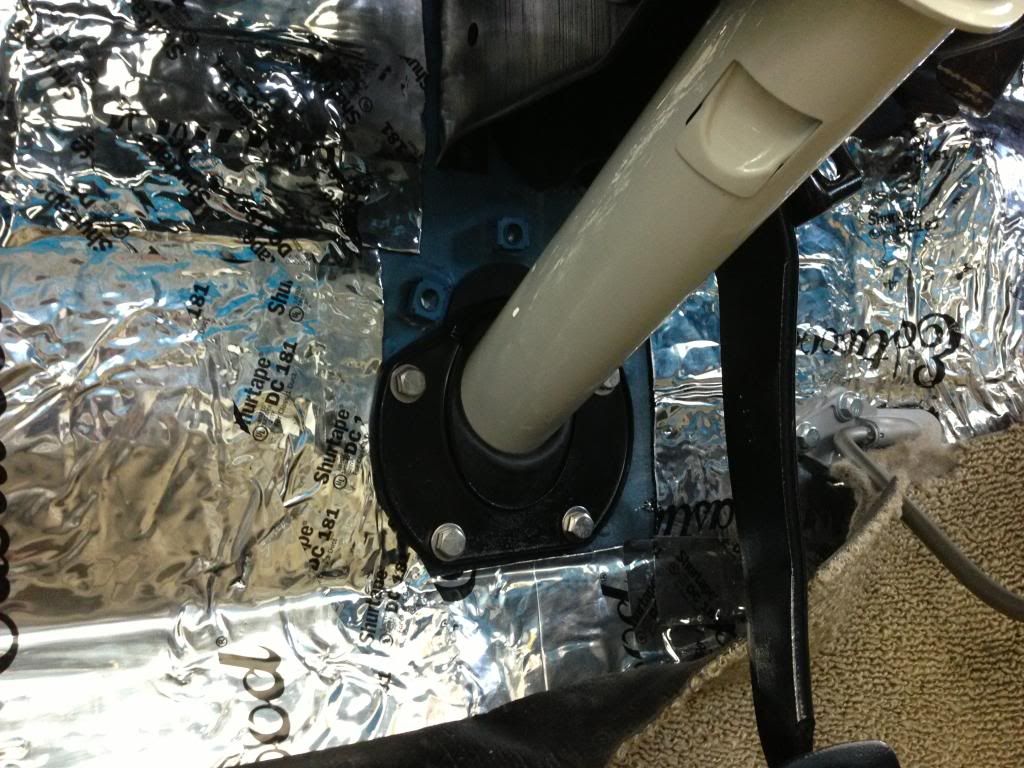
- Sound deadener on the floor, firewall, ceiling, inside both doors, behind fuel tank
- Carpet installed
- Painted steering column assembled and installed (may need to come back out - more later)
- New firewall cover installed
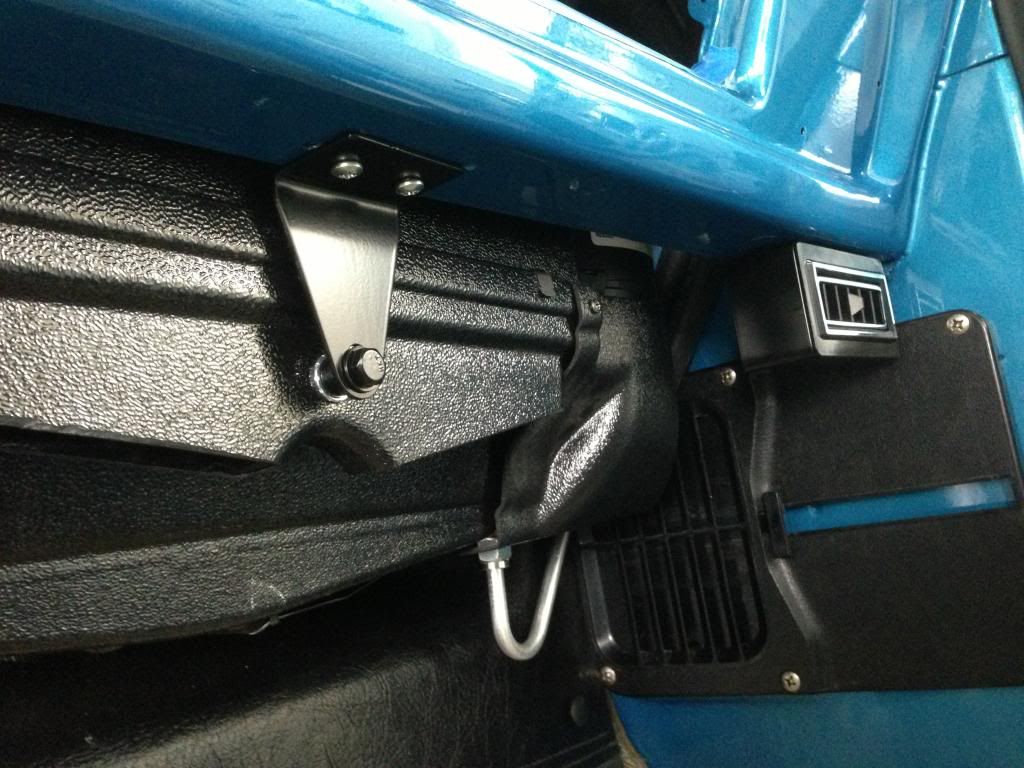
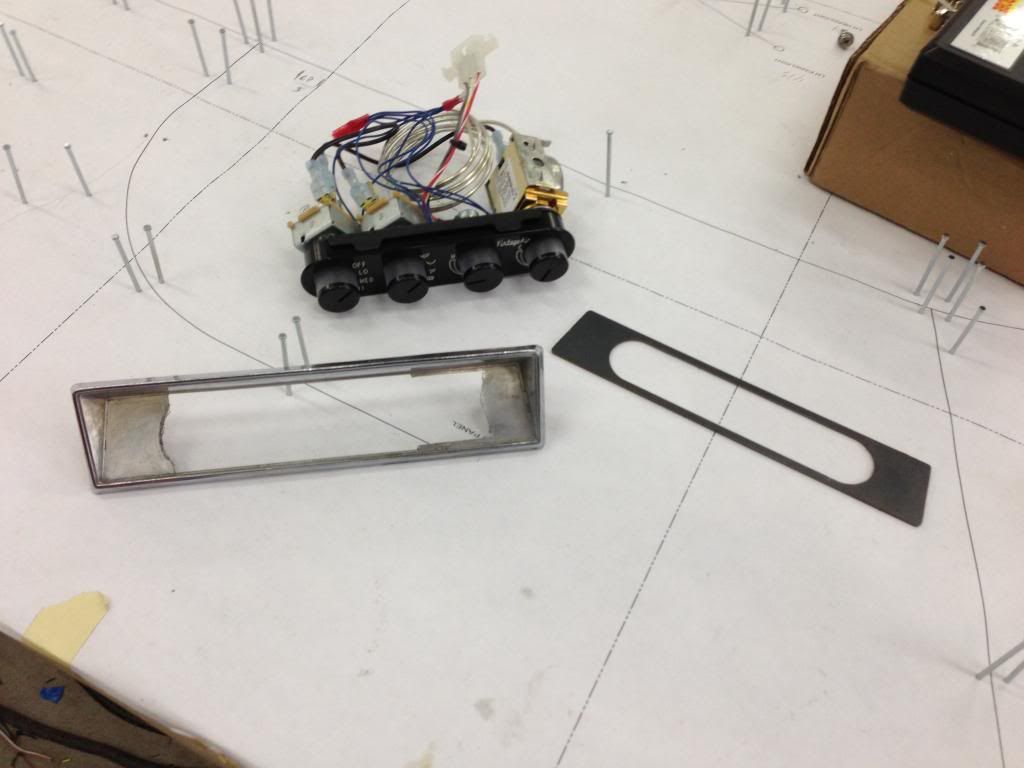
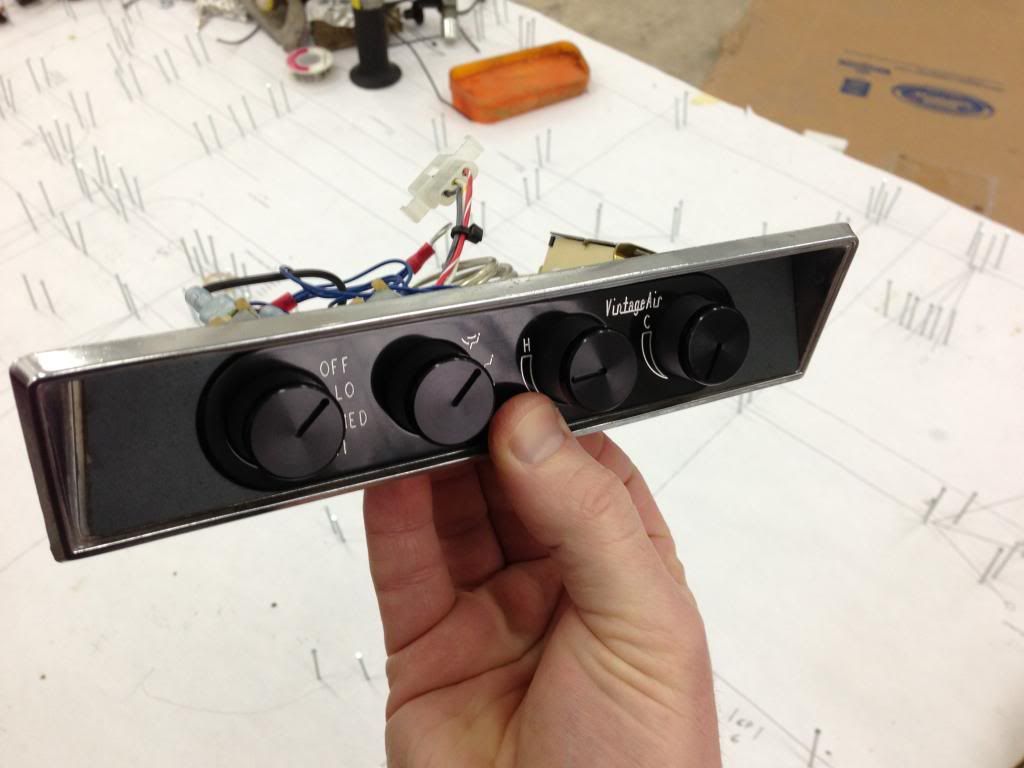
- Vintage Air Mini Gen II Air/Heat/Defrost evaporator installed
- Custom designed, built, and installed wire harness.
- Windshield installed
- Ranger dash trim installed
- Gas and brake pedals in
- Custom vent boxes installed
- Door weatherstripping finished
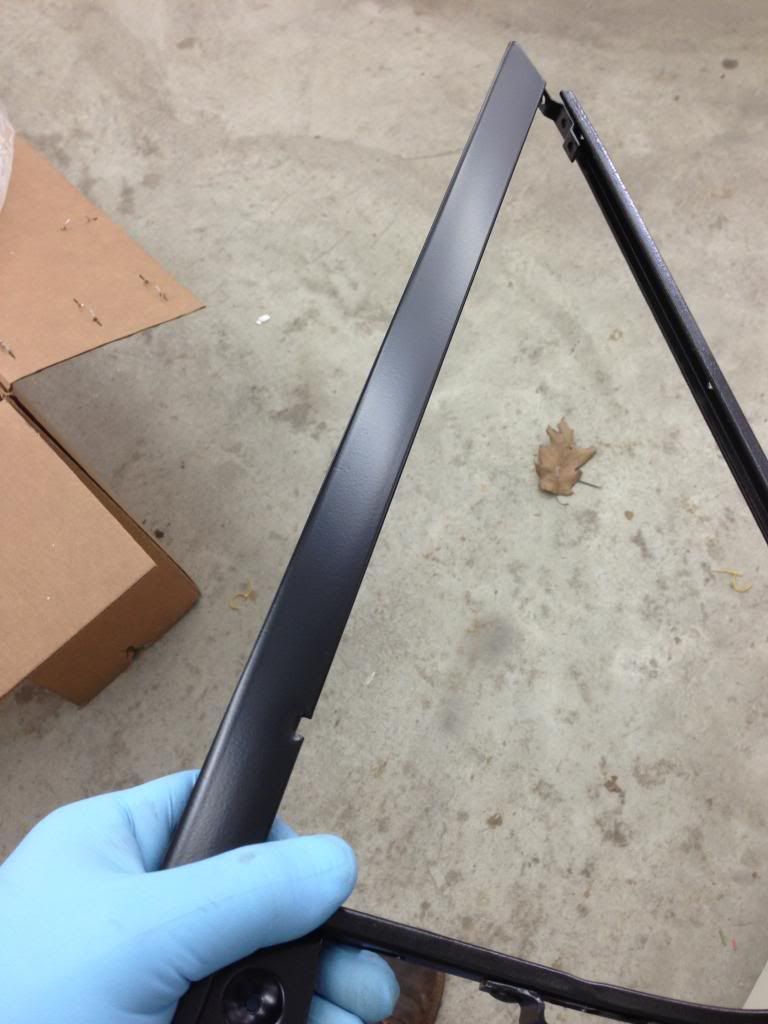
- Vent window assemblies were dissassembled, powdercoated, and installed with all new seals.
- New door handles and locks installed
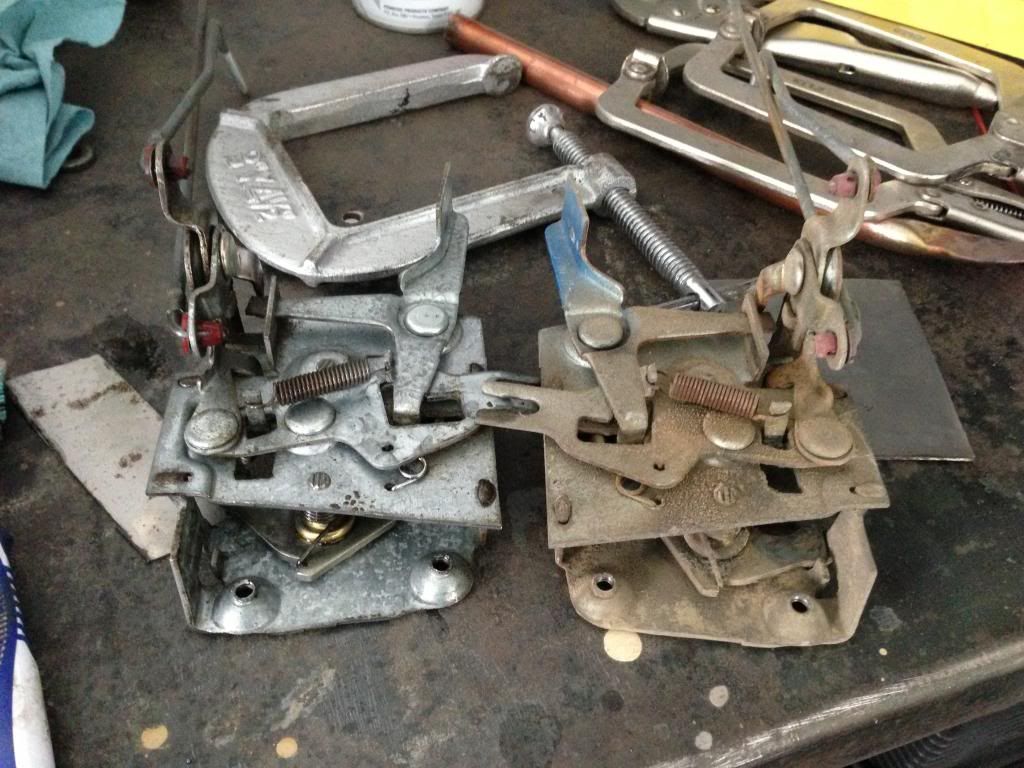
- Door latches were cleaned and reinstalled
- New dash speaker assembly is complete - yet to be installed
- Adapter plate for A/C controls is complete - waiting on bezel to be chromed before final install.
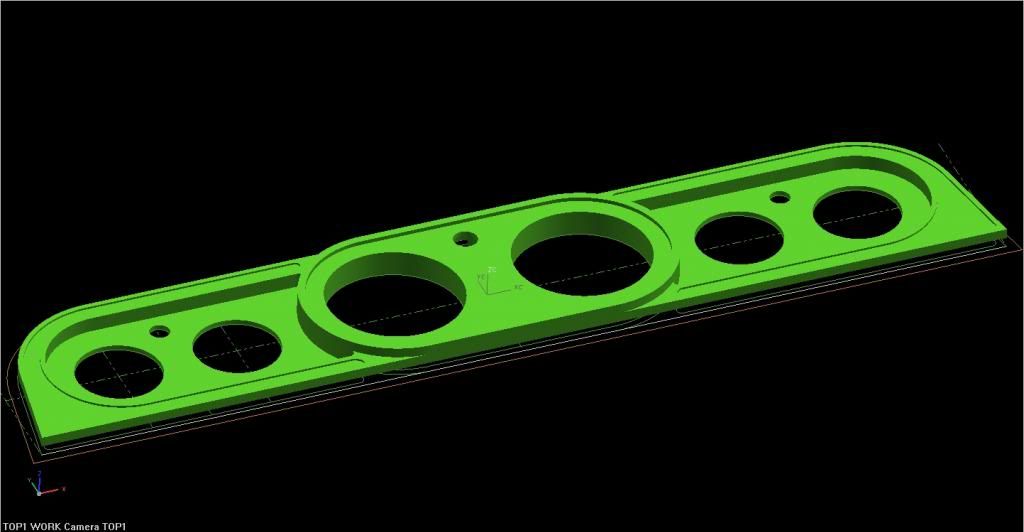
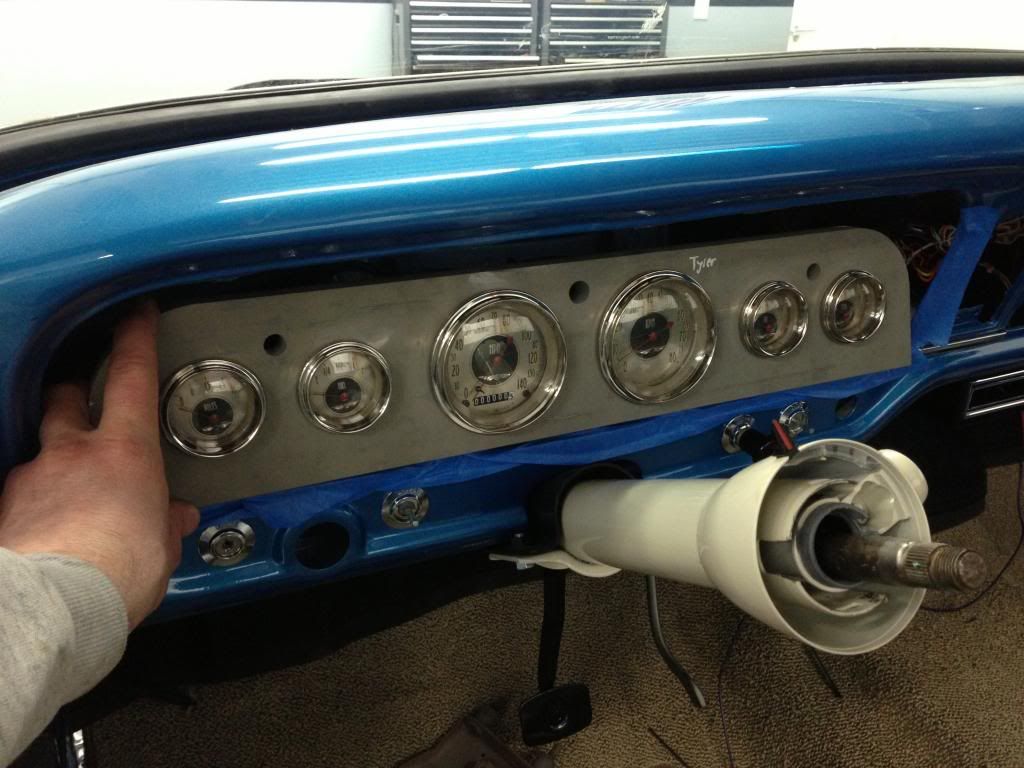
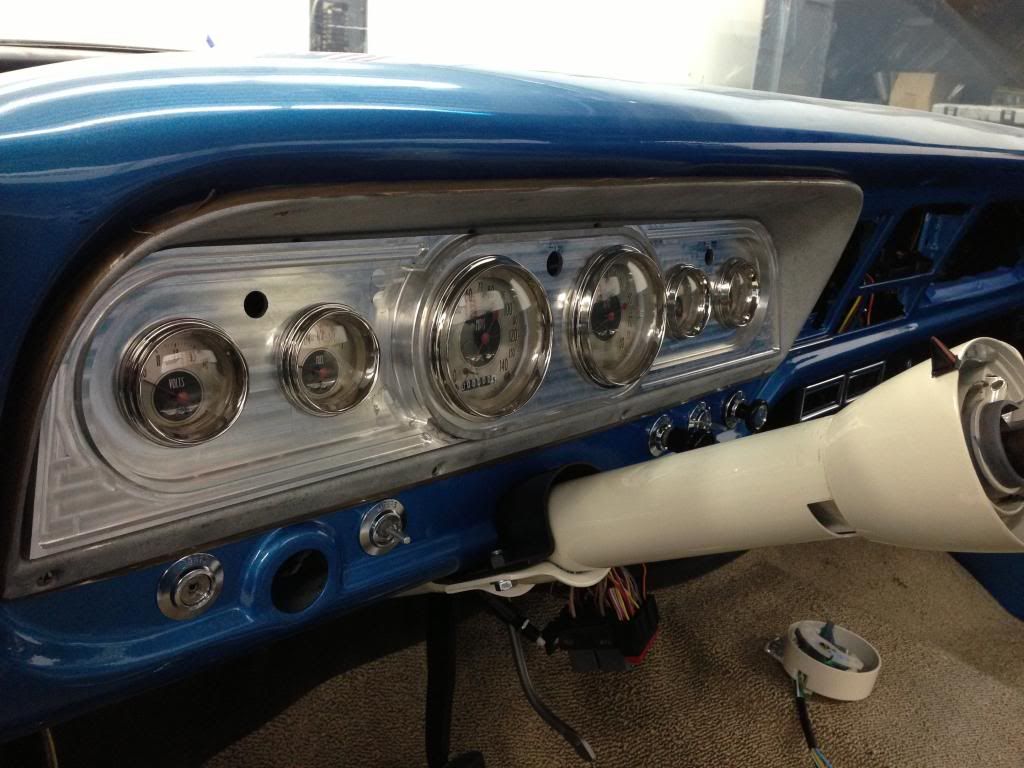
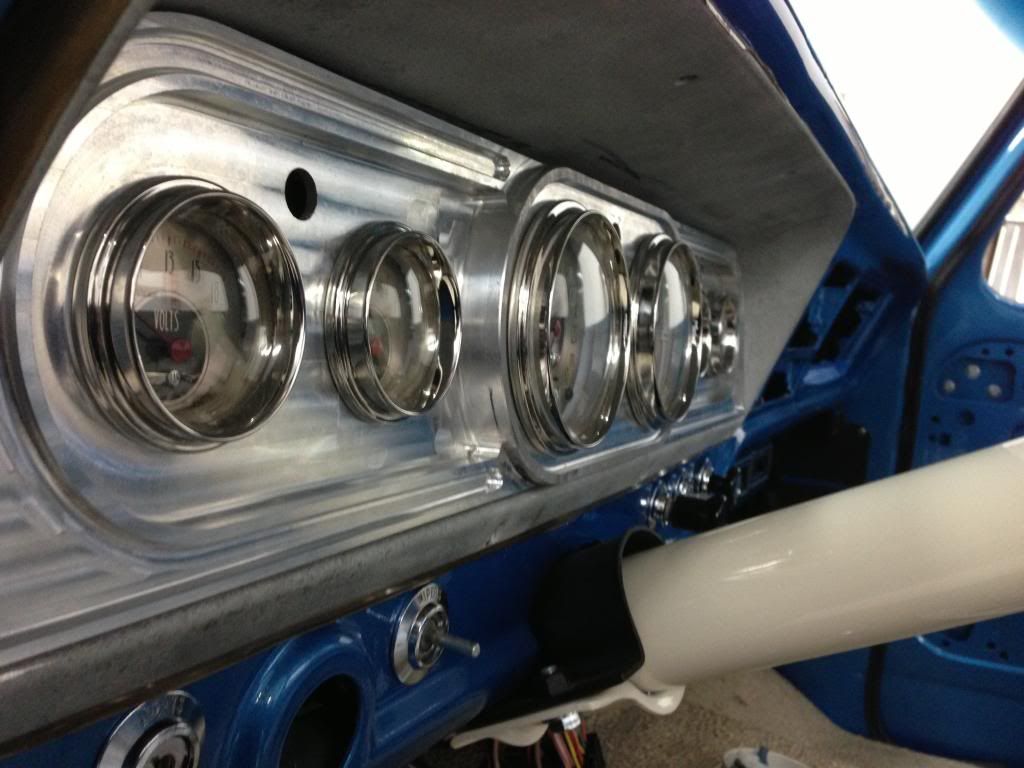
- Custom designed (by me) Instrument panel has been machined and test fit - deciding on final finish/color before final install.

And here's some photo's to go along with the above; (several more on previous pages obviously)
Image

Image

Image

Image

Image

Image

Image
User avatar
tylerb43
Preferred User
Preferred User
Posts: 492
Joined: Fri Nov 14, 2008 2:54 pm
Location: Union, MO

Re: 1969 Ranger - Project Glory Days!

Post by tylerb43 »

On the gauges/bezel, the gauges I'm using are Classic Instruments All American Nickel Series (all electric). Now, how I came to decide on aftermarket gauges is a long story, but I'll skip to the part where I decided on this particular set, and stumbled on this set on ebay unused, NIB for a great price, so I grabbed them.

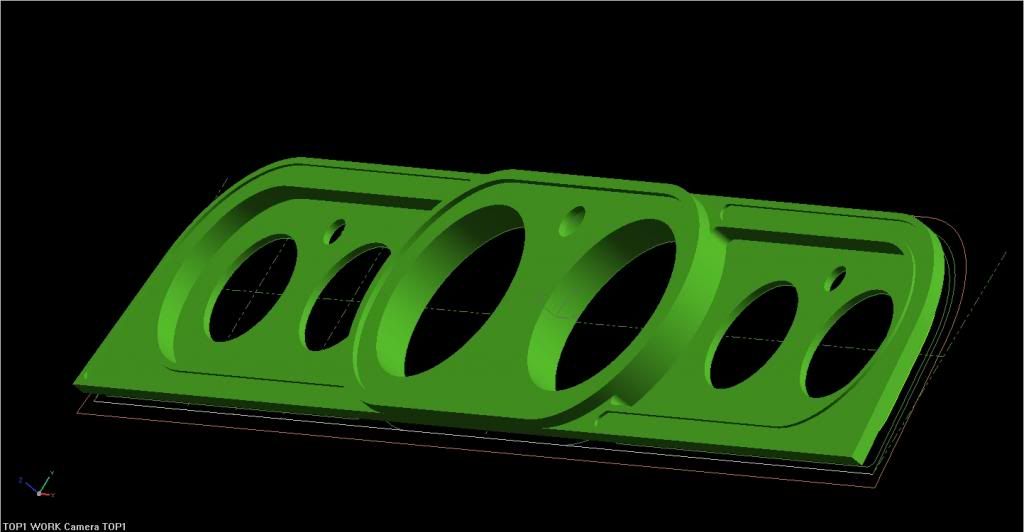
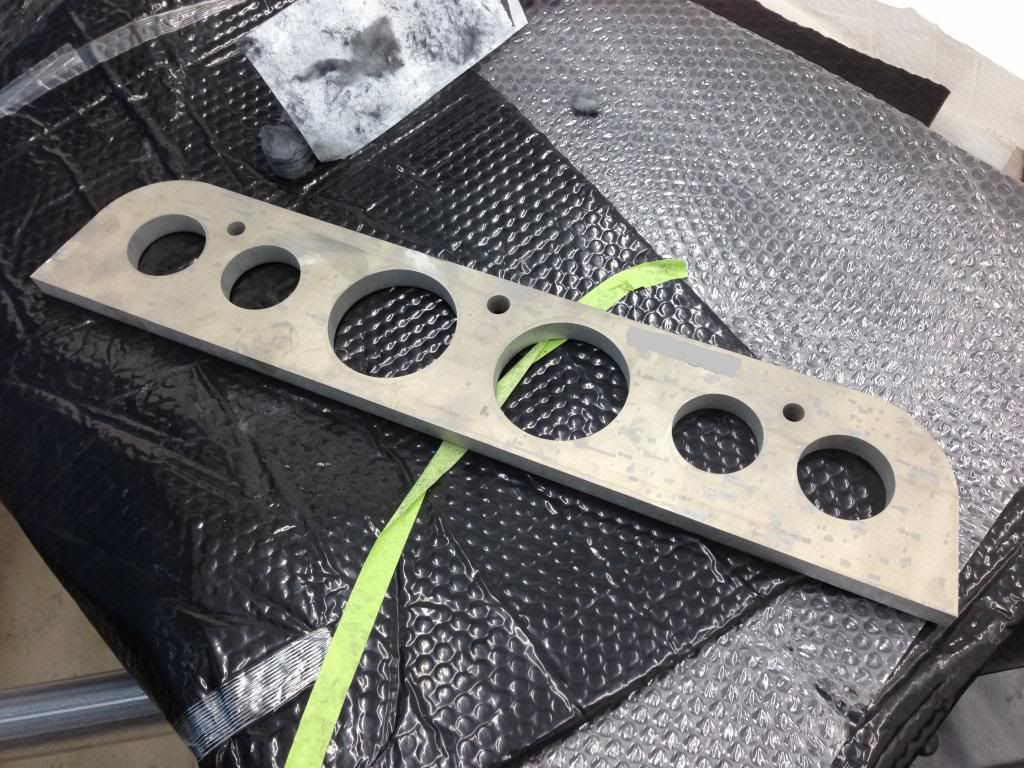
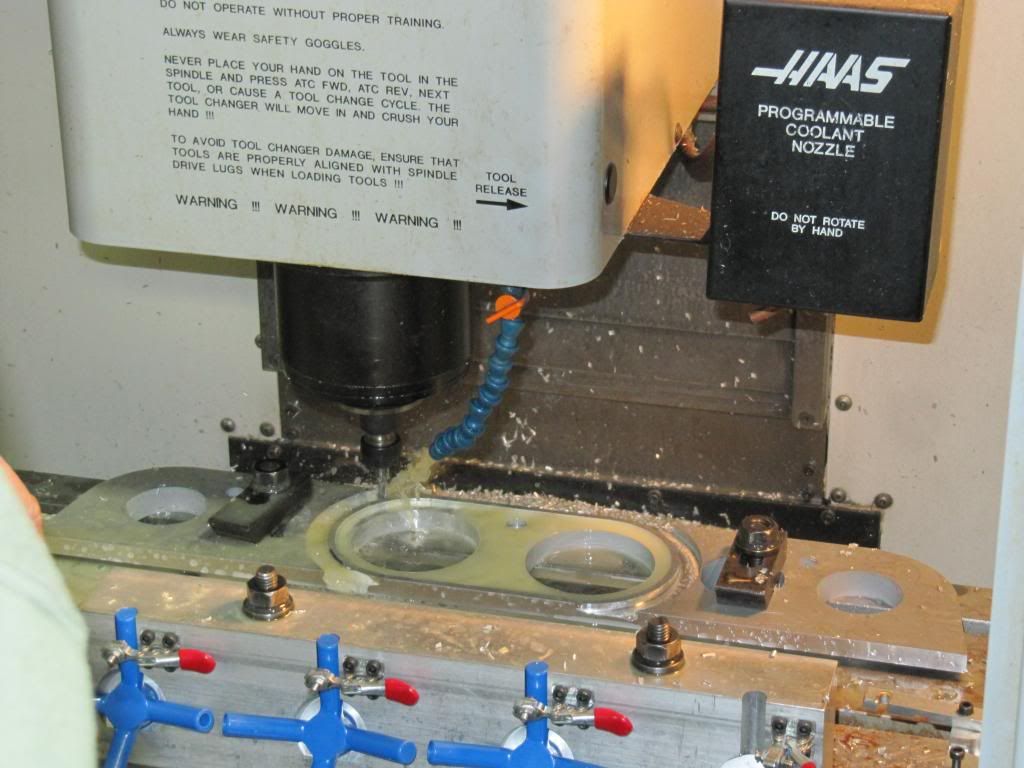
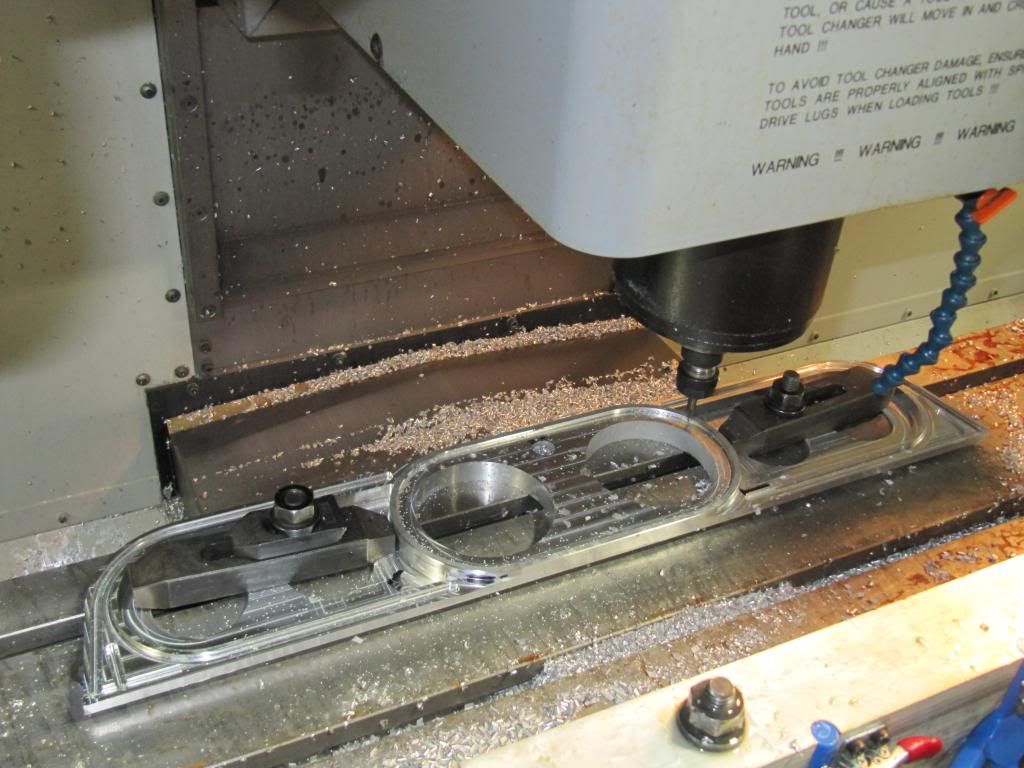
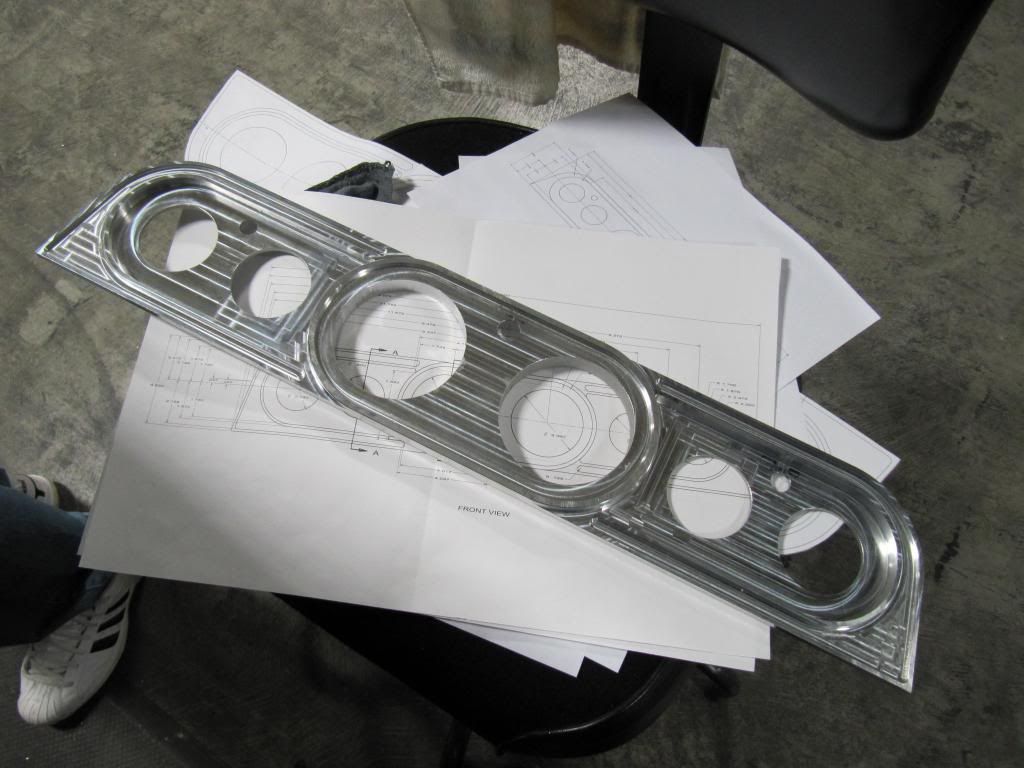
Then I turned my attention to the bezel itself. I wanted something to compliment the awesome design of the gauges. So I came up with a 2-sided machining that would fit inside a trimmed stock metal bezel (from a base model '68 I have). The machining sets the 4 small gauges further back into the bezel, while the tach and speedo are more pronounced, giving a stepped look.

Image

Image

So I had my waterjet source cut the profile out of .750 thick aluminum plate, and couldn't help but test fit the gauges to get a quick visual.

Image

Image

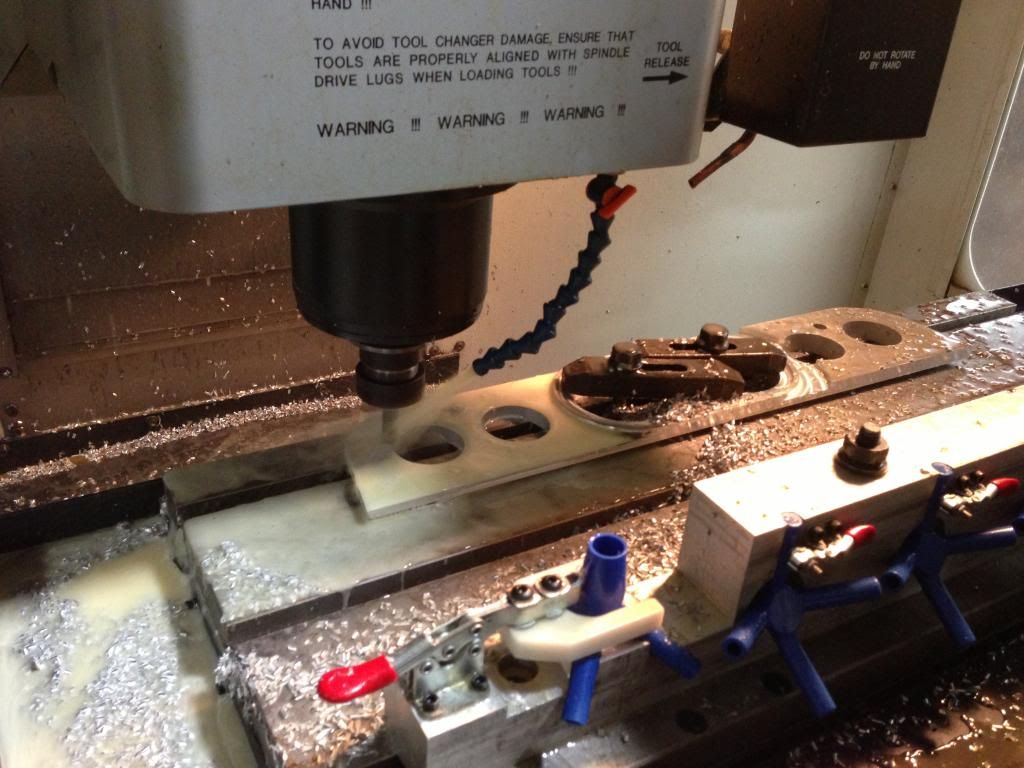
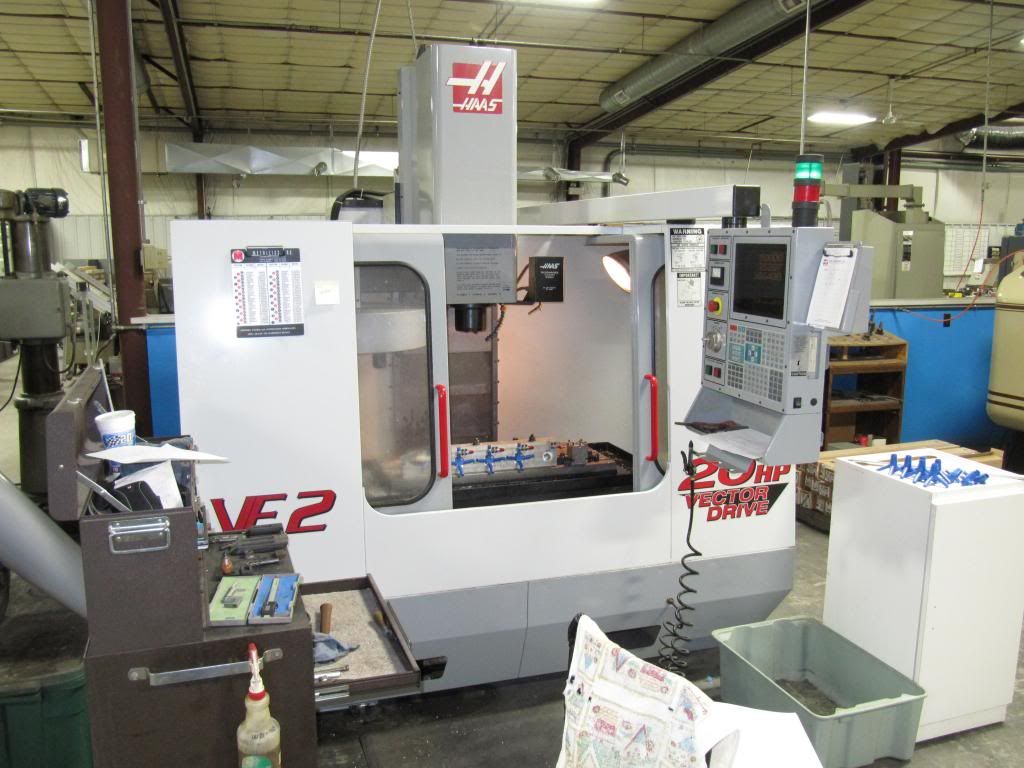
One of my older brother's is a farmer, but he's also a machinist (which I think is a kick-ass combination). So he has access to a Haas VF-2, and we started cutting one night at the machine shop after hours...

Image

Image

Image

The part came out freaking perfect. My brother is a perfectionist (most machinist are) and even though I kept telling him "close enough, it's just for a truck", he couldn't help it and every surface is down to the .0002". Yes, that's 2/10's of 1 thousandth..crazy. You can see the cutting marks, but you can't feel them. I couldn't wait to get home and throw it in the dash for a test fit. :woohoo:

Image

Image

Image

So there it is, my latest idea proudly brought to life. But now the problem is - how do I finish it? I want to polish it, and maybe fill the outer insets with black vinyl to highlight the shapes (it's actually kinda hard to see in my crappy pictures - sorry) But what about the metal surround? Paint it blue? Argent silver? Chrome? :hmm: Decisions yet to be made here...
Last edited by tylerb43 on Wed Apr 17, 2013 9:34 am, edited 1 time in total.
cole71
Preferred User
Preferred User
Posts: 442
Joined: Tue Aug 02, 2011 11:27 pm
Location: Tallapoosa, Georgia

Re: 1969 Ranger - Project Glory Days!

Post by cole71 »

Man that bezel is badass! Personally, I would try to polish it on a polishing wheel on a bench grinder the best I could. If that didn't suit me I would go another direction. Again this is just my opinion.
User avatar
Cipher43
New Member
New Member
Posts: 227
Joined: Wed Oct 17, 2012 7:31 am
Location: Storm Lake IA

Re: 1969 Ranger - Project Glory Days!

Post by Cipher43 »

WOW love the progress you have made and definitely love the vintage air box look. All good things come with time so those little details will payoff someday....... with that said I cant wait to see this thing on the road.

I am surprised you haven't tried to have your brother make you an aluminum surround that would look like the original but better with your insert you have. If you don't have him do that I would personally paint it black or silver since your dash is blue. Unless you are putting a dash pad on then blue would look good too.
Greg
My Toys
Image...... Image......Image......Image
......1969 F-100................1968 F-250...........................57 S-100 IHC................71 CL350, 73CL450

original 360, T18 tranny, 9" with 3.25s

Project Rejuvenate Bill
http://www.fordification.com/forum/view ... 22&t=69060
User avatar
sargentrs
100% FORDified!
100% FORDified!
Posts: 9866
Joined: Fri Jun 22, 2007 9:30 am
Location: Georgia, Jasper

Re: 1969 Ranger - Project Glory Days!

Post by sargentrs »

Man, Tyler, that bezel is awesome! Excellent work. Everything looks fantastic!
Randy
1970 F100 Sport Custom Limited LWB, 302cid, 3 on the tree. NO A/C, NO P/S, NO P/B. Currently in 1000 pcs while rebuilding. Project thread: http://www.fordification.com/forum/view ... 22&t=59995 Plan: 351w, C4, LSD, pwr front disc, p/s, a/c, bucket seats, new interior and paint.
1987 F-150 XLT Lariat, 5.0/C6 auto.
User avatar
SATURN5
New Member
New Member
Posts: 157
Joined: Tue Oct 02, 2012 1:08 pm
Location: Kettering, Oh

Re: 1969 Ranger - Project Glory Days!

Post by SATURN5 »

Paint the outer to match the steering column and clear anodize the billet bezel. Nice work!
Bob
68 F100 Flareside, CVIFS, Cobra IRS, DOHC, M122, MS3, T45, 4.10, Cobra brakes
84 Mustang SVO, B234F, HE351, Full Cobra spec suspension and brakes including IRS, T-tops
96 Mark VIII, Complete chassis bracing, 03 Cobra wheels, Maruader converter, built trans.
jrreed1634
New Member
New Member
Posts: 103
Joined: Sat Jan 22, 2011 3:29 pm
Location: Hudsonville, MI

Re: 1969 Ranger - Project Glory Days!

Post by jrreed1634 »

I agree with the last post. The steering column color would give it a nice offset color to the blue. Great work on everything, espeically the gauges. Looks awesome.
User avatar
tylerb43
Preferred User
Preferred User
Posts: 492
Joined: Fri Nov 14, 2008 2:54 pm
Location: Union, MO

Re: 1969 Ranger - Project Glory Days!

Post by tylerb43 »

Thanks Guys! And thanks for the suggestions. I like the idea of using the cream color somehow. I love this blue, but you can easily do too much, and throw off the balance. And Greg, I smoothed the dash, so no dash pad will be used. The steering wheel is also the cream color, so I think I'll have to get the seat and wheel in the picture to be able to make a final decision... Hmm :hmm:


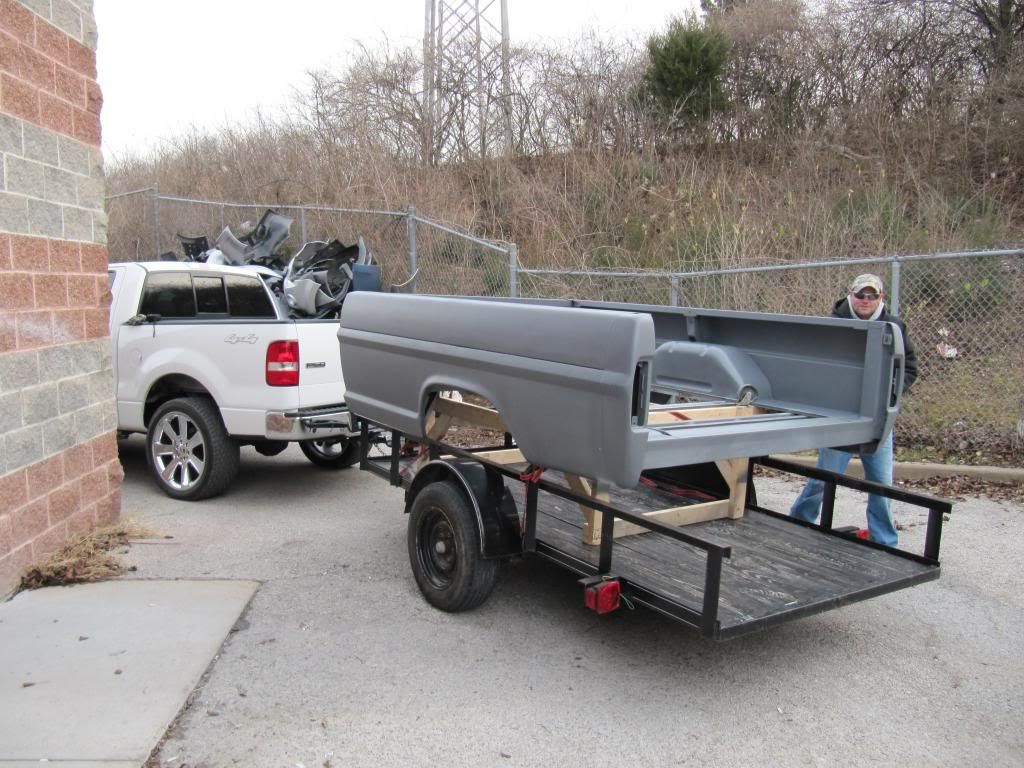
And in the "state of the project", I forgot to update you guys on the bed. I dropped it off at the body shop several months ago, will all the metal work finished by me, but will all the body work to do. Remember - the biggest changes are the fact that I cut out the floor to be replaced with wood, and I replaced a bedside. This is my brother's shop, which is a pretty high-end collision shop. They jump on the bed only during short down times in between the big money jobs, so I'm totally fine with them taking awhile. With my progress being so slow at home, it's not like I'm waiting on it anyway. :) Besides, these guys do excellent work, like - amazing. So, I'm fine with the time they take.

Anyway, here's me and my younger brother hauling it to the bodyshop. The dolly I built for it also flips over and doubles as a transport stand. It worked great on my little trailer for the short, 45 minute ride. I got a couple "thumbs up" on the interstate on the way, which was pretty cool, I was surprised that some felt that even seeing a piece of an old truck is "thumbs up" worthy...there may be hope for this world yet. :thup:

Image
Last edited by tylerb43 on Thu Apr 18, 2013 8:33 am, edited 1 time in total.
Post Reply