Calf's 69 Crew build, and CNM67's 67 shorty build
Moderator: FORDification
- Calfdemon
- 100% FORDified!
- Posts: 2672
- Joined: Tue May 25, 2010 11:31 pm
- Location: California, Santa Clarita
Re: Calf's 69 Crew build, and CNM67's 67 shorty build
No pictures, but I have been sanding, prepping and painting various parts that I should have done a long time ago... Got out the gloss black and painted my brake and accelerator pedal assemblies, some of my pulleys, my hood latch assembly, my brake booster, my steering column and collars, and a few other miscellaneous parts that will be seen on the gloss black firewall in the engine bay. I painted my kick panel vent dark green, and a second one that I have that I may run on my passenger side as my aftermarket heat and A/C system does not use that kick panel for an air intake. I still have some more engine bay components to paint gloss black (pulleys, power steering system, etc..) but I ran out of gloss black today. So I will need to pick up a few more cans and some more painters tape. Ran out of that too..
Ordered the Moog steering stabilizer that Mancar suggested and also picked up a new pair of radius arm bushings as mine are falling apart. Those are coming from Summit any day now. I also picked up new KYB gas shocks from Shockwarehouse.com, so I will tackle the front end once all the parts get here. Should be a few hundred pounds lighter without the motor in, and a little more room to work in.
I also am going to order the Summit HEI distributor for now. I was going to run a recurved Duraspark with an MSD box, but I fried an MSD box and we installed the other one we had in CNM67's truck. So for now, I think I am just going to try the HEI dizzy and see how that goes. If I don't like it, I still have my Duraspark and can pick up an MSD later. This truck is going to be waaaaay too big and heavy to win any races (looking at you Bobbyford), so I really dont think I am going to notice too much of a difference between the HEI and the MSD setup.
-Rich
Current toys -
69 Ford F350 Crew Cab - 460 / C6 - http://i253.photobucket.com/albums/hh67 ... lqgskp.jpg
31 Ford Vicky - 1955 270 Red Ram Hemi / 4 speed - http://i253.photobucket.com/albums/hh67 ... bsibvn.jpg
Former toys -
67 Pontiac Firebird 400 convertible (sold 9/13) - http://i253.photobucket.com/albums/hh67 ... bird-1.jpg
67 Ford Fairlane GT - 390 / 4 speed (sold 7/15) - http://i253.photobucket.com/albums/hh67 ... c5hu8z.jpg
- Calfdemon
- 100% FORDified!
- Posts: 2672
- Joined: Tue May 25, 2010 11:31 pm
- Location: California, Santa Clarita
Re: Calf's 69 Crew build, and CNM67's 67 shorty build
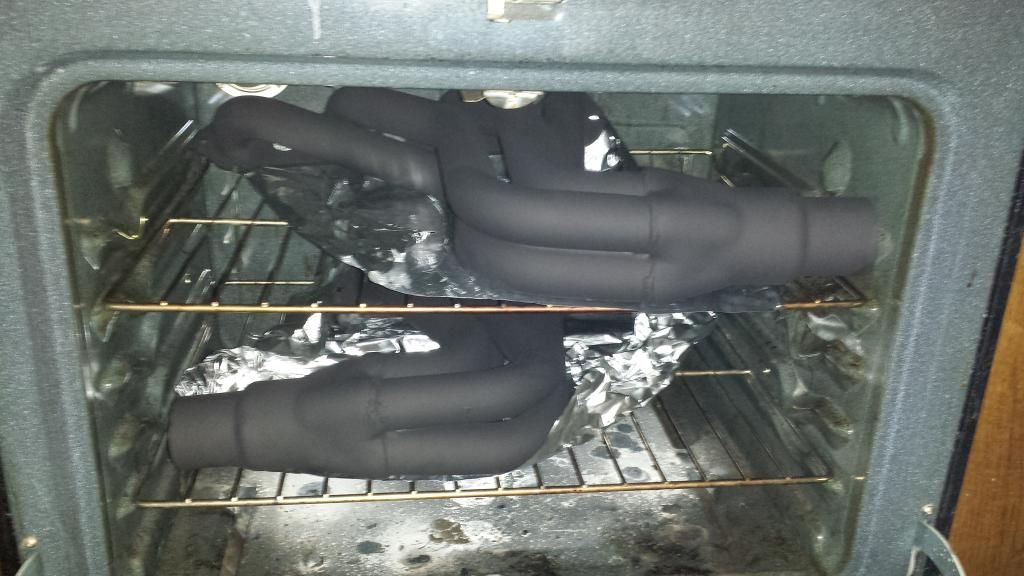
So today I painted my headers with super high temp VHT flat black. Of course, there is a curing process that goes along with using that paint. 30 minutes at 250 degrees, 30 minutes cooling. 30 minutes at 400 degrees, 30 minutes cooling. 30 minutes at 600 degrees, 30 minutes cooling. The oven only goes to 550 degrees, so hopefully 550 at an hour will make up that difference?? I dunno... All I know is the wife came home after running errands during hour 2 and for some reason is upset with me!
Its better to ask forgiveness than to ask permission!
-Rich
Current toys -
69 Ford F350 Crew Cab - 460 / C6 - http://i253.photobucket.com/albums/hh67 ... lqgskp.jpg
31 Ford Vicky - 1955 270 Red Ram Hemi / 4 speed - http://i253.photobucket.com/albums/hh67 ... bsibvn.jpg
Former toys -
67 Pontiac Firebird 400 convertible (sold 9/13) - http://i253.photobucket.com/albums/hh67 ... bird-1.jpg
67 Ford Fairlane GT - 390 / 4 speed (sold 7/15) - http://i253.photobucket.com/albums/hh67 ... c5hu8z.jpg
Current toys -
69 Ford F350 Crew Cab - 460 / C6 - http://i253.photobucket.com/albums/hh67 ... lqgskp.jpg
31 Ford Vicky - 1955 270 Red Ram Hemi / 4 speed - http://i253.photobucket.com/albums/hh67 ... bsibvn.jpg
Former toys -
67 Pontiac Firebird 400 convertible (sold 9/13) - http://i253.photobucket.com/albums/hh67 ... bird-1.jpg
67 Ford Fairlane GT - 390 / 4 speed (sold 7/15) - http://i253.photobucket.com/albums/hh67 ... c5hu8z.jpg
- Alstoyz
- Preferred User
- Posts: 289
- Joined: Thu Aug 16, 2012 10:43 pm
- Location: Gainesville, Tx
Re: Calf's 69 Crew build, and CNM67's 67 shorty build
Rich. You are a braver man than I, my friend. The crew is looking AWSOME!!!
1970 F-100 SWB Tubbed
1971 F-350 4X4 (traded for 71 crewcab)
1971 F-250 Crew-Cab Dually
1972 F-100 SWB 4X4
1972 F-350 Crew-Cab 4X4 Dually
2001 F-350 Crew-Cab Short Bed 4X4 Dually
1971 F-350 4X4 (traded for 71 crewcab)
1971 F-250 Crew-Cab Dually
1972 F-100 SWB 4X4
1972 F-350 Crew-Cab 4X4 Dually
2001 F-350 Crew-Cab Short Bed 4X4 Dually
- fbomb100
- Blue Oval Fanatic
- Posts: 820
- Joined: Tue Jun 02, 2009 10:51 pm
- Location: palmdale,calf
Re: Calf's 69 Crew build, and CNM67's 67 shorty build
did the smell of the house tip her off.. I did it once in mine and the oven smelled that way for a week let alone the house for 2 days
- Calfdemon
- 100% FORDified!
- Posts: 2672
- Joined: Tue May 25, 2010 11:31 pm
- Location: California, Santa Clarita
Re: Calf's 69 Crew build, and CNM67's 67 shorty build
What tipped her off was her coming home while they were cooking and catching me in the act. She called it my "pipe roast".fbomb100 wrote:did the smell of the house tip her off.. I did it once in mine and the oven smelled that way for a week let alone the house for 2 days
Anyway, the smell wasn't too bad as I had the vent fan on full blast and had the door to the outside open, so the smell did not linger long after it was done.
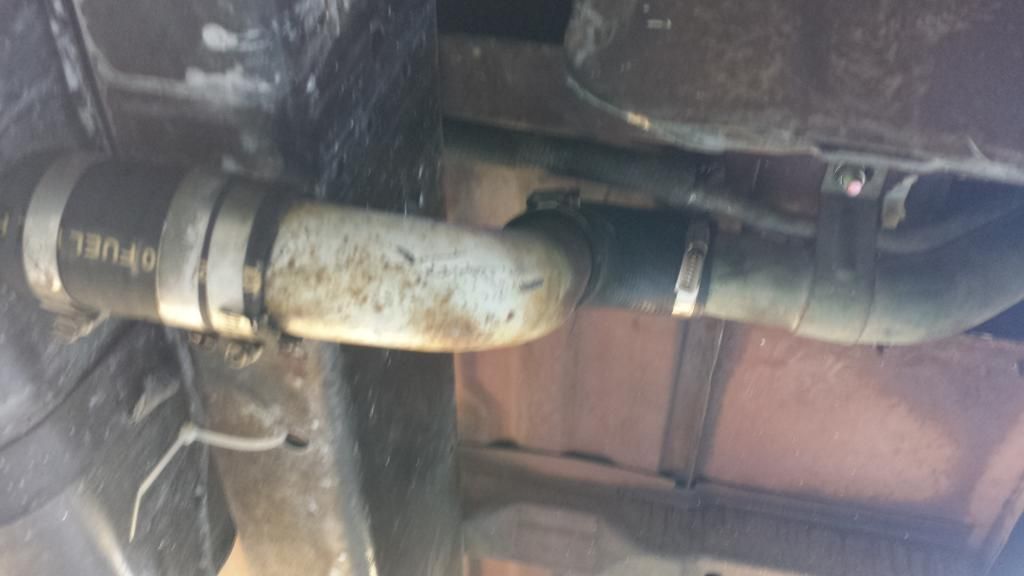
So I have been plugging away every day getting little things done here and there. Got the entire fuel system up to the engine bay done. Blew out all the old line and replaced all of the rubber. I also needed to figure out a fill tube method for the undercab tank. My truck has the rare crew cab tank which is different than the normal undercab tank, and then to top it off, this truck had a service bed on it originally with a fill location that is different than a normal bump. With the long bed from my 72 now sitting on the frame, the fill location and fill tube is a bit different than this truck originally had. The thing that took a while was trying to figure out how to run from the 2 1/4" fill spout to the tank pipe which is less than 2". I ended up finding a radiator hose at the autopart store which had a 45 degree bend in it and was 2 1/4 at one end and 2 at the other. I cut the hose to where I needed it and then used a bent piece of old exhaust (cleaned well of course) as the lower bend. Took a while to figure out and some time in the auto part store, but it all worked out in the end for about $25.
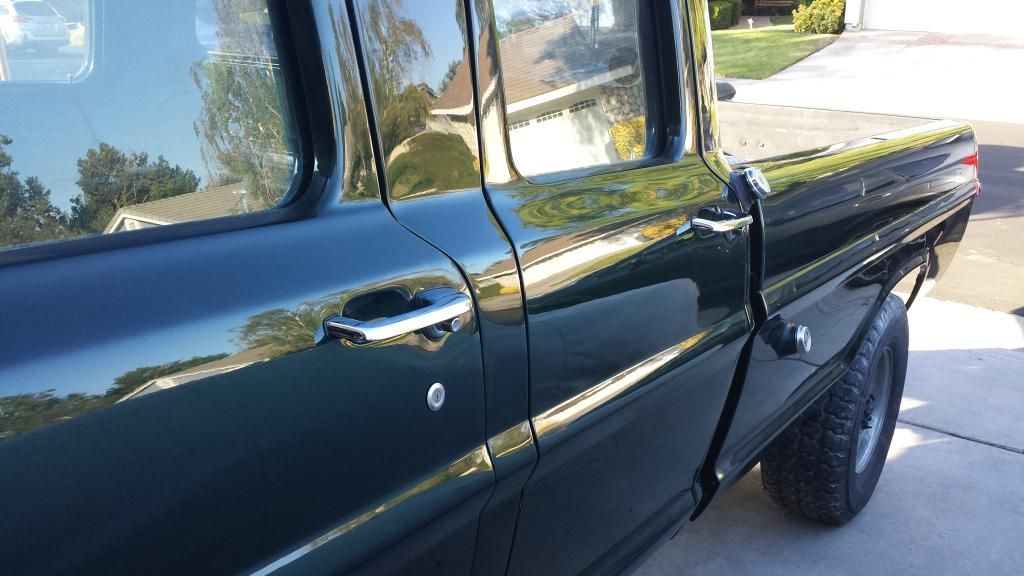
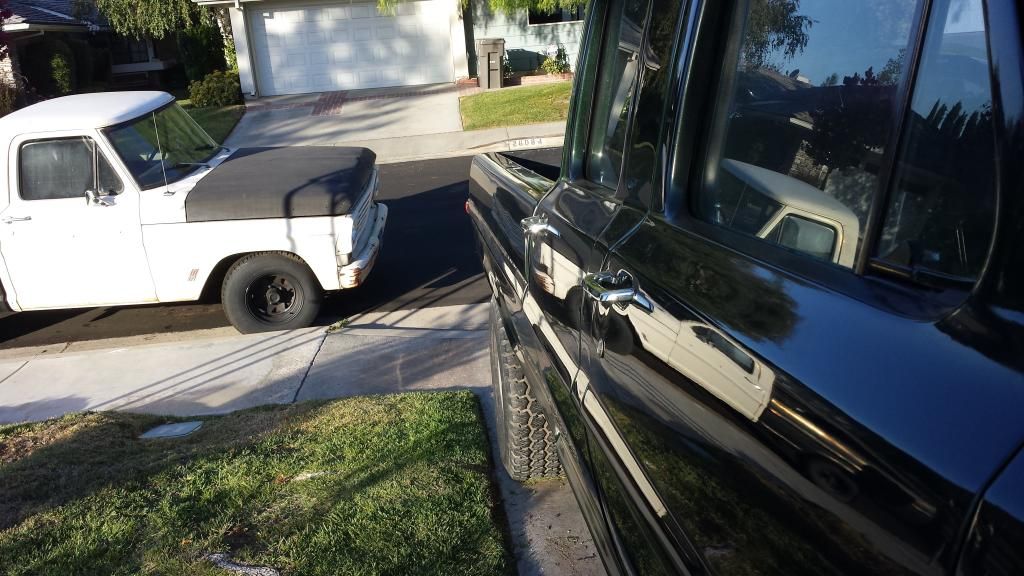
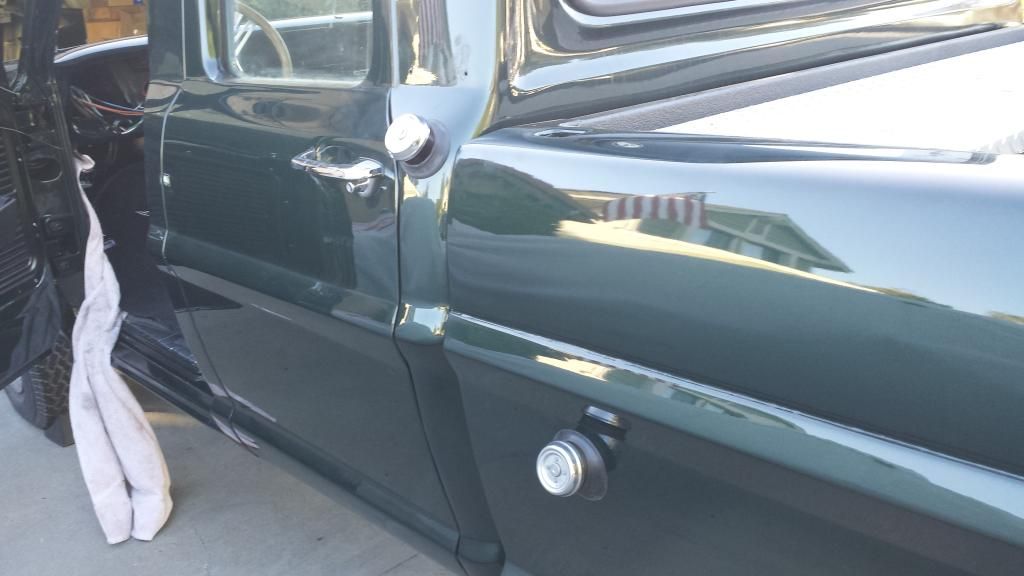
Some gratuitous shots of the outside of the tuck with new door handles and gas caps installed:
The bed looks like it is not lined up in the first picture, but it is. Just came out that way in the picture.
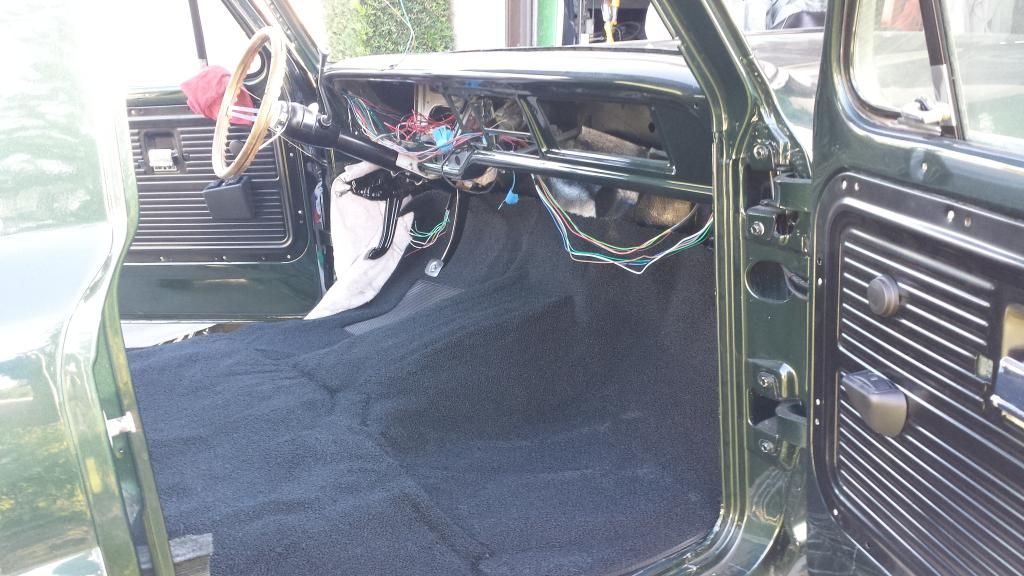
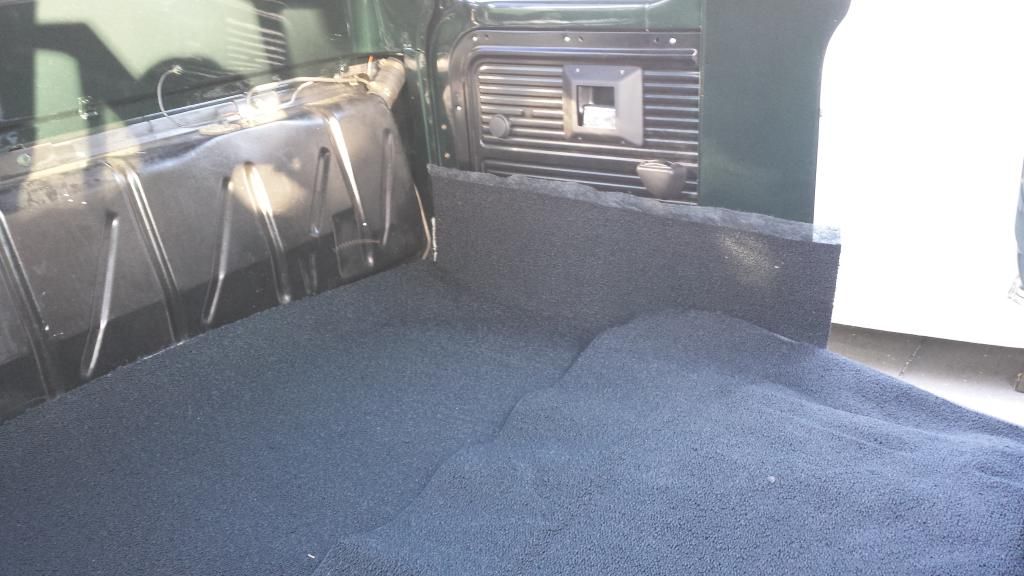
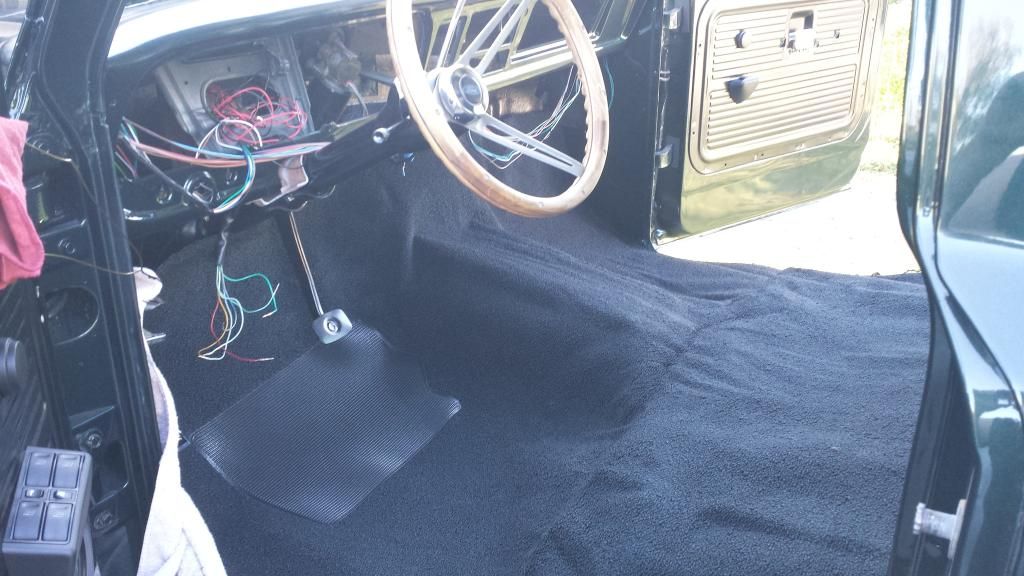
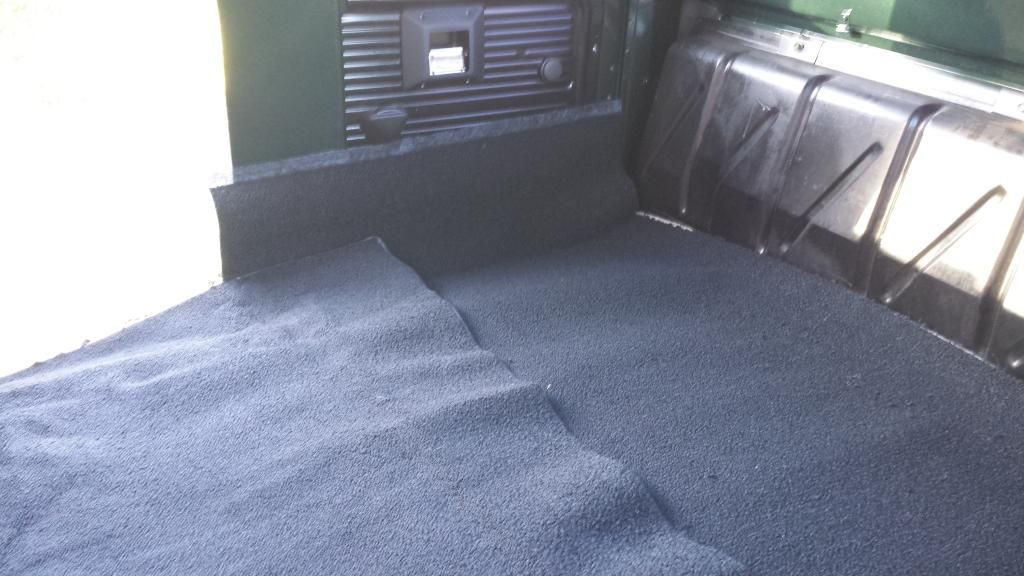
I got the steering completely installed along with the wiper system and the brake booster. I pulled my carpet down from the garage rafters where it has been in the shipping boxes for over 2 years. Needless to say, it took several hours in the hot California sun to get it to lie down right after I unrolled it. I layed it in the truck for test fitting purposes and it seems to be lining up every where rather nicely. I will be marking and cutting it probably this afternoon and get it installed properly so I can finish up my firewall pad and at least get the rear seat in the truck. I need to get my headliner painted and installed as well.
Here it is with the carpet just laid inside. It is actually starting to look like a truck interior and less of a messy workspace.
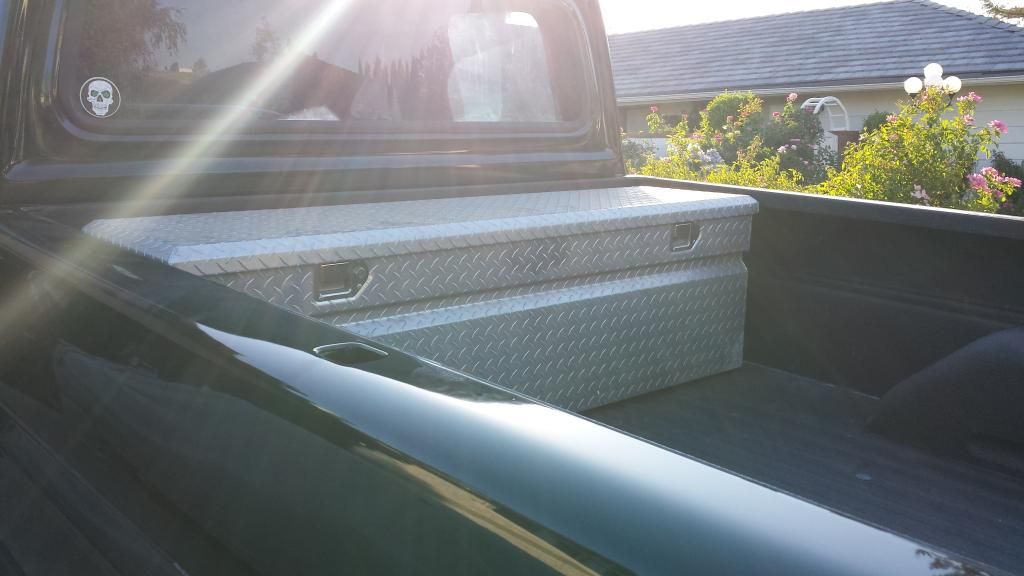
I also needed to install my bed toolbox as 2 of the bolts that hold it down inside are the same bolts that hold down my filler cover in the bed, and hold the fill tube to the bed on the underside of the truck. So at least that freed up a bit of space on my garage shelves.
Still waiting on some of my front suspension components so I can install all of that without the weight of the motor on them. Once I get the front suspension taken care of, it wont be long before the motor and tranny are stabbed back into the beast... Then comes the wiring.
-Rich
Current toys -
69 Ford F350 Crew Cab - 460 / C6 - http://i253.photobucket.com/albums/hh67 ... lqgskp.jpg
31 Ford Vicky - 1955 270 Red Ram Hemi / 4 speed - http://i253.photobucket.com/albums/hh67 ... bsibvn.jpg
Former toys -
67 Pontiac Firebird 400 convertible (sold 9/13) - http://i253.photobucket.com/albums/hh67 ... bird-1.jpg
67 Ford Fairlane GT - 390 / 4 speed (sold 7/15) - http://i253.photobucket.com/albums/hh67 ... c5hu8z.jpg
Current toys -
69 Ford F350 Crew Cab - 460 / C6 - http://i253.photobucket.com/albums/hh67 ... lqgskp.jpg
31 Ford Vicky - 1955 270 Red Ram Hemi / 4 speed - http://i253.photobucket.com/albums/hh67 ... bsibvn.jpg
Former toys -
67 Pontiac Firebird 400 convertible (sold 9/13) - http://i253.photobucket.com/albums/hh67 ... bird-1.jpg
67 Ford Fairlane GT - 390 / 4 speed (sold 7/15) - http://i253.photobucket.com/albums/hh67 ... c5hu8z.jpg
- Calfdemon
- 100% FORDified!
- Posts: 2672
- Joined: Tue May 25, 2010 11:31 pm
- Location: California, Santa Clarita
Re: Calf's 69 Crew build, and CNM67's 67 shorty build
So I am still waiting on my radius arm bushings to arrive before I dive into the front suspension, but in the meantime, I cut the carpet to fit and buttoned down all of the rear cab carpeting and the driver's side carpeting. I left the passenger side unsecured for now so I can fold it back and access the trans cover when we stab the motor and tranny into the truck. I did not take pictures of the carpet install yet as I forgot, but I will take some next time I have the cover off the truck as I am pretty happy with how it looks with the painted sills installed and how the carpet laid down on the rear steps.
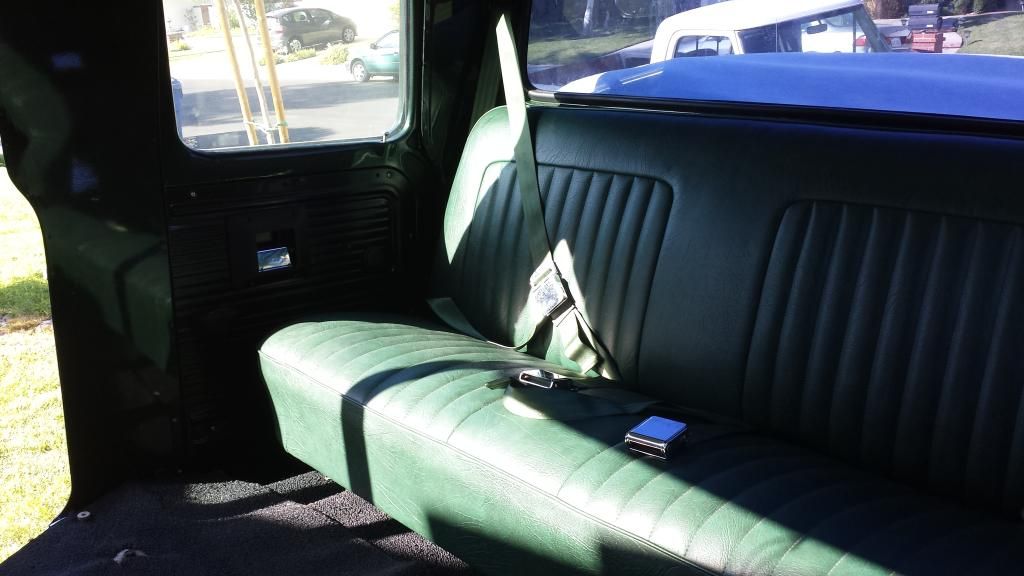
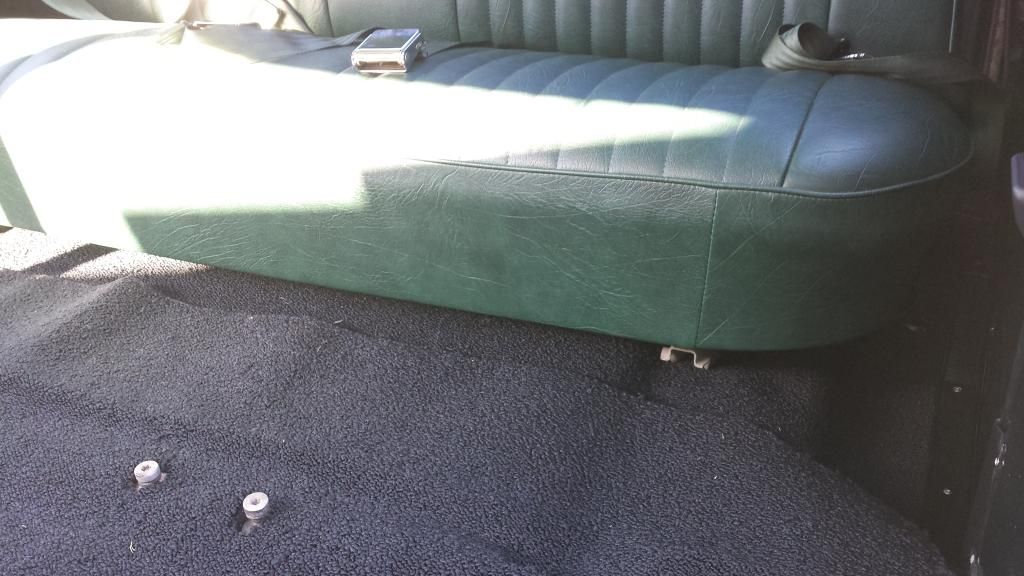
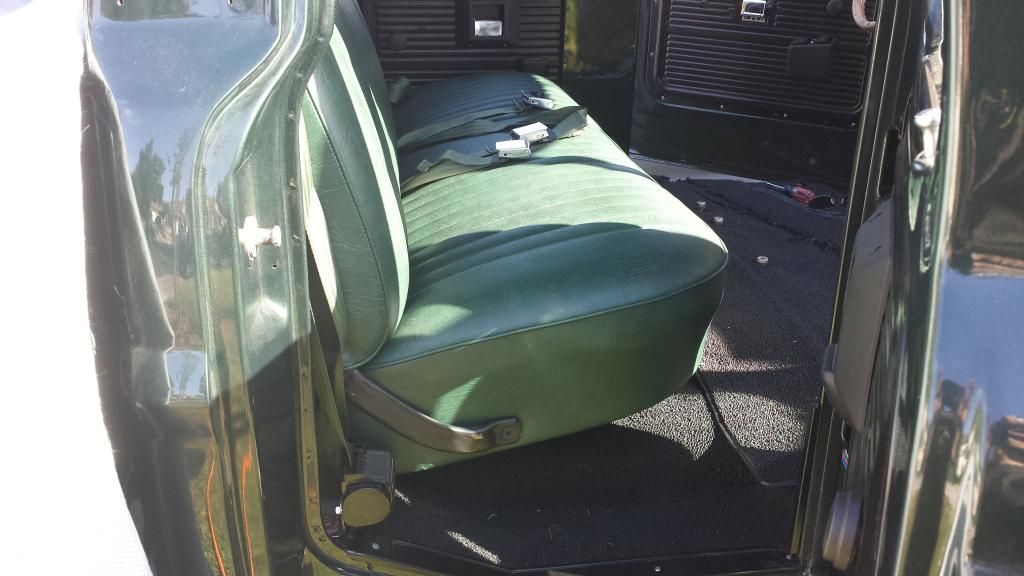
Anyway, since I am done with the back half of the cab, I decided to put the rear seat in the truck for 2 reasons. One being that it is part of what secures the carpet, and two because that is another large part that is out of my garage making a little more room. I also installed all 3 of the rear seat belts as well since that goes hand in hand with the rear seat. I did take some pictures of the seat installed though. I am rather happy with the look of the seat in the truck. The vinyl that I had the seats done in are a dark green with a black marbling in it. It really goes with the green and black theme of my truck. The wife helped me install the seat as she has been wanting to wrench on the truck. So this is the second weekend in a row she had braved the heat and helped me do some stuff. The only problem with that was she HATED the truck when I first got it and it was ugly. She could not see the potential in it and cursed it from the day I got it. Now that it is looking great and coming together, she is trying to claim it and is telling me it is her truck. Ain't gonna happen! I promised to build her something after the truck is done and I finish the Fairlane. So the next project is hers...
Anyway, here is the rear seat and seat belts installed. Now I have a comfy place to sit when I need to take a break while working in the truck.
Today was also a day with mostly dead air finally... While it sucked because a breeze would have been nice when it was over 100 outside, I was finally able to paint my headliner pieces. So got the headliners shot in gloss black (rattle can) and they are now drying in the garage. Once I get the trim all polished up, I will be able to get the headliner squared away. Little things here and there, but it is coming together!
Last edited by Calfdemon on Tue Jul 15, 2014 8:24 pm, edited 1 time in total.
-Rich
Current toys -
69 Ford F350 Crew Cab - 460 / C6 - http://i253.photobucket.com/albums/hh67 ... lqgskp.jpg
31 Ford Vicky - 1955 270 Red Ram Hemi / 4 speed - http://i253.photobucket.com/albums/hh67 ... bsibvn.jpg
Former toys -
67 Pontiac Firebird 400 convertible (sold 9/13) - http://i253.photobucket.com/albums/hh67 ... bird-1.jpg
67 Ford Fairlane GT - 390 / 4 speed (sold 7/15) - http://i253.photobucket.com/albums/hh67 ... c5hu8z.jpg
Current toys -
69 Ford F350 Crew Cab - 460 / C6 - http://i253.photobucket.com/albums/hh67 ... lqgskp.jpg
31 Ford Vicky - 1955 270 Red Ram Hemi / 4 speed - http://i253.photobucket.com/albums/hh67 ... bsibvn.jpg
Former toys -
67 Pontiac Firebird 400 convertible (sold 9/13) - http://i253.photobucket.com/albums/hh67 ... bird-1.jpg
67 Ford Fairlane GT - 390 / 4 speed (sold 7/15) - http://i253.photobucket.com/albums/hh67 ... c5hu8z.jpg
- Calfdemon
- 100% FORDified!
- Posts: 2672
- Joined: Tue May 25, 2010 11:31 pm
- Location: California, Santa Clarita
Re: Calf's 69 Crew build, and CNM67's 67 shorty build
Did one of my FAVORITE things to do today...
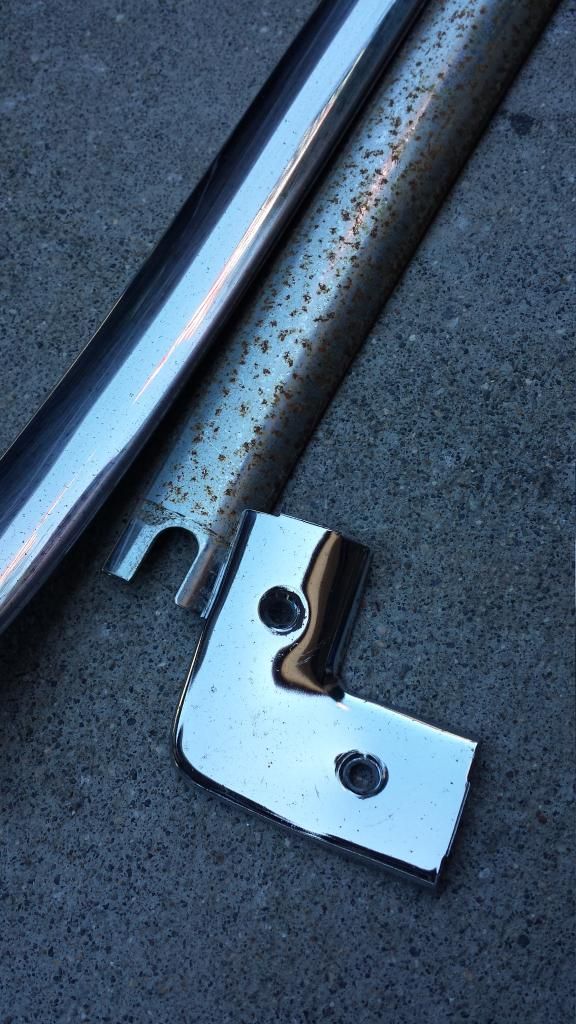
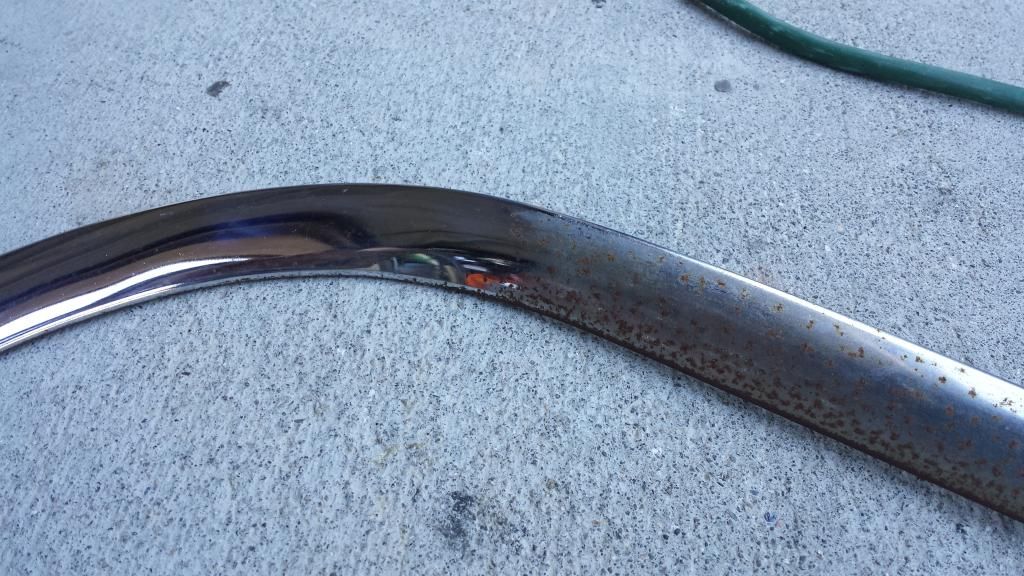
I spent 4 hours polishing rusty chrome to get all of the rust off and make it presentable again. Now that I am done with the pieces, I am happy. But I was almost at the point of just sanding them and painting them black. My fricken arm hurts from the monotony of polishing all that chrome. A standard cab headliner only has 4 pieces of trim with 2 corner pieces. My crew cab has 8 large pieces and 4 corners. To make matters worse, my trim had 45 years of rust on them over the chrome. I went through about 3 pieces of steel wool and half a tube of Simichrome polish, but finally finished. Painted a few more pieces I needed today and ran the electrical to my rear view mirror location as I am installing a newer rear view mirror I pulled from the junkyard that has the built in map lights. I hope to have the headliner up in the next few days.
I wish I had taken pictures of all the headliner trim at the start, but thought to do it when i was about halfway done. Every piece was as bad as the rusted piece in these photos, if not worse. So you get the idea of what I had to go through. But you can see that the finished pieces look almost new. So it was worth the work.
-Rich
Current toys -
69 Ford F350 Crew Cab - 460 / C6 - http://i253.photobucket.com/albums/hh67 ... lqgskp.jpg
31 Ford Vicky - 1955 270 Red Ram Hemi / 4 speed - http://i253.photobucket.com/albums/hh67 ... bsibvn.jpg
Former toys -
67 Pontiac Firebird 400 convertible (sold 9/13) - http://i253.photobucket.com/albums/hh67 ... bird-1.jpg
67 Ford Fairlane GT - 390 / 4 speed (sold 7/15) - http://i253.photobucket.com/albums/hh67 ... c5hu8z.jpg
Current toys -
69 Ford F350 Crew Cab - 460 / C6 - http://i253.photobucket.com/albums/hh67 ... lqgskp.jpg
31 Ford Vicky - 1955 270 Red Ram Hemi / 4 speed - http://i253.photobucket.com/albums/hh67 ... bsibvn.jpg
Former toys -
67 Pontiac Firebird 400 convertible (sold 9/13) - http://i253.photobucket.com/albums/hh67 ... bird-1.jpg
67 Ford Fairlane GT - 390 / 4 speed (sold 7/15) - http://i253.photobucket.com/albums/hh67 ... c5hu8z.jpg
- BobbyFord
- 100% FORDified!
- Posts: 5373
- Joined: Sun Feb 04, 2007 9:52 am
- Location: Chatsworth, California
Re: Calf's 69 Crew build, and CNM67's 67 shorty build
Wow, some real progress there. The seat looks great.
When's the motor going in?
- Calfdemon
- 100% FORDified!
- Posts: 2672
- Joined: Tue May 25, 2010 11:31 pm
- Location: California, Santa Clarita
Re: Calf's 69 Crew build, and CNM67's 67 shorty build
Hopefully soon... Caleb is moving out and a couple hours away to Palm Desert for work at the end of August, so I definitely hope to have it in before that as it is not something I can do on my hill of a driveway by myself. Of course, you are always welcome to come help.. I definitely will be calling you for the initial start up, but that will be a while as I still have all the wiring and the AC system to look forward to. But hope to have the suspension done this weekend and then the motor and tranny should be soon after that!
-Rich
Current toys -
69 Ford F350 Crew Cab - 460 / C6 - http://i253.photobucket.com/albums/hh67 ... lqgskp.jpg
31 Ford Vicky - 1955 270 Red Ram Hemi / 4 speed - http://i253.photobucket.com/albums/hh67 ... bsibvn.jpg
Former toys -
67 Pontiac Firebird 400 convertible (sold 9/13) - http://i253.photobucket.com/albums/hh67 ... bird-1.jpg
67 Ford Fairlane GT - 390 / 4 speed (sold 7/15) - http://i253.photobucket.com/albums/hh67 ... c5hu8z.jpg
Current toys -
69 Ford F350 Crew Cab - 460 / C6 - http://i253.photobucket.com/albums/hh67 ... lqgskp.jpg
31 Ford Vicky - 1955 270 Red Ram Hemi / 4 speed - http://i253.photobucket.com/albums/hh67 ... bsibvn.jpg
Former toys -
67 Pontiac Firebird 400 convertible (sold 9/13) - http://i253.photobucket.com/albums/hh67 ... bird-1.jpg
67 Ford Fairlane GT - 390 / 4 speed (sold 7/15) - http://i253.photobucket.com/albums/hh67 ... c5hu8z.jpg
- marz68
- Blue Oval Guru
- Posts: 1387
- Joined: Sat Dec 03, 2005 2:25 am
- Location: California, Northridge
- Contact:
- Calfdemon
- 100% FORDified!
- Posts: 2672
- Joined: Tue May 25, 2010 11:31 pm
- Location: California, Santa Clarita
Re: Calf's 69 Crew build, and CNM67's 67 shorty build
Thanks for the compliments guys.
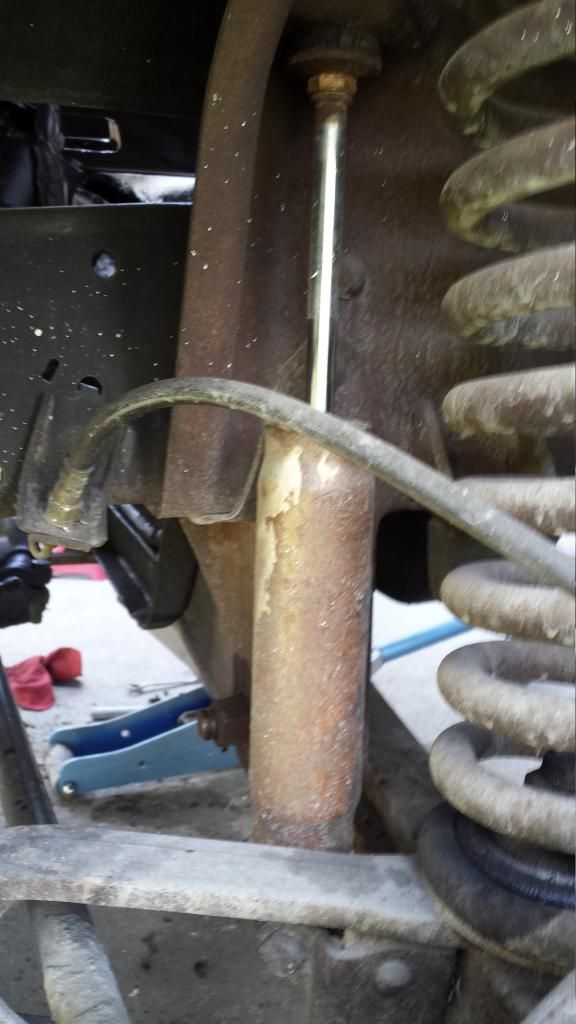
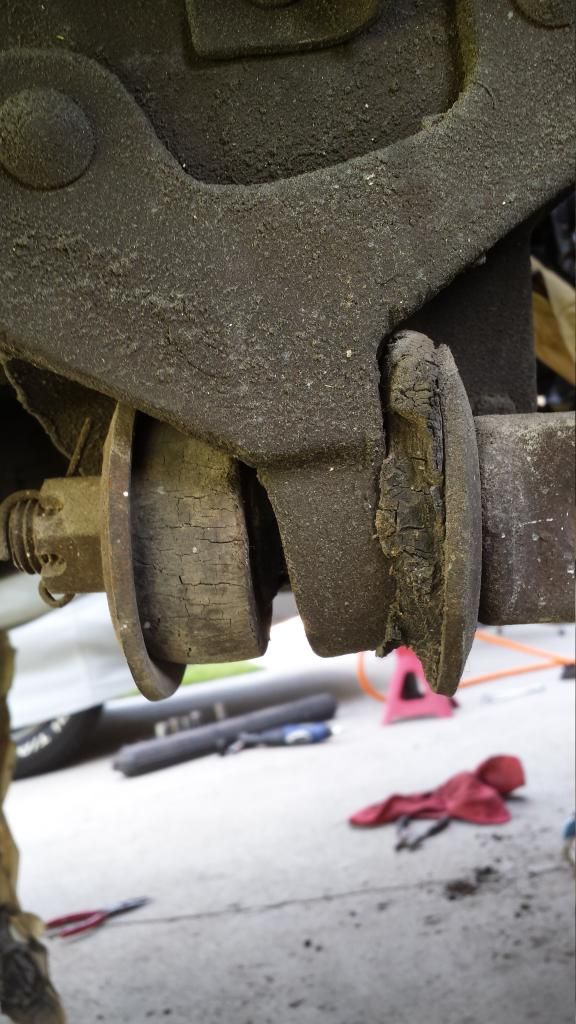
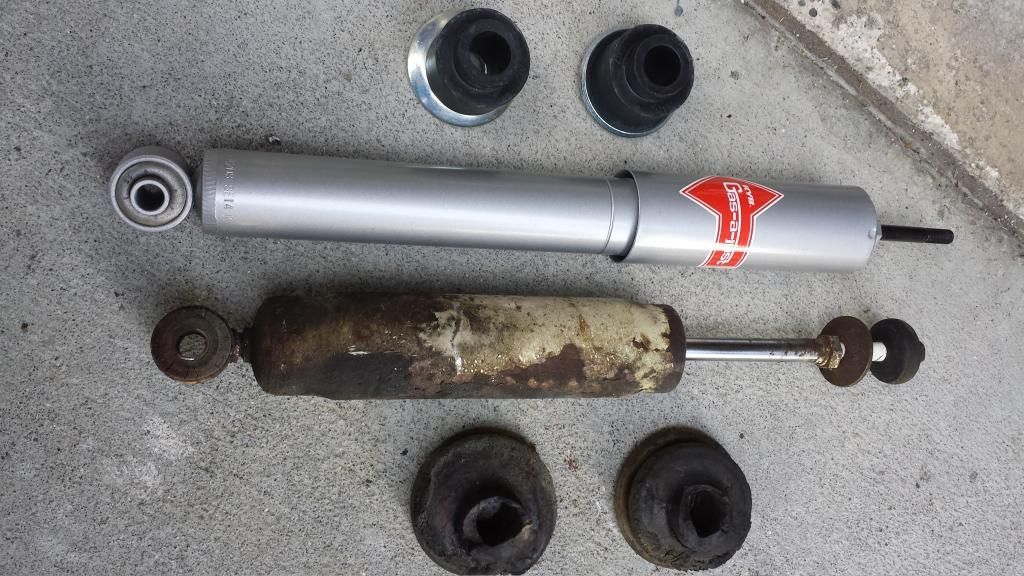
Well, I have not put the headliner in yet as it is a 2 person job and my wife has been sick the last 2 days. So I went ahead and tackled the front suspension today. Took out what appears to be the original radius arm bushing and if they are not the original shocks, they are not much newer! I was able to move the shocks easily by hand and there is almost no resistance on them.
Old crusty shocks:
What was left of my stock radius arm bushings:
Old next to new:
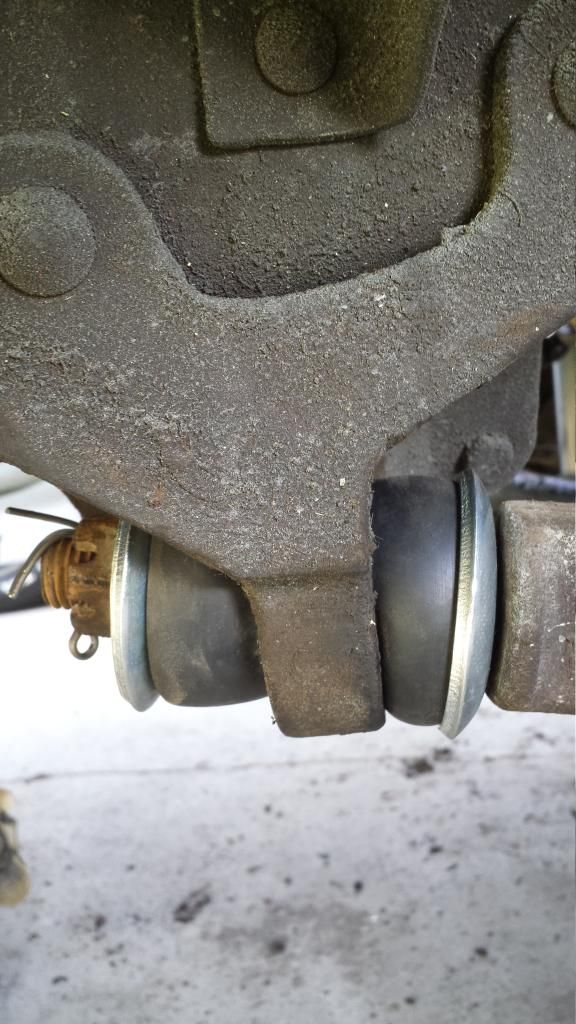
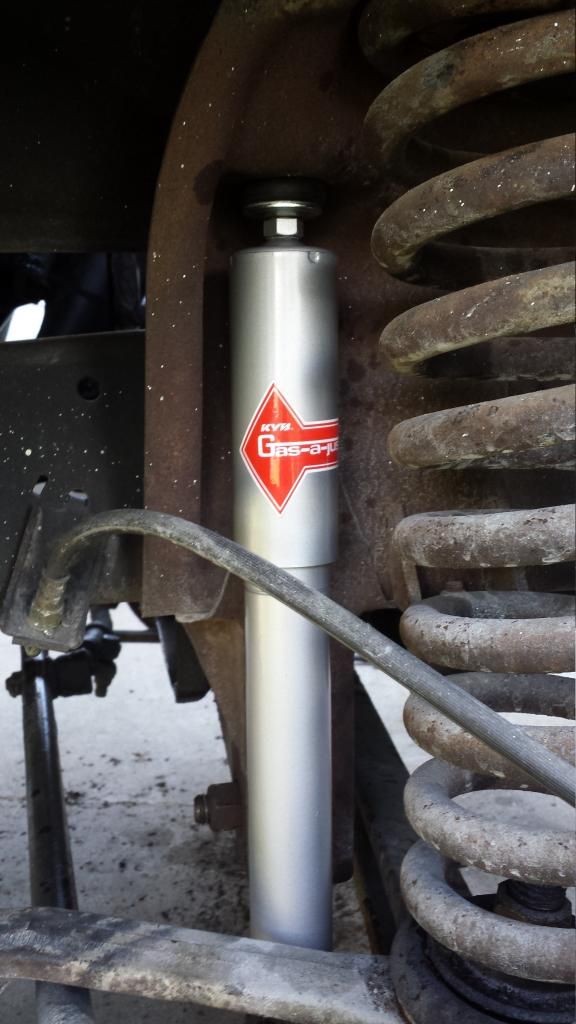
Installed some KYB Gas-a-just shocks that I picked up on sale at shockwarehouse.com and some Moog radius arm bushings I got from summit:
I also picked up the Mood steering stabilizer that Mancar suggested, but decided to hold off on installing it until I have the truck driveable. I want to feel the actual difference that it makes. So I will install it after I have driven the truck. It has been over 2 years since the truck was on the road, so my memory of how it handled is not very fresh. I want to actually appreciate the difference. I also have a rear sway bar that I want to install, but I will do that a little later too.
Now the motor and tranny are pretty much ready to drop in, so that should be in the near future once I line up a little help.
-Rich
Current toys -
69 Ford F350 Crew Cab - 460 / C6 - http://i253.photobucket.com/albums/hh67 ... lqgskp.jpg
31 Ford Vicky - 1955 270 Red Ram Hemi / 4 speed - http://i253.photobucket.com/albums/hh67 ... bsibvn.jpg
Former toys -
67 Pontiac Firebird 400 convertible (sold 9/13) - http://i253.photobucket.com/albums/hh67 ... bird-1.jpg
67 Ford Fairlane GT - 390 / 4 speed (sold 7/15) - http://i253.photobucket.com/albums/hh67 ... c5hu8z.jpg
Current toys -
69 Ford F350 Crew Cab - 460 / C6 - http://i253.photobucket.com/albums/hh67 ... lqgskp.jpg
31 Ford Vicky - 1955 270 Red Ram Hemi / 4 speed - http://i253.photobucket.com/albums/hh67 ... bsibvn.jpg
Former toys -
67 Pontiac Firebird 400 convertible (sold 9/13) - http://i253.photobucket.com/albums/hh67 ... bird-1.jpg
67 Ford Fairlane GT - 390 / 4 speed (sold 7/15) - http://i253.photobucket.com/albums/hh67 ... c5hu8z.jpg
- Calfdemon
- 100% FORDified!
- Posts: 2672
- Joined: Tue May 25, 2010 11:31 pm
- Location: California, Santa Clarita
Re: Calf's 69 Crew build, and CNM67's 67 shorty build
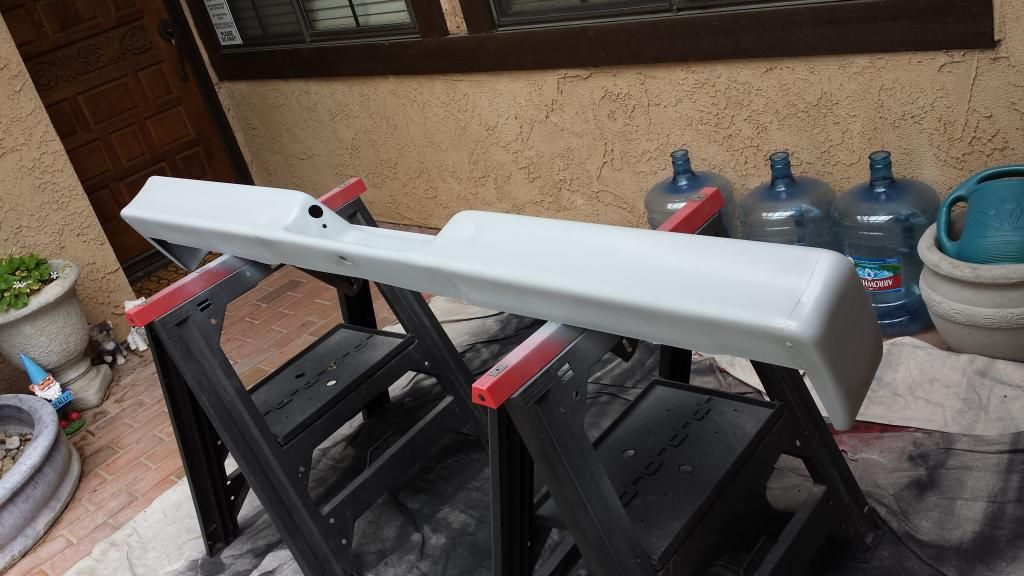
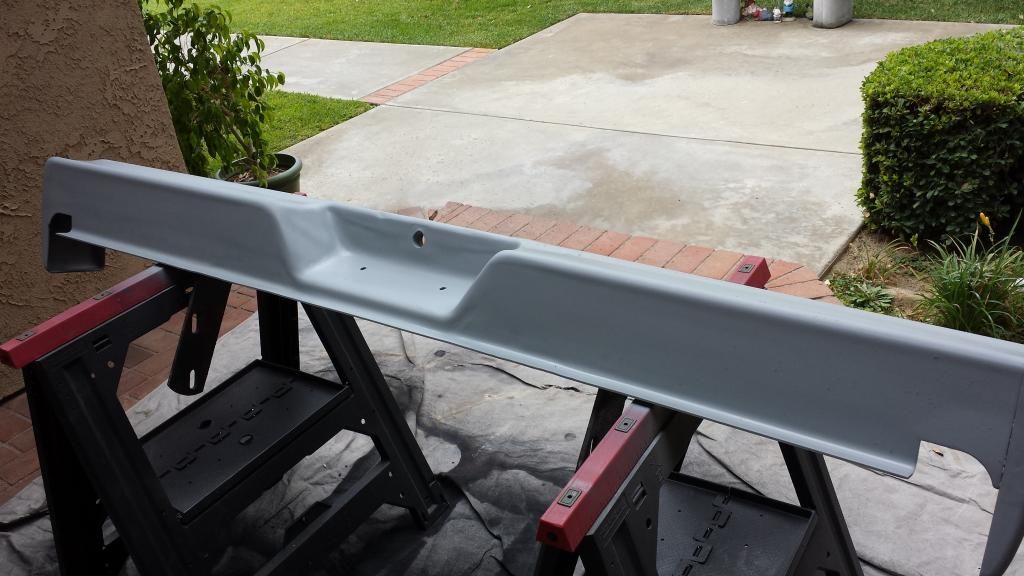
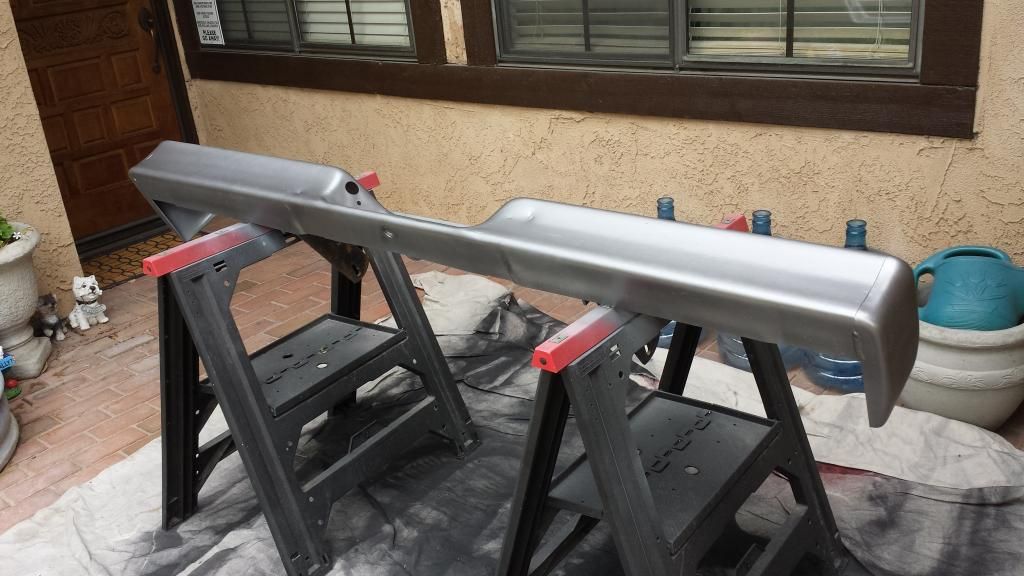
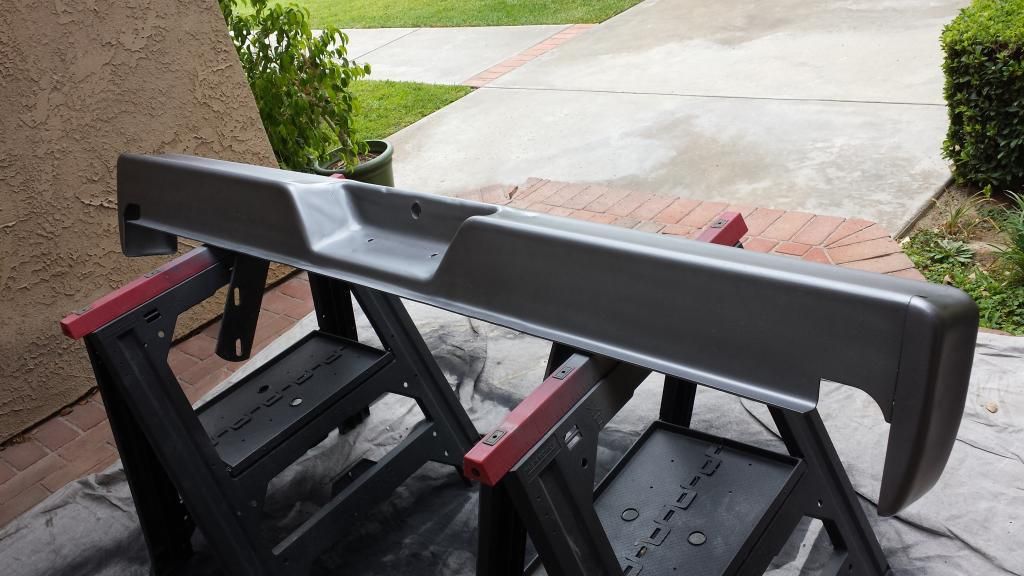
So far today, I pulled my rear bumper out and decided that it needed to be repainted. So primered it and painted it with Dynacolor Bumper Coating. We will see how it holds up. I forgot to take a before picture, but took some primed and then painted. Everyone like pictures, right?
Primed:
Painted:
I recently purchased a new body bolt kit since my old bolts and screws look like crap with the new paint. So in between coats, I was replacing old bolts and screws one at a time with brand new ones. I just did the tailgate and doors for now. I will do the front end later when I need to pull the front clip off. I may do some more work later this afternoon, we will see... Or maybe I will save it for tomorrow. I think sushi is sounding good right about now.
-Rich
Current toys -
69 Ford F350 Crew Cab - 460 / C6 - http://i253.photobucket.com/albums/hh67 ... lqgskp.jpg
31 Ford Vicky - 1955 270 Red Ram Hemi / 4 speed - http://i253.photobucket.com/albums/hh67 ... bsibvn.jpg
Former toys -
67 Pontiac Firebird 400 convertible (sold 9/13) - http://i253.photobucket.com/albums/hh67 ... bird-1.jpg
67 Ford Fairlane GT - 390 / 4 speed (sold 7/15) - http://i253.photobucket.com/albums/hh67 ... c5hu8z.jpg
Current toys -
69 Ford F350 Crew Cab - 460 / C6 - http://i253.photobucket.com/albums/hh67 ... lqgskp.jpg
31 Ford Vicky - 1955 270 Red Ram Hemi / 4 speed - http://i253.photobucket.com/albums/hh67 ... bsibvn.jpg
Former toys -
67 Pontiac Firebird 400 convertible (sold 9/13) - http://i253.photobucket.com/albums/hh67 ... bird-1.jpg
67 Ford Fairlane GT - 390 / 4 speed (sold 7/15) - http://i253.photobucket.com/albums/hh67 ... c5hu8z.jpg
- Calfdemon
- 100% FORDified!
- Posts: 2672
- Joined: Tue May 25, 2010 11:31 pm
- Location: California, Santa Clarita
Re: Calf's 69 Crew build, and CNM67's 67 shorty build
And here are the rest of the updates for today, after the sushi break.
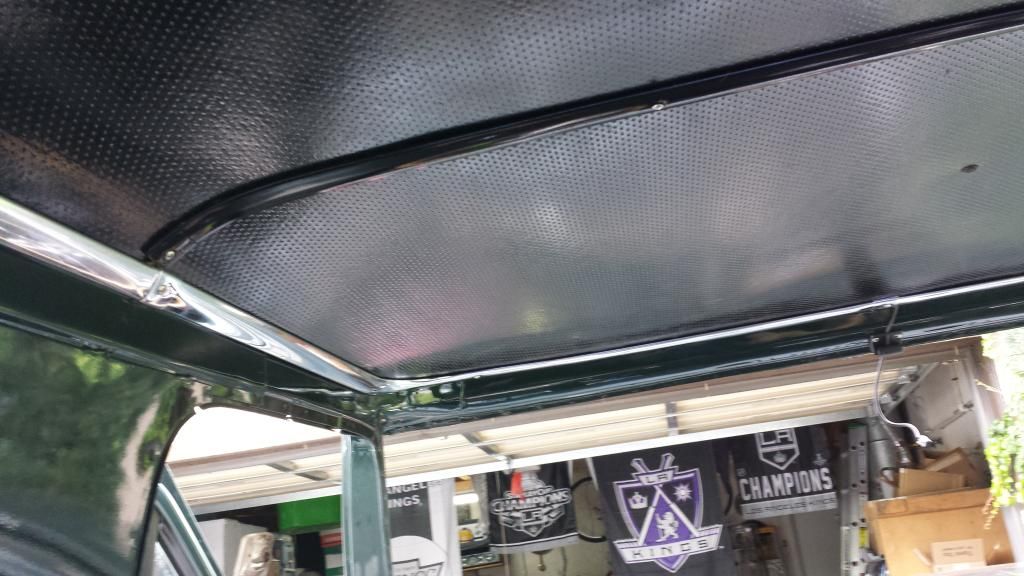
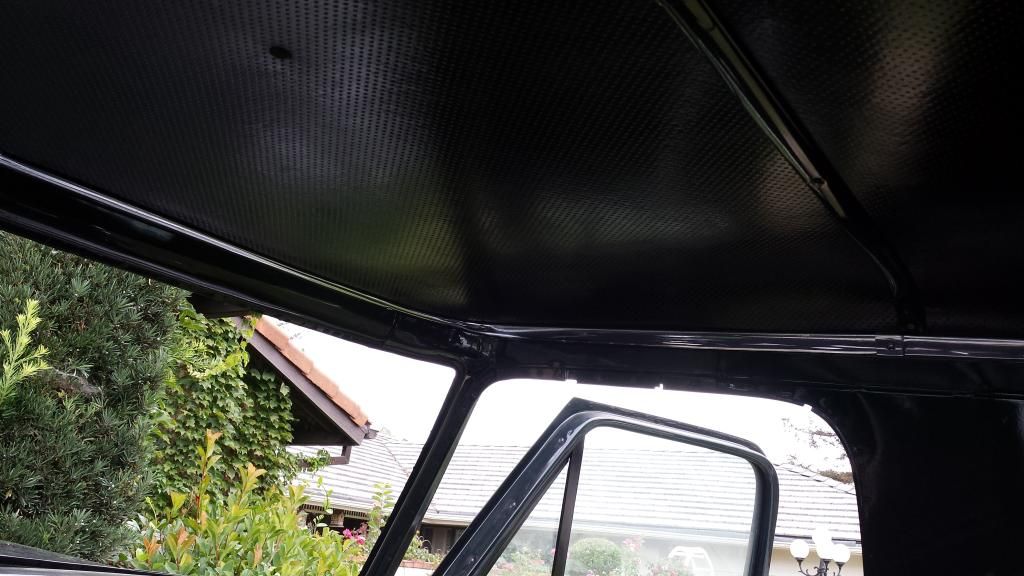
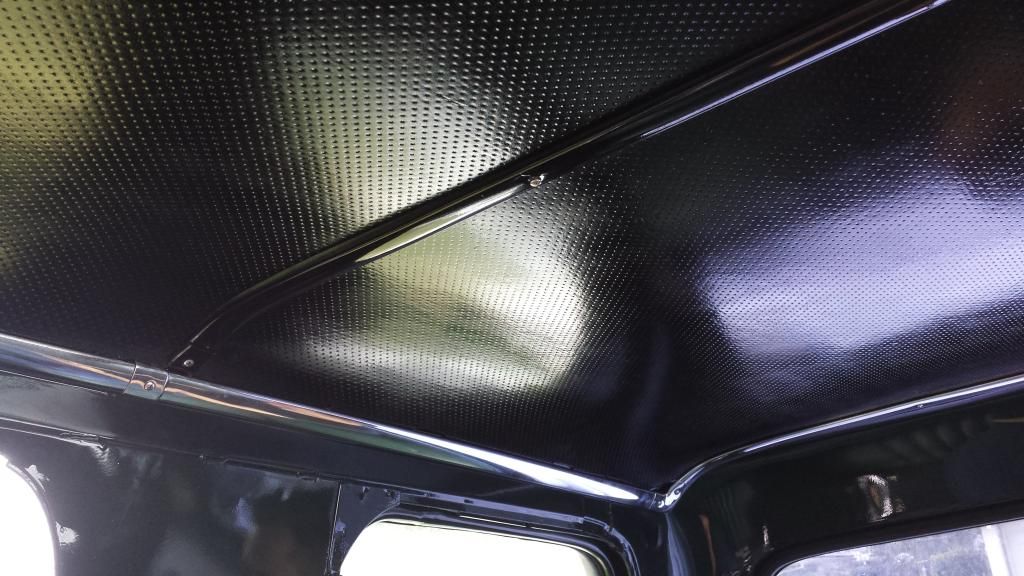
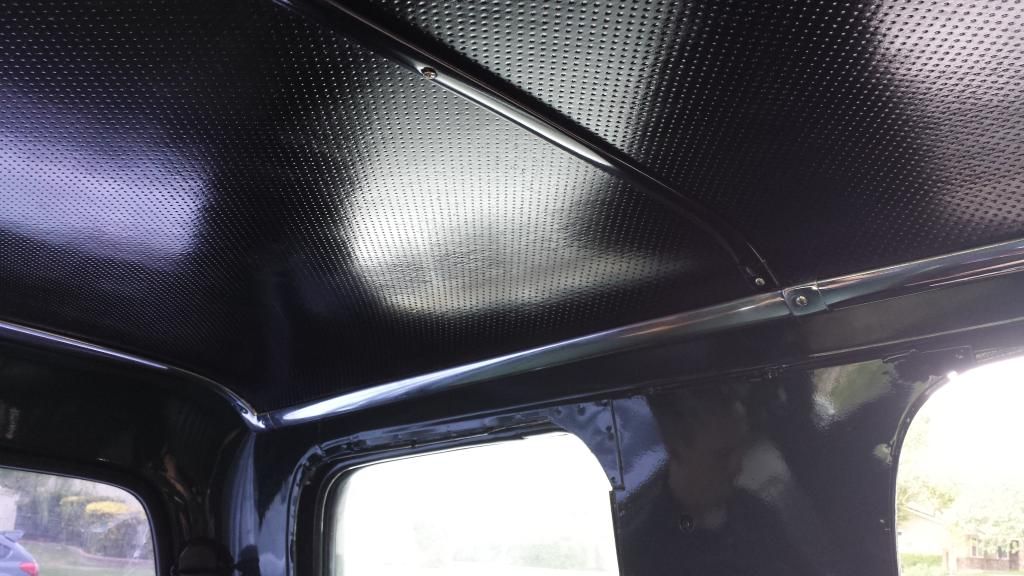
CNM67 showed up after work and helped me put the headliner in the crew cab. Talk about a PITA... But we were able to get it done and it came out better than I had hoped!! For those not familiar with the crew cab headliners, they came stock with a plastic snap on piece down the center between the front and back headliner that helped hold them in place. It was actually a really bad design and did not work for crap. The plastic center piece was not re-popped and 45 year old plastic is no bueno... I had the original piece, but came up with the idea of using another pair of rear trim to accomplish the same thing. So I gave my original piece to another member here a while back and today my idea was put into action. It actually worked VERY well. I drilled the small holes in the snap rail where the screw holes were in the trim and now it is held up where it wont fall down.
I solved the cosmetic issue where the ends were forked by using a stock corner piece. I cut the corner so that it was 2 square ends that cap the center piece and screw into the roof. It actually looks really good.
Anyway, here are pictures of the headliner looking at all 4 corners. Painted the headliners and center bracket in gloss black, and polished the rusted chrome to a shine again. I think the black and chrome really pop on the dark green painted interior...
Front driver corner:
Front passenger corner:
Rear passenger:
Rear driver:
We then shifted our attention from my truck to CNM67's truck. I scored him some old school Mickey Thompson valve covers for his birthday a few months ago. We decided to go get some new gaskets and dress up his motor. The valve covers make it look so much better!
We also addressed the leaking master cylinder issue he has been having by adding a second gasket under the cap as someone else here suggested. It solved their leak and appears to have solved his too...
Thats it for today. I have a few minor things left that I can knock out here and there, but the motor and trans are next on the list. Need to stab those in the truck so I can get started on the heat and air, and then the wiring...
Last edited by Calfdemon on Mon Aug 11, 2014 2:27 pm, edited 1 time in total.
-Rich
Current toys -
69 Ford F350 Crew Cab - 460 / C6 - http://i253.photobucket.com/albums/hh67 ... lqgskp.jpg
31 Ford Vicky - 1955 270 Red Ram Hemi / 4 speed - http://i253.photobucket.com/albums/hh67 ... bsibvn.jpg
Former toys -
67 Pontiac Firebird 400 convertible (sold 9/13) - http://i253.photobucket.com/albums/hh67 ... bird-1.jpg
67 Ford Fairlane GT - 390 / 4 speed (sold 7/15) - http://i253.photobucket.com/albums/hh67 ... c5hu8z.jpg
Current toys -
69 Ford F350 Crew Cab - 460 / C6 - http://i253.photobucket.com/albums/hh67 ... lqgskp.jpg
31 Ford Vicky - 1955 270 Red Ram Hemi / 4 speed - http://i253.photobucket.com/albums/hh67 ... bsibvn.jpg
Former toys -
67 Pontiac Firebird 400 convertible (sold 9/13) - http://i253.photobucket.com/albums/hh67 ... bird-1.jpg
67 Ford Fairlane GT - 390 / 4 speed (sold 7/15) - http://i253.photobucket.com/albums/hh67 ... c5hu8z.jpg
- Calfdemon
- 100% FORDified!
- Posts: 2672
- Joined: Tue May 25, 2010 11:31 pm
- Location: California, Santa Clarita
Re: Calf's 69 Crew build, and CNM67's 67 shorty build
So today was a good day and a bad day. I will let you read through the events and look at the pictuers so you can decide for yourself which was which.
I took today off of work because CNM67 had today off and was available to help me get my motor and tranny in my truck. Since I am working on a driveway with an incline, this is not something that one wants to tackle on their own as the weight of a cherry picker holding a 460 with tranny is a bit much to hold.
Anyway, as our luck would have it, the true SoCal summer decided to show up and it was over 100 by 10am. I think it peaked between 105 and 107 where we live.
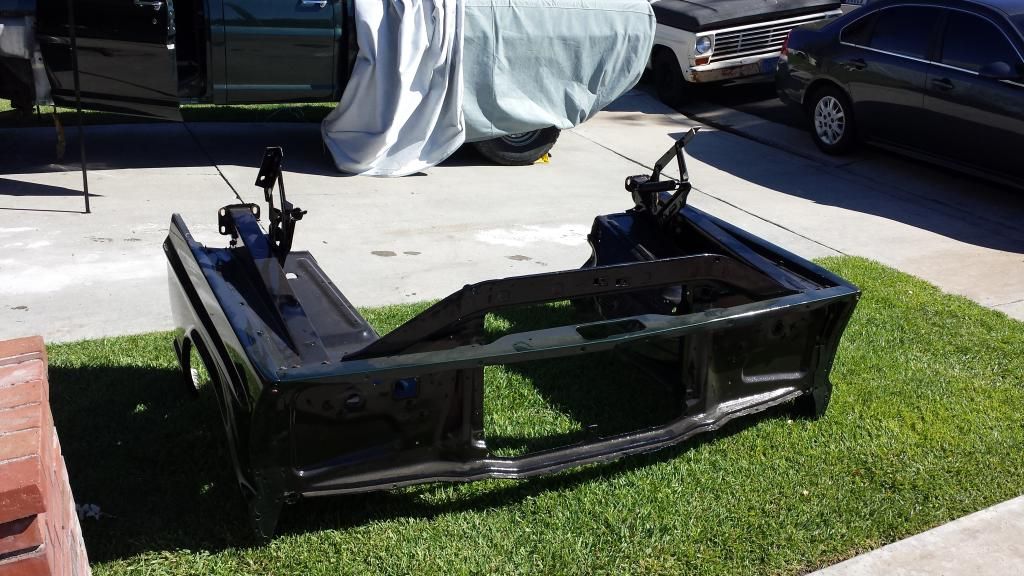
So started off this morning taking the hood and front clip off as that makes things so much easier. I also used my brand new $100 "easy up" over the engine bay to give us some nice shade to work in.
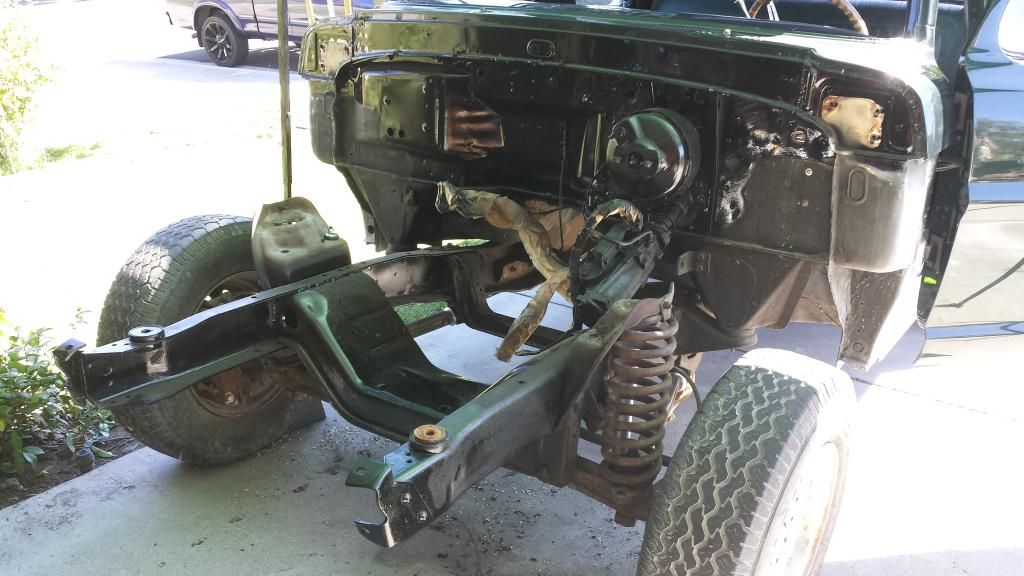
I promptly displayed some new yard art to impress the local homeowners association and my neighbors across the street that like to take pictures of my work and provide them to the Homeowners association for their enjoyment. I am sure I will be getting yet another letter of appreciation.
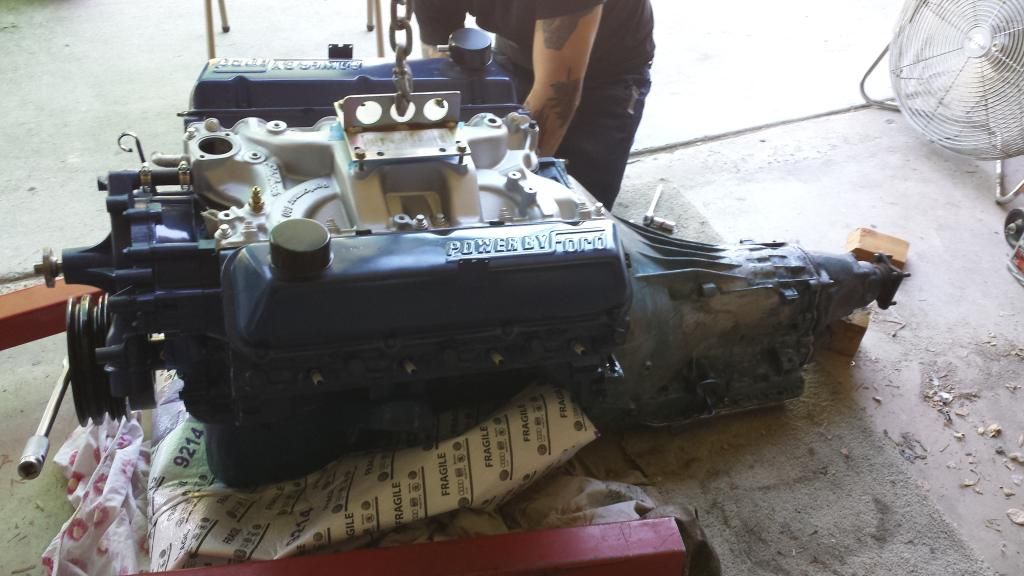
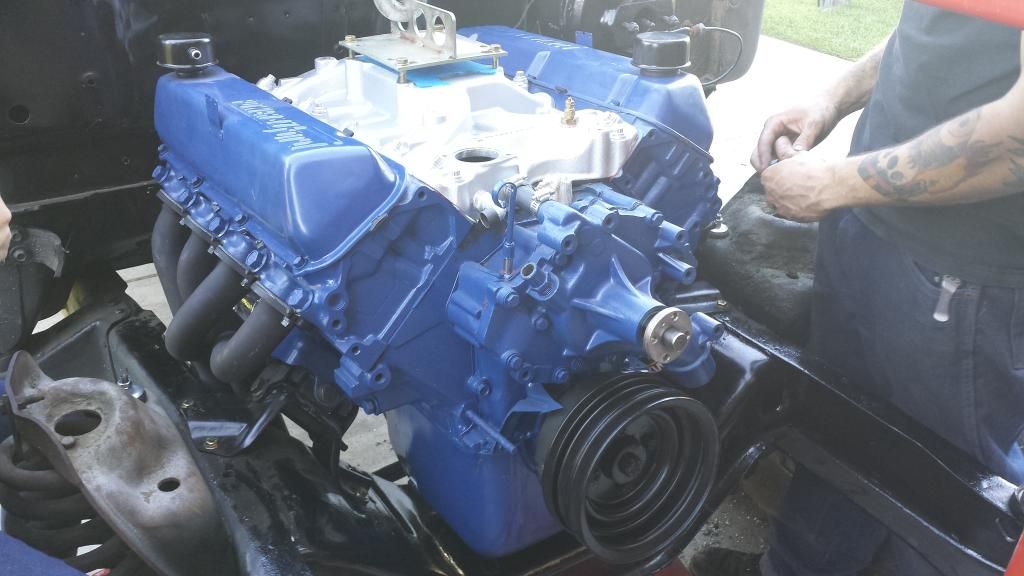
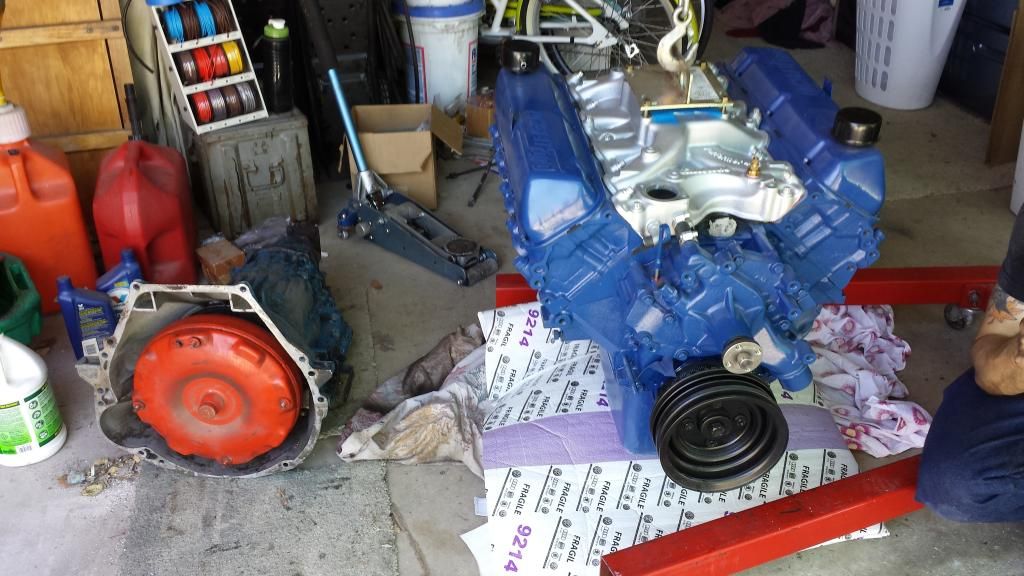
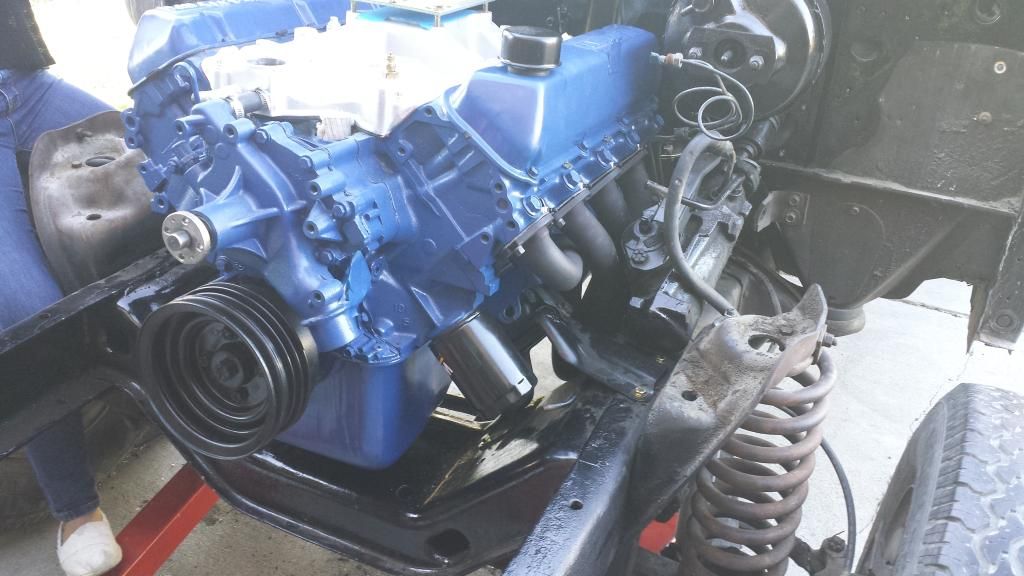
Took the big 460 off the stand where it has been resting for the past 2 years and got it on the hoist. We then pulled out the C6 from its resting place and proceeded to mate the 2 together. I kinda wish I had painted the C6 instead of just cleaning it, but since no one sees it unless they crawl under the truck, it is no big deal I guess...
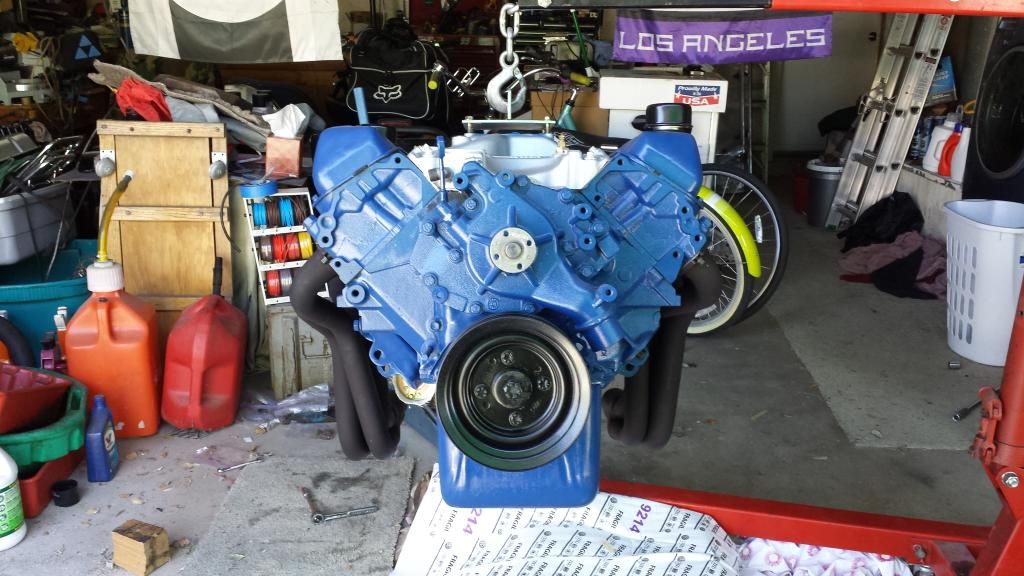
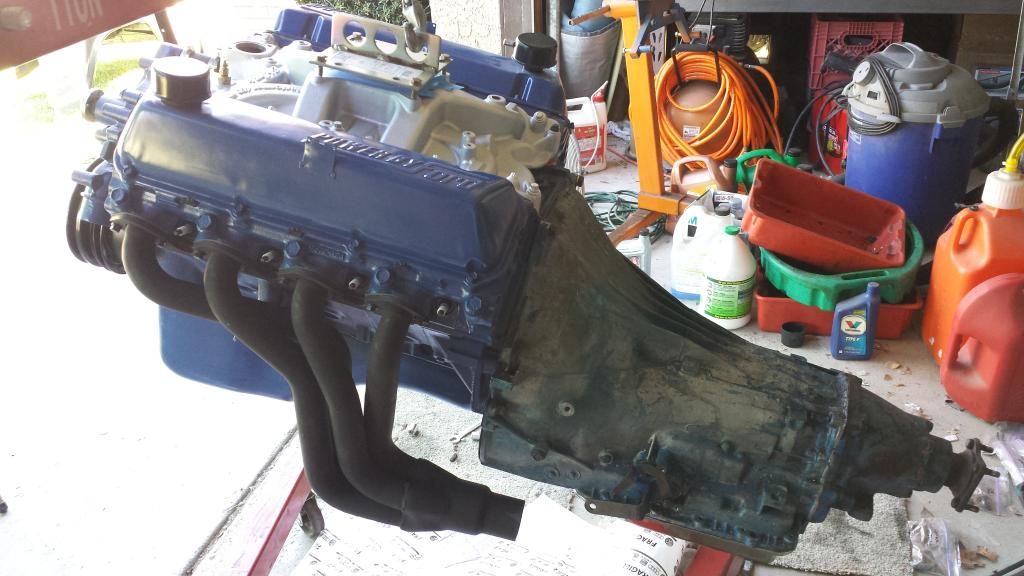
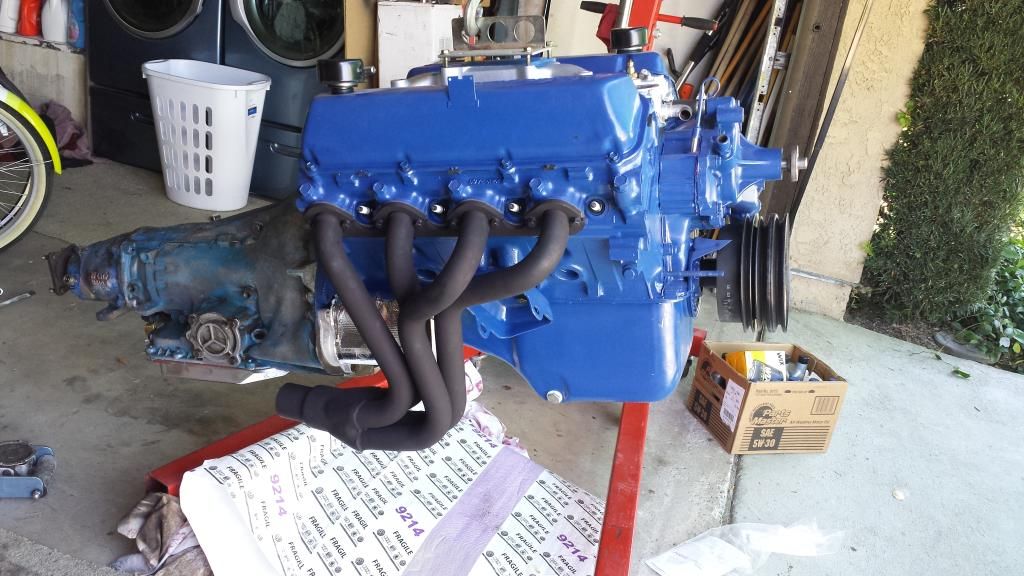
Got the motor mounts, starter, and headers on...
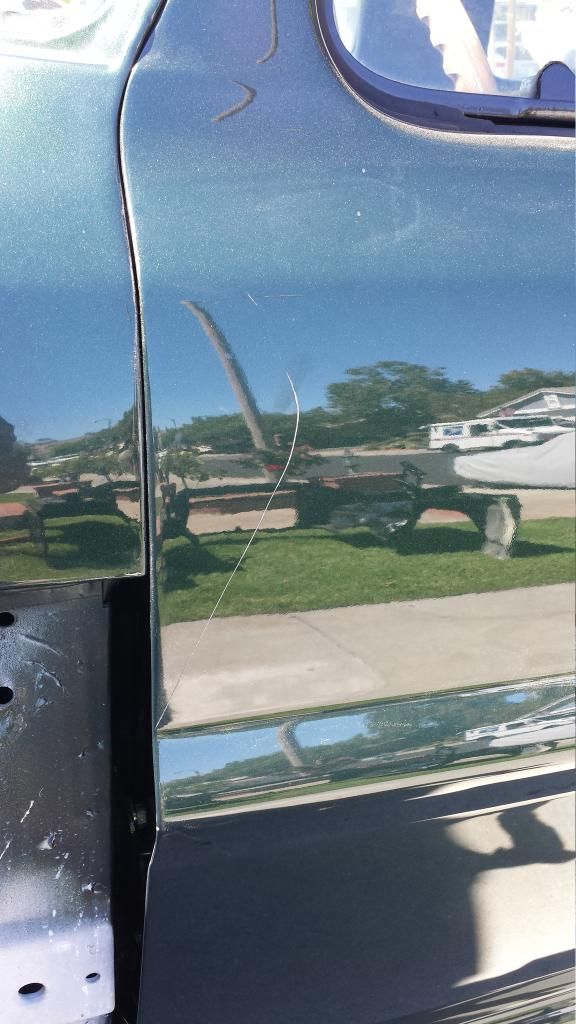
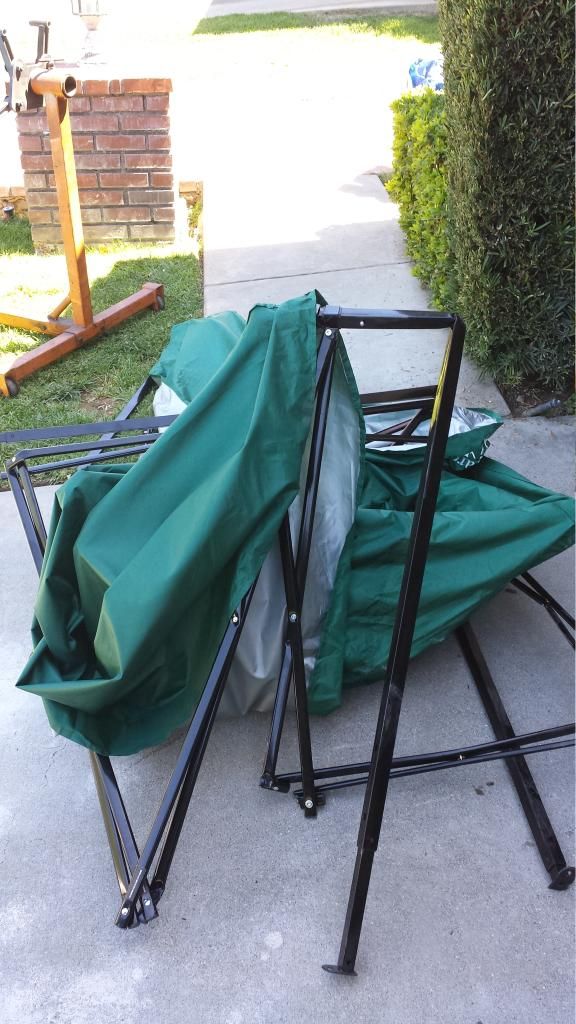
We decided to fill the motor and tranny with oil and ATF to see if there were any leaks before putting them in the truck. As we were doing this, the dead air that had been surrounding us all day long decided to change and a strong gust of wind came out of nowhere. The "easy-up" caught the gust and started to take off upwards. I grabbed the leg that was closest to me (by the garage) and yelled at Caleb to grab the other leg to help keep it away from the truck. Before I could finish my statement, I watched as all 4 legs were off the ground and the flying leg near the drivers side caught the drivers door as it was lifting upward.
I pushed the leg I was holding into the garage in an attempt to salvage what I could of the paint job and proceeded to snap the aluminum leg in half along with a lot of the upper support. But at least the maneuver grounded the flying easy-up and got it off of the drivers door.
Anyway, this is what I was left with when it was all done...
I will take the truck back to the shop when it is all together and get that spot taken care of...
And this is the price that my brand new $100 easy up had to pay as I took my anger out on it....
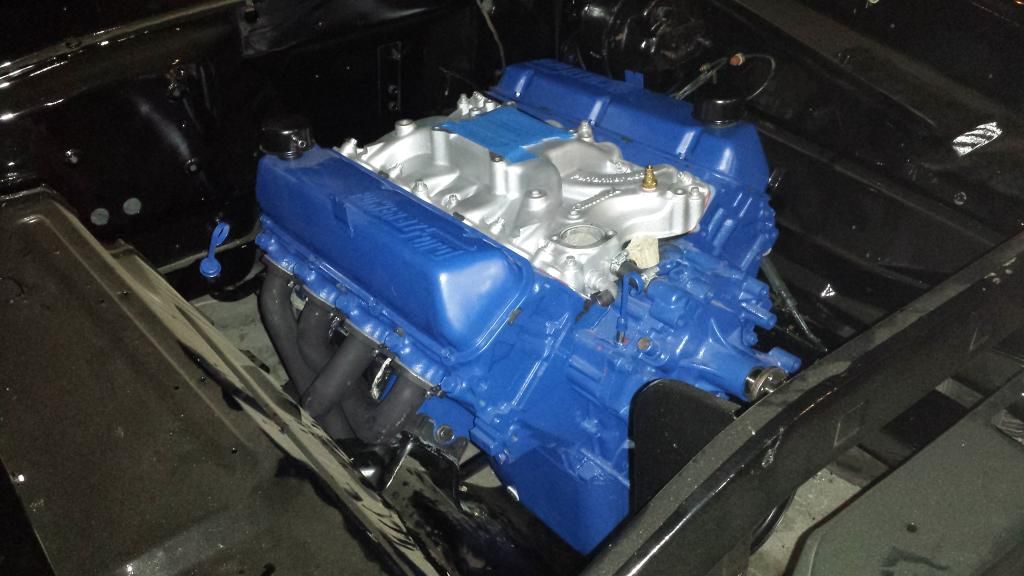
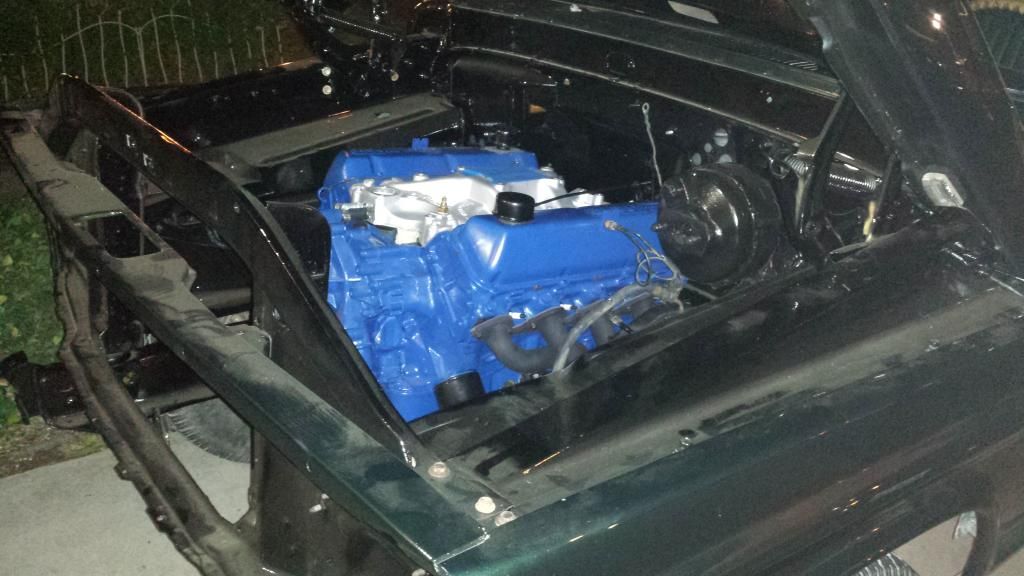
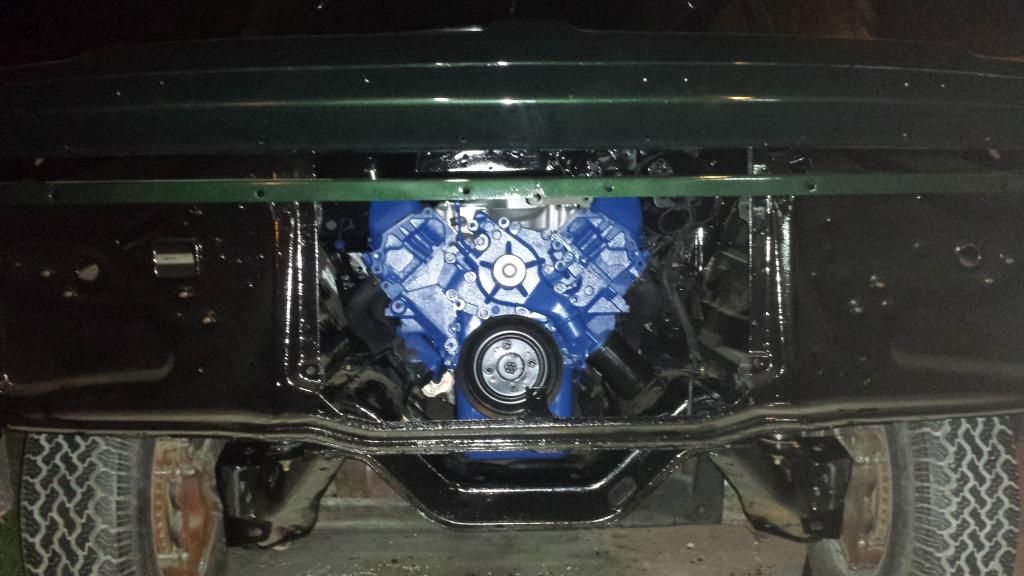
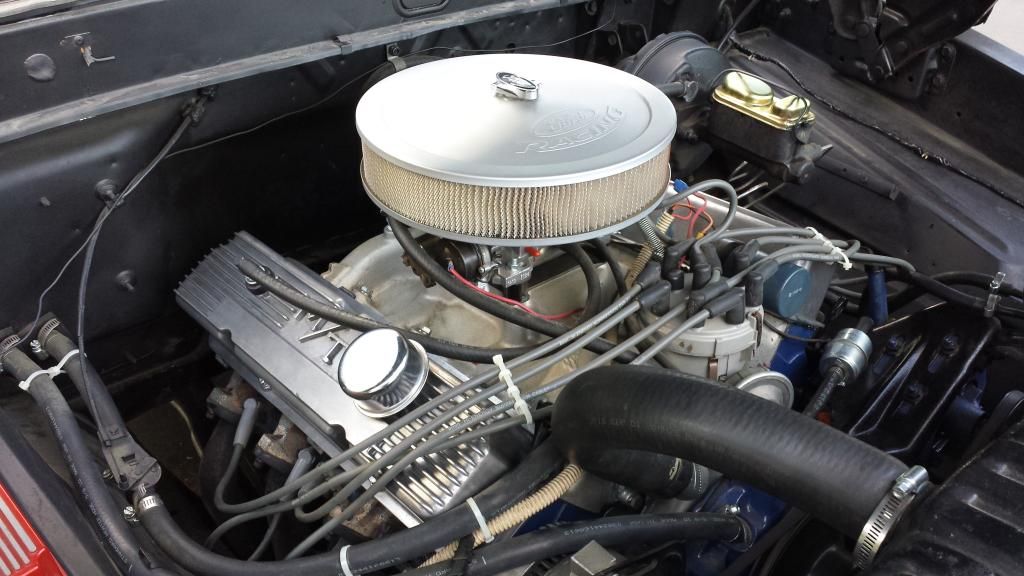
Anyway, once that ordeal was done and I took my anger out on the pile of scrap aluminum that was once our shade, we got back to putting everything into the truck. There were some obstacles we had to overcome with our motor mounts, trans crossmember, and header clearance, but after a couple calls to Bobbyford for some help, we got it all figured out and everything is now sitting pretty in the truck.
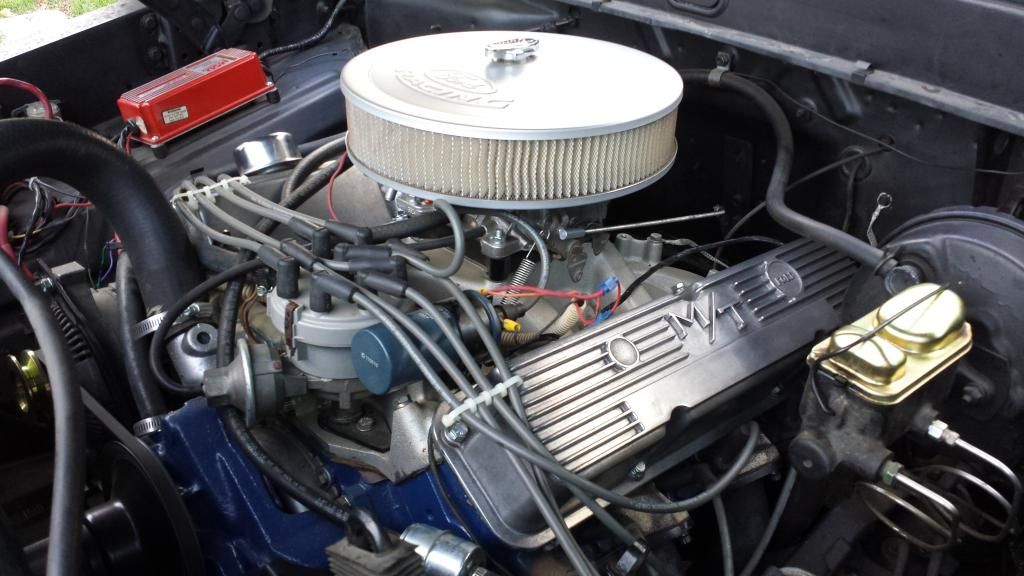
Got the front clip and hood back on the truck so the Homeowners association doesn't lynch me and took some final pictures for the night...
I took today off of work because CNM67 had today off and was available to help me get my motor and tranny in my truck. Since I am working on a driveway with an incline, this is not something that one wants to tackle on their own as the weight of a cherry picker holding a 460 with tranny is a bit much to hold.
Anyway, as our luck would have it, the true SoCal summer decided to show up and it was over 100 by 10am. I think it peaked between 105 and 107 where we live.
So started off this morning taking the hood and front clip off as that makes things so much easier. I also used my brand new $100 "easy up" over the engine bay to give us some nice shade to work in.
I promptly displayed some new yard art to impress the local homeowners association and my neighbors across the street that like to take pictures of my work and provide them to the Homeowners association for their enjoyment. I am sure I will be getting yet another letter of appreciation.
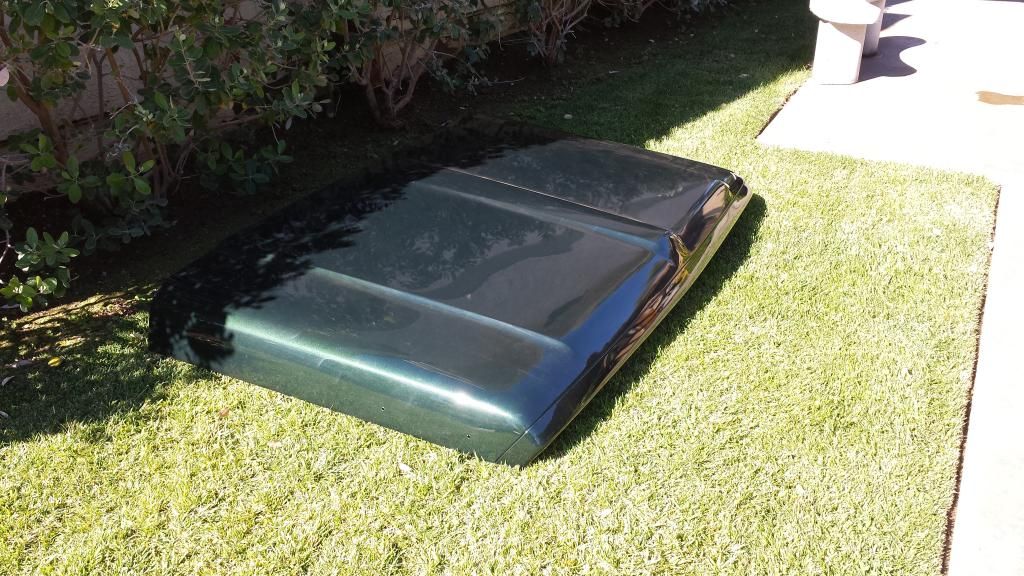
Took the big 460 off the stand where it has been resting for the past 2 years and got it on the hoist. We then pulled out the C6 from its resting place and proceeded to mate the 2 together. I kinda wish I had painted the C6 instead of just cleaning it, but since no one sees it unless they crawl under the truck, it is no big deal I guess...
Got the motor mounts, starter, and headers on...
We decided to fill the motor and tranny with oil and ATF to see if there were any leaks before putting them in the truck. As we were doing this, the dead air that had been surrounding us all day long decided to change and a strong gust of wind came out of nowhere. The "easy-up" caught the gust and started to take off upwards. I grabbed the leg that was closest to me (by the garage) and yelled at Caleb to grab the other leg to help keep it away from the truck. Before I could finish my statement, I watched as all 4 legs were off the ground and the flying leg near the drivers side caught the drivers door as it was lifting upward.
I pushed the leg I was holding into the garage in an attempt to salvage what I could of the paint job and proceeded to snap the aluminum leg in half along with a lot of the upper support. But at least the maneuver grounded the flying easy-up and got it off of the drivers door.
Anyway, this is what I was left with when it was all done...
I will take the truck back to the shop when it is all together and get that spot taken care of...
And this is the price that my brand new $100 easy up had to pay as I took my anger out on it....
Anyway, once that ordeal was done and I took my anger out on the pile of scrap aluminum that was once our shade, we got back to putting everything into the truck. There were some obstacles we had to overcome with our motor mounts, trans crossmember, and header clearance, but after a couple calls to Bobbyford for some help, we got it all figured out and everything is now sitting pretty in the truck.
Got the front clip and hood back on the truck so the Homeowners association doesn't lynch me and took some final pictures for the night...
-Rich
Current toys -
69 Ford F350 Crew Cab - 460 / C6 - http://i253.photobucket.com/albums/hh67 ... lqgskp.jpg
31 Ford Vicky - 1955 270 Red Ram Hemi / 4 speed - http://i253.photobucket.com/albums/hh67 ... bsibvn.jpg
Former toys -
67 Pontiac Firebird 400 convertible (sold 9/13) - http://i253.photobucket.com/albums/hh67 ... bird-1.jpg
67 Ford Fairlane GT - 390 / 4 speed (sold 7/15) - http://i253.photobucket.com/albums/hh67 ... c5hu8z.jpg
Current toys -
69 Ford F350 Crew Cab - 460 / C6 - http://i253.photobucket.com/albums/hh67 ... lqgskp.jpg
31 Ford Vicky - 1955 270 Red Ram Hemi / 4 speed - http://i253.photobucket.com/albums/hh67 ... bsibvn.jpg
Former toys -
67 Pontiac Firebird 400 convertible (sold 9/13) - http://i253.photobucket.com/albums/hh67 ... bird-1.jpg
67 Ford Fairlane GT - 390 / 4 speed (sold 7/15) - http://i253.photobucket.com/albums/hh67 ... c5hu8z.jpg
- 460 crew
- Blue Oval Guru
- Posts: 1128
- Joined: Fri Mar 25, 2005 10:03 pm
- Location: Nevada, Las Vegas
- Contact:
Re: Calf's 69 Crew build, and CNM67's 67 shorty build
Looking great! I feel your pain on the easy up, lost one in anger also. My most recent easy up attack was at the dunes 2yrs ago. It was staked down for 2 days, mind you no wind even kicked up all weekend. As I would have it after pulling 3 of the 4 stakes a gust of wind flipped it over and a leg hit the rear corner of my megacab leaving a dent that looks like I smacked a fifth wheel into it. I actually contained my enthusiasm on this one and salvaged the easy up. Dent....still there I try to not look at it.
1970 4x4 Crewcab build and 12v cummins conversion
http://www.fordification.com/forum/view ... 22&t=17179