1971 short wide (shortstack)
Moderator: FORDification
- pedro69ford
- New Member

- Posts: 115
- Joined: Sat Jan 10, 2009 1:02 pm
- Location: tennesse red boiling springs
Re: 1971 short wide (shortstack)
HEY SHORTSTACK,NICE WORK YOUR DOING THERE COMING RIGHT ALONG.ABOUT YOUR BRAKE LINE BRACKET,THE ORIGINAL HOLE WAS WHERE THE SMALLER BRACKET BOLTED FOR THE DRUM BRAKE LINE,CONVERTING TO DISC THE BRACKET YOU NOW HAVE ATTACHES HIGHER UP ON THE FRAME AS IN YOUR LATTER PICTURE,I BELIEVE THE HOLES ARE THERE YOU MAY HAVE TO TAKE OUT THE PS BOX BOLT TO INSTALL IT,I DONT HAVE A GOOD PIC BUT IF YOU LOOK AT BOBBY FORD PROJECT HE HAS SOME GOOD PICS THERE,JUST THOUGHT I WOULD SHARE,KEEP UP THE GREAT WORK. 
- pedro69ford
- New Member

- Posts: 115
- Joined: Sat Jan 10, 2009 1:02 pm
- Location: tennesse red boiling springs
Re: 1971 short wide (shortstack)
HEY SHORTSTACK,SORRY FOR ANY MIS INFO I THINK YOU MAY HAVE TO DRILL ONE HOLE,I KEPT MY SMALLER BRACKETS AND JUST USED A LONGER BRAKE LINE SO I WASNT REALLY AWARE TILL I WENT TO THE SHOP AND LOOKED AT IT CLOSER,LOOKS LIKE ONE WILL HAVE TO BE DRILLED.SORRY FOR THAT 
- shortstack
- New Member

- Posts: 129
- Joined: Wed Sep 22, 2010 9:45 am
- Location: Austin TX
Re: 1971 short wide (shortstack)
Thanks Pedro. I checked out Bobby's build again. His small tab towards the front of the truck almost appears to be in a different location than mine. I am overthinking this and making it tougher than it should be. I do know that I cannot utilize the original drum bracket hole and have the bracket sit vertical. This weekend, I'll pull the sector and drill two new holes for my bracket and be done with it.
1971 f100 Custom, SWB, 302, T5
"It can't be that hard."
"It can't be that hard."
- pedro69ford
- New Member

- Posts: 115
- Joined: Sat Jan 10, 2009 1:02 pm
- Location: tennesse red boiling springs
Re: 1971 short wide (shortstack)
cool man keep us posted 
- shortstack
- New Member

- Posts: 129
- Joined: Wed Sep 22, 2010 9:45 am
- Location: Austin TX
Re: 1971 short wide (shortstack)
This weekend, my only real goals were to mount/plumb the fuel system, and figure out the clutch cable mounting for the T5. After deciding to go the Mustang tank swap route for the time being, I found one locally through Dallas Mustang, and was able to pick it up on my way out of town. I decided to go with the 20 Gallon tank from a 69 Mustang.
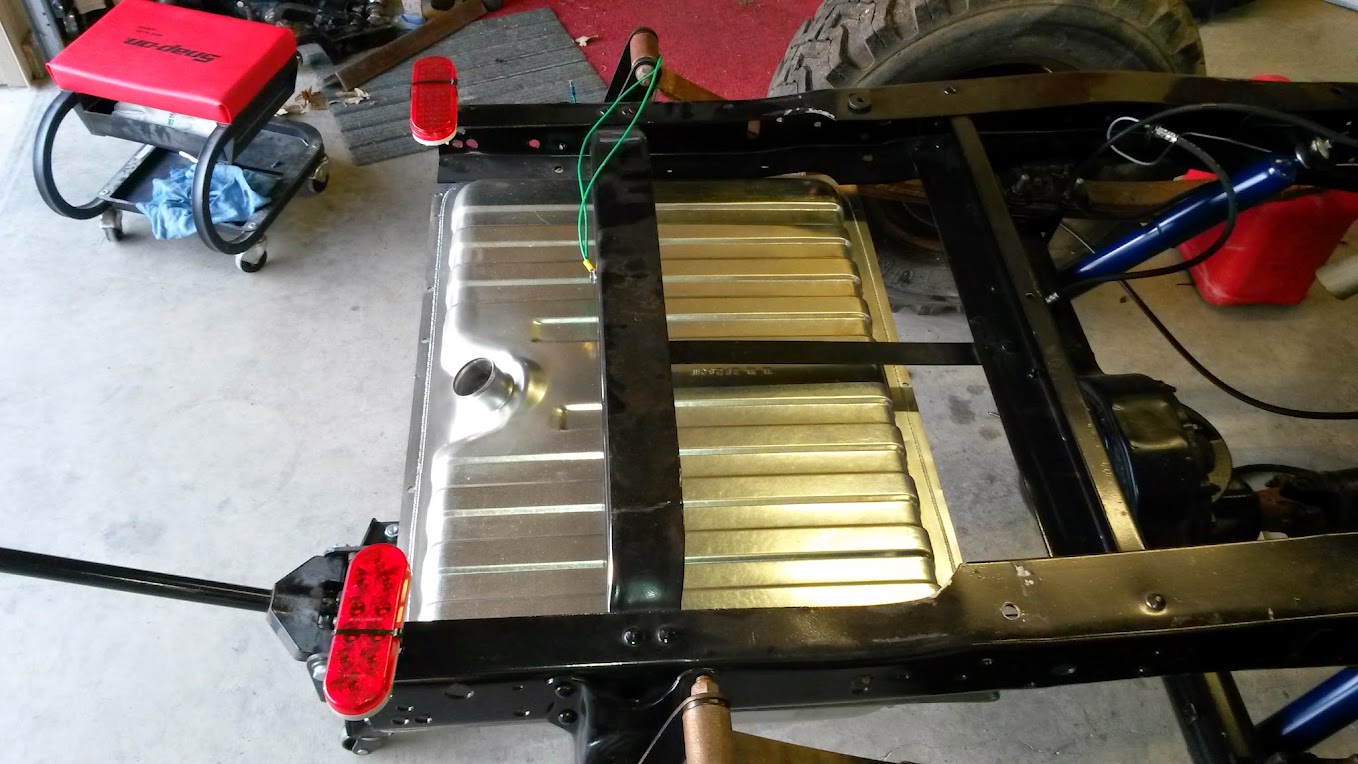
I started by mocking it up to see what I would have to do to make it fit without moving the rear cross member. I could see that the frame is going to need to be trimmed in order for the tank to sit where I want.

The piece of strap between the rear most cross members is going to have to go. The tank will also sit as far forward as I can go.
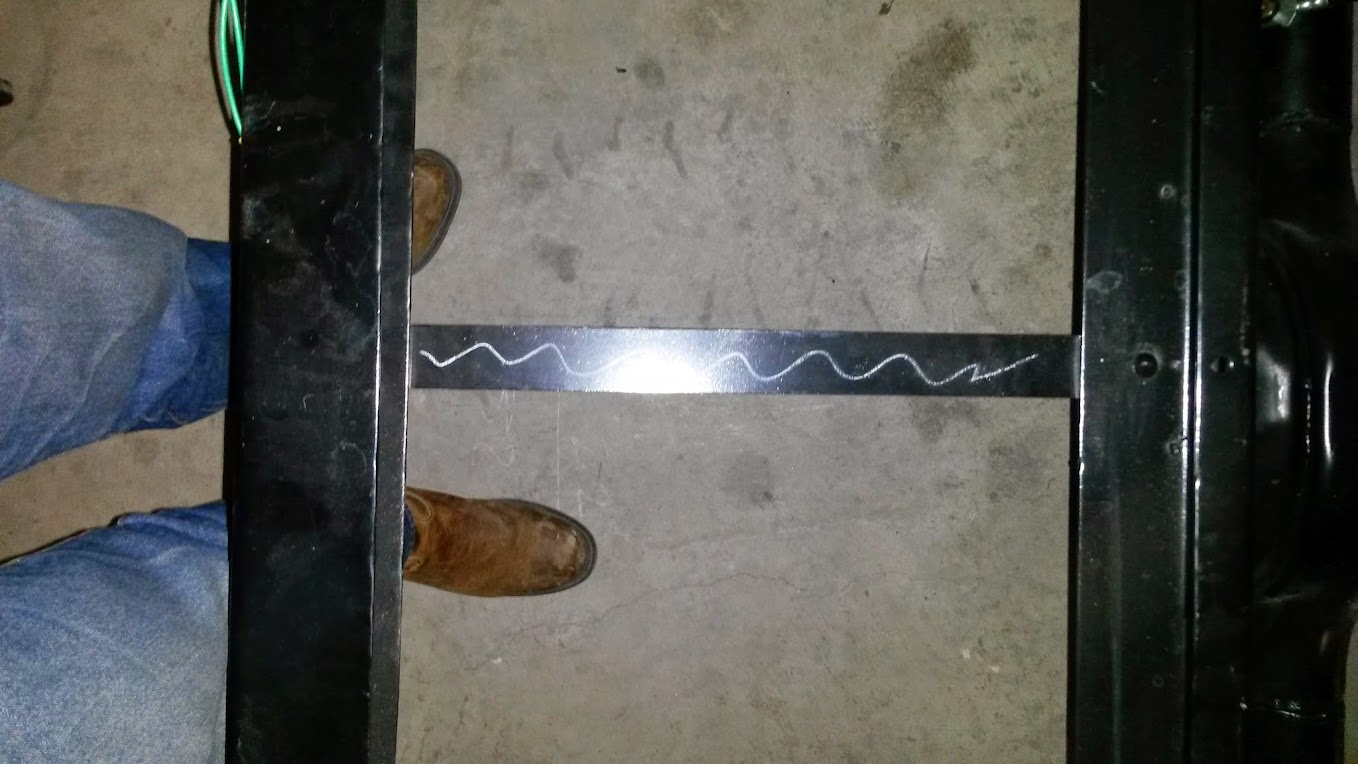
As others have stated, the easiest way to remove these rivets is to cut a cross in them, and use an air hammer to remove the four pieces, and also to push the rivet out.

There was no real plan here, just to make the frame about 30" wide from the second to rear cross member all the way back.
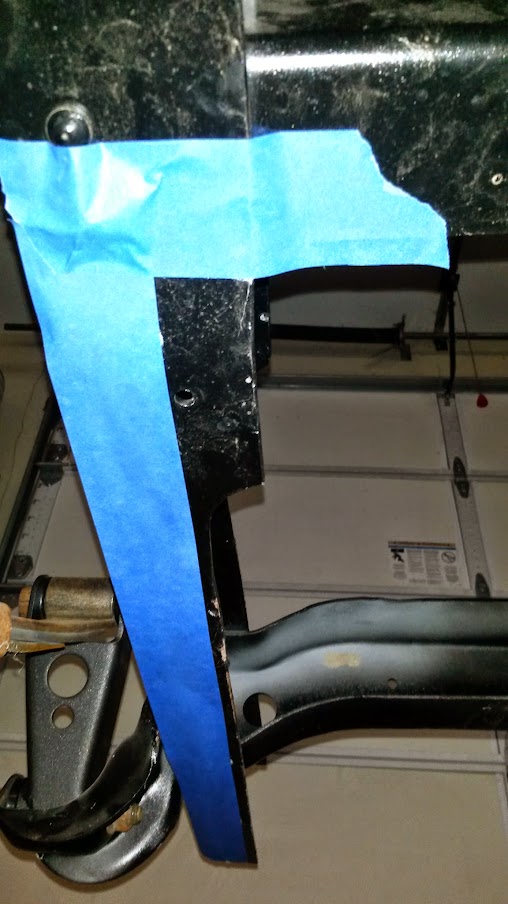
After cutting and fitting, I realized that I should just go ahead and make this cut flush with the cross member.
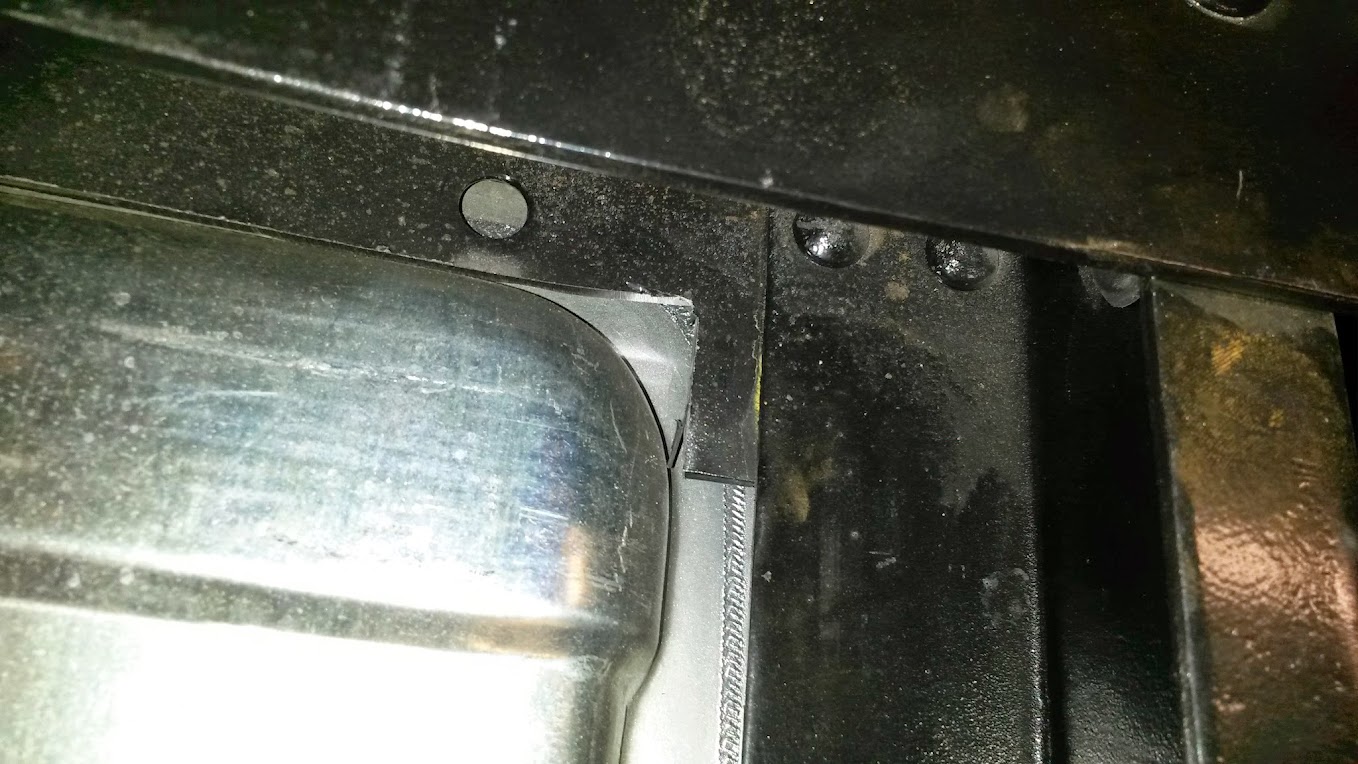
Once I had trimmed the frame, I noticed I will have to "massage" the tank for clearance under the rear cross member.
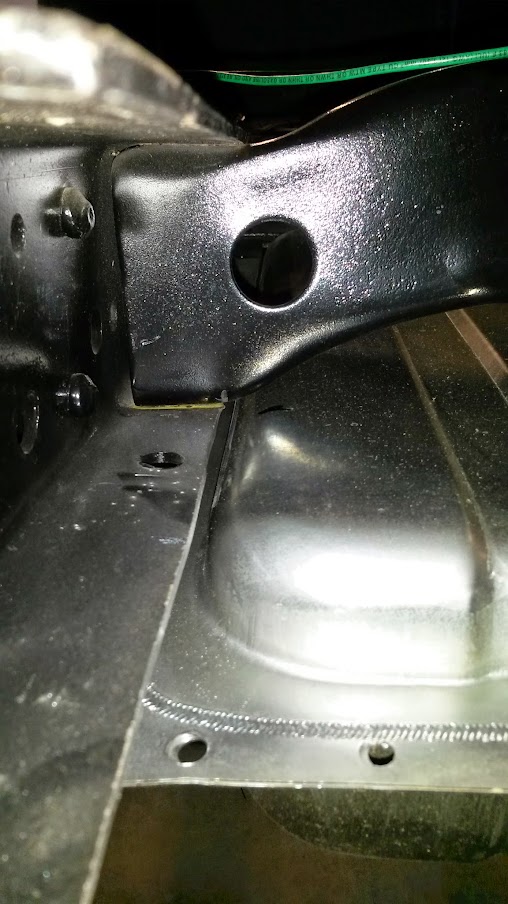
A little careful persuasion with a 2X4 and a hammer and it fits like a glove.

All cut, trimmed, and "massaged" into place.

The rivets for the rear cross member protrude from the bottom of the frame about 1/4" so I cut some spacers to allow for them.

Where the tank would mount to the front cross member, the frame was about 1.5" higher than the rear. I used a piece of square stock to take up the distance.
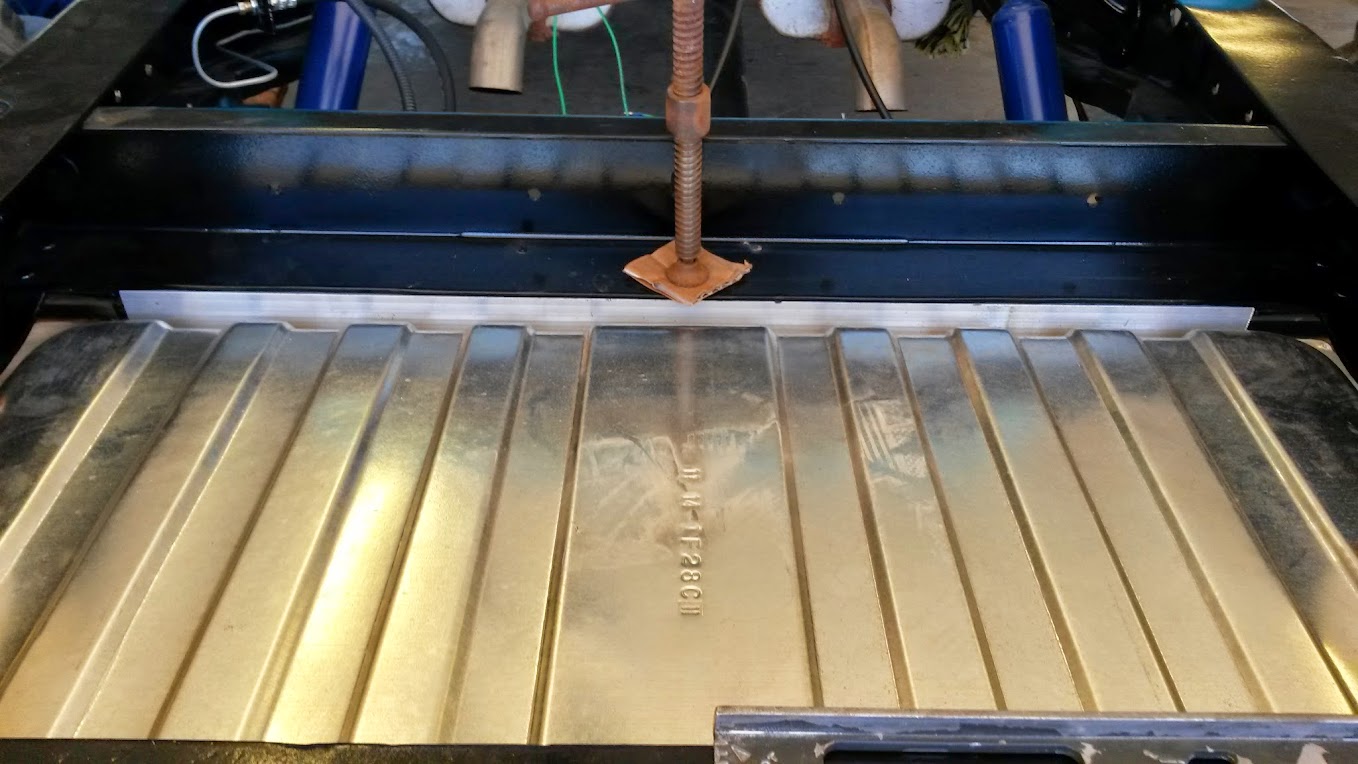
I used the existing holes in the tank flange and drilled through the spacer and front cross member. I used some captive nuts so I can remove the tank from the bottom.
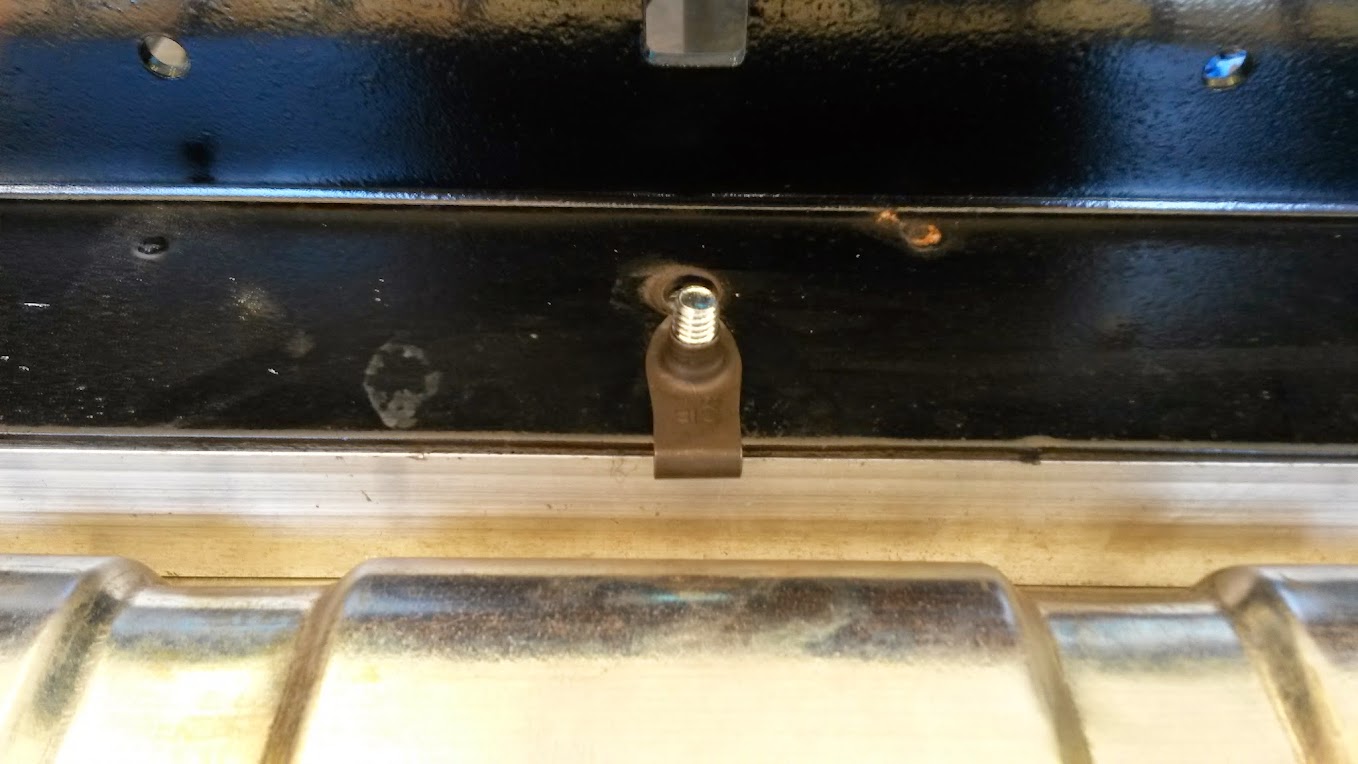
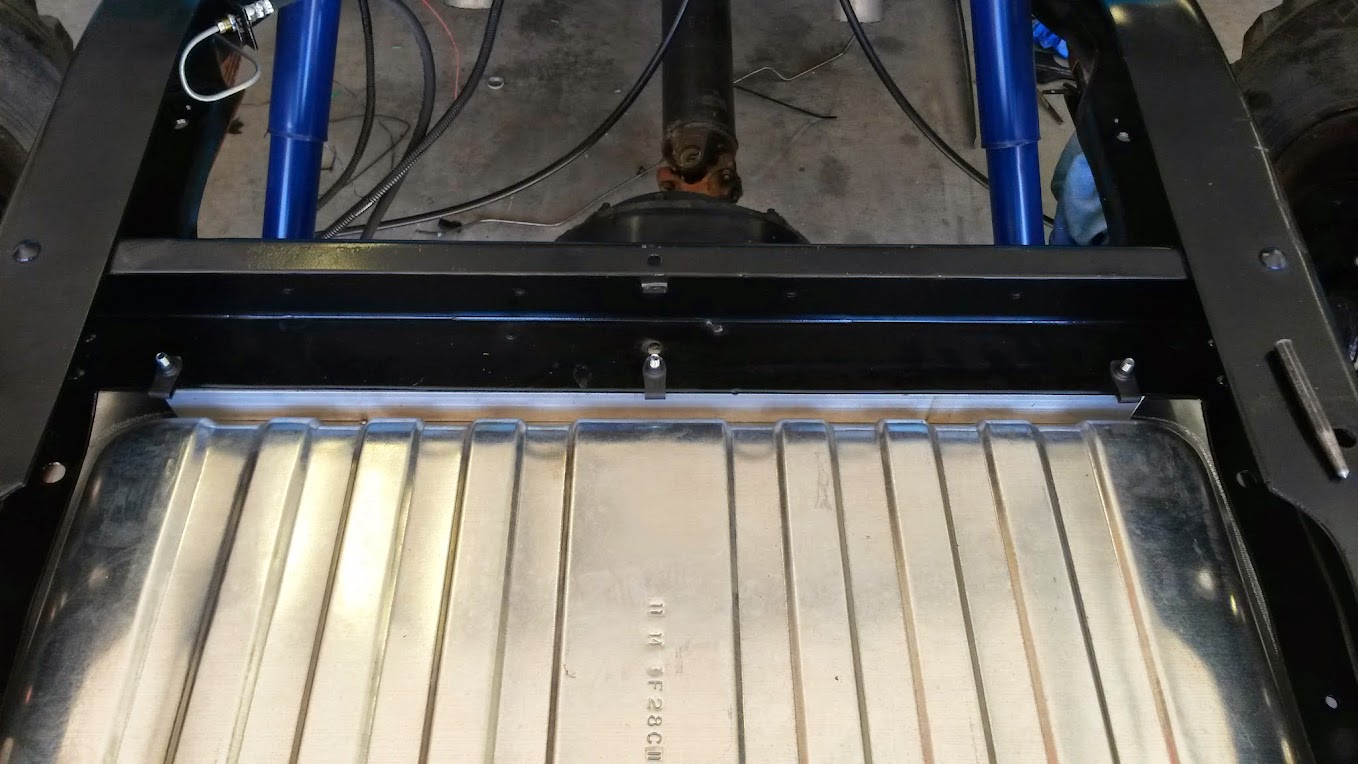
I didn't have any captive nuts that were long enough and didn't feel like getting out the welder to weld a nut, so I cut some reliefs in the frame for the side mounting bolts.

I used a piece of 2" angle to make a mounting bracket for the rear of the tank. The four bolts that hold the tank to the piece of angle will not need to be removed to drop the tank. The two bolts that hold the angle iron to the frame will be removed. I also added some bolts to the front spacer so that it stays in place when the tank is removed.
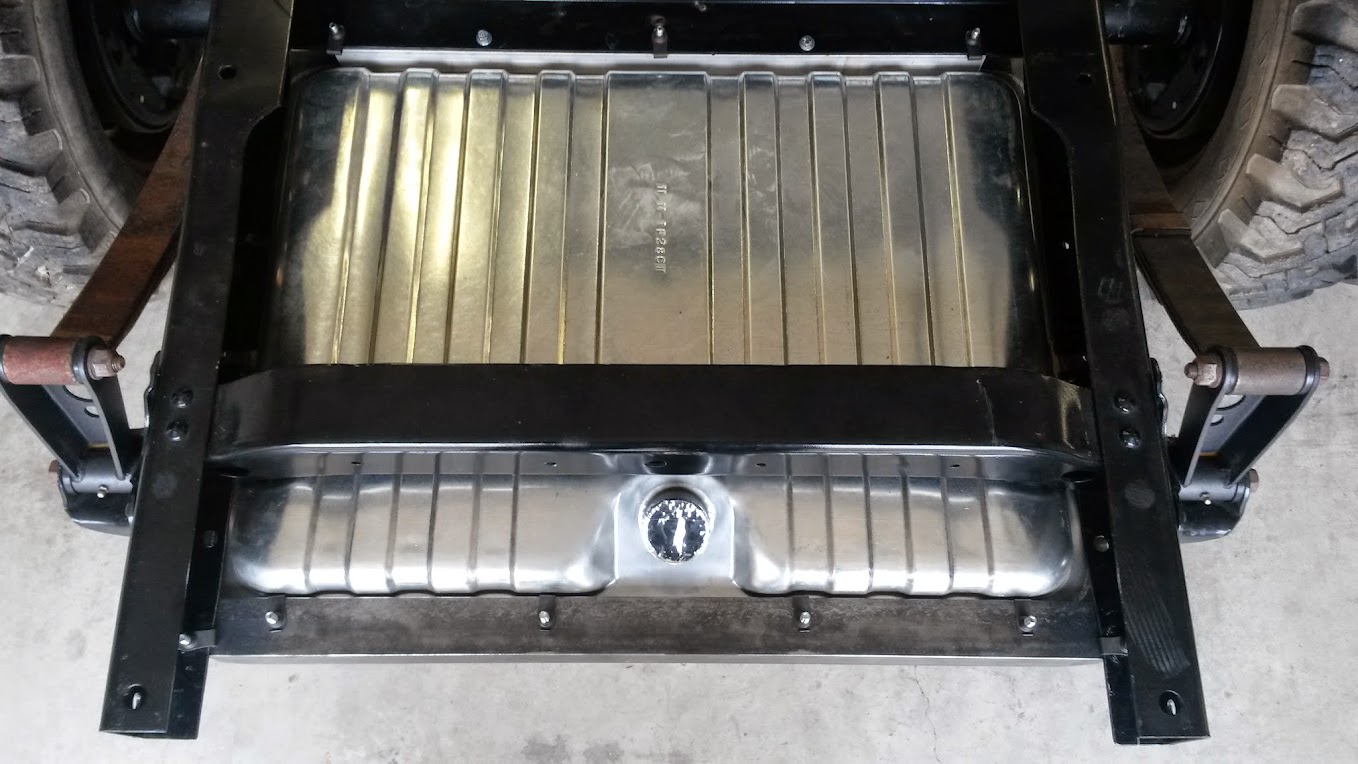
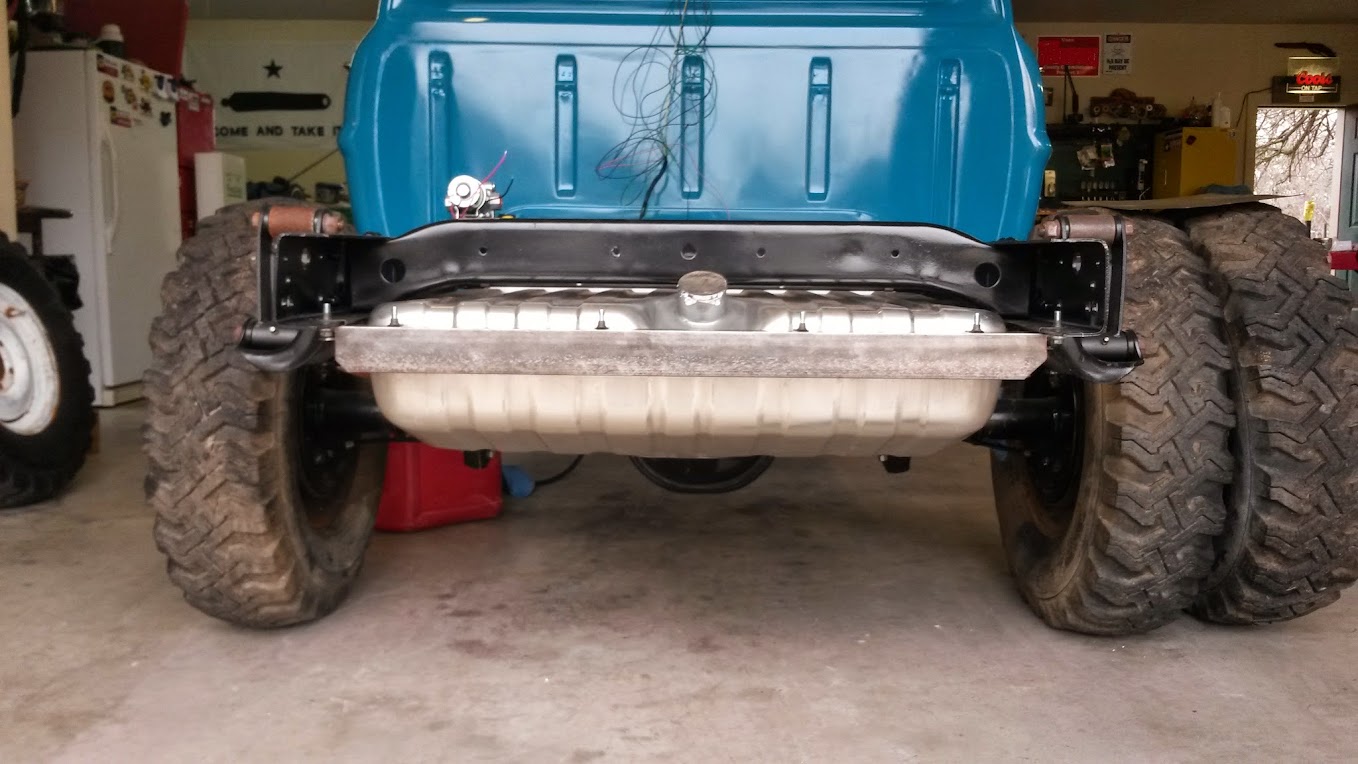
I have three bolts in the front, two in the side, and four in the rear to mount the tank, and they can be removed from the bottom. The tank has clearance and does not touch the frame.
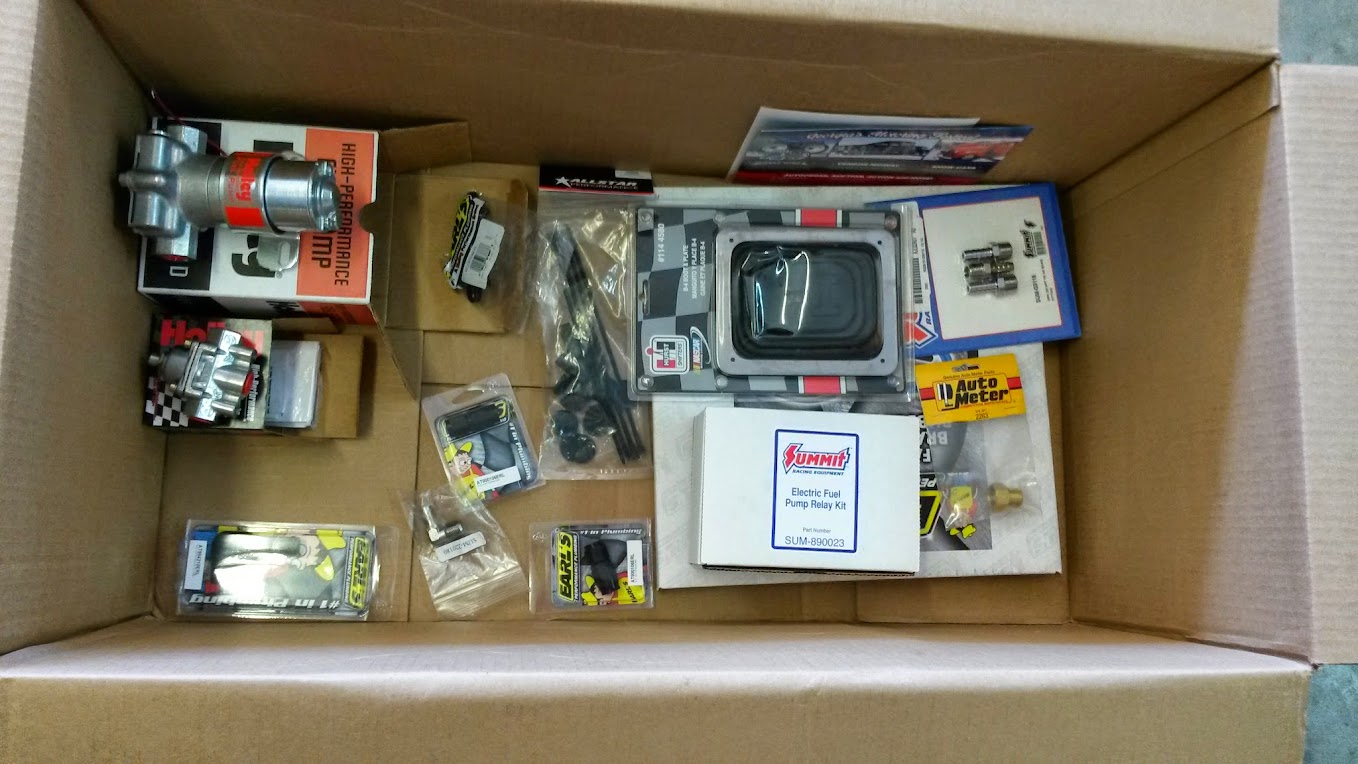
I wasn't expecting my shipment until Monday or Tuesday, but the truck showed up Saturday around lunch. Got the fuel pump, bypass pressure regulator, a bunch of fittings and hose to plumb the system, and a couple other items I'll need. It was an awfully big box for the parts, but oh well...
I needed to make a bracket to mount the pump and regulator. The pump I am using (Holley Red pump) doesn't require a pressure regulator, but after reading about vapor lock, and other problems associated with a frame mounted electric pump, I decided to use a bypass regulator.
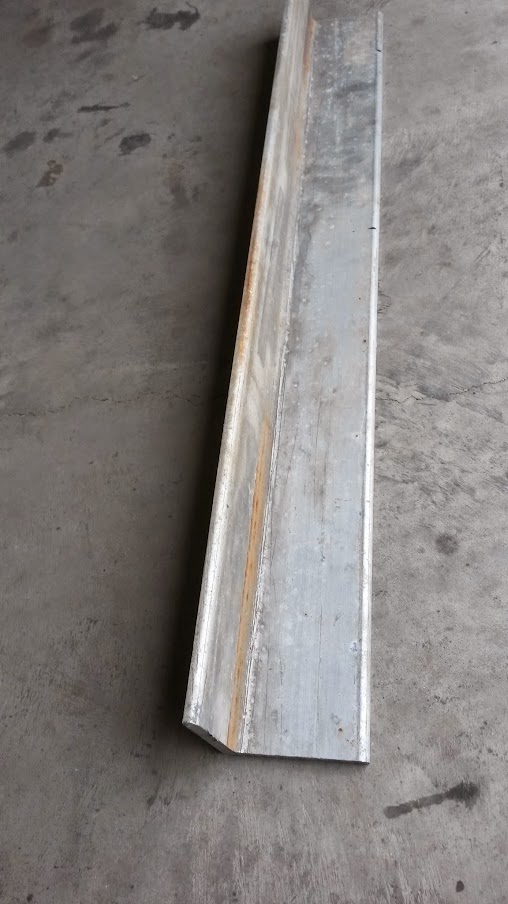
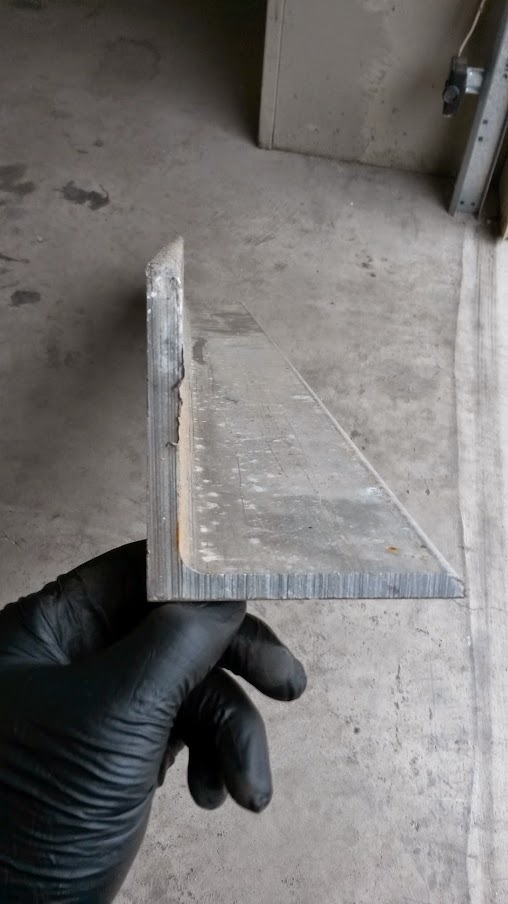
Started with some 4" aluminum angle I had lying around. It is pretty big and I had my doubts at first, but after I cut it to size, I really like how it turned out.
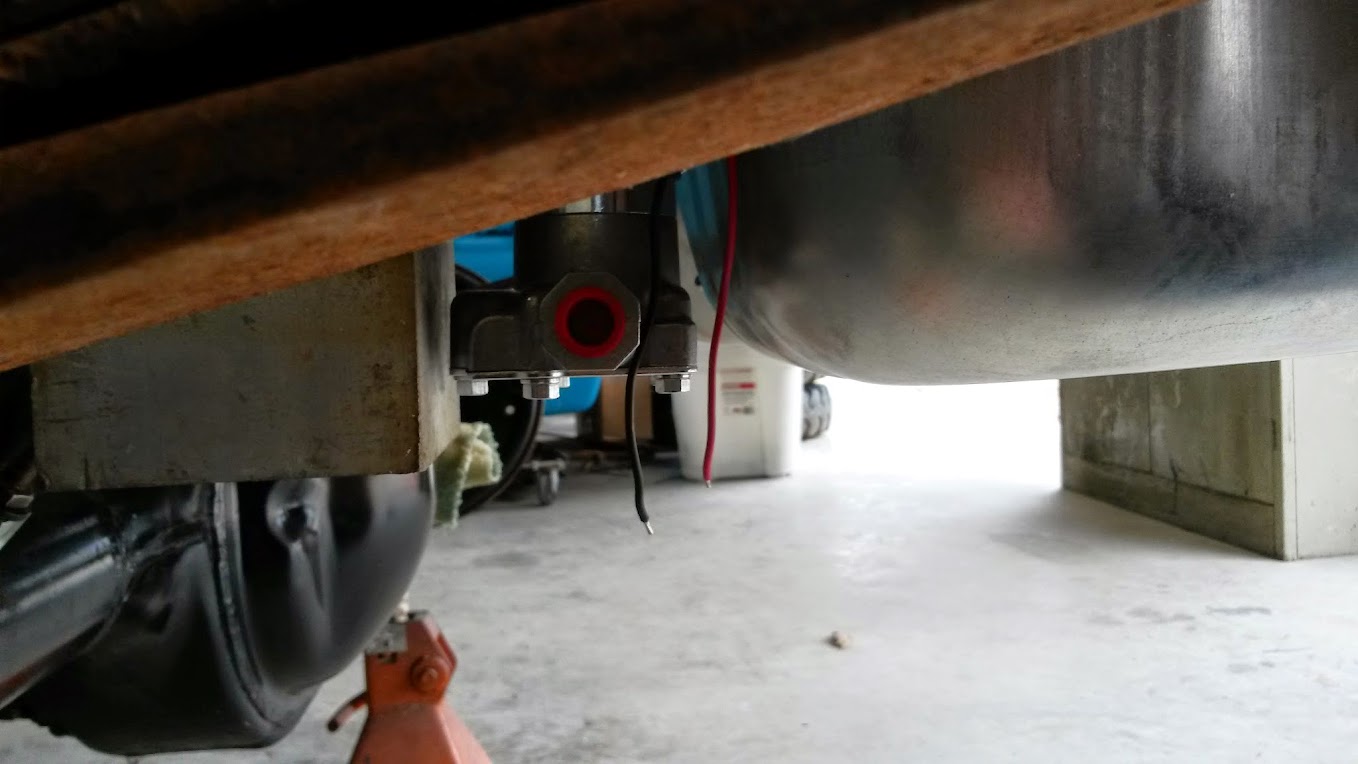
Got the pump mounted to the bracket and held in place temporarily. I wanted the pump to sit as low as possible, while still being unseen from the rear of the truck. I was able to get it lower than the tank outlet, and it is protected from road debris by the bracket.


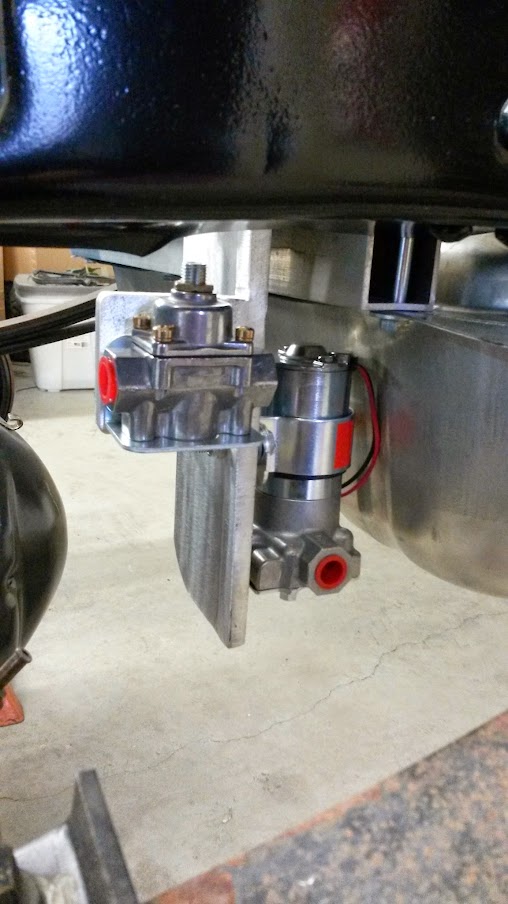

I am using fuel hose barbs for right now until I make sure everything it going to work, at which point I will go with -6AN line all the way.
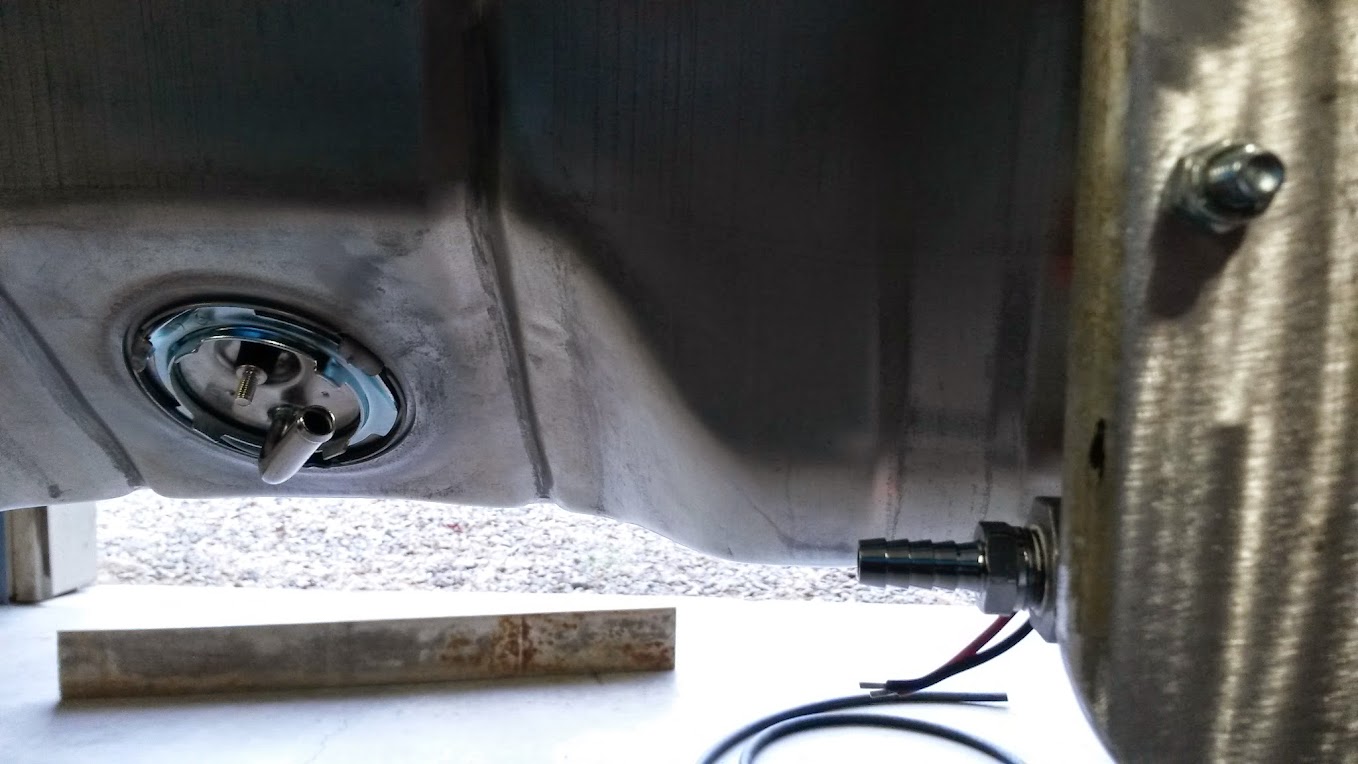
I may go back and radius the remaining corners of the bracket. There is enough room to adjust the regulator once everything is installed.
While I was working on the fuel system, dad was measuring and getting ready to drill the hole in the firewall for the clutch cable. I can get measurements if anyone wants them, but since I relocated my quadrant, they would be different. I also have not seen anyone else running this cable so it may not even matter.

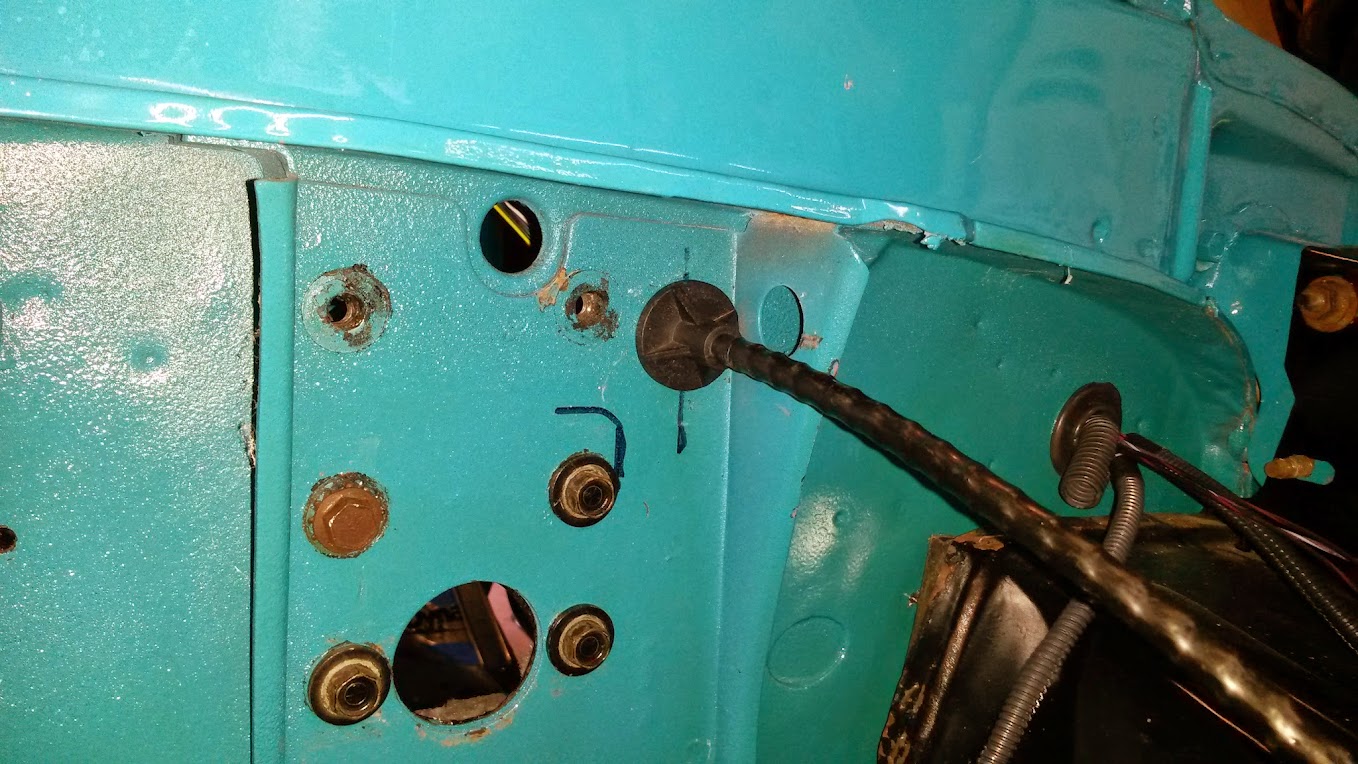
After getting the 3/4" hole in the firewall and the cable in place, (excuse the hose clamp and rusty washer, it was a temporary means to see if it would even work.) we realized that we will in fact need the adjustable mount for the cable.
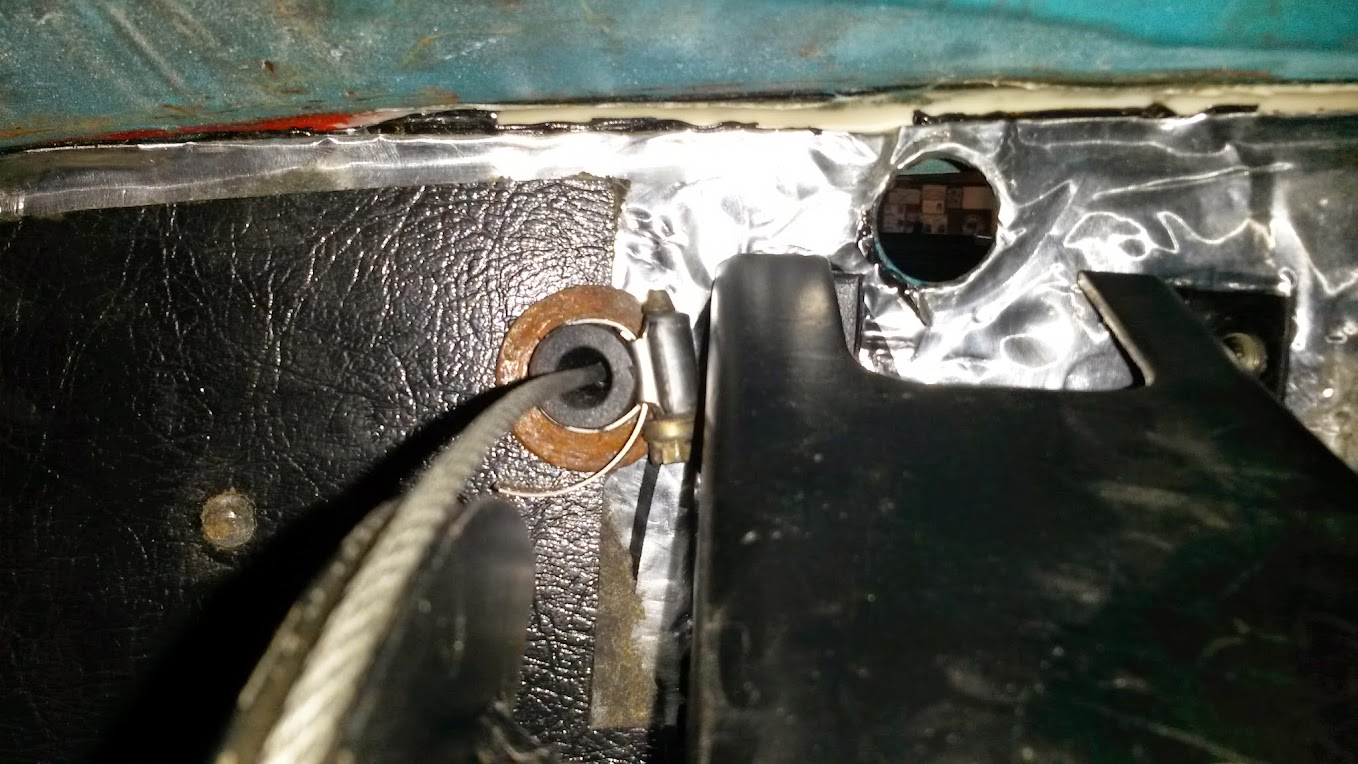
With the adjustable end that mounts through the fork adjusted all the way it still would not release the clutch. There is about 7/8" travel at the fork, but it still will not release. I am not sure how much movement is usual, but it seems like that should have been enough. Back to the drawing board on the clutch cable.
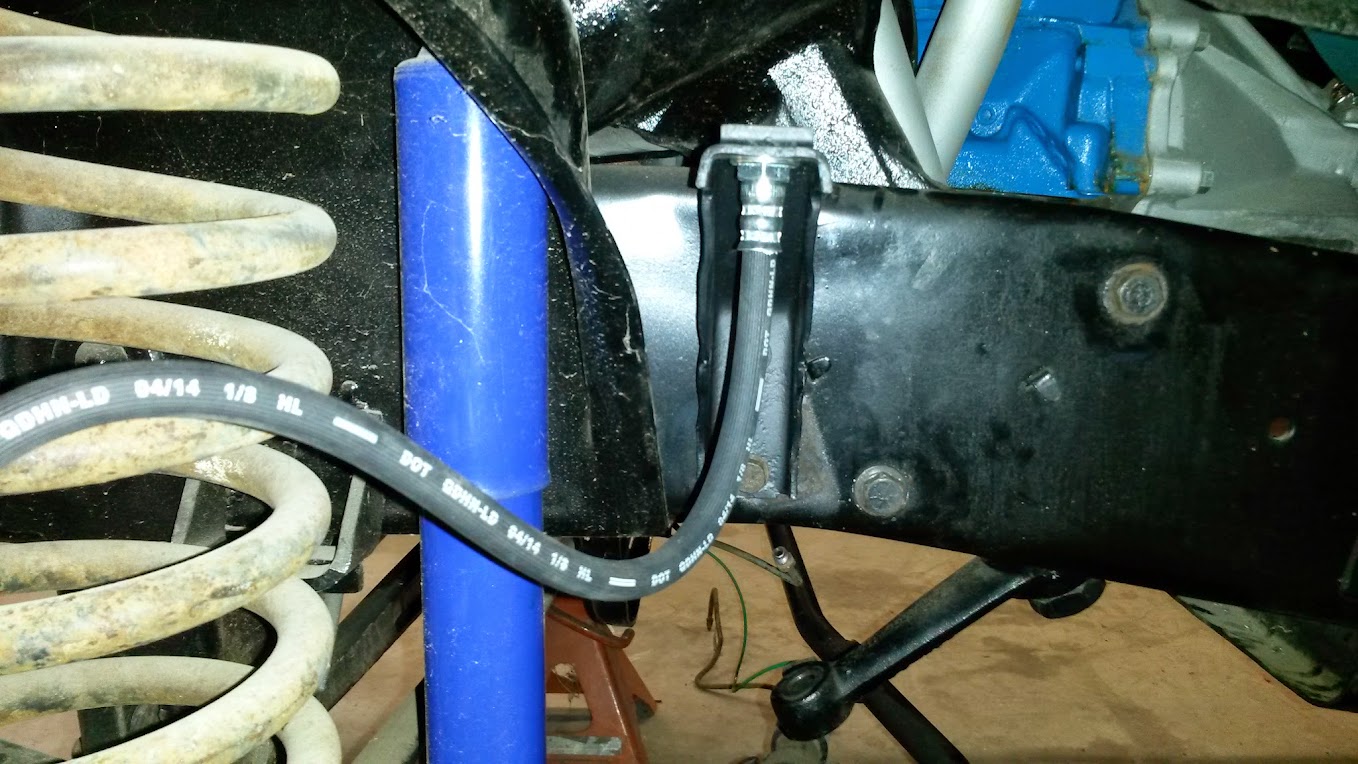
I also drilled and tapped two holes for my driver side brake hose bracket, painted the frame where the old bracket was, and installed it for the last time.

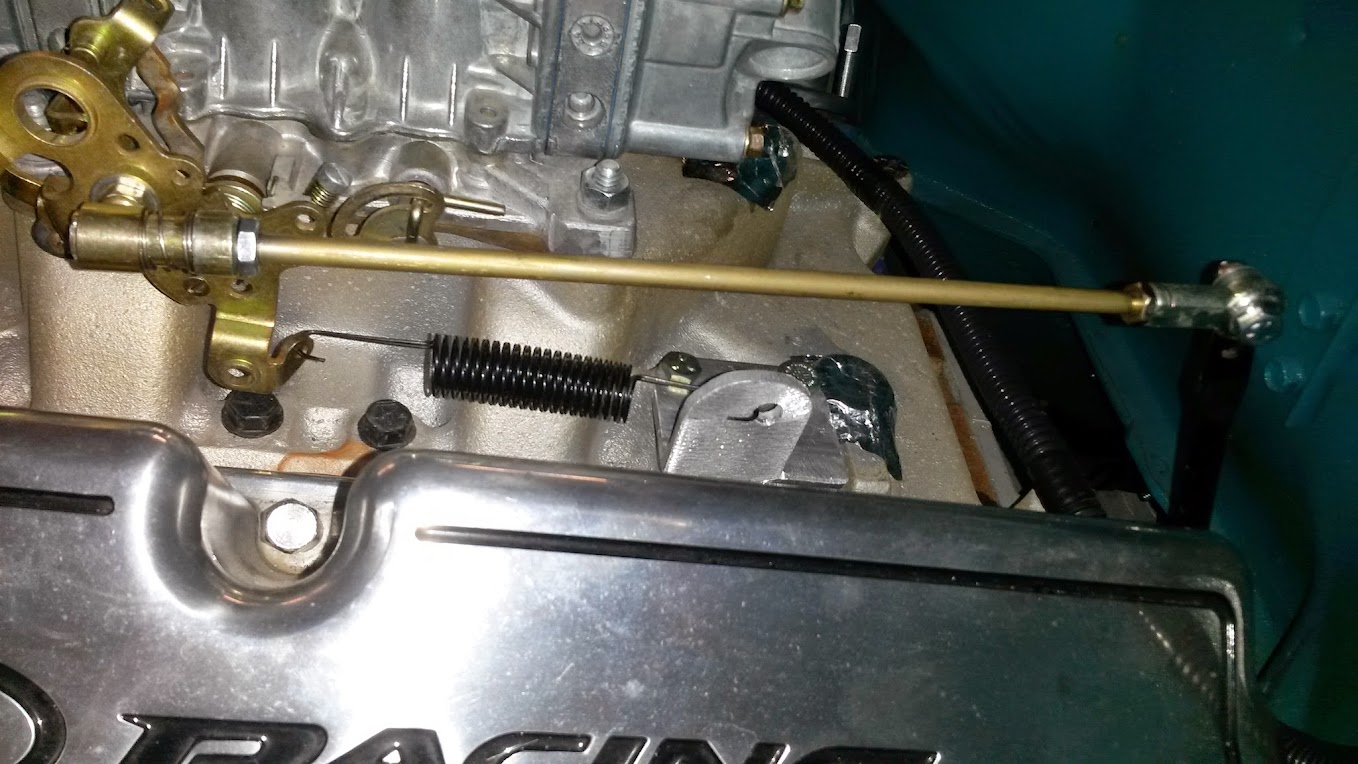
I got my throttle return spring bracket built and installed.
I am still trying to figure out the best method for getting the return line into the tank, as well as how I am going to fill the tank. There is enough clearance to run it out of the original fill hole with a 90 and then over to the side. I guess I'll burn that bridge when I get to it.
I started by mocking it up to see what I would have to do to make it fit without moving the rear cross member. I could see that the frame is going to need to be trimmed in order for the tank to sit where I want.

The piece of strap between the rear most cross members is going to have to go. The tank will also sit as far forward as I can go.

As others have stated, the easiest way to remove these rivets is to cut a cross in them, and use an air hammer to remove the four pieces, and also to push the rivet out.

There was no real plan here, just to make the frame about 30" wide from the second to rear cross member all the way back.

After cutting and fitting, I realized that I should just go ahead and make this cut flush with the cross member.

Once I had trimmed the frame, I noticed I will have to "massage" the tank for clearance under the rear cross member.

A little careful persuasion with a 2X4 and a hammer and it fits like a glove.

All cut, trimmed, and "massaged" into place.

The rivets for the rear cross member protrude from the bottom of the frame about 1/4" so I cut some spacers to allow for them.

Where the tank would mount to the front cross member, the frame was about 1.5" higher than the rear. I used a piece of square stock to take up the distance.

I used the existing holes in the tank flange and drilled through the spacer and front cross member. I used some captive nuts so I can remove the tank from the bottom.


I didn't have any captive nuts that were long enough and didn't feel like getting out the welder to weld a nut, so I cut some reliefs in the frame for the side mounting bolts.

I used a piece of 2" angle to make a mounting bracket for the rear of the tank. The four bolts that hold the tank to the piece of angle will not need to be removed to drop the tank. The two bolts that hold the angle iron to the frame will be removed. I also added some bolts to the front spacer so that it stays in place when the tank is removed.

I have three bolts in the front, two in the side, and four in the rear to mount the tank, and they can be removed from the bottom. The tank has clearance and does not touch the frame.

I wasn't expecting my shipment until Monday or Tuesday, but the truck showed up Saturday around lunch. Got the fuel pump, bypass pressure regulator, a bunch of fittings and hose to plumb the system, and a couple other items I'll need. It was an awfully big box for the parts, but oh well...

I needed to make a bracket to mount the pump and regulator. The pump I am using (Holley Red pump) doesn't require a pressure regulator, but after reading about vapor lock, and other problems associated with a frame mounted electric pump, I decided to use a bypass regulator.
Started with some 4" aluminum angle I had lying around. It is pretty big and I had my doubts at first, but after I cut it to size, I really like how it turned out.


Got the pump mounted to the bracket and held in place temporarily. I wanted the pump to sit as low as possible, while still being unseen from the rear of the truck. I was able to get it lower than the tank outlet, and it is protected from road debris by the bracket.


I am using fuel hose barbs for right now until I make sure everything it going to work, at which point I will go with -6AN line all the way.

I may go back and radius the remaining corners of the bracket. There is enough room to adjust the regulator once everything is installed.
While I was working on the fuel system, dad was measuring and getting ready to drill the hole in the firewall for the clutch cable. I can get measurements if anyone wants them, but since I relocated my quadrant, they would be different. I also have not seen anyone else running this cable so it may not even matter.


After getting the 3/4" hole in the firewall and the cable in place, (excuse the hose clamp and rusty washer, it was a temporary means to see if it would even work.) we realized that we will in fact need the adjustable mount for the cable.

With the adjustable end that mounts through the fork adjusted all the way it still would not release the clutch. There is about 7/8" travel at the fork, but it still will not release. I am not sure how much movement is usual, but it seems like that should have been enough. Back to the drawing board on the clutch cable.
I also drilled and tapped two holes for my driver side brake hose bracket, painted the frame where the old bracket was, and installed it for the last time.


I got my throttle return spring bracket built and installed.

I am still trying to figure out the best method for getting the return line into the tank, as well as how I am going to fill the tank. There is enough clearance to run it out of the original fill hole with a 90 and then over to the side. I guess I'll burn that bridge when I get to it.
1971 f100 Custom, SWB, 302, T5
"It can't be that hard."
"It can't be that hard."
- shortstack
- New Member

- Posts: 129
- Joined: Wed Sep 22, 2010 9:45 am
- Location: Austin TX
Re: 1971 short wide (shortstack)
Not sure if anyone is following this, but it makes me feel better to see the progress. I chipped away at my to do list a little more this weekend. My goal for the weekend was to get the fuel system fully plumbed, wired, and tested. I also wanted to get the clutch cable adjusted and tested.
I went ahead and ordered the remaining fuel fittings and braided hose.
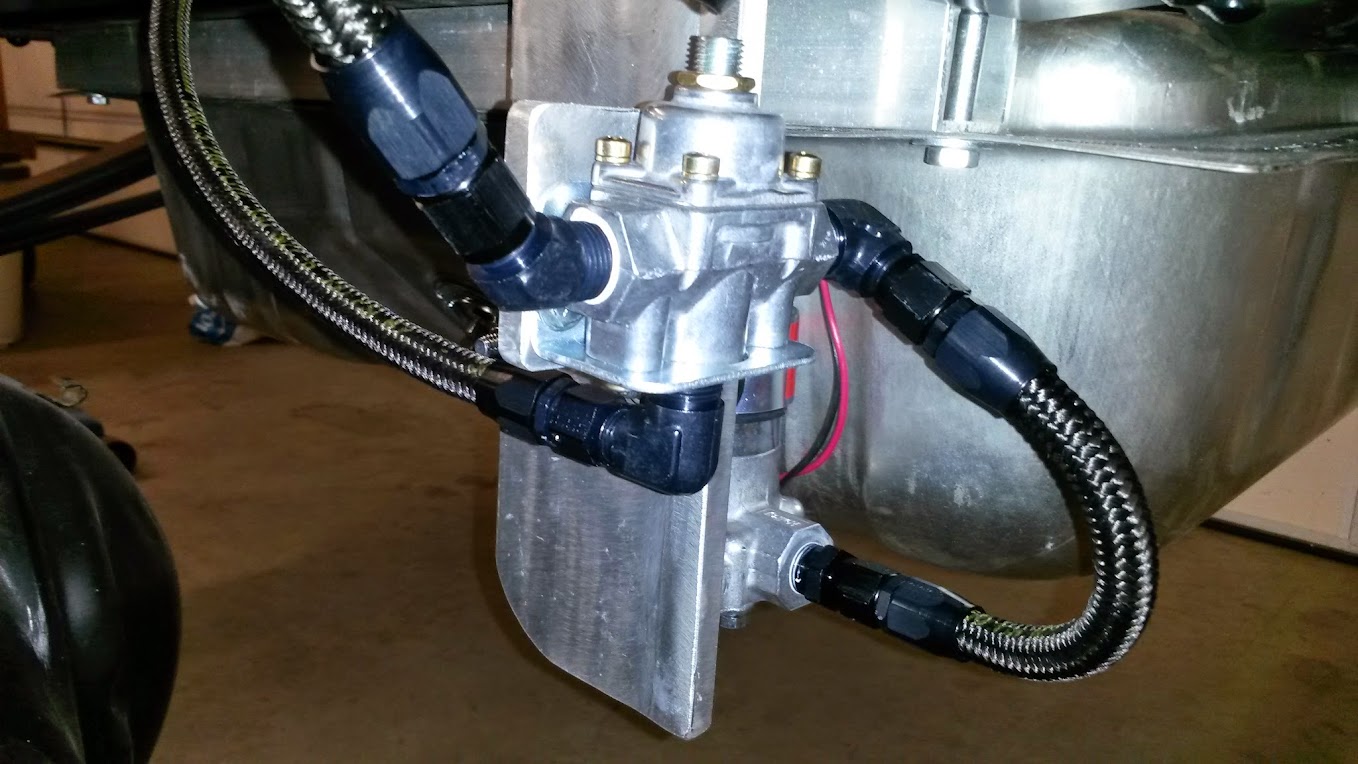

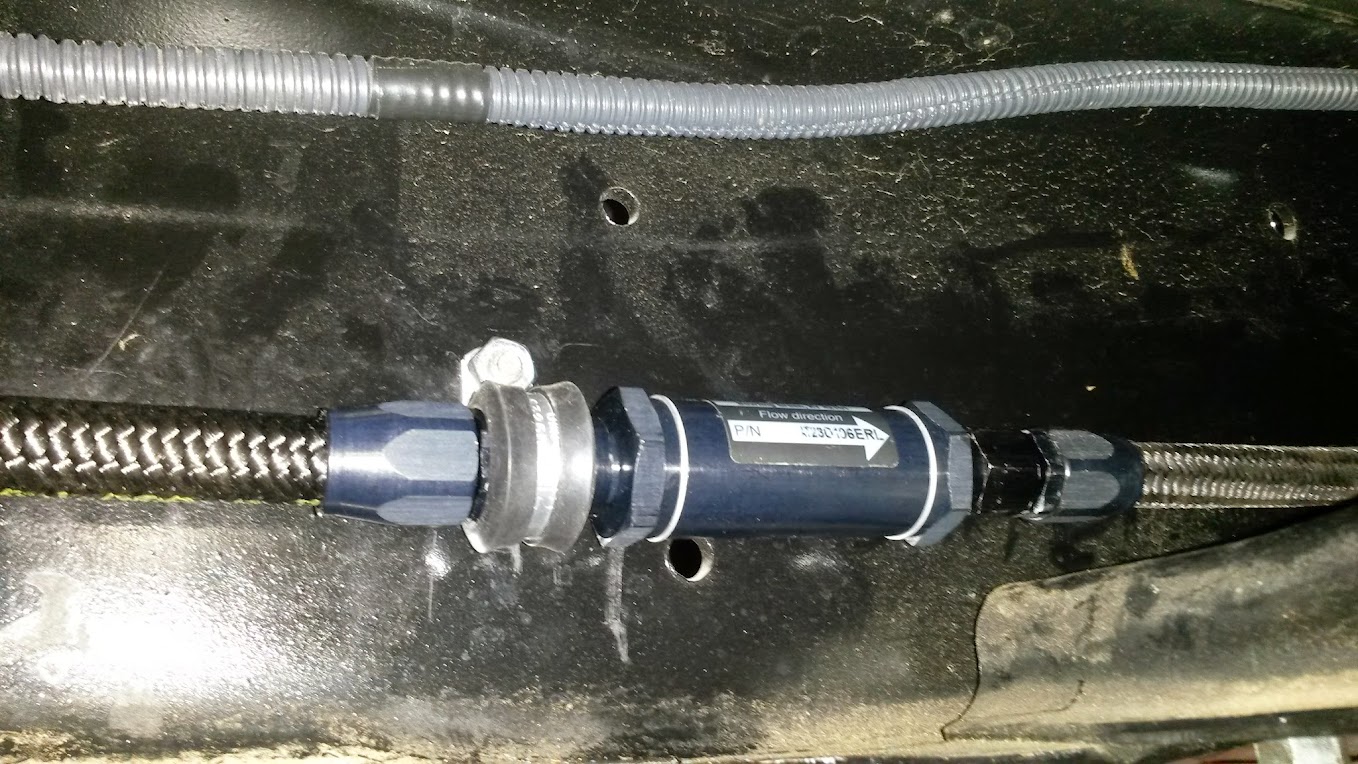
I got the wiring for the fuel pump ran and loomed. The return line from the regulator is just run up and out of the way for now.

The fuel pump instructions said I didn't have to run a relay, and to use a 7.5 amp fuse inline. The passenger side inner fender is getting more cluttered with wiring than I would like, but I will work on that when I have made sure everything will work as designed.
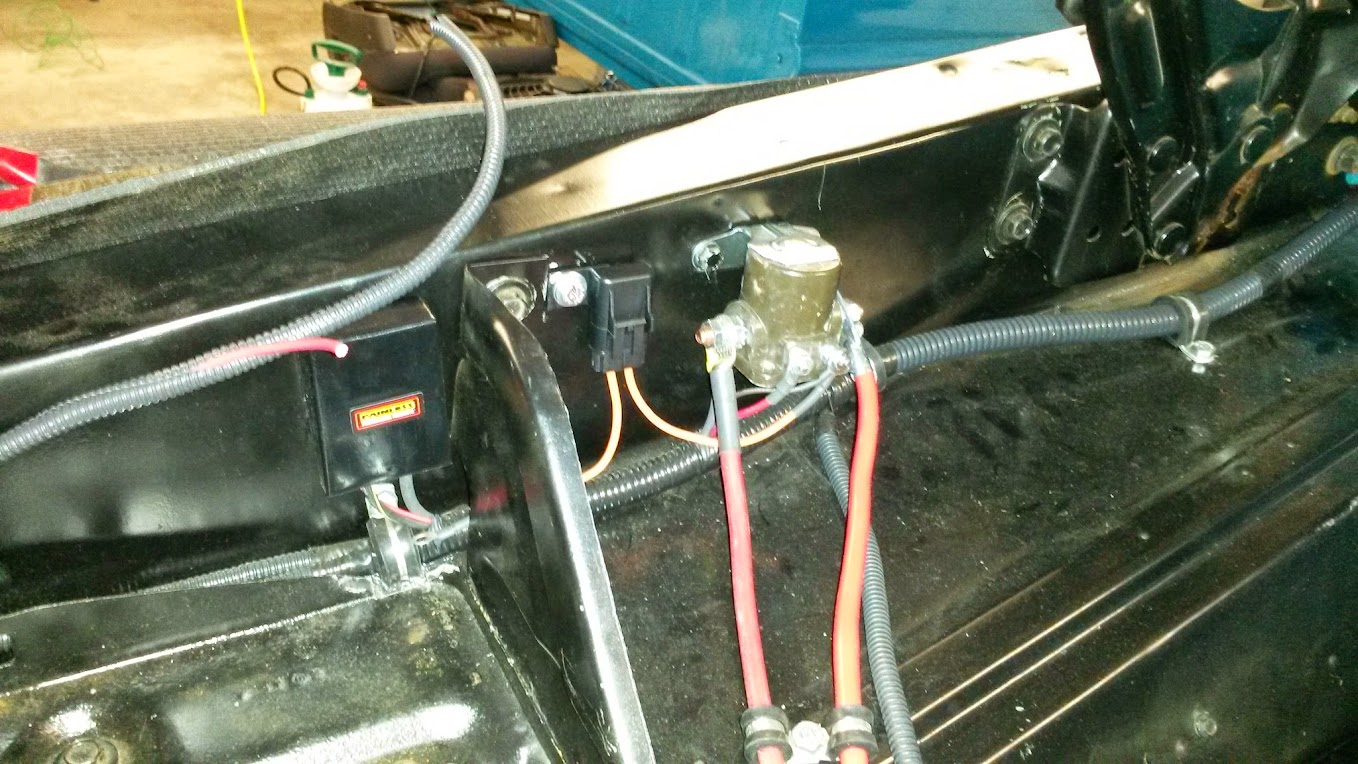
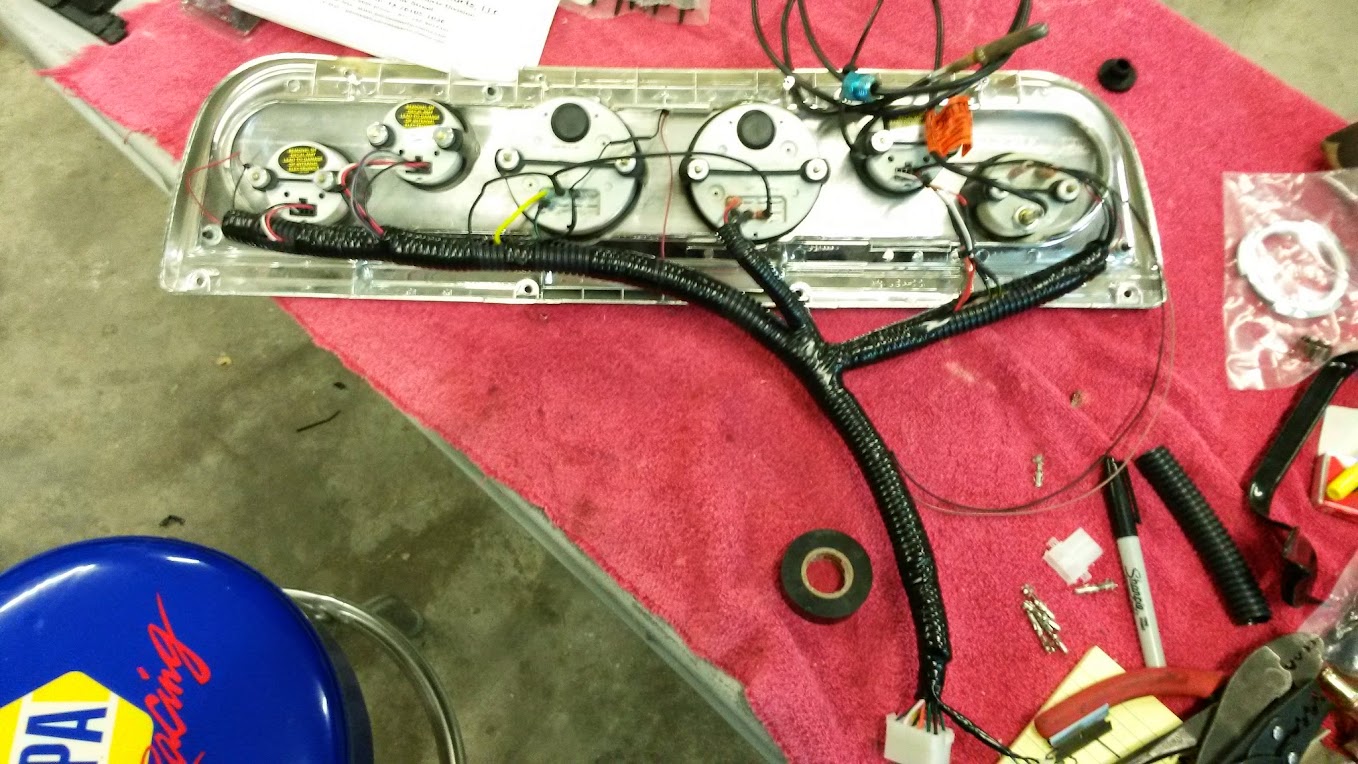
The Autometer oil pressure sending unit required three additional wires be run back to the gauge in the dash. I decided to run them along the driver side valve cover, and tie into the main engine harness running into the cab. It turned out ok.

All of the pins for the gauge cluster connector were used, so I had to come up with a three pin connector in order to get the signal from the oil pressure sending unit into the dash. I had some connectors available through work. This way, in order to remove the gauge cluster, I will have the screws, two electrical connectors, and the water temp sending hose.

This is cleaned up a bit with some loom as well.
I worked on the clutch a bit more and was able to get it adjusted without having to use an adjustable mount like I thought I would. There is about 1" of fork travel, and it is pretty easy and smooth to operate.
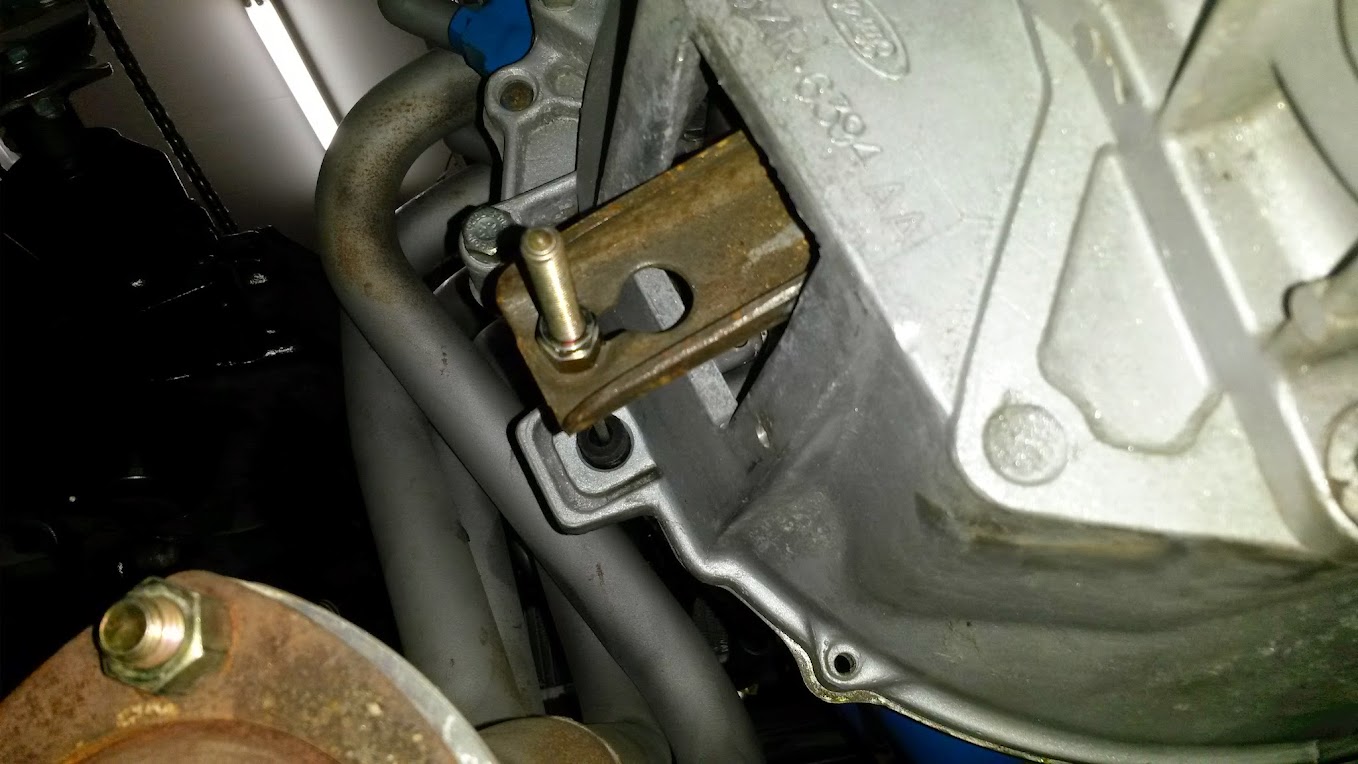
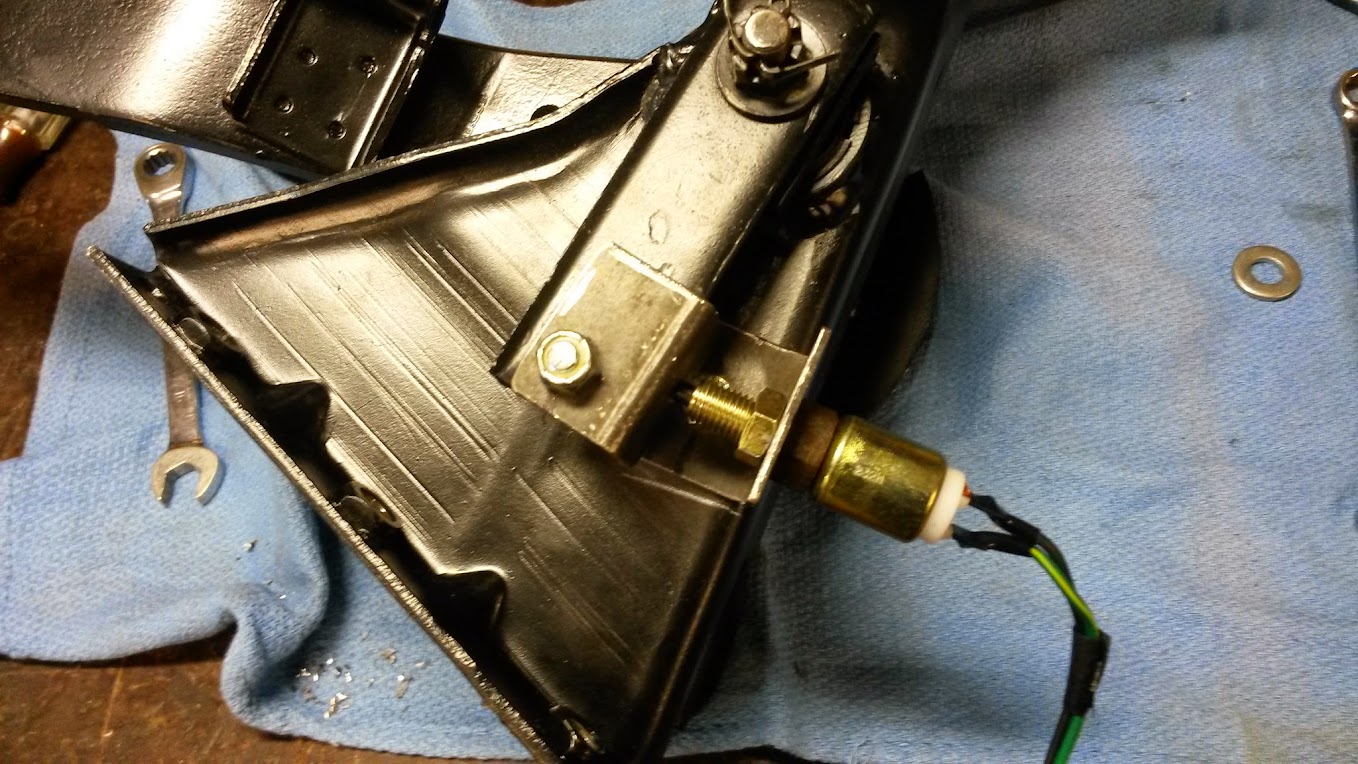
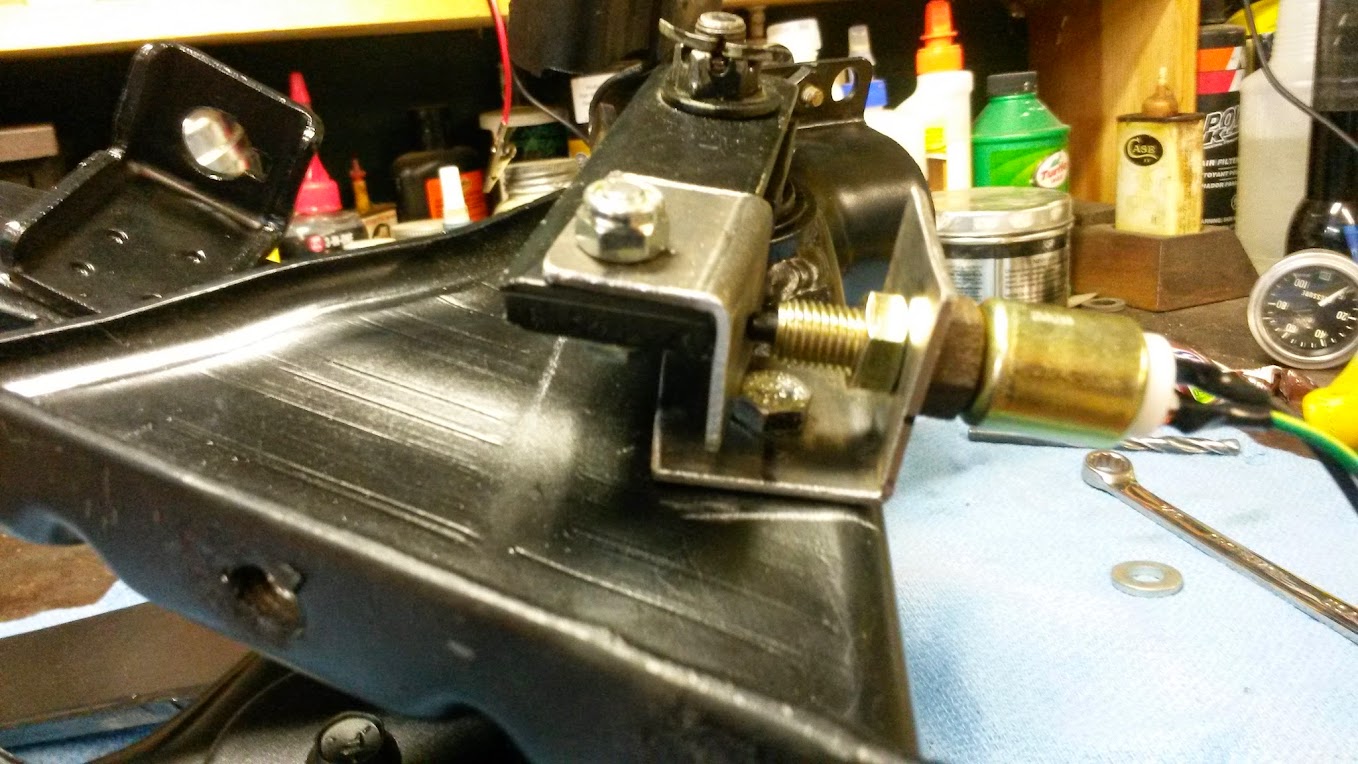
I also wanted to install a clutch safety starting switch. I have read bad things about the neutral safety switch on the T5s, so I decided to use a clutch safety switch instead. Basically, the clutch will have to be depressed fully in order to start the truck. The neutral safety switch was apparently only used for cruise control, so that the computer could kill the cruise control when the transmission was in neutral.
I just used some angle iron and a generic switch I got online.
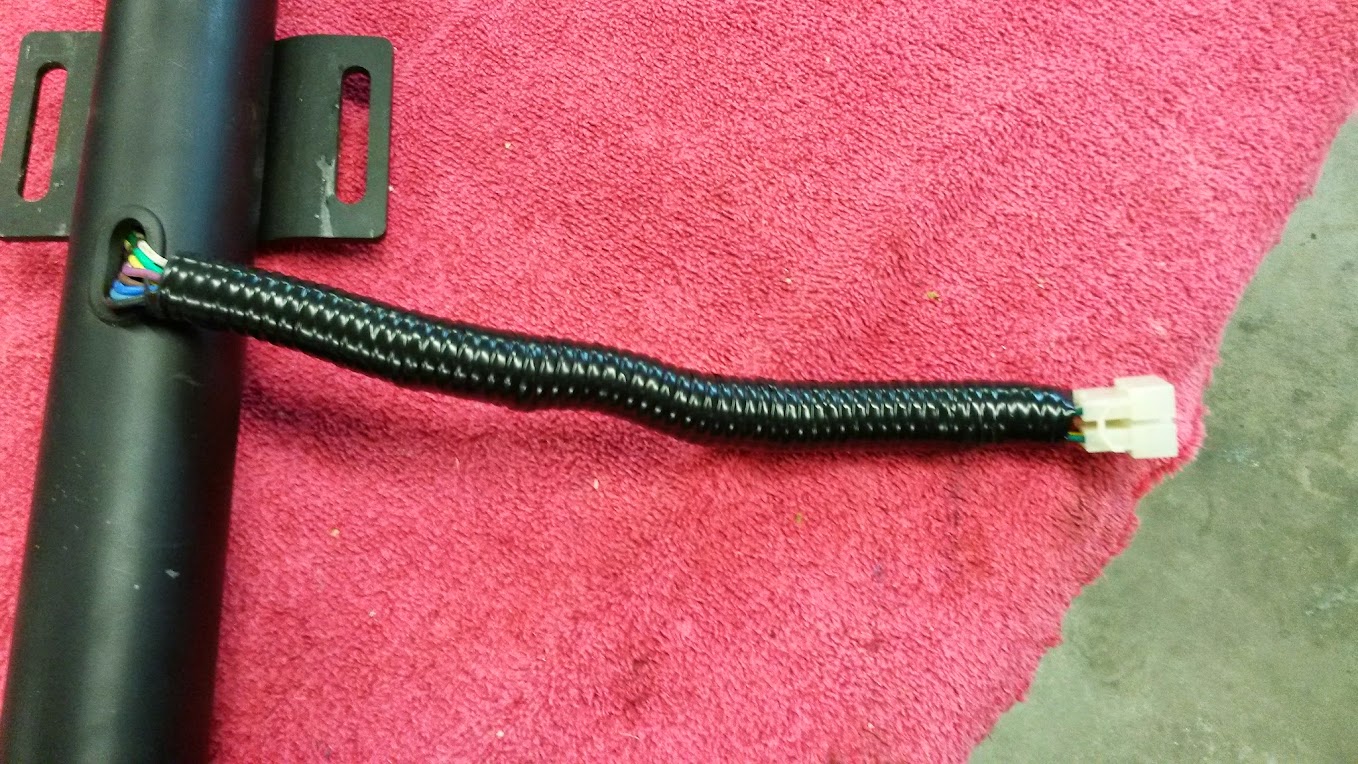
When I bought my Ididit steering column, they had the mounts for our trucks, but the wiring was still the GM style long flat connector. They have since come out with a column that has the correct connector already installed. We just pinned it out, and soldered the wires to the correct terminals, then cleaned it up a bit.

I had to run additional wires towards the rear of the truck for my electric speedometer, the reverse switch on the transmission, and the fuel pump. This required larger loom and re-doing all of the loom to the rear.
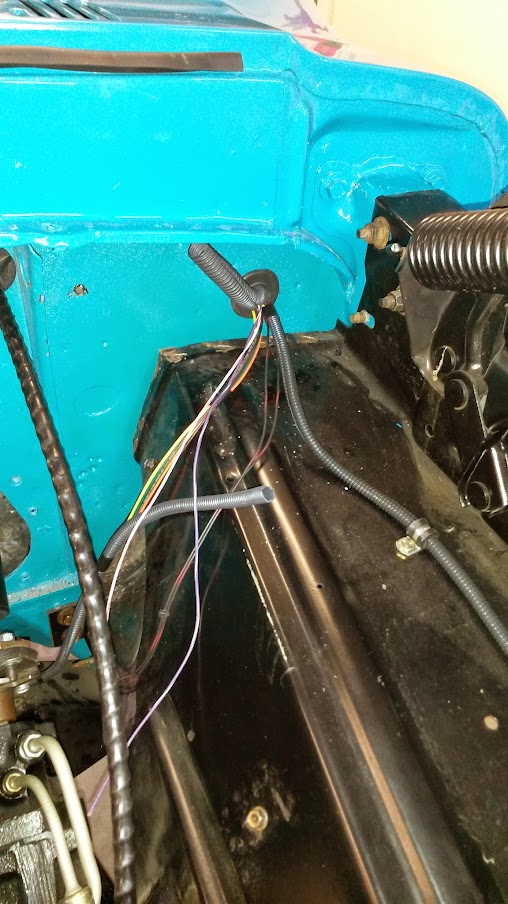
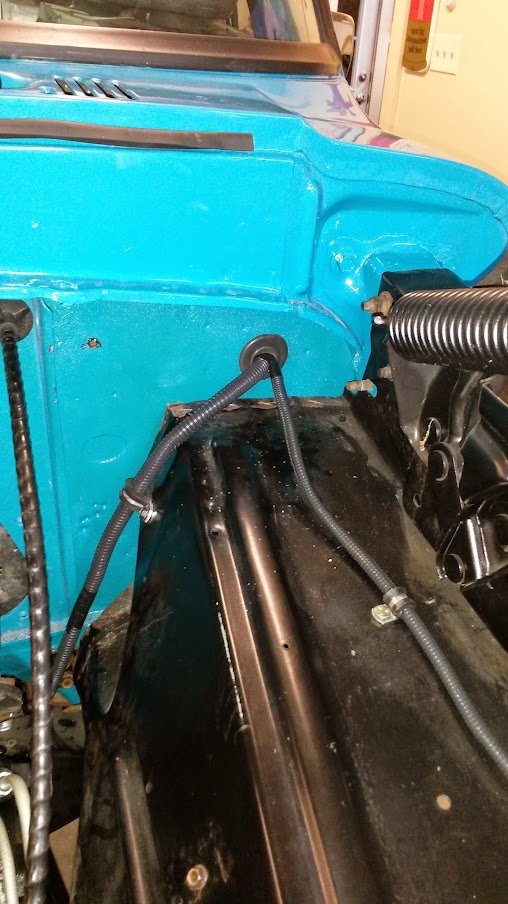
I got bored waiting on some buddies to help me move the bed and cleaned up a bit. It is still a terrible mess, but is so much cleaner than it has been the past couple of months.
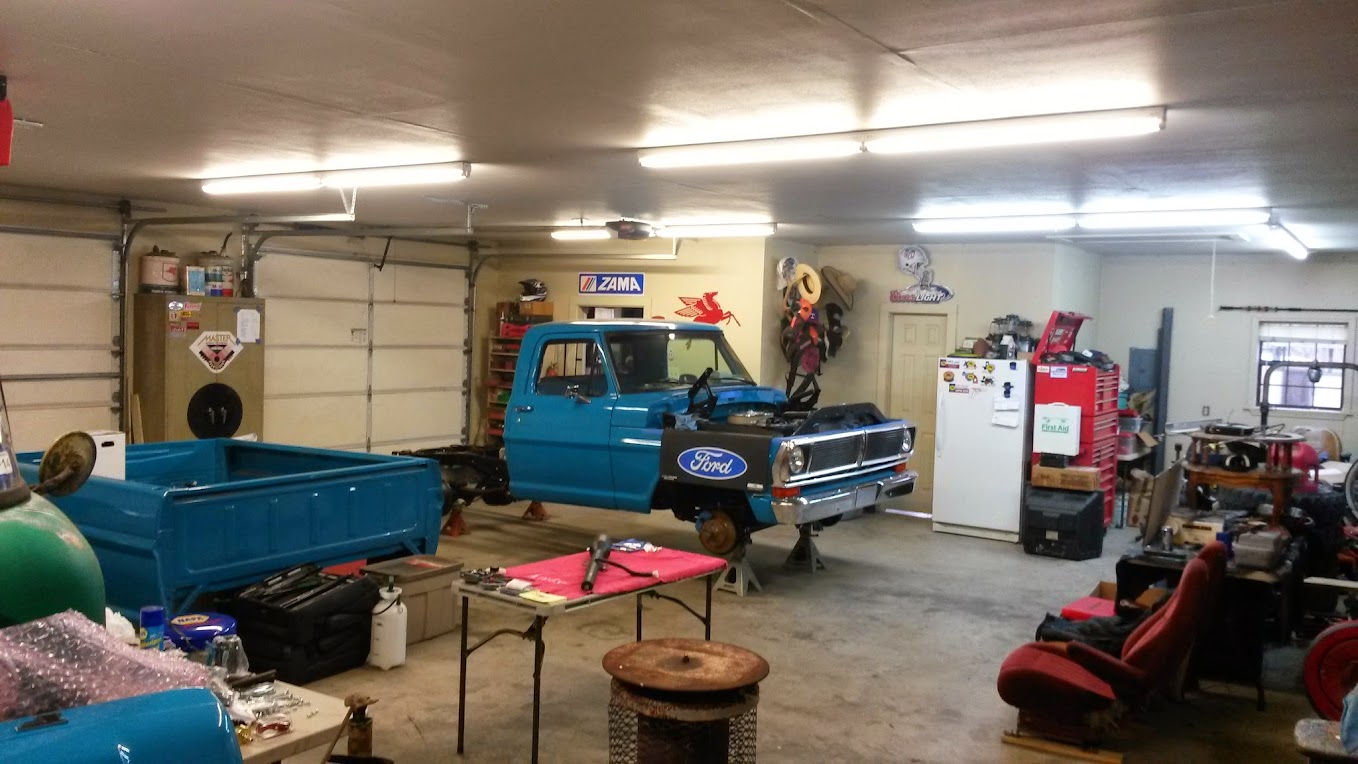
I got everything ready to put the bed back in place. I wanted to make sure I would have enough clearance between the bed and fuel inlet to run a filler where I wanted. After the bed was installed, I had about 5" from the inlet to the bed floor, and about 3" between the frame rail, and the bed floor. I think this will be more than enough to fun a filler to the driver side as planned.
I learned that masking tape is a lot cheaper than paint, so I covered everything before setting the bed back in place.
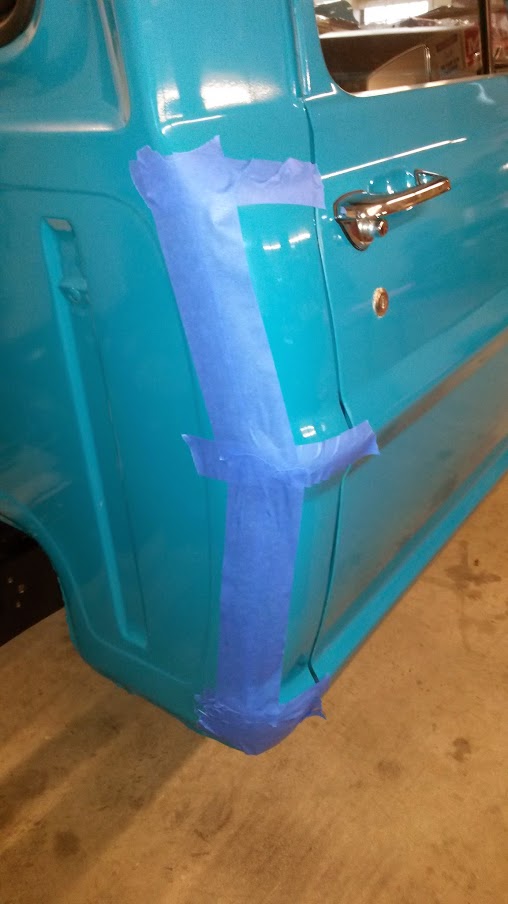
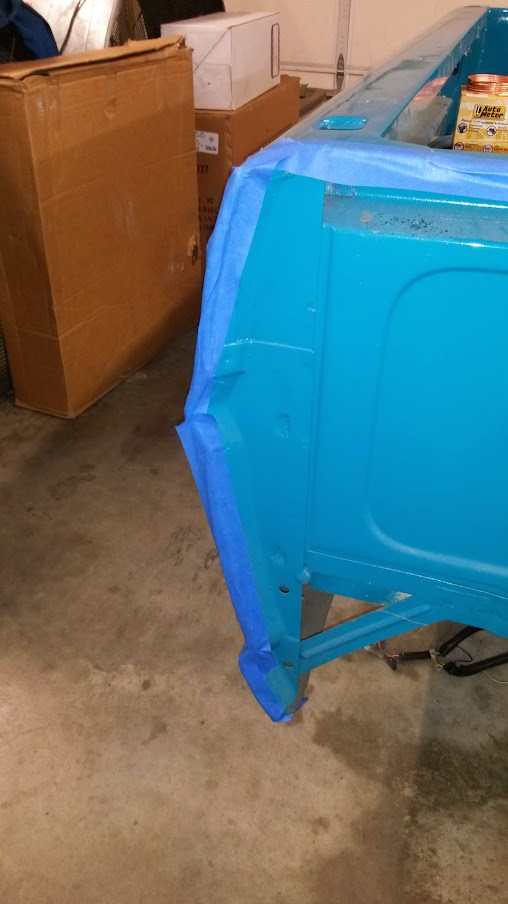
The tank is visible from the rear, but I can live with that. It may be less visible if you were to run a traditional style bumper.


After setting the bed back in place, I jumped up and down to settle the rear suspension as best I could. It was sitting at 36.75" front and back before. (Measured from the floor to the center of the bump.) It is now an inch lower in the rear, but the front suspension is not settled either.
Before settling the rear:

After settling the rear:
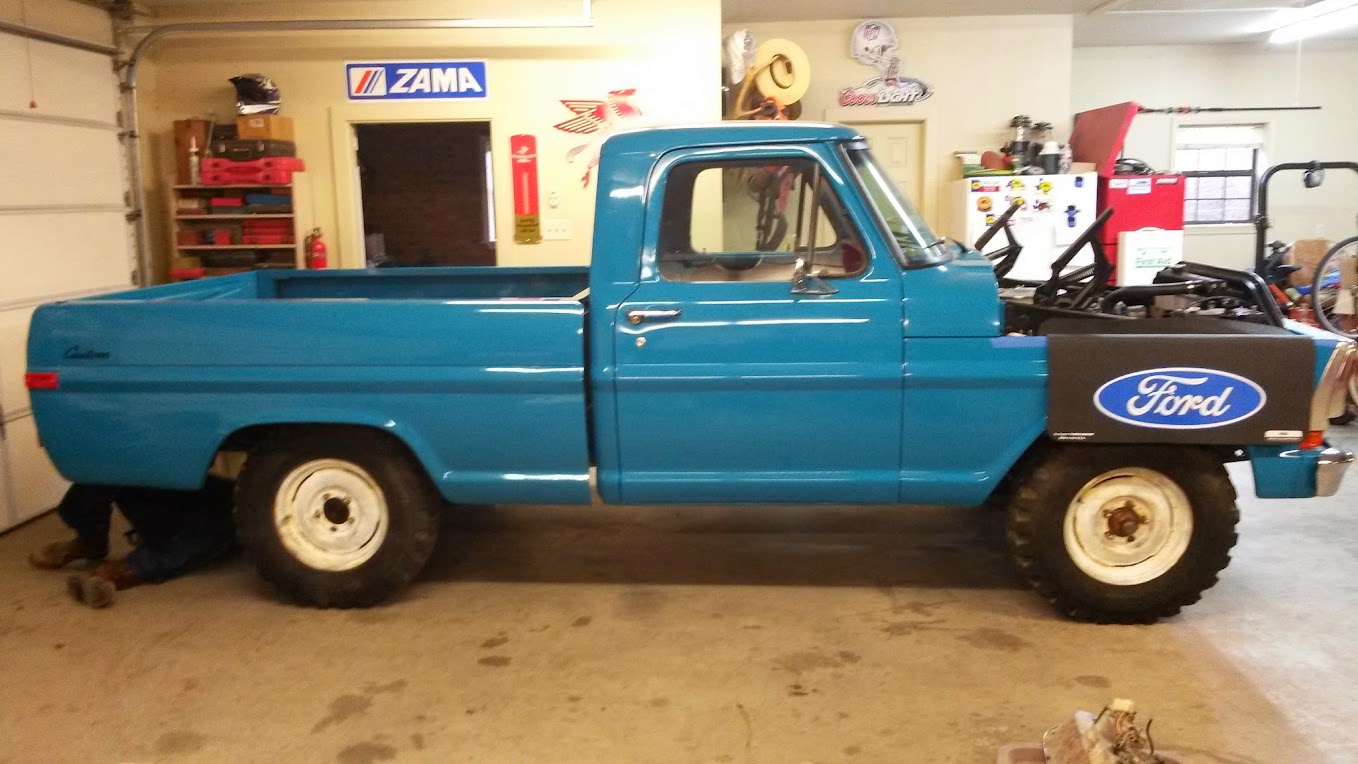
I know you cannot tell much difference, and I will know how much lower I want to go after I have the hood in place, and have settled the front and rear suspension some more.
I am currently waiting on the Eastwood brake flaring tool to arrive, and I will start my brake lines. My fuel filler, return line, and brakes are the only real obstacles to getting to drive it around the block for the first time in 10 years. I am getting pretty excited.
I went ahead and ordered the remaining fuel fittings and braided hose.


I got the wiring for the fuel pump ran and loomed. The return line from the regulator is just run up and out of the way for now.

The fuel pump instructions said I didn't have to run a relay, and to use a 7.5 amp fuse inline. The passenger side inner fender is getting more cluttered with wiring than I would like, but I will work on that when I have made sure everything will work as designed.

The Autometer oil pressure sending unit required three additional wires be run back to the gauge in the dash. I decided to run them along the driver side valve cover, and tie into the main engine harness running into the cab. It turned out ok.

All of the pins for the gauge cluster connector were used, so I had to come up with a three pin connector in order to get the signal from the oil pressure sending unit into the dash. I had some connectors available through work. This way, in order to remove the gauge cluster, I will have the screws, two electrical connectors, and the water temp sending hose.

This is cleaned up a bit with some loom as well.

I worked on the clutch a bit more and was able to get it adjusted without having to use an adjustable mount like I thought I would. There is about 1" of fork travel, and it is pretty easy and smooth to operate.

I also wanted to install a clutch safety starting switch. I have read bad things about the neutral safety switch on the T5s, so I decided to use a clutch safety switch instead. Basically, the clutch will have to be depressed fully in order to start the truck. The neutral safety switch was apparently only used for cruise control, so that the computer could kill the cruise control when the transmission was in neutral.
I just used some angle iron and a generic switch I got online.


When I bought my Ididit steering column, they had the mounts for our trucks, but the wiring was still the GM style long flat connector. They have since come out with a column that has the correct connector already installed. We just pinned it out, and soldered the wires to the correct terminals, then cleaned it up a bit.


I had to run additional wires towards the rear of the truck for my electric speedometer, the reverse switch on the transmission, and the fuel pump. This required larger loom and re-doing all of the loom to the rear.


I got bored waiting on some buddies to help me move the bed and cleaned up a bit. It is still a terrible mess, but is so much cleaner than it has been the past couple of months.

I got everything ready to put the bed back in place. I wanted to make sure I would have enough clearance between the bed and fuel inlet to run a filler where I wanted. After the bed was installed, I had about 5" from the inlet to the bed floor, and about 3" between the frame rail, and the bed floor. I think this will be more than enough to fun a filler to the driver side as planned.
I learned that masking tape is a lot cheaper than paint, so I covered everything before setting the bed back in place.


The tank is visible from the rear, but I can live with that. It may be less visible if you were to run a traditional style bumper.


After setting the bed back in place, I jumped up and down to settle the rear suspension as best I could. It was sitting at 36.75" front and back before. (Measured from the floor to the center of the bump.) It is now an inch lower in the rear, but the front suspension is not settled either.
Before settling the rear:

After settling the rear:

I know you cannot tell much difference, and I will know how much lower I want to go after I have the hood in place, and have settled the front and rear suspension some more.
I am currently waiting on the Eastwood brake flaring tool to arrive, and I will start my brake lines. My fuel filler, return line, and brakes are the only real obstacles to getting to drive it around the block for the first time in 10 years. I am getting pretty excited.
1971 f100 Custom, SWB, 302, T5
"It can't be that hard."
"It can't be that hard."
- hfdco4
- Blue Oval Guru

- Posts: 1312
- Joined: Mon Apr 01, 2013 1:45 pm
Re: 1971 short wide (shortstack)
Nice progress, it does me so good to see others getting things done. This gives me the push to get back to work on mine. 
Paul
 FE390PC
1970 F250 4x4
2016 F150 4x4 2.7 ECO
Gone 1997, 1999 & 2003 F150 4x4s
Gone 1988, 1989 & 1991 Broncs
1970 F250 4x4
2016 F150 4x4 2.7 ECO
Gone 1997, 1999 & 2003 F150 4x4s
Gone 1988, 1989 & 1991 Broncs
- shortstack
- New Member

- Posts: 129
- Joined: Wed Sep 22, 2010 9:45 am
- Location: Austin TX
Re: 1971 short wide (shortstack)
Made a little progress in the past couple weeks.
I had a bunch of goodies waiting on me when I got there.
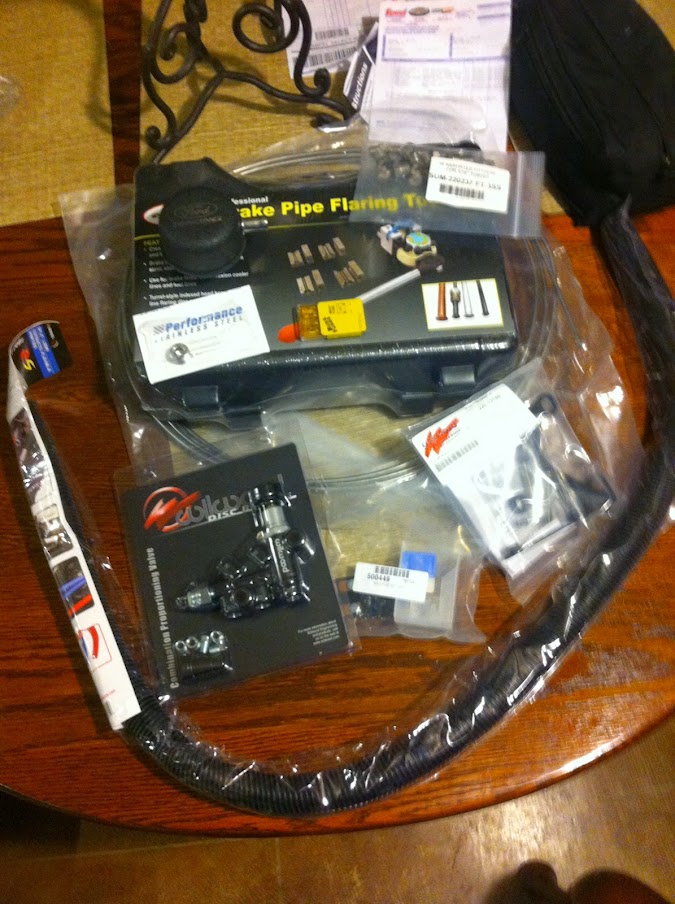
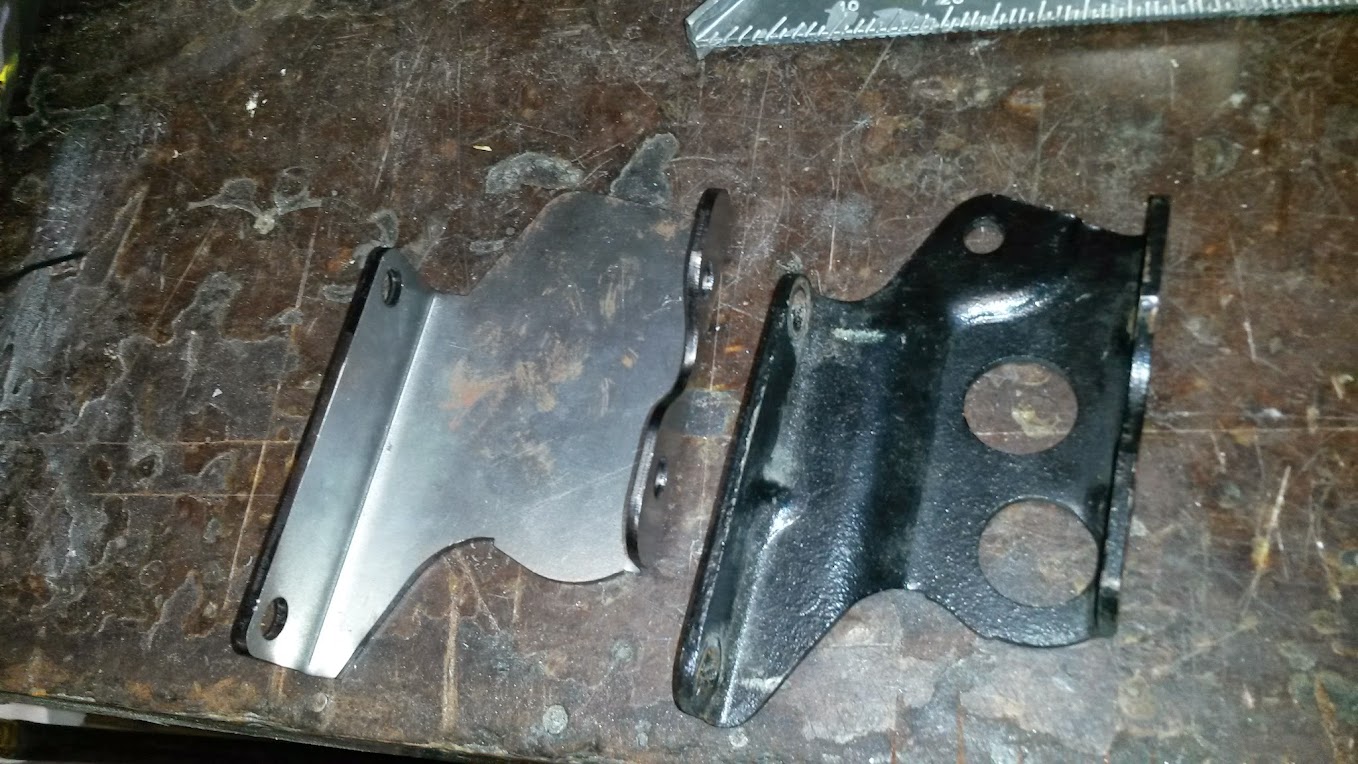
Got the booster brackets from Flashback F100s. The fit and quality is awesome. Pictured next to a set I temporarily borrowed from the one ton.
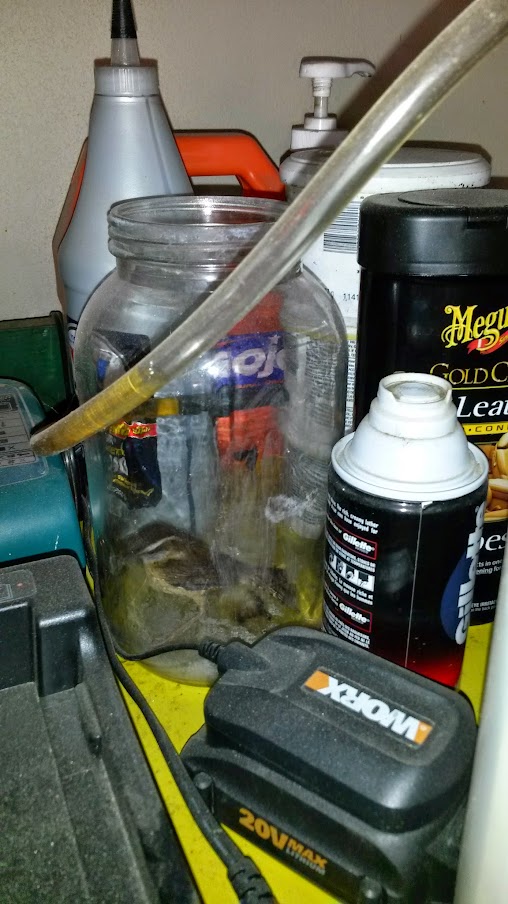
I opened the shop door Saturday morning and then went back in to eat breakfast. When I returned, I heard some noises and saw a bird flying around the shop. Nothing new, but it wasn't leaving as I began working like they usually do. I heard some more commotion and found this little guy stuck in a jar we had on top of a cabinet. I took his picture and left him alone for a bit and he managed to get out.
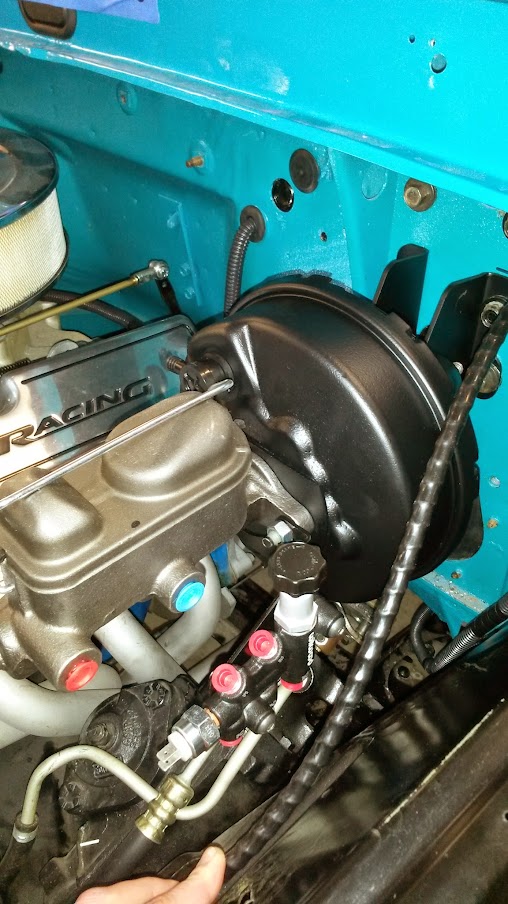
I got the brackets painted along with the booster. I mounted the Proportioning valve and am not dead set on its mounting location yet. The bracket and lines it came with will not work with this master cylinder. I will end up using this master on another bump, and will order a different one.

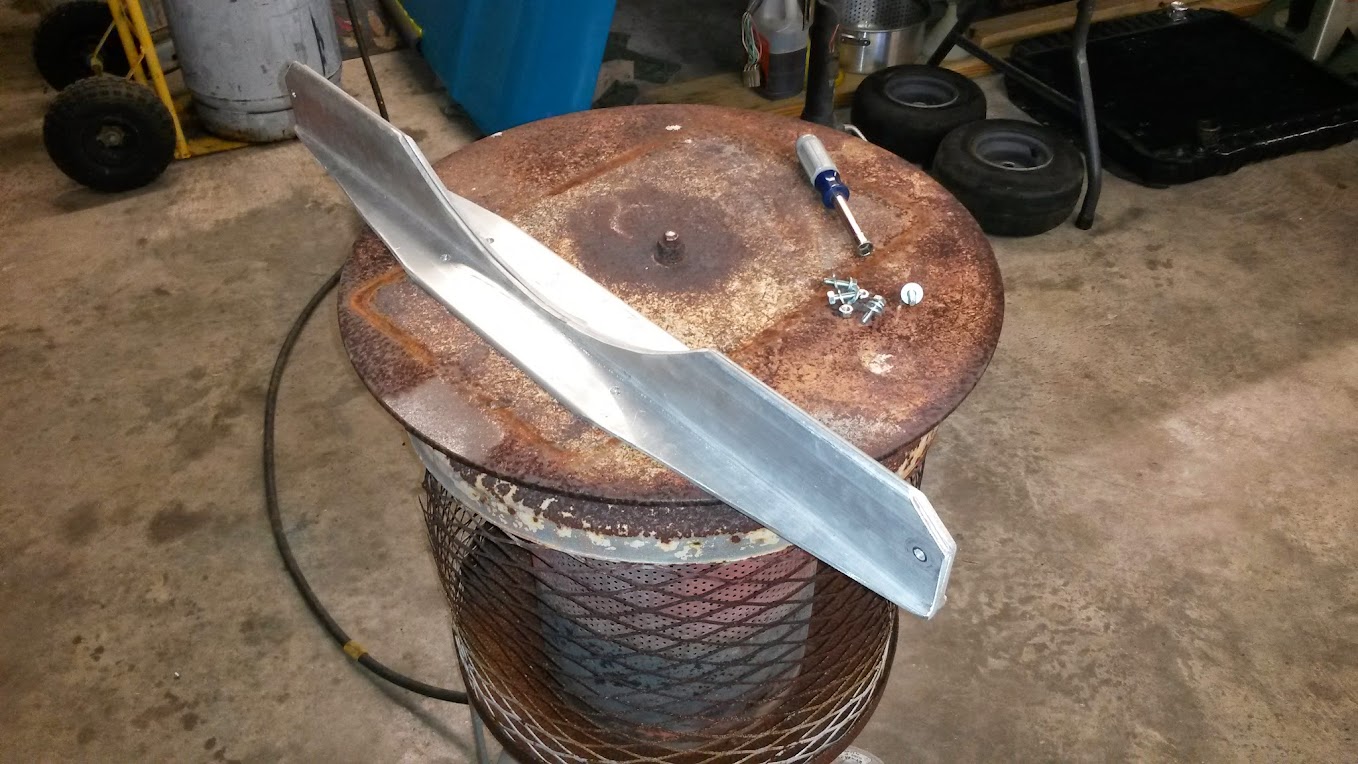
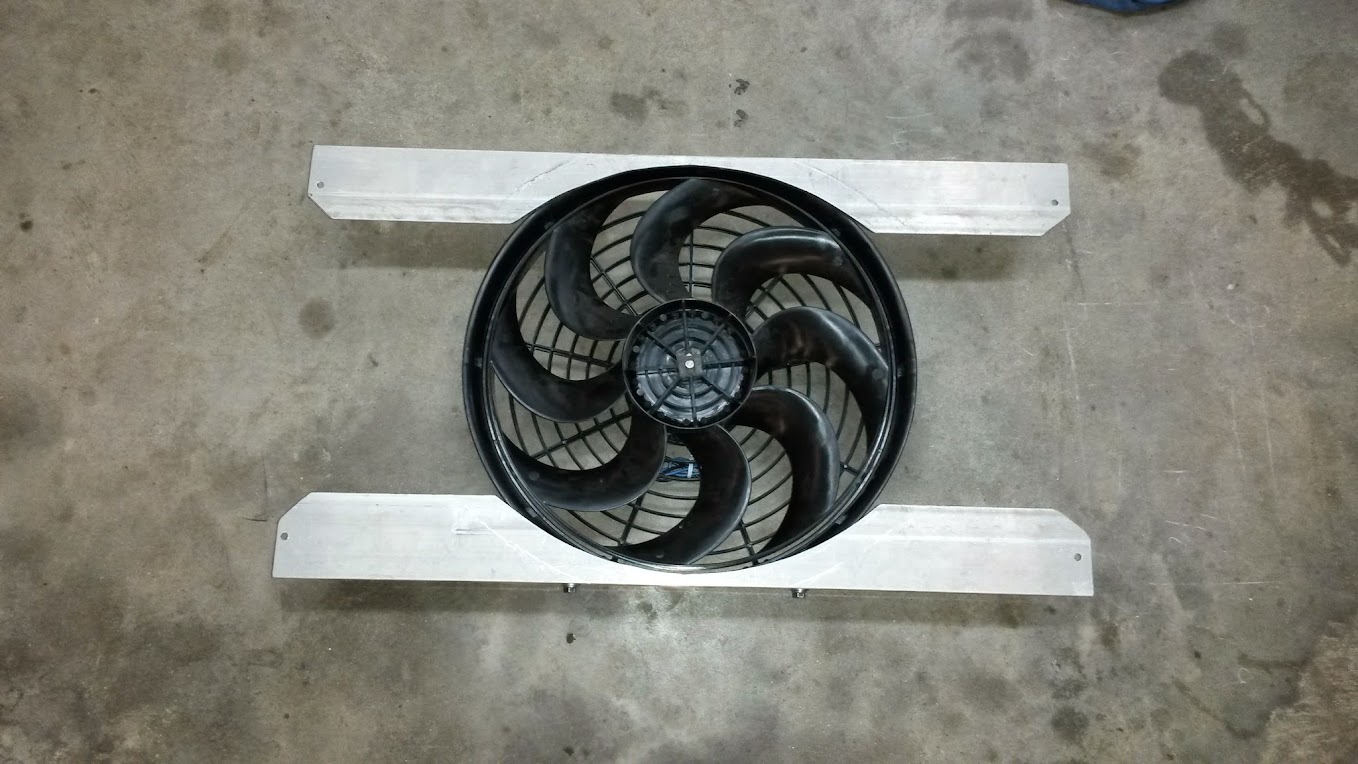
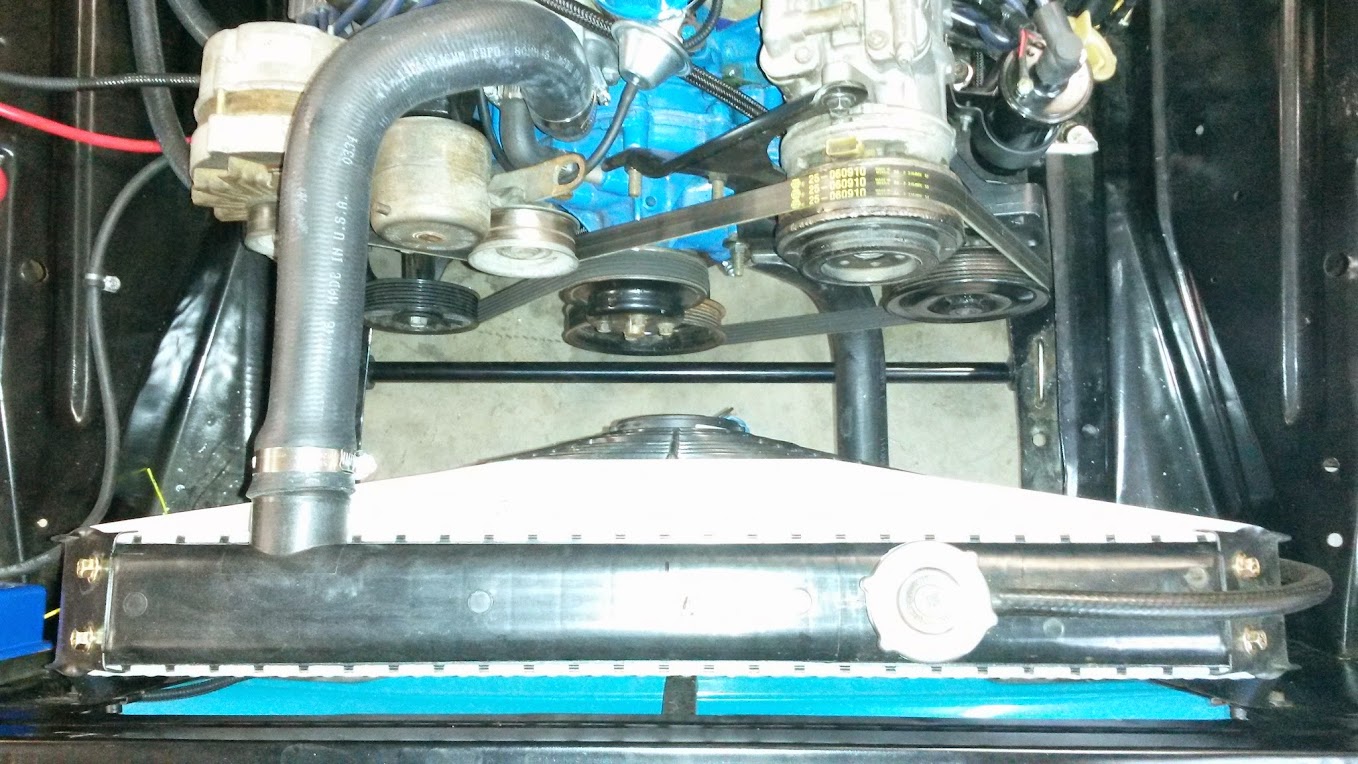
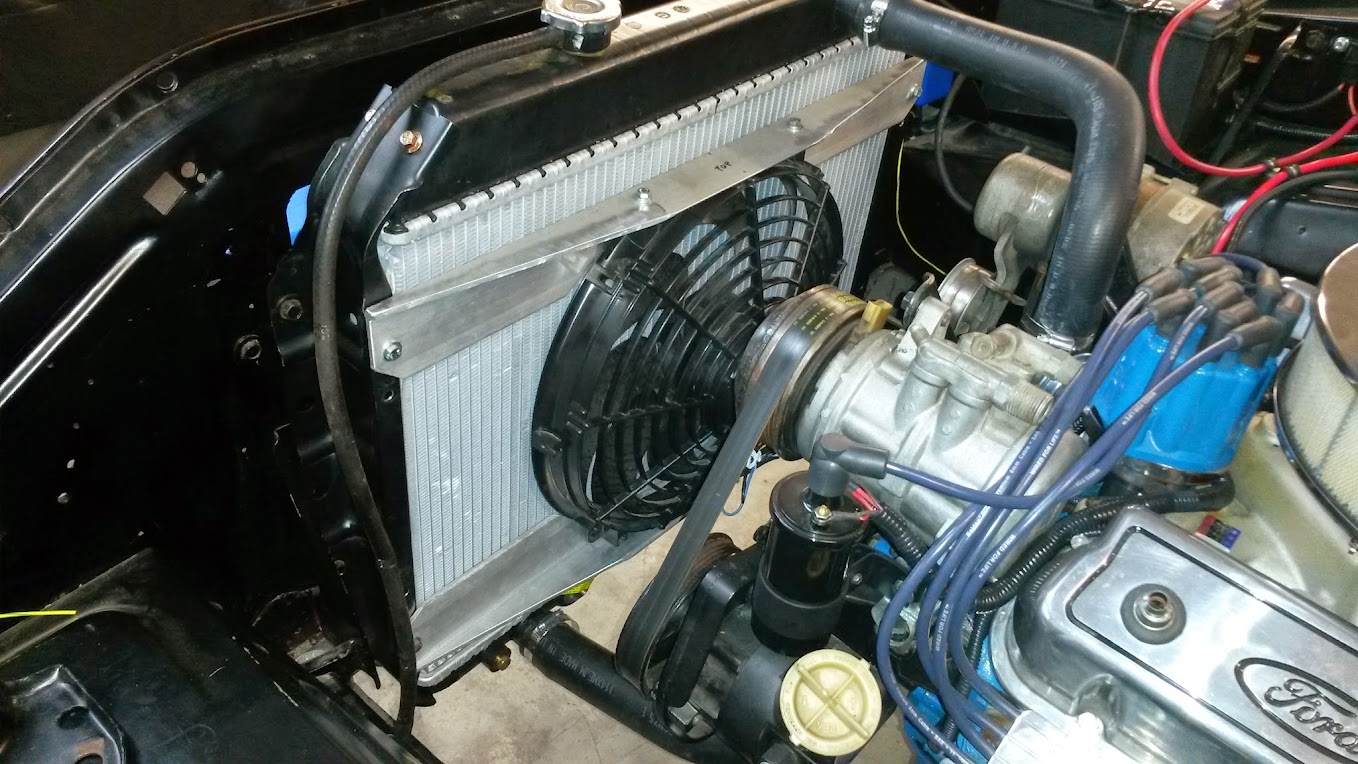
I also worked on mounting the cooling fan to the radiator. Started with 2"X3" Aluminum angle, and came up with this. It is a somewhat temporary solution. As stated before, I am not pleased with the overall quality of the radiator, and the fan is not going to be powerful enough. (1950CFM Thanks LMC) I also may trim the brackets to allow more flow through the radiator.

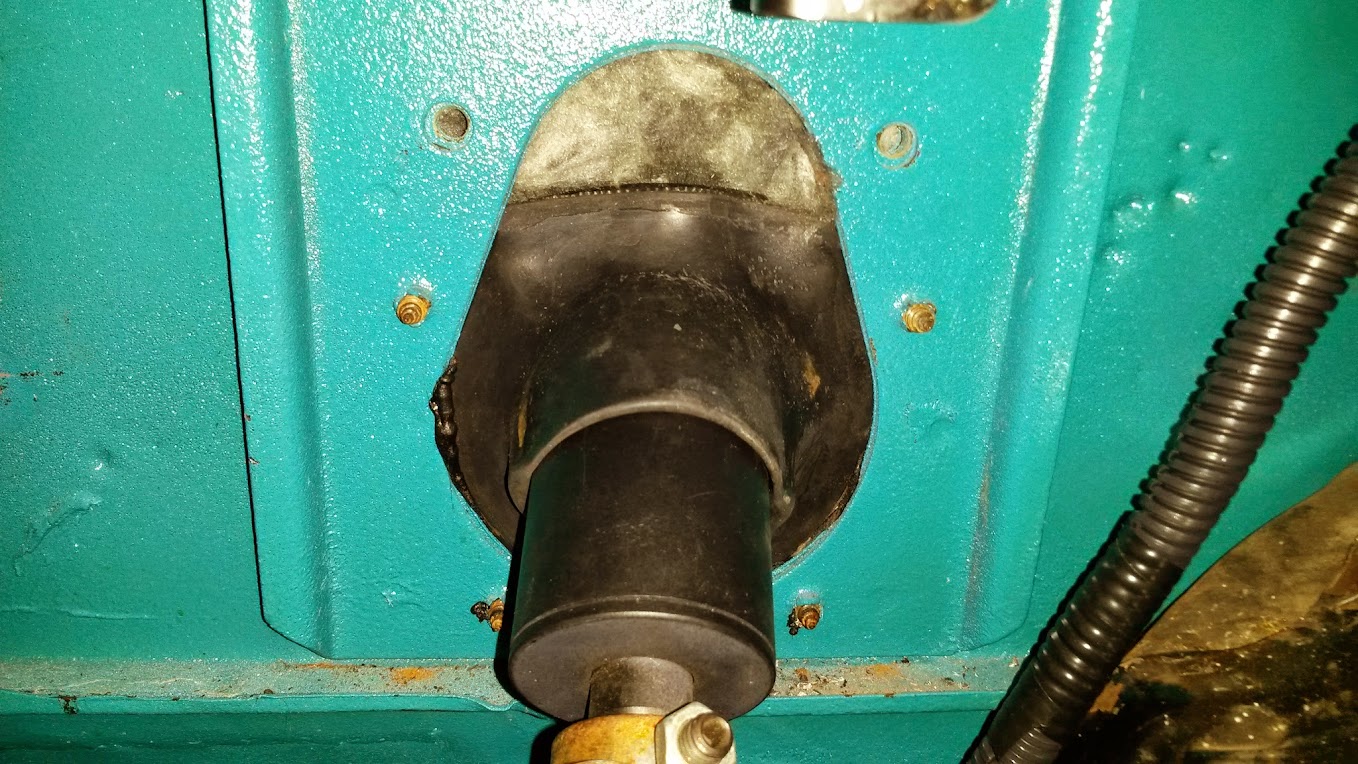
One other issue I am working on is the column seal. There is a significant gap along the bottom of the column, and the firewall pad is exposed on the top section of the opening. I am going to look around and see if I can figure out if this is even the right seal or what I am missing.
I had a bunch of goodies waiting on me when I got there.

Got the booster brackets from Flashback F100s. The fit and quality is awesome. Pictured next to a set I temporarily borrowed from the one ton.

I opened the shop door Saturday morning and then went back in to eat breakfast. When I returned, I heard some noises and saw a bird flying around the shop. Nothing new, but it wasn't leaving as I began working like they usually do. I heard some more commotion and found this little guy stuck in a jar we had on top of a cabinet. I took his picture and left him alone for a bit and he managed to get out.

I got the brackets painted along with the booster. I mounted the Proportioning valve and am not dead set on its mounting location yet. The bracket and lines it came with will not work with this master cylinder. I will end up using this master on another bump, and will order a different one.


I also worked on mounting the cooling fan to the radiator. Started with 2"X3" Aluminum angle, and came up with this. It is a somewhat temporary solution. As stated before, I am not pleased with the overall quality of the radiator, and the fan is not going to be powerful enough. (1950CFM Thanks LMC) I also may trim the brackets to allow more flow through the radiator.


One other issue I am working on is the column seal. There is a significant gap along the bottom of the column, and the firewall pad is exposed on the top section of the opening. I am going to look around and see if I can figure out if this is even the right seal or what I am missing.

1971 f100 Custom, SWB, 302, T5
"It can't be that hard."
"It can't be that hard."
- SSW
- New Member

- Posts: 55
- Joined: Sun Jul 06, 2014 9:55 pm
- Location: Mesa, AZ
Re: 1971 short wide (shortstack)
You are missing a bracket & the clamp that clamps the column to the bracket.
You do not have the required permissions to view the files attached to this post.
- shortstack
- New Member

- Posts: 129
- Joined: Wed Sep 22, 2010 9:45 am
- Location: Austin TX
Re: 1971 short wide (shortstack)
Sorry for the confusion. I should have stated that I do have the metal bracket and clamp, it is just removed in this picture for reference. My concern is that even with the metal bracket, there is no real seal. It covers the exposed firewall pad, but it seems like there should be something else, or a different column seal that is taller.
1971 f100 Custom, SWB, 302, T5
"It can't be that hard."
"It can't be that hard."
- shortstack
- New Member

- Posts: 129
- Joined: Wed Sep 22, 2010 9:45 am
- Location: Austin TX
Re: 1971 short wide (shortstack)
So for the past three updates or so I have been saying that I was going to get the brakes all buttoned up... I finally made some real progress this weekend, and need to go get one union before I can call them complete.
I kept putting off bending all the lines which gave me some time to get other odds and ends out of the way.
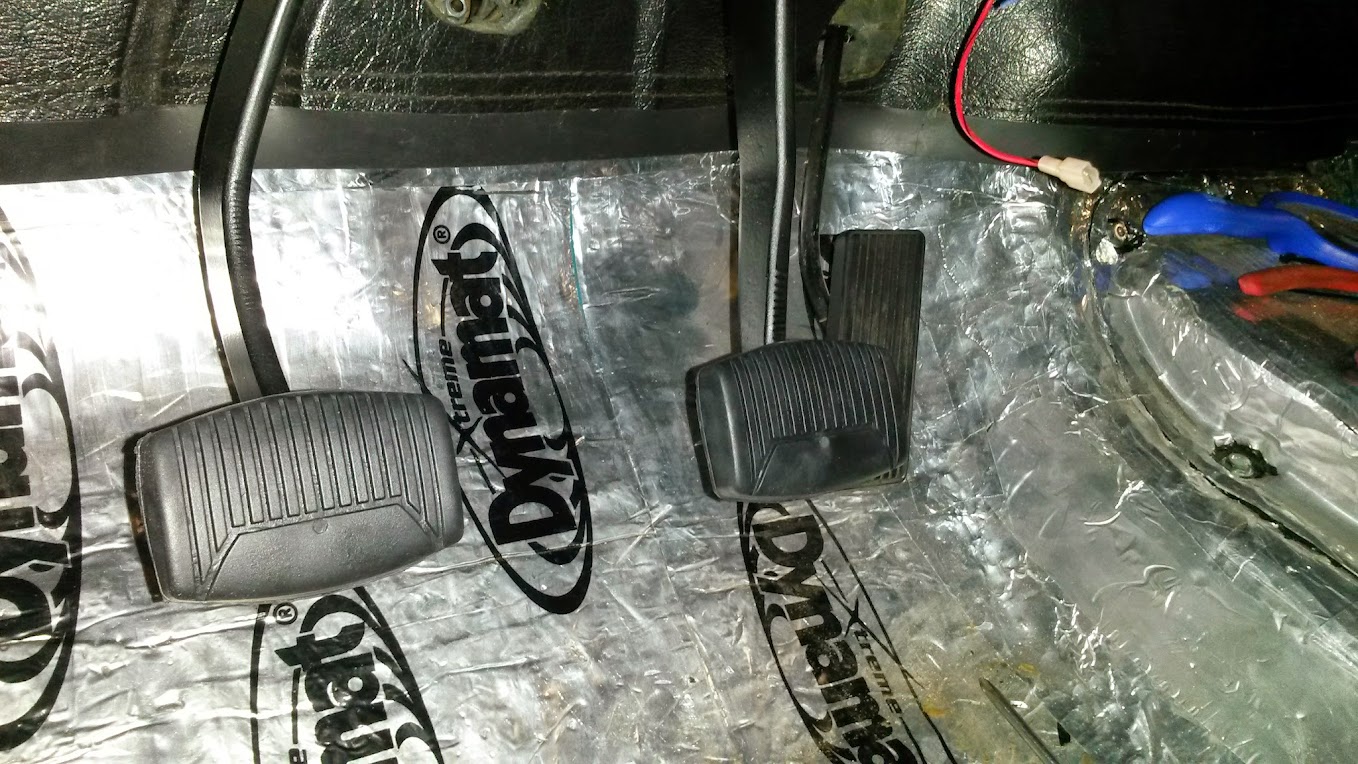
New brake and clutch pedal pads.
Windshield washer components. LMC didn't send near enough washer hose to complete the job, but I'll have to move my washer bottle anyways due to the proportioning valve and clutch cable. I wouldn't say that I was overly generous on the amount of slack I gave the washer tees, yet I had one foot of hose left over to make it the three or so feet to the washer bottle.
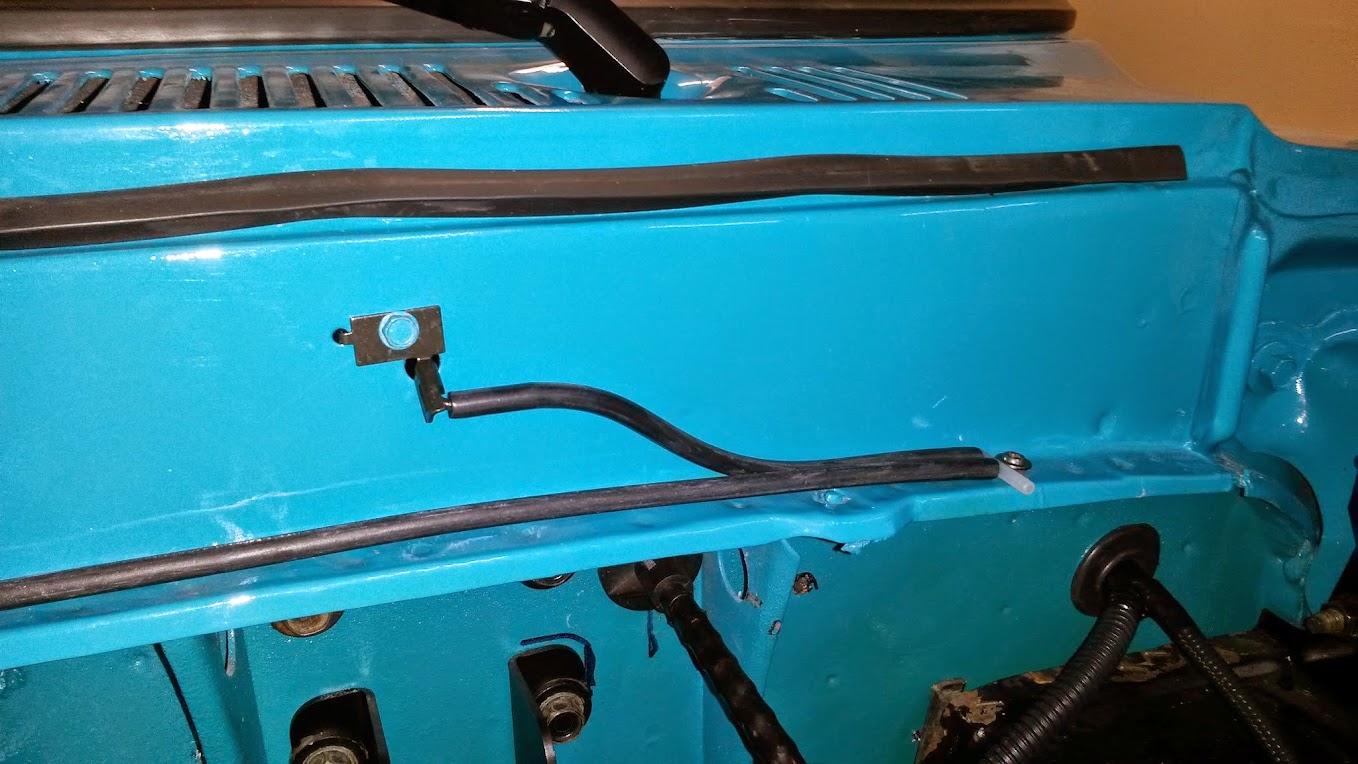
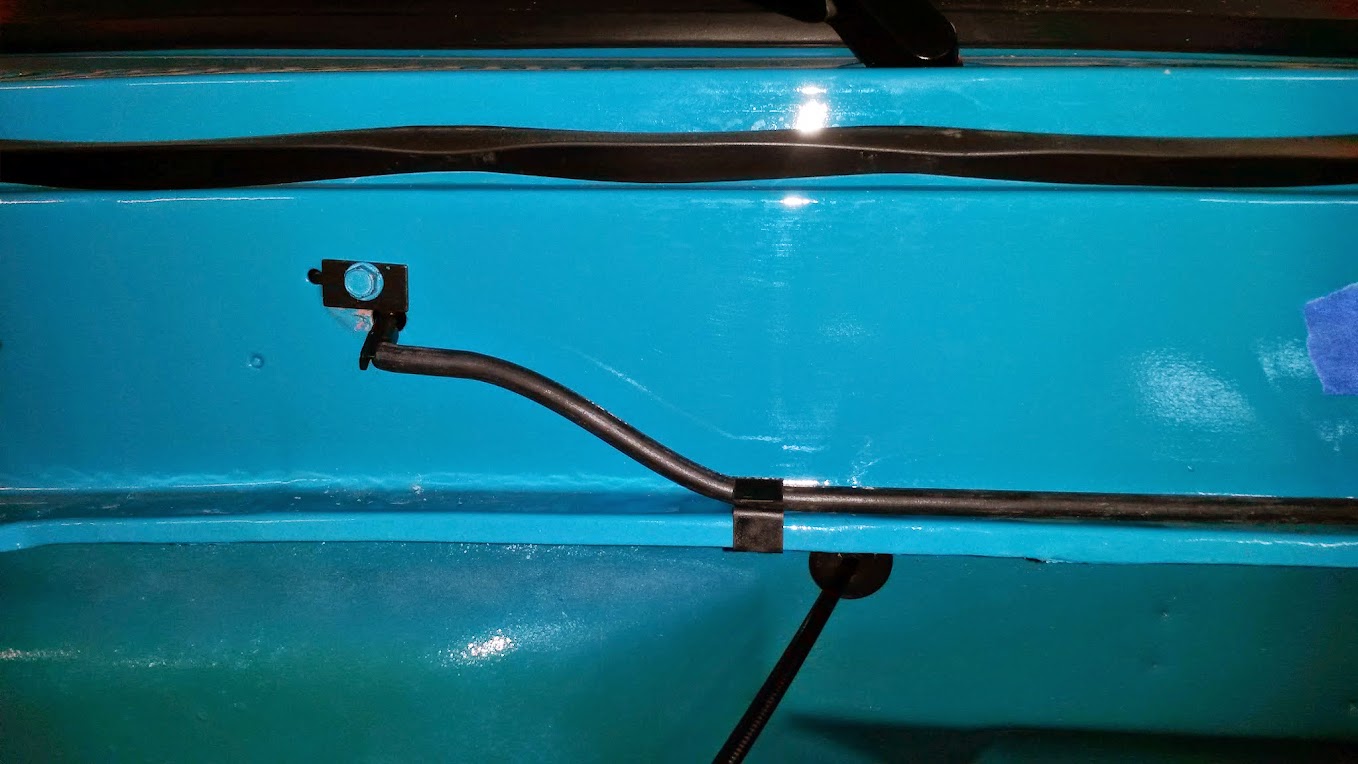
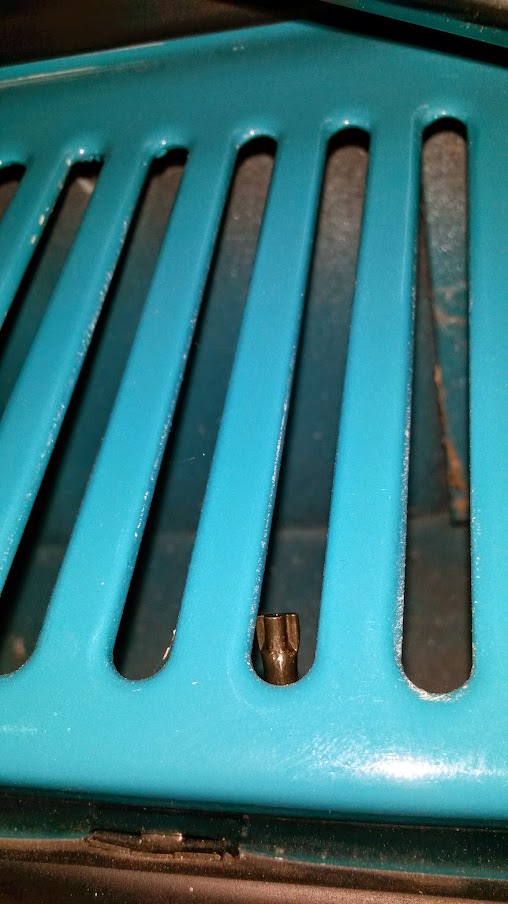
Somewhere along the way I lost a windshield washer, so I ordered two more. They were pretty easy to install and bend to the correct location.
I got a new glove box cable, because the old one had a pretty bad kink in it. Word of caution: the LMC cable does not have a large enough diameter to use your original shoulder screws. I drilled them out enough to use the original screws.

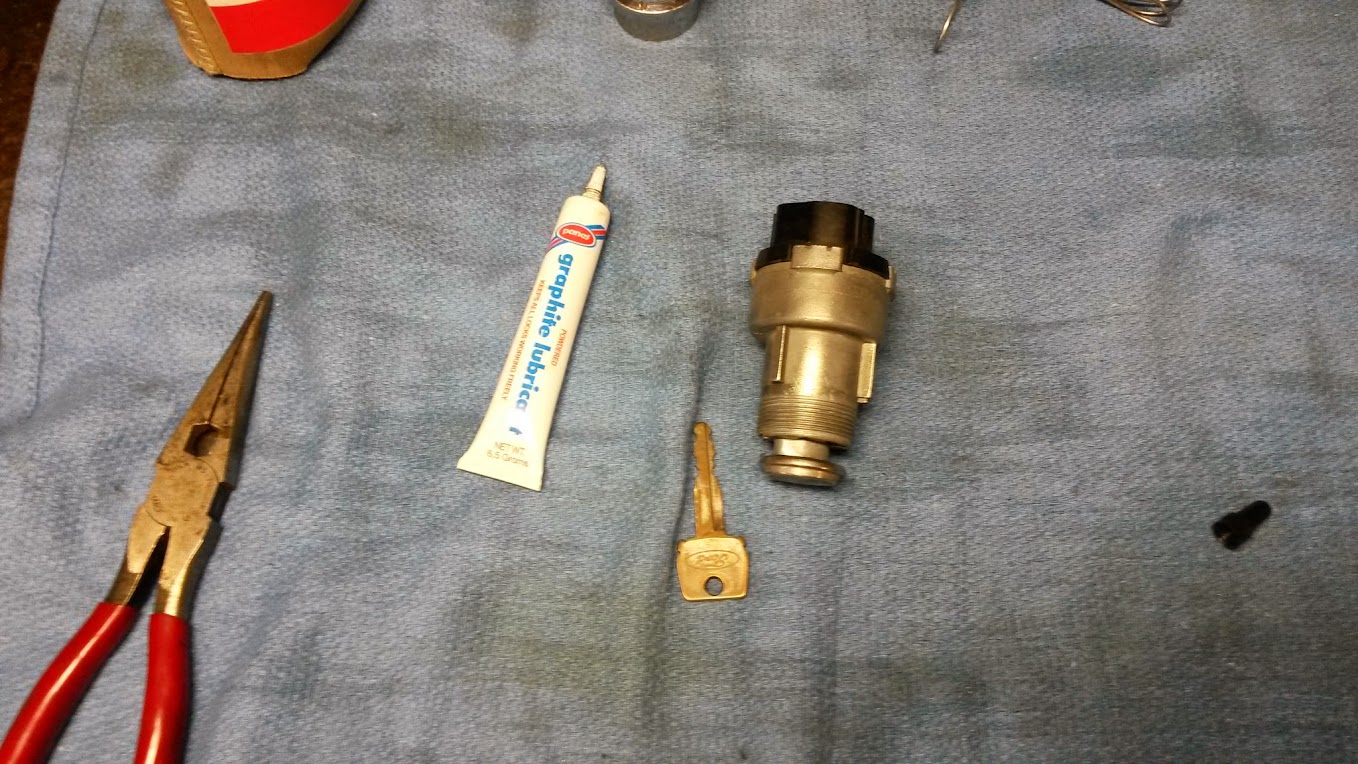
I had been debating between getting a new ignition switch or not. I decided to see if I could clean it up and make it work and am happy with it for the time being. Thanks to a thread I found here, I was able to remove the cylinder, clean it and the internal components and make it nice and smooth again.
Picture for my reference so I can hook it up without having to trace the wires again. It was pretty dirty, but cleaned up nicely.


Dad had a guy he works with make a rod for the brake booster. I couldn't find one through any vendor online, and didn't want to rob this one since it is for a running vehicle.

In my quest to procrastinate more on the brake lines, I decided to do some work on the bench grinder. The stone and wire wheel were in sad shape. It is amazing how much nicer it is to use with new wheels.

I woke up Sunday morning and decided I had put it off long enough. I had some of the old lines to use as a rough template, but the majority of them were bent up and not usable as a template. I started at about 6:30AM and finally finished up the last line at 5:00PM.
I ordered a bulk roll of 3/16" stainless line 20', which was just barely enough.

Doesn't look like 20' after I got it somewhat straightened out, but it was deceiving.
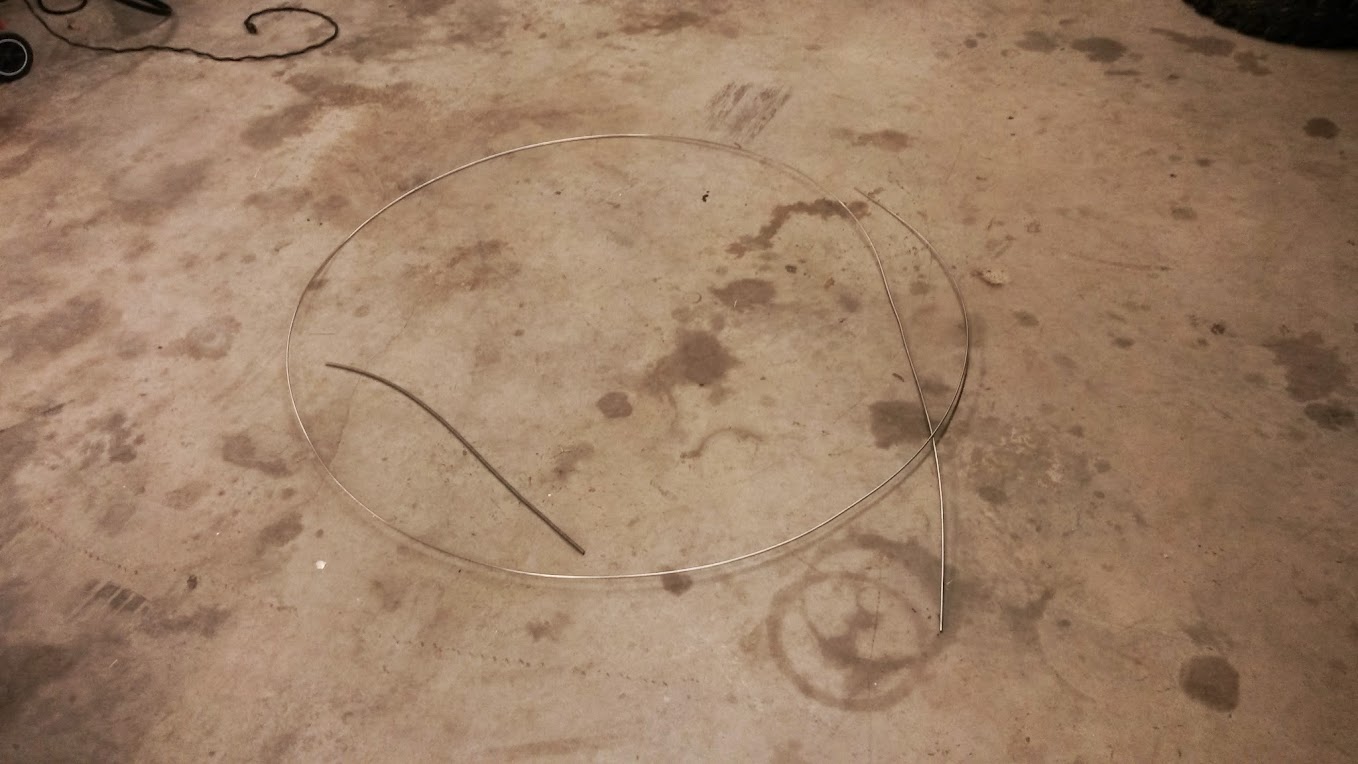
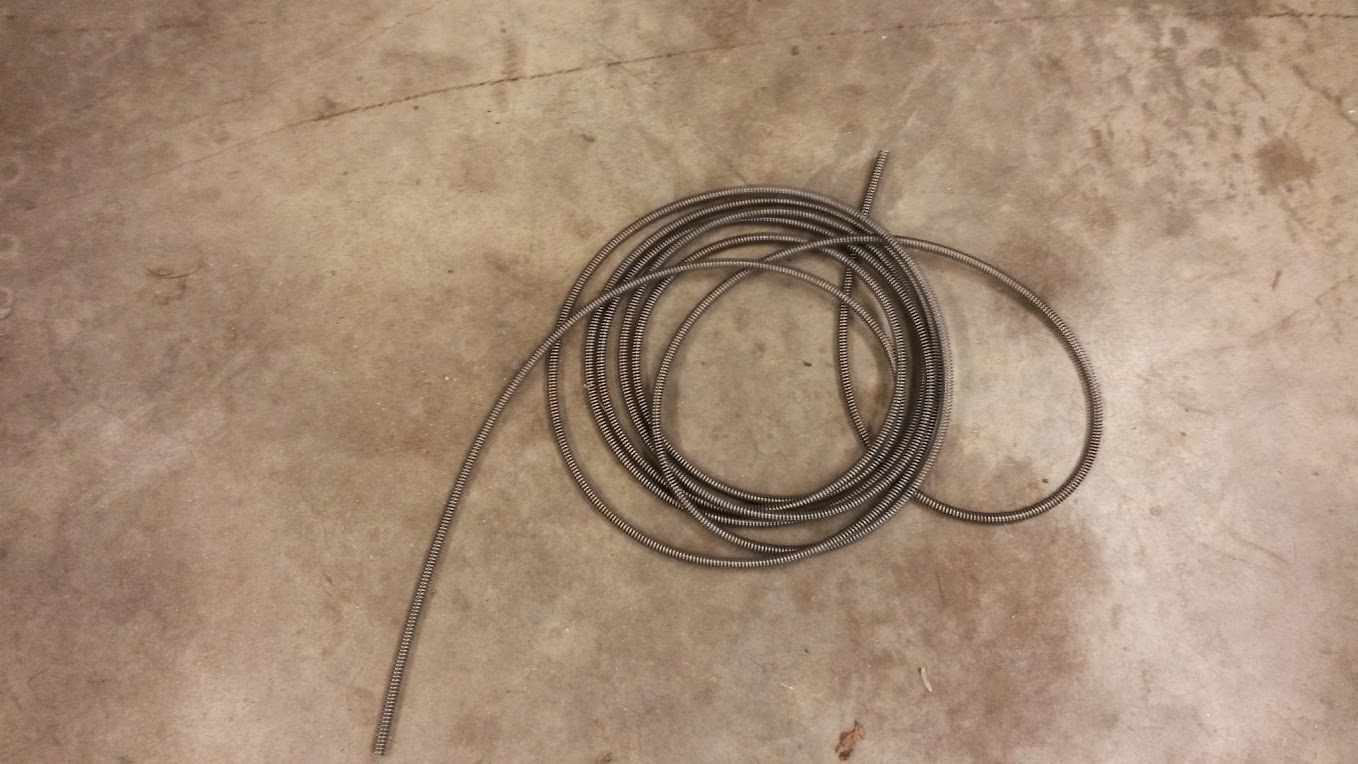
I got a 20' roll of stainless steel armor guard which is very nice and makes the lines looks awesome. It also hides any imperfections from messed up bends (of which I had a few).

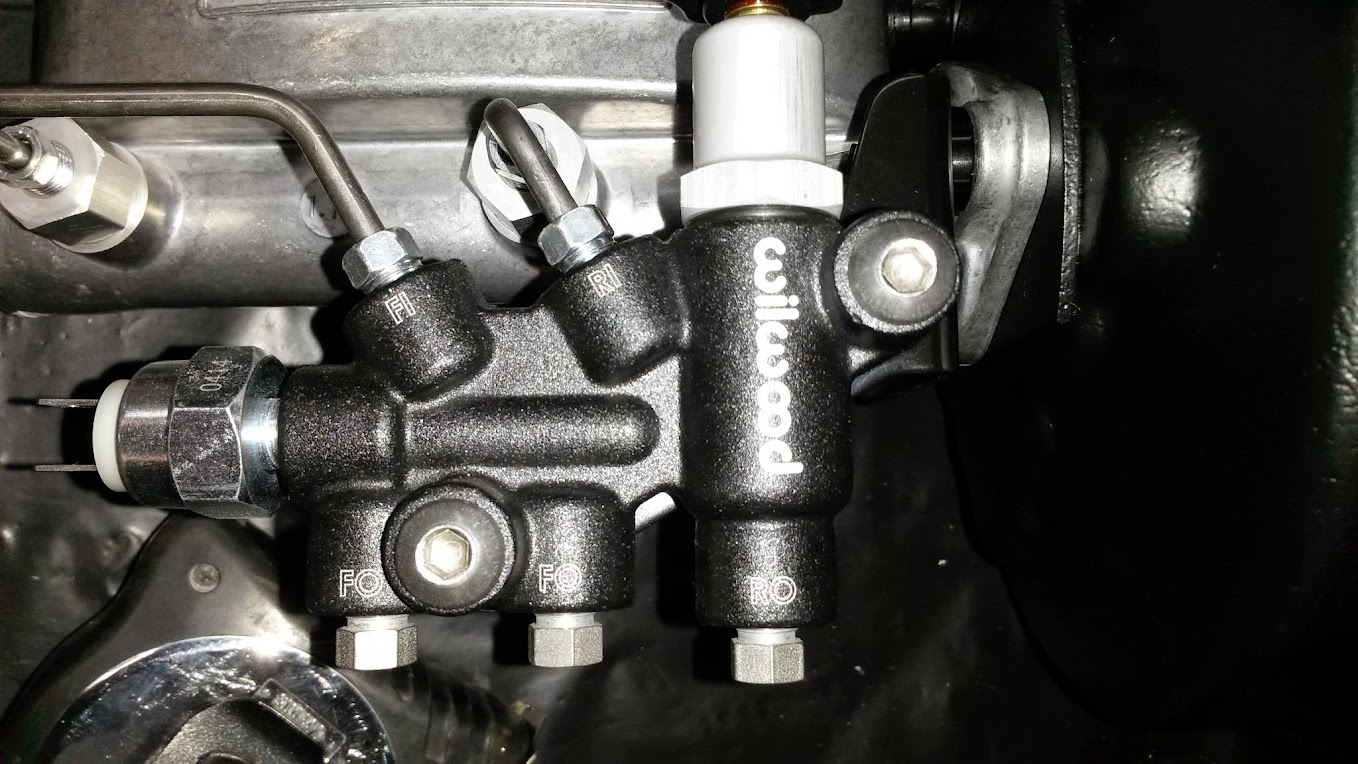
I ordered a Wilwood Master cylinder that was compatible with the proportioning valve kit I bought previously. It allowed me to use the pre-bent lines that came with the valve.

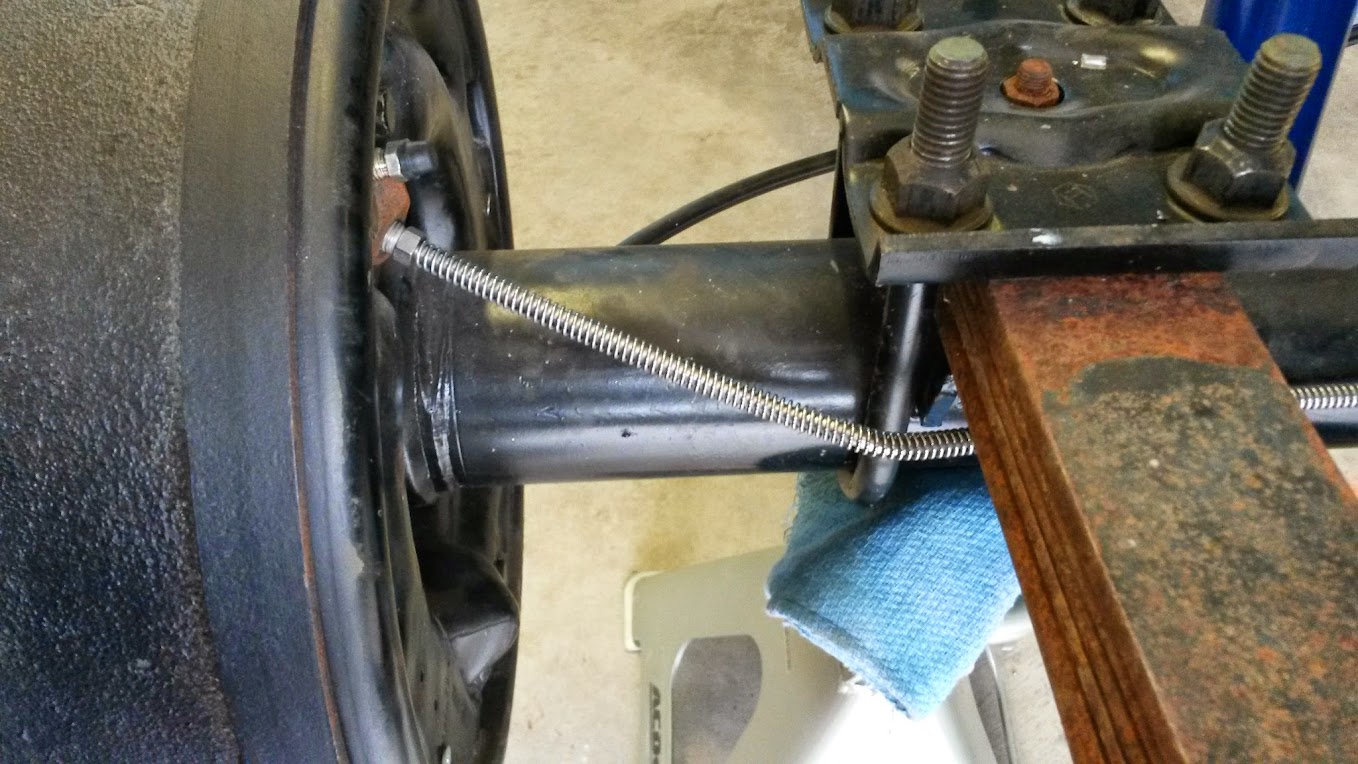
Started at the rear, and worked my way forward.


I ran the lines from the front passenger side, and rear up to the proportioning valve.
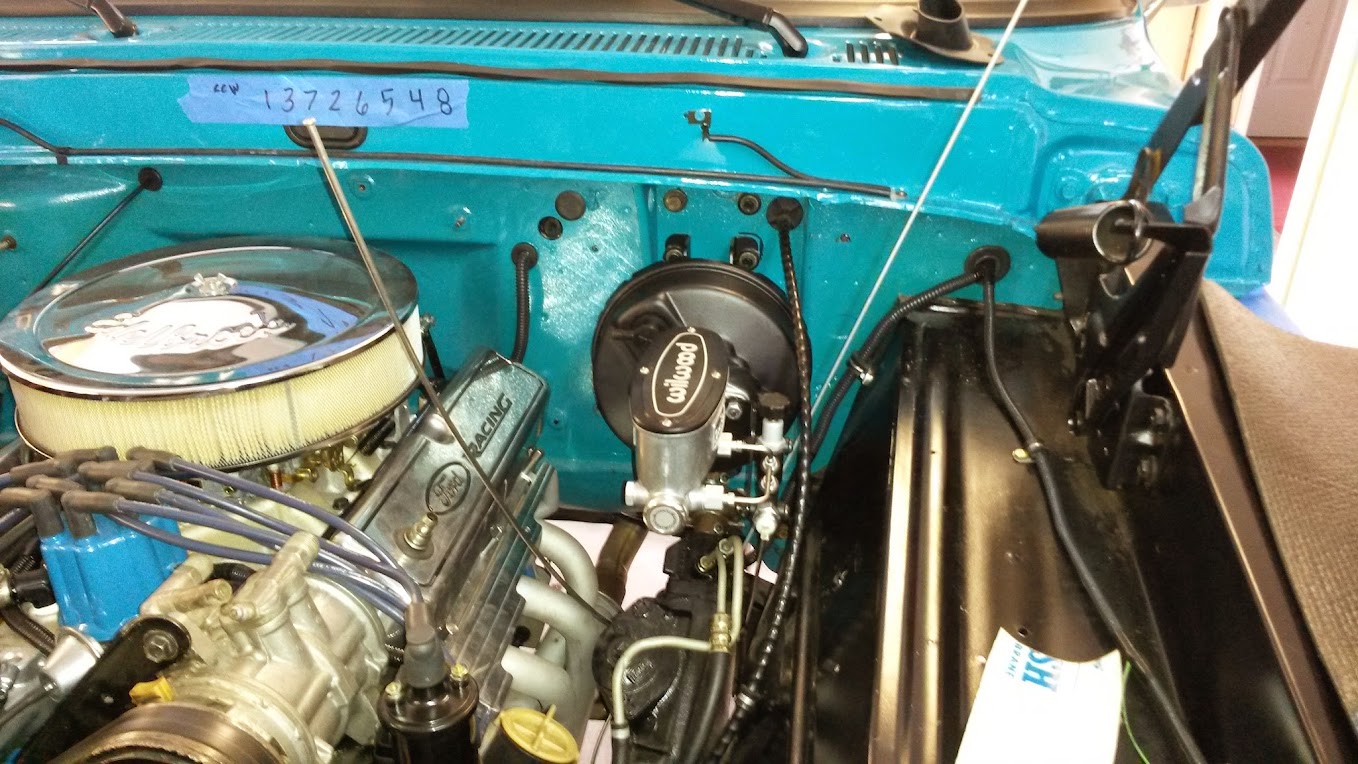
I made the front driver side line first since it was a short run.


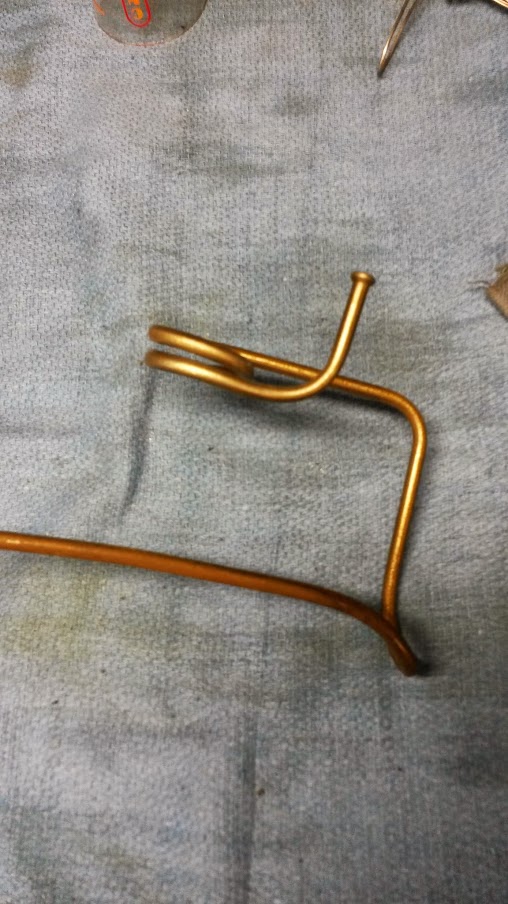
Tried my hand at making some loops on an old piece of line I had. This was done by just bending the line around a piece of pipe, but the diameter is too small to really allow much flex.
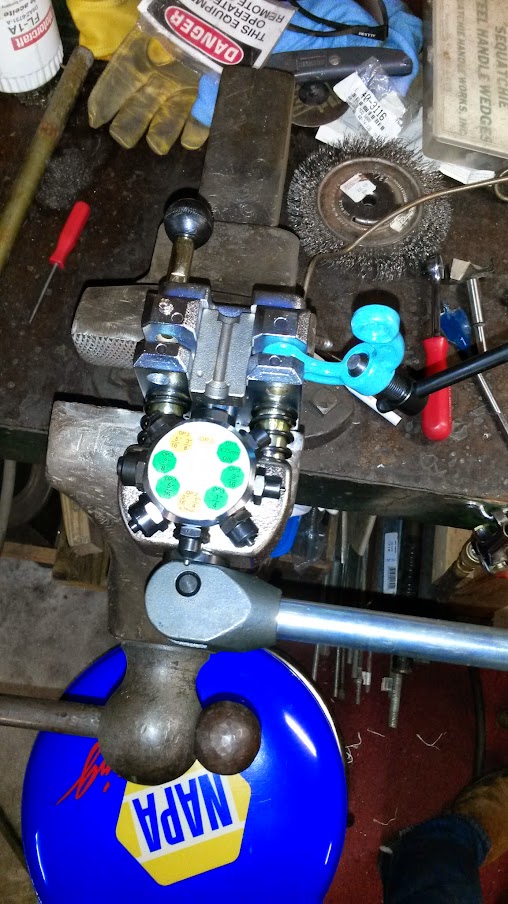
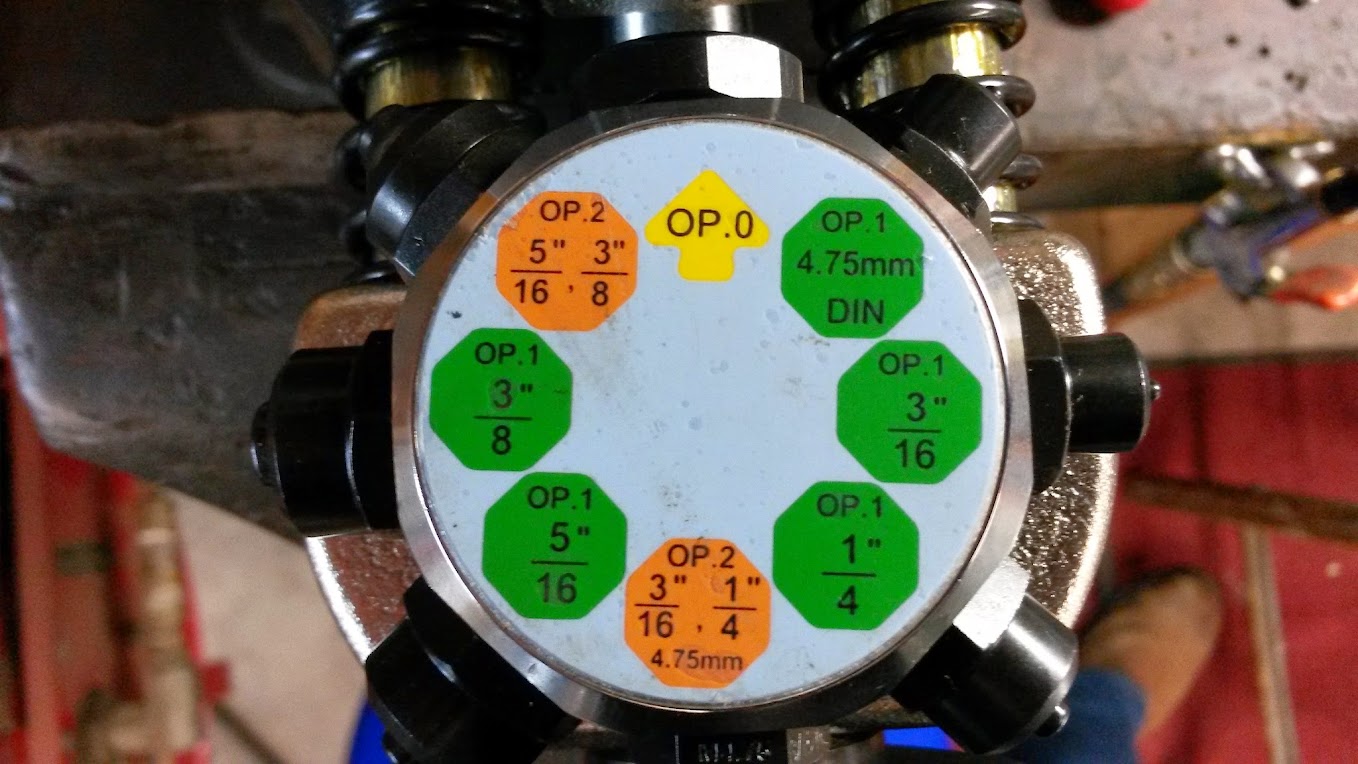
I ordered the professional flaring tool from K-tools since the Eastwood flaring tool was on backorder from the vendor I was using. It worked like a charm and really made flaring the lines a breeze. It was expensive, but even if I don't use it again for 5 years, I am still more than happy I made the purchase.
I got the rear line bent and in place. I left them loose all the way down to the frame to allow for firewall flex, body flex, etc.

There was no way I could make the rear section all one line, as I figured out after I fished it through the cross members and all the way back. I will have a union under the driver's floor board.
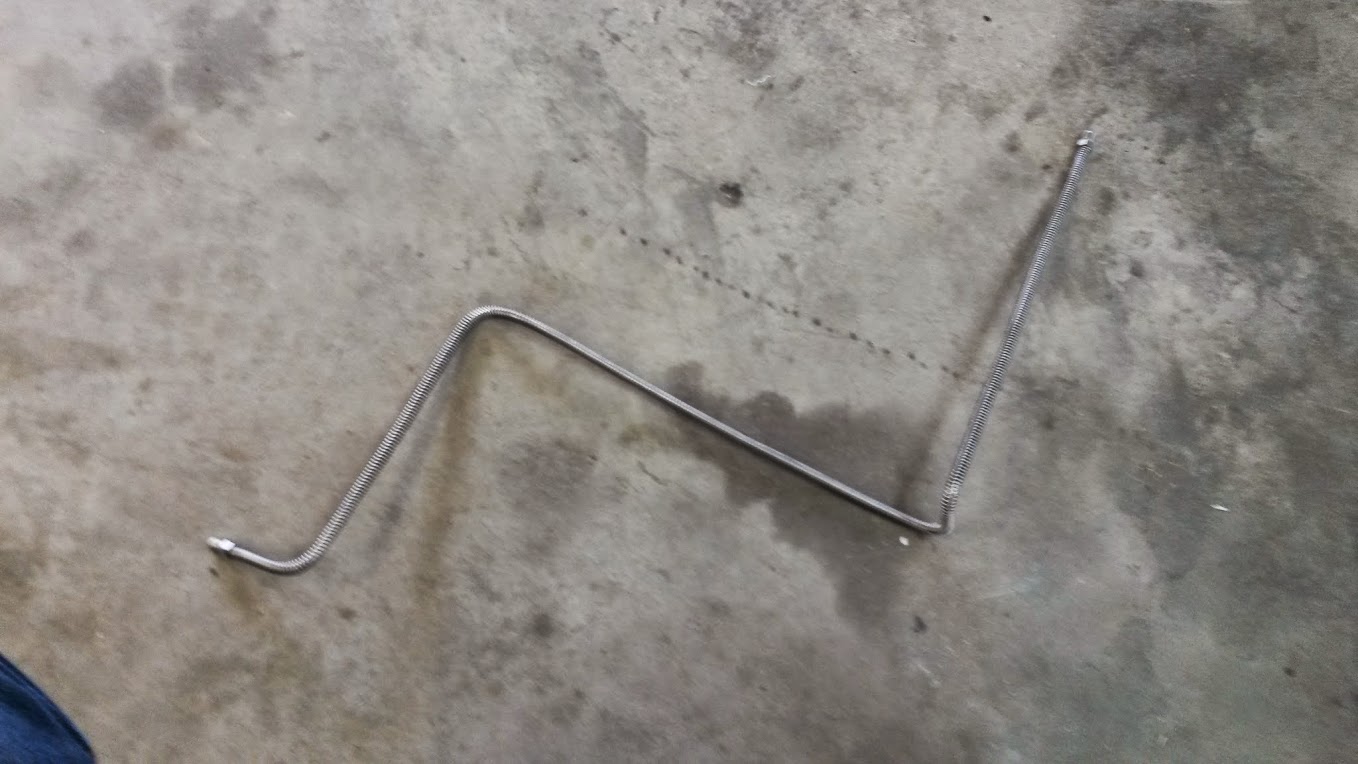
The passenger side was a task. Making it look nice and tucked out of the way took much longer than I anticipated. It will still allow easy removal of the starter and passenger header in the future if necessary.


Got everything done and I really like how it turned out.
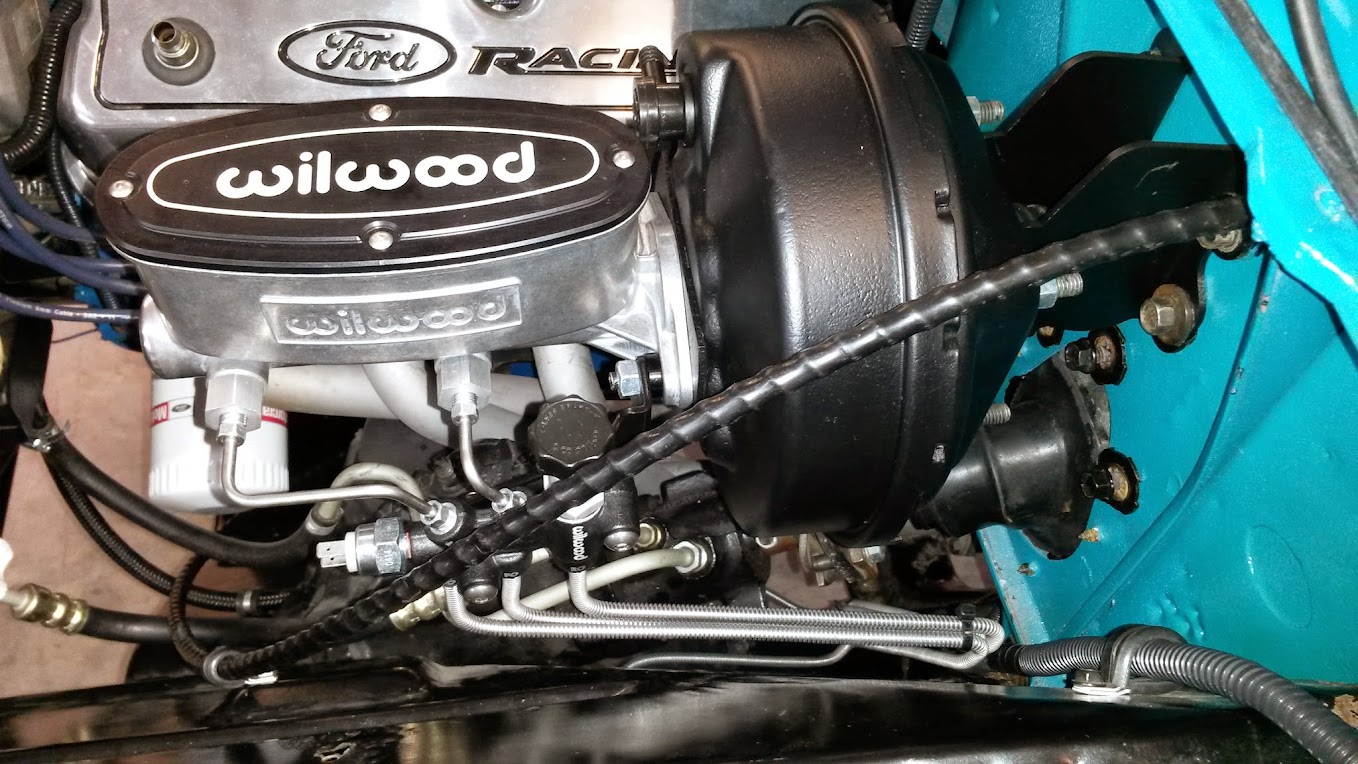
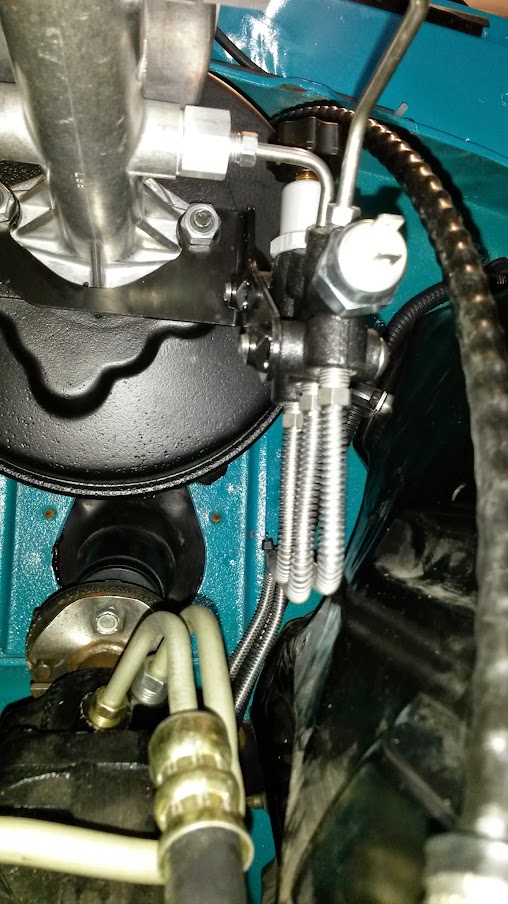
Dad worked on getting the clutch safety switch wired, brake switch wired, door switches wired, rear section terminated with the bed, and all bolted up/out of the way. I didn't get any pictures yet, but it looks very clean.
As soon as I get the union, I can bleed the brakes and check for leaks.
I need to go over every nut and bolt to make sure they are tight, then I should be ready for the maiden voyage around the block.
I kept putting off bending all the lines which gave me some time to get other odds and ends out of the way.
New brake and clutch pedal pads.

Windshield washer components. LMC didn't send near enough washer hose to complete the job, but I'll have to move my washer bottle anyways due to the proportioning valve and clutch cable. I wouldn't say that I was overly generous on the amount of slack I gave the washer tees, yet I had one foot of hose left over to make it the three or so feet to the washer bottle.


Somewhere along the way I lost a windshield washer, so I ordered two more. They were pretty easy to install and bend to the correct location.

I got a new glove box cable, because the old one had a pretty bad kink in it. Word of caution: the LMC cable does not have a large enough diameter to use your original shoulder screws. I drilled them out enough to use the original screws.

I had been debating between getting a new ignition switch or not. I decided to see if I could clean it up and make it work and am happy with it for the time being. Thanks to a thread I found here, I was able to remove the cylinder, clean it and the internal components and make it nice and smooth again.
Picture for my reference so I can hook it up without having to trace the wires again. It was pretty dirty, but cleaned up nicely.


Dad had a guy he works with make a rod for the brake booster. I couldn't find one through any vendor online, and didn't want to rob this one since it is for a running vehicle.

In my quest to procrastinate more on the brake lines, I decided to do some work on the bench grinder. The stone and wire wheel were in sad shape. It is amazing how much nicer it is to use with new wheels.
I woke up Sunday morning and decided I had put it off long enough. I had some of the old lines to use as a rough template, but the majority of them were bent up and not usable as a template. I started at about 6:30AM and finally finished up the last line at 5:00PM.
I ordered a bulk roll of 3/16" stainless line 20', which was just barely enough.

Doesn't look like 20' after I got it somewhat straightened out, but it was deceiving.

I got a 20' roll of stainless steel armor guard which is very nice and makes the lines looks awesome. It also hides any imperfections from messed up bends (of which I had a few).


I ordered a Wilwood Master cylinder that was compatible with the proportioning valve kit I bought previously. It allowed me to use the pre-bent lines that came with the valve.


Started at the rear, and worked my way forward.


I ran the lines from the front passenger side, and rear up to the proportioning valve.

I made the front driver side line first since it was a short run.


Tried my hand at making some loops on an old piece of line I had. This was done by just bending the line around a piece of pipe, but the diameter is too small to really allow much flex.

I ordered the professional flaring tool from K-tools since the Eastwood flaring tool was on backorder from the vendor I was using. It worked like a charm and really made flaring the lines a breeze. It was expensive, but even if I don't use it again for 5 years, I am still more than happy I made the purchase.


I got the rear line bent and in place. I left them loose all the way down to the frame to allow for firewall flex, body flex, etc.

There was no way I could make the rear section all one line, as I figured out after I fished it through the cross members and all the way back. I will have a union under the driver's floor board.

The passenger side was a task. Making it look nice and tucked out of the way took much longer than I anticipated. It will still allow easy removal of the starter and passenger header in the future if necessary.


Got everything done and I really like how it turned out.


Dad worked on getting the clutch safety switch wired, brake switch wired, door switches wired, rear section terminated with the bed, and all bolted up/out of the way. I didn't get any pictures yet, but it looks very clean.
As soon as I get the union, I can bleed the brakes and check for leaks.
I need to go over every nut and bolt to make sure they are tight, then I should be ready for the maiden voyage around the block.
1971 f100 Custom, SWB, 302, T5
"It can't be that hard."
"It can't be that hard."
-
IN2FORD
- Preferred User

- Posts: 345
- Joined: Sun Apr 27, 2014 3:54 pm
- Location: Cookeville TN
Re: 1971 short wide (shortstack)
Great work on the brake lines!! I really appreciate you sharing the pics and info. I am about to tackle this myself and was dreading it. Where did you get your lines and the SS cover?
Barry
Barry
- shortstack
- New Member

- Posts: 129
- Joined: Wed Sep 22, 2010 9:45 am
- Location: Austin TX
Re: 1971 short wide (shortstack)
Thanks Barry. I got the roll of stainless line and armor guard from Summit Racing. What helped me was having some scrap line to make a template, and I also bought a few assorted lengths of straight steel line from the local NAPA. I could work with a foot or so to get a couple of bends down, then transfer that to my stainless line so I wasn't fighting a six or more foot long section. I suppose you could use a wire hanger or something similar as a template.
This is the line I bought.
http://www.summitracing.com/parts/sum-220236
That is for the armor guard. It is on clearance right now as well.
http://www.summitracing.com/parts/sum-220272/overview/
This is the line I bought.
http://www.summitracing.com/parts/sum-220236
That is for the armor guard. It is on clearance right now as well.
http://www.summitracing.com/parts/sum-220272/overview/
1971 f100 Custom, SWB, 302, T5
"It can't be that hard."
"It can't be that hard."
- shortstack
- New Member

- Posts: 129
- Joined: Wed Sep 22, 2010 9:45 am
- Location: Austin TX
Re: 1971 short wide (shortstack)
Small update this week. I am thinking about changing the name of the project to Two Step. Every time I make a step forward, it seems I make two back...
I got the steering column in place and got the correct seal and bracket for power steering.

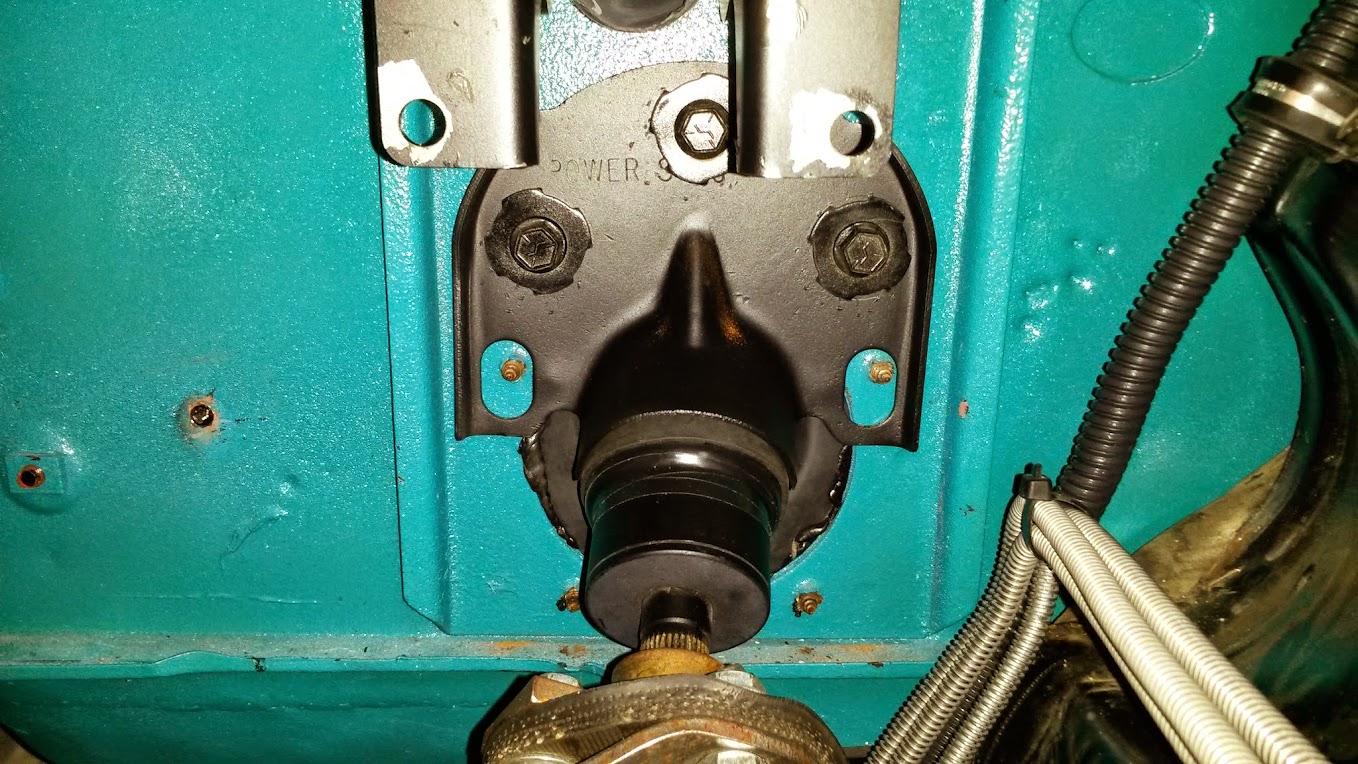
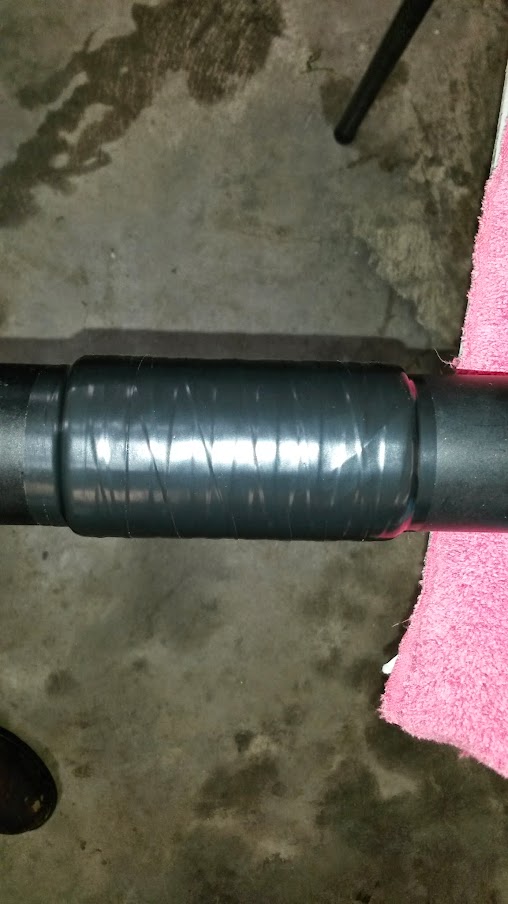
The Ididit column as it turns out is 2" diameter, whereas the seal and original column were 2-1/4" diameter. I used some rubberized flashing I had to wrap the column, and then taped it up. It worked out nicely, and makes a tight seal with the new column seal I bought.
I got the steering column in place and got the correct seal and bracket for power steering.


The Ididit column as it turns out is 2" diameter, whereas the seal and original column were 2-1/4" diameter. I used some rubberized flashing I had to wrap the column, and then taped it up. It worked out nicely, and makes a tight seal with the new column seal I bought.

1971 f100 Custom, SWB, 302, T5
"It can't be that hard."
"It can't be that hard."
- shortstack
- New Member

- Posts: 129
- Joined: Wed Sep 22, 2010 9:45 am
- Location: Austin TX
Re: 1971 short wide (shortstack)
I hit the submit button a little too soon... 
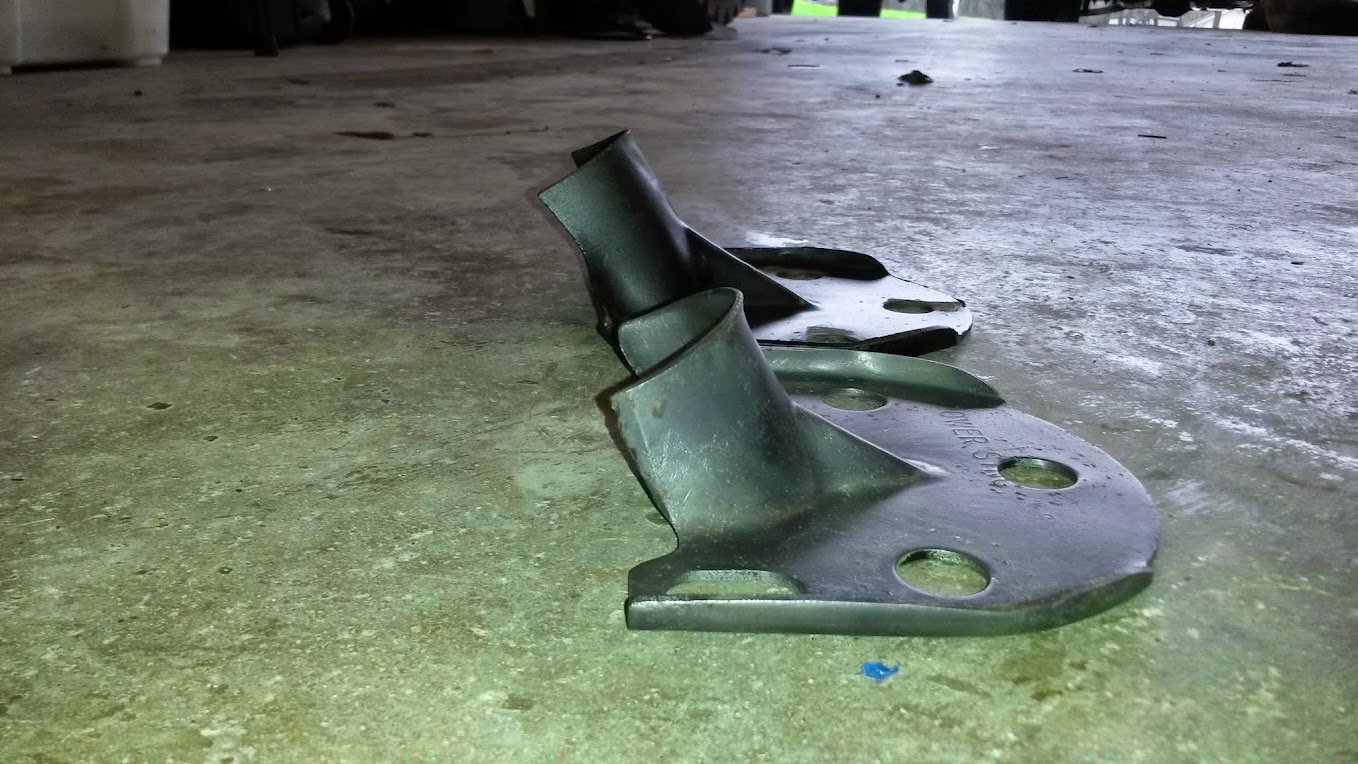
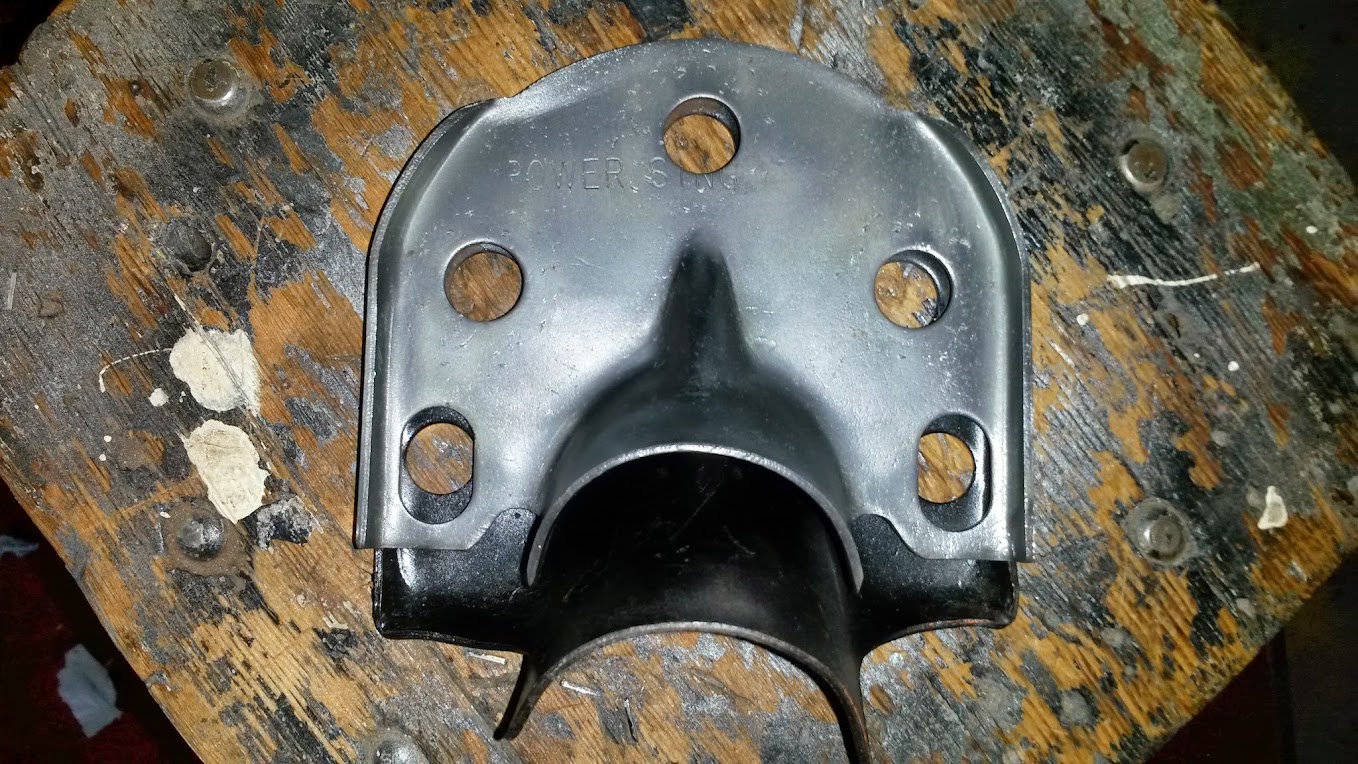
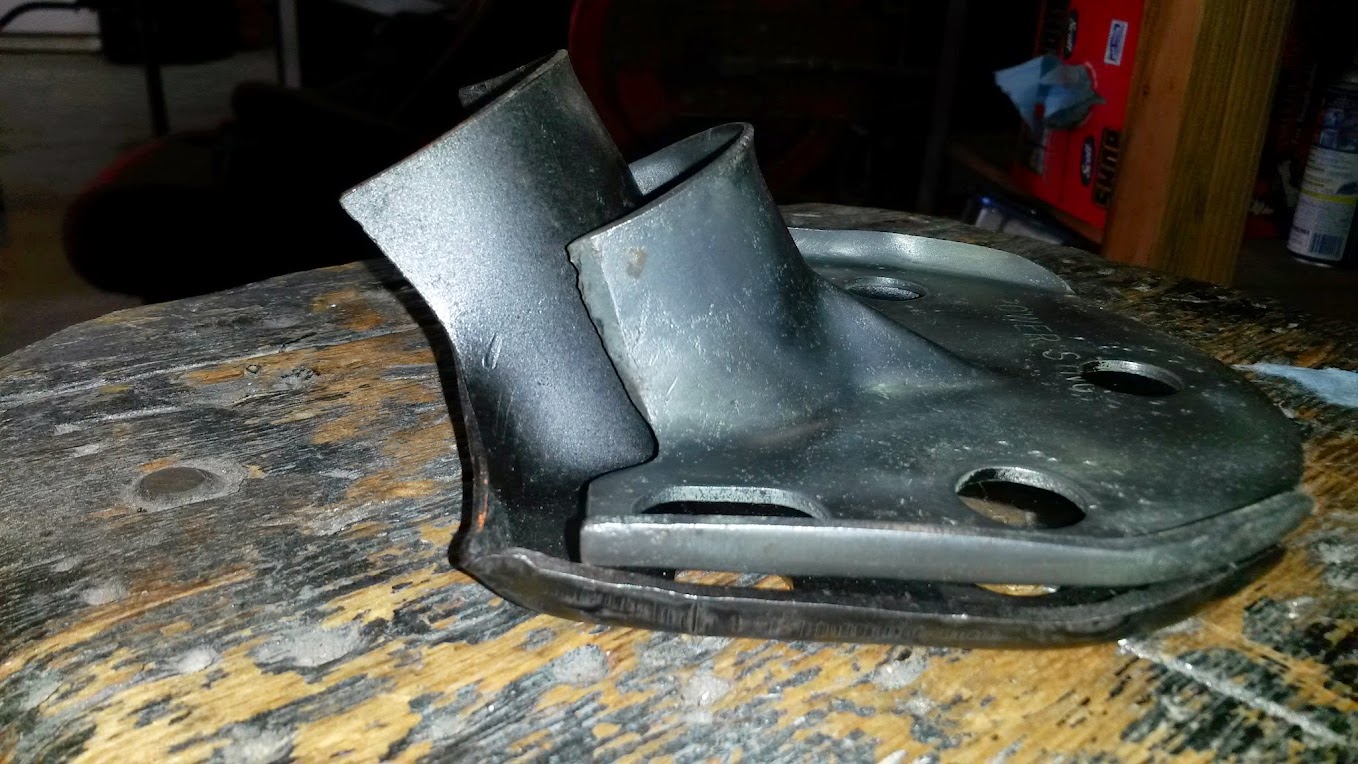
The steering column bracket I had floating around for the truck was for manual steering. At some point along the line, we did a engine swap in the One Ton of Fun, and upgraded to power brakes/power steering, and used the power steering bracket.
Comparison shot of the two different brackets. There is an awesome write up on the differences in these two brackets on this site, but it never hurts to have more information.
The clamp was pretty bent up, but nothing a socket and hammer couldn't straighten out.

I have robbed parts from this truck for mock up, and replaced most of them. (brake booster brackets, brake rod, hose fittings, and now the steering column brackets) I'll get it all back together, but I'll have to find a replacement bracket at some point.
Hang tight buddy, I'll get you back on the road...



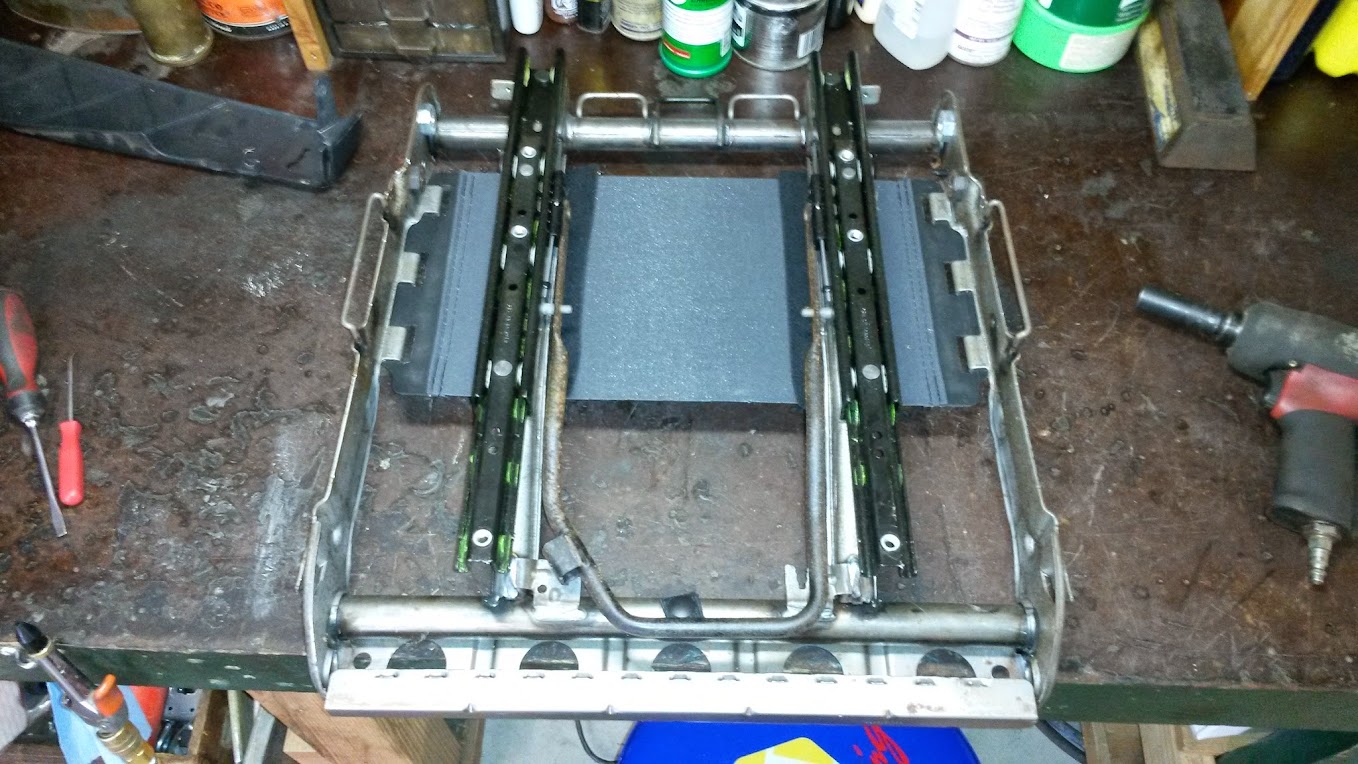
I started to build my brackets for mounting the seats I'll be using. Took the seat apart so it was easier to maneuver.
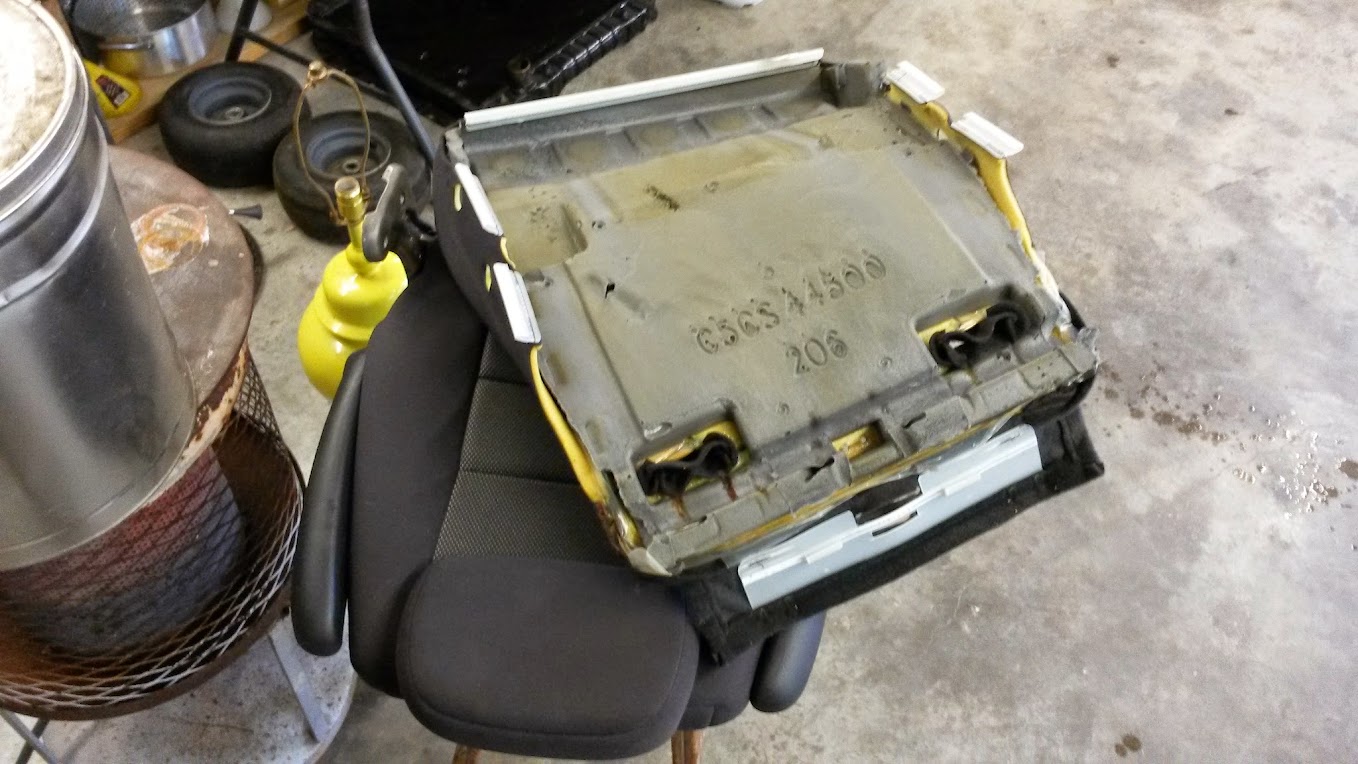
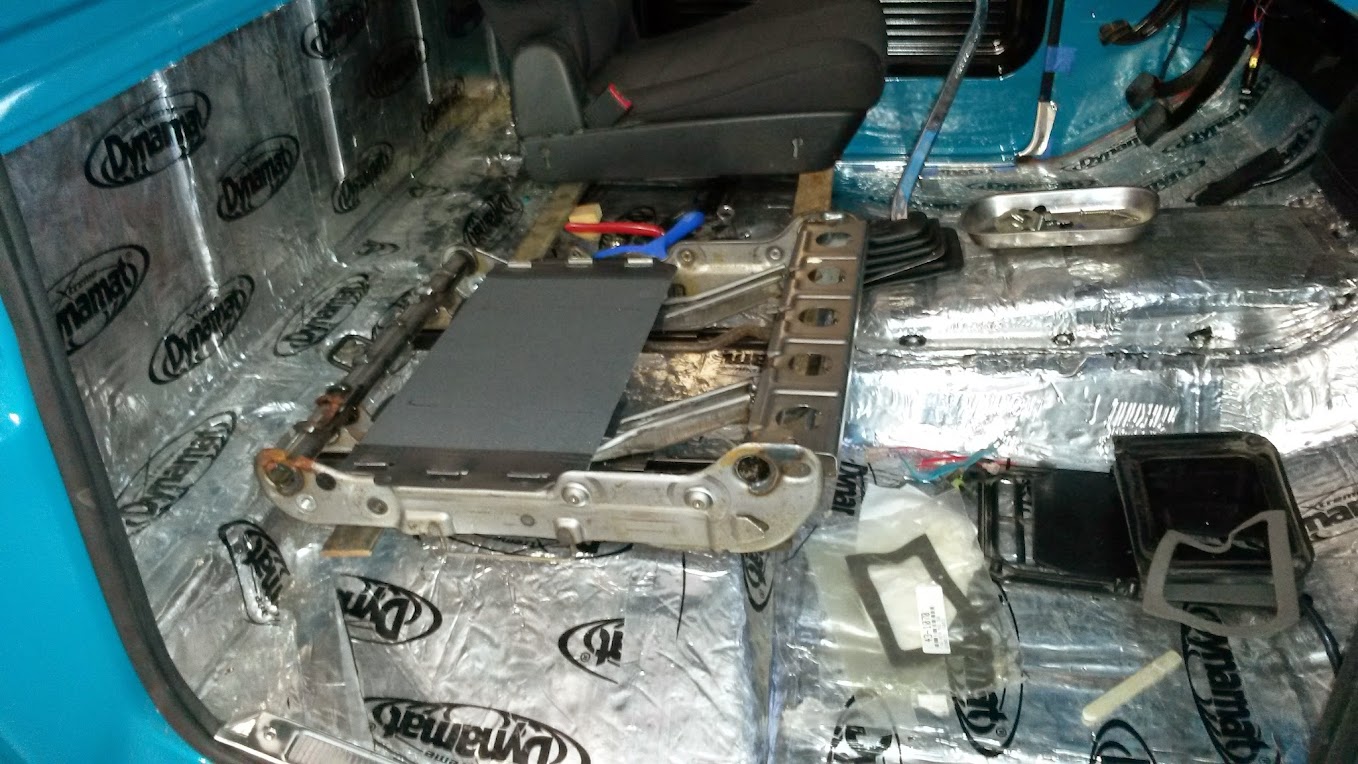
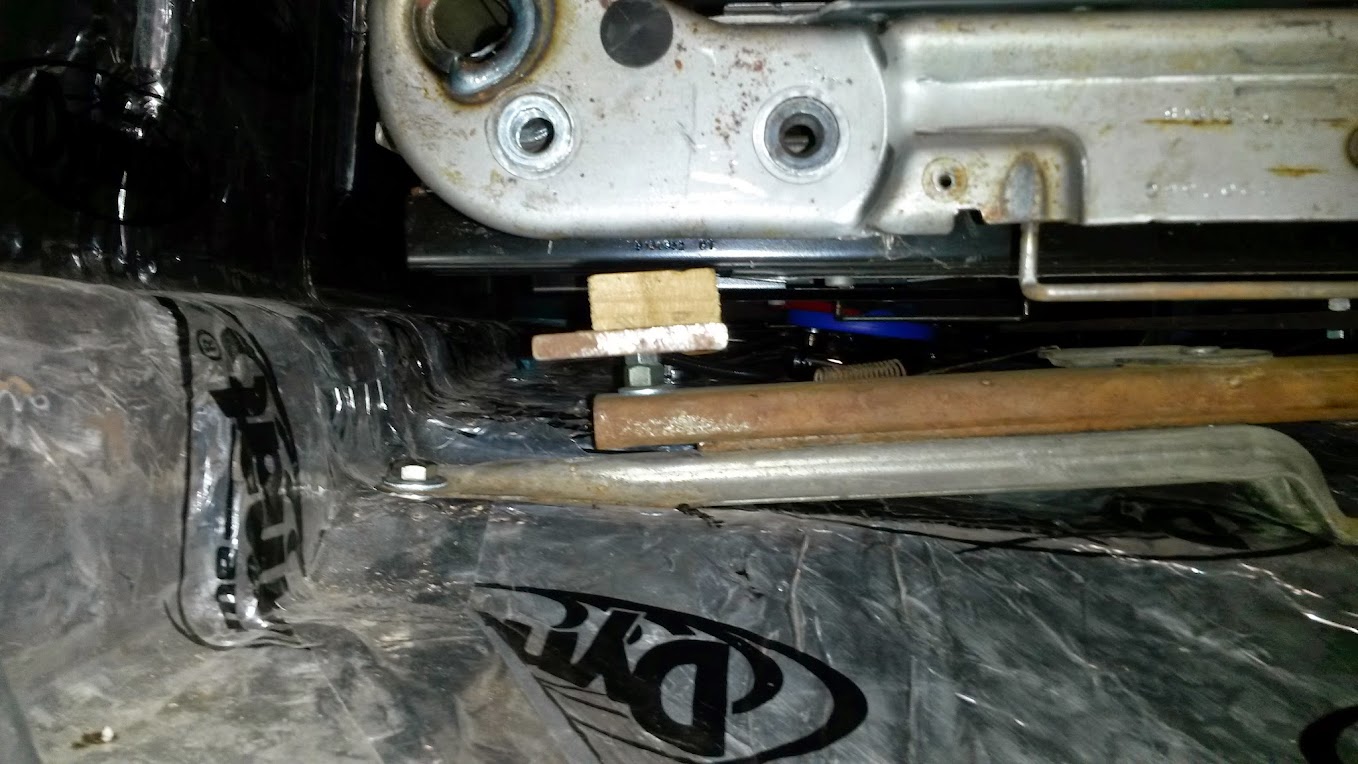
I'm using the original bench seat brackets with some strap connecting the two for mock-up. I just used some nuts and blocks of wood for spacers to get the seat position correct. It took some trial and error, but I like where the seat sits. When I am sitting in the seat, my head is in the middle of the windshield, and with it as far back as I can get it, it will still recline enough to be comfortable.

Now I have to take some measurements, and figure out the best material and method for building the actual bracket to mount the seats. As I have mentioned in other posts, these seats are out of a 2010 Chrysler Town and Country that a company retrofits to handicap vehicles. They are the second row seats, and pretty compact. I'll have to have some road time to see if they have enough cushion and are comfortable on long trips.
The steering column bracket I had floating around for the truck was for manual steering. At some point along the line, we did a engine swap in the One Ton of Fun, and upgraded to power brakes/power steering, and used the power steering bracket.
Comparison shot of the two different brackets. There is an awesome write up on the differences in these two brackets on this site, but it never hurts to have more information.


The clamp was pretty bent up, but nothing a socket and hammer couldn't straighten out.

I have robbed parts from this truck for mock up, and replaced most of them. (brake booster brackets, brake rod, hose fittings, and now the steering column brackets) I'll get it all back together, but I'll have to find a replacement bracket at some point.
Hang tight buddy, I'll get you back on the road...


I started to build my brackets for mounting the seats I'll be using. Took the seat apart so it was easier to maneuver.


I'm using the original bench seat brackets with some strap connecting the two for mock-up. I just used some nuts and blocks of wood for spacers to get the seat position correct. It took some trial and error, but I like where the seat sits. When I am sitting in the seat, my head is in the middle of the windshield, and with it as far back as I can get it, it will still recline enough to be comfortable.


Now I have to take some measurements, and figure out the best material and method for building the actual bracket to mount the seats. As I have mentioned in other posts, these seats are out of a 2010 Chrysler Town and Country that a company retrofits to handicap vehicles. They are the second row seats, and pretty compact. I'll have to have some road time to see if they have enough cushion and are comfortable on long trips.
1971 f100 Custom, SWB, 302, T5
"It can't be that hard."
"It can't be that hard."