1970 Ranger SlowMo Explosion
Moderator: FORDification
-
burteen
- New Member

- Posts: 21
- Joined: Tue Sep 17, 2013 3:39 pm
Re: 1970 Ranger SlowMo Explosion
i checked out the WP on american muscle and they have a pic with round ports on the backside for 45 bucks. THANK YOU!
I do believe this and the jegs you and sarge tell me about is the combo i need. What an ordeal.
http://www.americanmuscle.com/ford-waterpump-8693.html
http://www.jegs.com/i/JEGS/555/50300/10002/-1
I do believe this and the jegs you and sarge tell me about is the combo i need. What an ordeal.
http://www.americanmuscle.com/ford-waterpump-8693.html
http://www.jegs.com/i/JEGS/555/50300/10002/-1
- pincheweddo
- Preferred User

- Posts: 363
- Joined: Mon Sep 14, 2009 11:59 pm
- Location: Texas, Fort Worth
- Contact:
Re: 1970 Ranger SlowMo Explosion
If we all start our motors and it doesn't work, blame Sarge. If it does work I will happily take the credit!burteen wrote:i checked out the WP on american muscle and they have a pic with round ports on the backside for 45 bucks. THANK YOU!
I do believe this and the jegs you and sarge tell me about is the combo i need. What an ordeal.
http://www.americanmuscle.com/ford-waterpump-8693.html
http://www.jegs.com/i/JEGS/555/50300/10002/-1
- sargentrs
- 100% FORDified!

- Posts: 9866
- Joined: Fri Jun 22, 2007 9:30 am
- Location: Georgia, Jasper
Re: 1970 Ranger SlowMo Explosion
Welcome to the experimental team! HAH! Ya'll are both ahead of me, so I'll let you two make the mistakes and I'll learn from them 
Randy
1970 F100 Sport Custom Limited LWB, 302cid, 3 on the tree. NO A/C, NO P/S, NO P/B. Currently in 1000 pcs while rebuilding. Project thread: http://www.fordification.com/forum/view ... 22&t=59995 Plan: 351w, C4, LSD, pwr front disc, p/s, a/c, bucket seats, new interior and paint.
1987 F-150 XLT Lariat, 5.0/C6 auto.
- pincheweddo
- Preferred User

- Posts: 363
- Joined: Mon Sep 14, 2009 11:59 pm
- Location: Texas, Fort Worth
- Contact:
Re: 1970 Ranger SlowMo Explosion
-
burteen
- New Member

- Posts: 21
- Joined: Tue Sep 17, 2013 3:39 pm
Re: 1970 Ranger SlowMo Explosion
sarge, compared to your build, i'm realizing i skipped a few steps to get where i am!
I'm keeping the old (lighter) damper mainly out of ignorance of whether i need the heavier one with a serpentine setup or not, in true guinea pig form! I'm kind of hoping this is ok since i heard anytime you replace one it needs to be balanced with the flywheel or some such action, which i wanted to avoid thinking about since i don't know what is involved, and i got front suspension swap, new FEAD, steering and brake swap all kind of rolling along at the same time, hurting my head. I'm thinking if it needs to be swapped, it's not too hard, not sure about the flywheel balancing thing though.
There are front suspension parts drying in the garage as we speak, kingpin set coming tomorrow, got "almost" everything else for brakes, steering, FEAD swap, new timing chain, the jegs cover came today, hopefully the WP will get here soon. By tomorrow i will have a total glut of parts to assemble and install, except i still need to remove all the old stuff out of the truck.
I totally spaced on getting a pic of the ibeams, spindles, and radius arms when they were shiny before i painted them. I electrovatted them for about 1.5 to 2 days. For those that haven't done it, you take it out of the vat, hose them down with garden hose jet, dry them off with a towel. They are at this point black, coated with what is very similar to soot. This comes off rather easily with a few passes of a wire wheel and they will be totally friggin shiny, no lie. Each piece required at most 2 and a half easy minutes with the wire wheel to get each entire piece to spanking bare shiny metal. If you see any rust at all below the soot, make it easy on yourself and throw it back in the vat for another 12-24 hours.
I tried a couple different kinds of wheels. This kind lasts the longest and seemed to work the best IMO:

You'll need a skinnier brush shaped one for a drill to get to the crannies on some parts.
I'll have some more pics soon
I'm keeping the old (lighter) damper mainly out of ignorance of whether i need the heavier one with a serpentine setup or not, in true guinea pig form! I'm kind of hoping this is ok since i heard anytime you replace one it needs to be balanced with the flywheel or some such action, which i wanted to avoid thinking about since i don't know what is involved, and i got front suspension swap, new FEAD, steering and brake swap all kind of rolling along at the same time, hurting my head. I'm thinking if it needs to be swapped, it's not too hard, not sure about the flywheel balancing thing though.
There are front suspension parts drying in the garage as we speak, kingpin set coming tomorrow, got "almost" everything else for brakes, steering, FEAD swap, new timing chain, the jegs cover came today, hopefully the WP will get here soon. By tomorrow i will have a total glut of parts to assemble and install, except i still need to remove all the old stuff out of the truck.
I totally spaced on getting a pic of the ibeams, spindles, and radius arms when they were shiny before i painted them. I electrovatted them for about 1.5 to 2 days. For those that haven't done it, you take it out of the vat, hose them down with garden hose jet, dry them off with a towel. They are at this point black, coated with what is very similar to soot. This comes off rather easily with a few passes of a wire wheel and they will be totally friggin shiny, no lie. Each piece required at most 2 and a half easy minutes with the wire wheel to get each entire piece to spanking bare shiny metal. If you see any rust at all below the soot, make it easy on yourself and throw it back in the vat for another 12-24 hours.
I tried a couple different kinds of wheels. This kind lasts the longest and seemed to work the best IMO:

You'll need a skinnier brush shaped one for a drill to get to the crannies on some parts.
I'll have some more pics soon
- sargentrs
- 100% FORDified!

- Posts: 9866
- Joined: Fri Jun 22, 2007 9:30 am
- Location: Georgia, Jasper
Re: 1970 Ranger SlowMo Explosion
Great work so far! If you're using your original flexplate/flywheel, then keep your original damper. That is, provided you're crank pulley works with your damper. If you change your damper, you MIGHT need to change your flexplate/flywheel. There's really no "balancing" for you to do other than swapping those two parts. For a visual, here's a pic of some flexplates (borrowed from the photo gallery, thanks Phantom!)
Clockwise from top - 164 tooth 50 oz. imbalance from an '84 5.0L mated to AOD
*Notice that the counterweight is larger.
Bottom right: 164 tooth 28 oz. imbalance from a '79 351W mated to FMX
Bottom left: 157 tooth 28 oz. imbalance from a '66 289 mated to C4
They're manufactured that way so you just pick the right one and swap flexplates. The damper's imbalance, on originals, is built into the casting so you just pick the right one and swap those out, too. The front (damper) and rear (flexplate) imbalance weight must be the same or she will shake like a possum sh---ing peach seeds. You can buy adjustable dampers, just swap bolt on weights. If you're using both your original damper and flexplate, you're good. It only relates to what's bolted on the ends of the crank and has nothing to do with what belt setup you're running.
Clockwise from top - 164 tooth 50 oz. imbalance from an '84 5.0L mated to AOD
*Notice that the counterweight is larger.
Bottom right: 164 tooth 28 oz. imbalance from a '79 351W mated to FMX
Bottom left: 157 tooth 28 oz. imbalance from a '66 289 mated to C4
They're manufactured that way so you just pick the right one and swap flexplates. The damper's imbalance, on originals, is built into the casting so you just pick the right one and swap those out, too. The front (damper) and rear (flexplate) imbalance weight must be the same or she will shake like a possum sh---ing peach seeds.
You do not have the required permissions to view the files attached to this post.
Randy
1970 F100 Sport Custom Limited LWB, 302cid, 3 on the tree. NO A/C, NO P/S, NO P/B. Currently in 1000 pcs while rebuilding. Project thread: http://www.fordification.com/forum/view ... 22&t=59995 Plan: 351w, C4, LSD, pwr front disc, p/s, a/c, bucket seats, new interior and paint.
1987 F-150 XLT Lariat, 5.0/C6 auto.
1970 F100 Sport Custom Limited LWB, 302cid, 3 on the tree. NO A/C, NO P/S, NO P/B. Currently in 1000 pcs while rebuilding. Project thread: http://www.fordification.com/forum/view ... 22&t=59995 Plan: 351w, C4, LSD, pwr front disc, p/s, a/c, bucket seats, new interior and paint.
1987 F-150 XLT Lariat, 5.0/C6 auto.
-
motzingg
- Blue Oval Fan

- Posts: 742
- Joined: Wed Apr 24, 2013 1:11 pm
- Location: Milwaukee WI
Re: 1970 Ranger SlowMo Explosion
quote of the day right thurrrr.sargentrs wrote: The front (damper) and rear (flexplate) imbalance weight must be the same or she will shake like a possum sh---ing peach seeds.
- pincheweddo
- Preferred User

- Posts: 363
- Joined: Mon Sep 14, 2009 11:59 pm
- Location: Texas, Fort Worth
- Contact:
- HIO Silver
- 100% FORDified!

- Posts: 1970
- Joined: Sat Jul 23, 2011 11:31 pm
- Location: Devil's Mountain, CA
Re: 1970 Ranger SlowMo Explosion
Here's how it works: http://www.rowand.net/Shop/Tools/Electrolysis.htm
Here's my 30-gallon set up. I've got a hood hinge cooking away right now. Works great. I 've vatted master cylinders, spindles, disc calipers, brackets, radius arms, pulleys, bolts, washers, nuts, cab/rad support mounts, and a cast iron water pump.
However, it appears that spring steel loses some tempering due to this process. I was using some binder clips to hold the grounding wire to the submerged part and it broke easily when I tried to remove it. :

70 F100 LB 2WD, 360FE, E-Street EFI, TKO-500, 76K original miles.. follow my rebuild: The Lo-Buck Bumpside
71 F250 LB, 2WD, 360FE, T18, PS, PB, D60 with 4.11s
73 F100 SB 4WD, 390FE, NP435, +4 on 35s
01 Ferrari 360 Spider F1
01 F150 SuperCrew Lariat 4WD
01 PT Cruiser Limited (DD)
68 Mustang
65 Mustang
71 F250 LB, 2WD, 360FE, T18, PS, PB, D60 with 4.11s
73 F100 SB 4WD, 390FE, NP435, +4 on 35s
01 Ferrari 360 Spider F1
01 F150 SuperCrew Lariat 4WD
01 PT Cruiser Limited (DD)
68 Mustang
65 Mustang
-
burteen
- New Member

- Posts: 21
- Joined: Tue Sep 17, 2013 3:39 pm
Re: 1970 Ranger SlowMo Explosion
ok I've been AWOL for awhile. Unfortunately, I got too much stuff going on in my life to focus on the truck, but I've managed to piddle on it a little bit. Here is a minor update on the front end.
So I painted the parts:
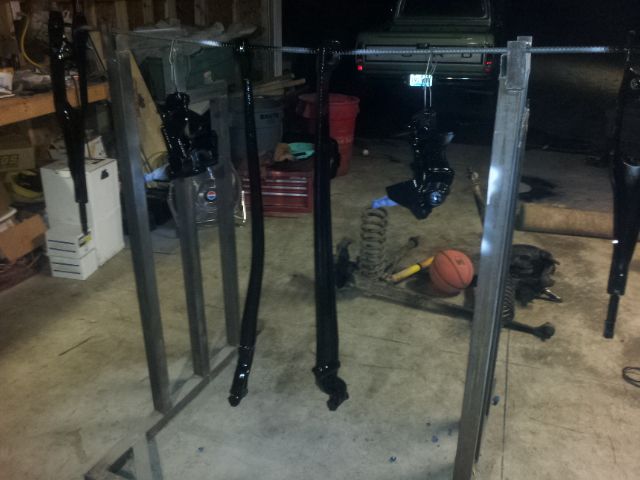
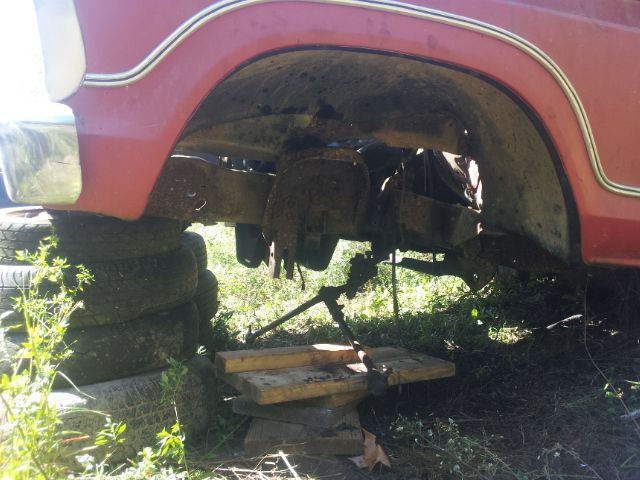
On a side note, you can see in the above pic in the background a whole another front end, still all dirty and assembled. I was picking some brake brackets off a 77 truck at the junkyard one day and it had the front end in it, and I was thinking how difficult it was to find the first front end, so I picked it too, for laters:
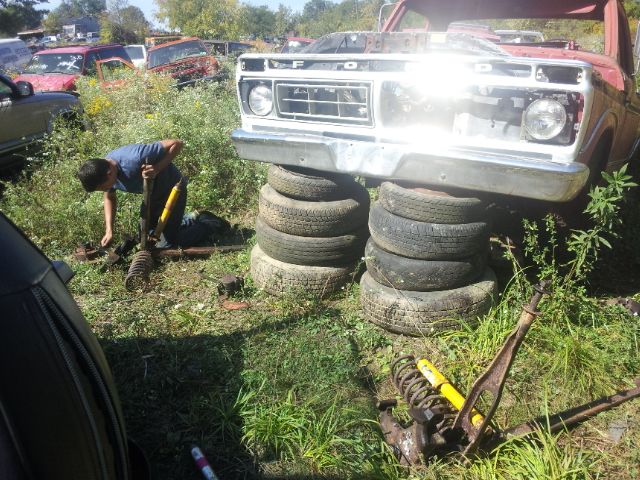
I recruited the old son to help.
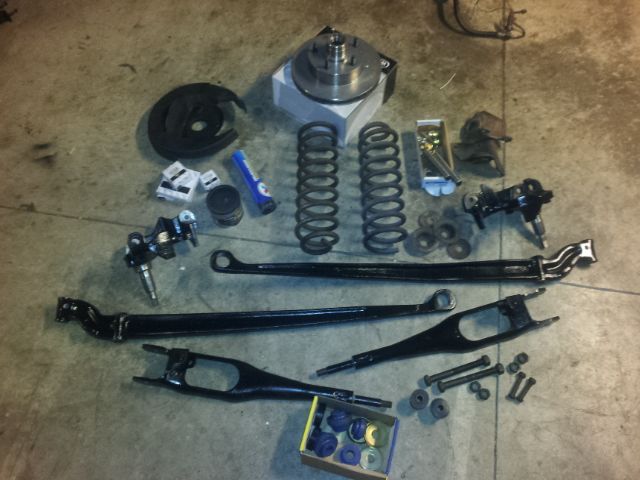
Alright anyway, i got a new kingpin set, bushings, bearings, grease, etc:
I got a bunch of paint in some of the holes in the spindles and the ibeams. This here combo easily fixes that situation:
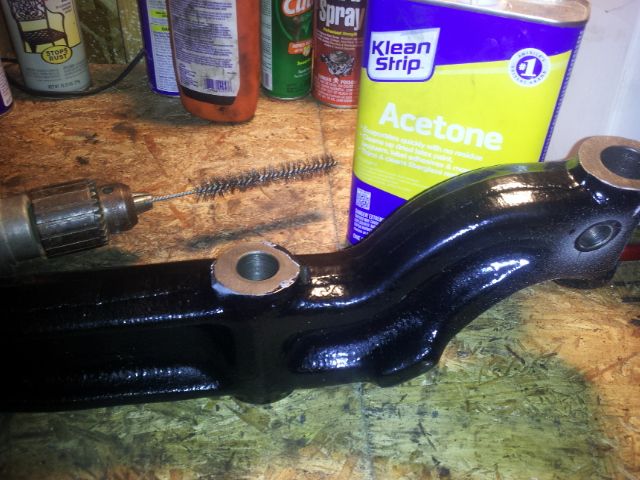
I started assembly with the ibeam bushings so they could be installed without the spindle flopping around on it, however the vise i have (had) is a sissyass vise. I cranked one in, but when I loosened the vise it was almost totally frozen like i stripped the screw in the vise. It's pretty much trashed. I'm going to get creative with a hydraulic jack and a ceiling somewhere i guess, or fab up some kind of homemade press frame, or just take all the pieces to a shop. I haven't really had time to even decide. That's about where it is now.
As far as the FEAD goes, that's all in now with a new, tight timing chain behind it. I'll post some pics later of a couple minor issues i had (having) with that.
So I painted the parts:

On a side note, you can see in the above pic in the background a whole another front end, still all dirty and assembled. I was picking some brake brackets off a 77 truck at the junkyard one day and it had the front end in it, and I was thinking how difficult it was to find the first front end, so I picked it too, for laters:

I recruited the old son to help.

Alright anyway, i got a new kingpin set, bushings, bearings, grease, etc:

I got a bunch of paint in some of the holes in the spindles and the ibeams. This here combo easily fixes that situation:

I started assembly with the ibeam bushings so they could be installed without the spindle flopping around on it, however the vise i have (had) is a sissyass vise. I cranked one in, but when I loosened the vise it was almost totally frozen like i stripped the screw in the vise. It's pretty much trashed. I'm going to get creative with a hydraulic jack and a ceiling somewhere i guess, or fab up some kind of homemade press frame, or just take all the pieces to a shop. I haven't really had time to even decide. That's about where it is now.
As far as the FEAD goes, that's all in now with a new, tight timing chain behind it. I'll post some pics later of a couple minor issues i had (having) with that.
- HIO Silver
- 100% FORDified!

- Posts: 1970
- Joined: Sat Jul 23, 2011 11:31 pm
- Location: Devil's Mountain, CA
Re: 1970 Ranger SlowMo Explosion
Hey Burteen.
Nice work on the front end components... it'll look AWESOME when you're done.
I've been refinishing the front end sheetmetal and hardware on my 70 and got info that may be of interest to ya. Instead of zapping the rust off of small parts and wire-wheeling nuts, bolts, and U-nuts, I decided to try out a product called "Evaporust" from Harbor Freight (available at Home Depot, Lowe's, Sears, too). I set up small plastic tubs and covered them overnight.... it works great.
It's $20 a gallon and it should last so long as ya don't let it evaporate into thin air. An added bonus is that it doesn't seem to affect spring steel.
http://www.evaporust.com/
-
burteen
- New Member

- Posts: 21
- Joined: Tue Sep 17, 2013 3:39 pm
Re: 1970 Ranger SlowMo Explosion
Interesting! I will give that a checksee. I still got lots of rusty small stuff, they seem to accumulate
-
burteen
- New Member

- Posts: 21
- Joined: Tue Sep 17, 2013 3:39 pm
Re: 1970 Ranger SlowMo Explosion
I'm alive!! Ok it is done. I did a bunch, then ran out of time, so I had somebody else do it. It's actually been done awhile, but im just now getting around to doing this.
Here is all that was done to it:
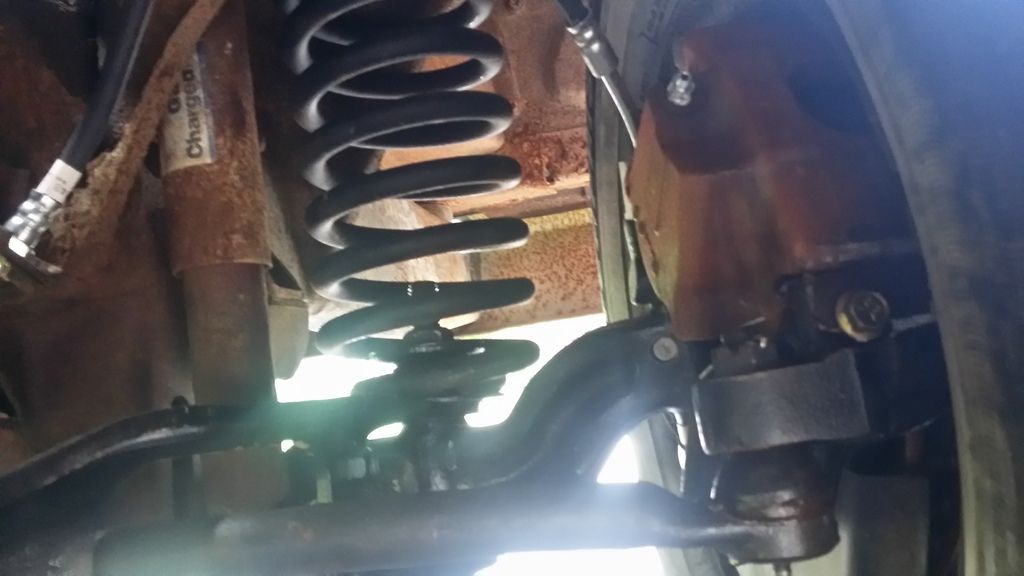
Front end swapped out for 79 f150 front end (radius arms, beams, spindles)
Steering replaced with '79 power steering (tie rods, gearbox, ps pump, steering wheel/column)
Power disc brakes from the '79 installed, new calipers and rotors, master cylinder, vacuum booster, brake booster bracket from 78?- see below
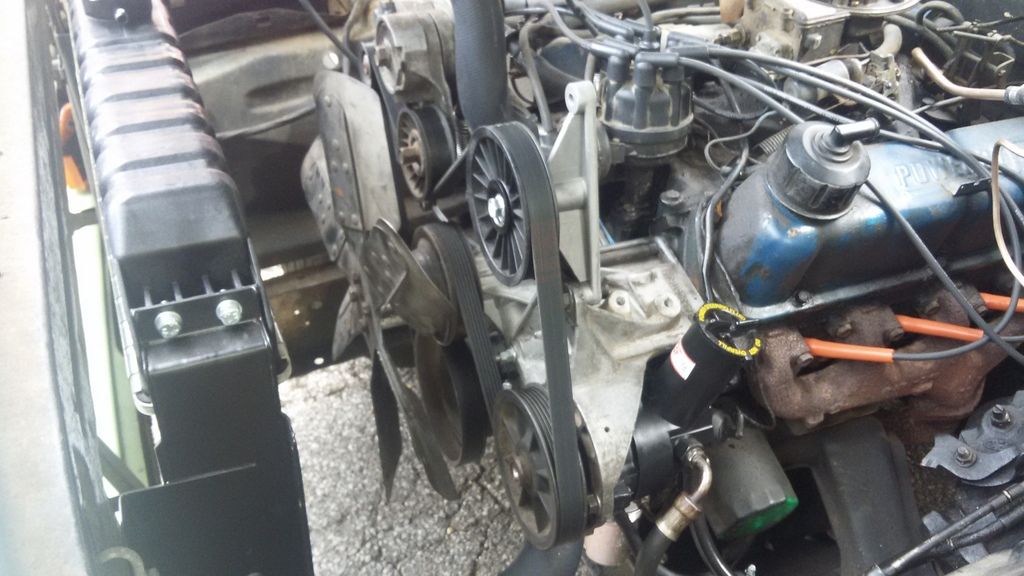
Serpentine system accessory brackets, fan, etc from 302 out of '85 bronco installed.
Some of this is talked about above, but this whole thing was pretty straightforward except for a few things:
Going from v belt to serpentine necessitated finding a timing cover to accomodate water flowing in different direction, a dipstick hole, and a place for a mechanical fuel pump.
Also the correct water pump. And then a dummy pulley and deciphering some serpentine loop pattern and belt length options.
The vacuum booster needed to be mounted on a bracket of the kind, i think it was only a few years late 70's maybe(?, maybe 78 only?) where it wasn't a straight shot from the brake pedal lever to the piston of the vacuum booster, there is a like a little jigjog lever thing in between built into the bracket that holds the vacuum booster to the firewall. I will try to post a pic. I got extremely lucky there was a truck i could pull this off. The junkyard i always went to had about 10 or so 70's trucks and only one with this type of brake booster bracket
It drives great, did not even need an alignment. I haven't really looking at tire waear very closely though. It has the really bent beam in it from above pics, but drives great, goes fast and straight with no vibrations. You don't have to be andre the giant to drive it anymore.
Sorry I don't have more and better pics.

