1971 F250 2wd to 4wd project
Moderator: FORDification
-
- New Member
- Posts: 52
- Joined: Sat Nov 15, 2014 5:13 pm
Re: 1971 F250 2wd to 4wd project
A bit more progress to report.
The underside of the truck bed is coated with POR 15 and we went with Al's Liner for the bed. Used 2 gallons of the liner, but 3 would have been better. Prior to spraying the liner we applied Shopline JP 215 etch primer which is a green color. I am really impressed with Al's liner at this point. Seems like it will hold up well, but time will tale.
The truck bed was well used by the PO. Some body filler and the liner really dressed it up/ hid the worst of it.
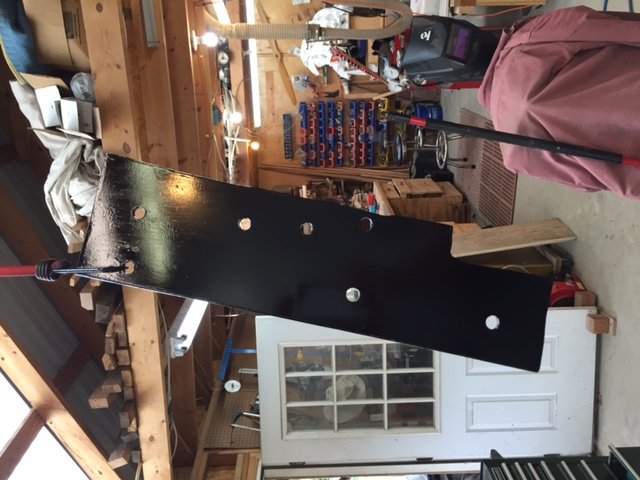
I notched the frame to give the fuel filler hose some breathing room. To strengthen the frame I added 1/4" plate 18" long.
The underside of the truck bed is coated with POR 15 and we went with Al's Liner for the bed. Used 2 gallons of the liner, but 3 would have been better. Prior to spraying the liner we applied Shopline JP 215 etch primer which is a green color. I am really impressed with Al's liner at this point. Seems like it will hold up well, but time will tale.
The truck bed was well used by the PO. Some body filler and the liner really dressed it up/ hid the worst of it.
I notched the frame to give the fuel filler hose some breathing room. To strengthen the frame I added 1/4" plate 18" long.
-
- New Member
- Posts: 52
- Joined: Sat Nov 15, 2014 5:13 pm
Re: 1971 F250 2wd to 4wd project
Need some help. I am planning on doing the 78/79 power steering conversion. I would like to use my 1971 steering column, but not for sure how to attach the linkage. Originally my 71 column attached directly to the gear box. I have a 73 column I could use for parts. See picture below. How do people attach an intermediate shaft when doing this conversion?
-
- New Member
- Posts: 52
- Joined: Sat Nov 15, 2014 5:13 pm
Re: 1971 F250 2wd to 4wd project
Making Progress
Bronco II Fuel Tank with filler hose installed. I needed a flexible hose, but it also tends to crease where you don't want it to. The stainless piece of exhaust pipe cut in half and lightly clamped fixed that problem.
The smaller line does not run to anything, it is just acting as a vent for the tank. If anyone knows where I can find a pigtail for a 84 Bronco II sending unit I have not been able to locate one.
The 71 bed does not sit exactly level on the 73 frame and must be shimmed to keep it level. I went with a 1 inch body lift plus the homemade shims. Here you can see I used large washer and sleeved them to fit the bed bolts as shims.
Time to start thinking about tires. I think the 37 Nittos may be to big. Maybe 35" would be better.
My parking brake cable was to long and I couldn't find one that would work. I found a the following fix on another website but it is worth sharing. Worked like a charm. Just take some 3/8 round bar, cut off about 3/8, drill a 1/8 hole, stick the brake cable through about 3/16 and weld it up.
Starting to work on the AC. The truck came with a Clardy AC installed April 1971 in Fort Worth, TX. (I have the warranty paper work and user manual that came with the truck) I plan to reuse the evaporator and housing. The blower motor still works fine and the evap holds a suction. I ordered a new superflow condenseor, drier, trinary switch and have a Sanden 508 compressor installed. I was impressed the 40 plus year old evap was still solid.
-
- New Member
- Posts: 52
- Joined: Sat Nov 15, 2014 5:13 pm
Re: 1971 F250 2wd to 4wd project
AC cleaned up and ready for install.
Moving on to the heater.
What is this thing?
Moving on to the heater.
What is this thing?
- popeyes71
- Blue Oval Guru
- Posts: 1176
- Joined: Tue Jan 31, 2012 3:46 pm
- Location: Bay Area, Ca.
Re: 1971 F250 2wd to 4wd project
Great updates, looks like you are making some good progress! I think those 37" would be awesome on your truck. As for your question on the part; that's a resistor for the blower fan. It controls the high and low speed of the fan motor. Hope that helps some.
-Popeye-
1971 F-250 4x4 Highboy
1966 Chevy Nova, 8 second 10.5 car
1971 F-250 4x4 Highboy
1966 Chevy Nova, 8 second 10.5 car
-
- New Member
- Posts: 52
- Joined: Sat Nov 15, 2014 5:13 pm
Re: 1971 F250 2wd to 4wd project
I was lucky to get in on the Redhead Steering Group Buy and received my 78-79 F250 4wd gear box yesterday. Got it all mounted up today.
Here are the steps I used to attach the gear box.
1. Cut the raised part of the frame in two places, heated it up, and beat it flat.
2. Then beat the two remaining flaps down. I had to cut off a small slice so the flaps would line up and welded them up.
3. Next was inserting a piece of 1/4" plate. Got it make a nice fit on the frame and then clamped the gear box to the frame and marked the holes on the plate for the gear box.
4. Drilled the plate first.
5. Then bolted the plate to the gear box and then set the whole thing in place and tacked the plate to the frame.
6. Removed the gear box.
7. Then fully welded up the plate.
8. Then used the plate holes to line up the frame side holes and drilled them.
9. Next insert some spacers between plate and frame.
10. Insert grade eight 9/16" x 4" bolts and toque.
11. I trimmed the radiator core support as pictured below and did not need to cut the cross member. Radiator has plenty of clearance.
-
- New Member
- Posts: 120
- Joined: Fri Jul 21, 2006 10:59 am
- Location: Tacoma, Washington
Re: 1971 F250 2wd to 4wd project
Nice work!! Looks like a lot of fun. Keep up the great progress!!
anything worth doing is worth doing in EXCESS!! - Carroll Shelby
70 F-350 4X4 crew
70 F-350 4X4 crew
-
- Blue Oval Fan
- Posts: 742
- Joined: Wed Apr 24, 2013 1:11 pm
- Location: Milwaukee WI
Re: 1971 F250 2wd to 4wd project
That 'gold JB weld' looks like braze to me, poorly applied... not enough flux or dirty metal/paint.
I have that same 'clardy' AC unit, which probably never was more than 100 miles from fort worth until i brought it down to austin.
It has a weird circuit, best i can tell, it is running the power from the AC clutch (the clutch's ground line, so to speak) back from the clutch to the control panel. The temp control is cycling the compressor on and off based on the thermocouple and the 'temp' selection on the first dial. Then the second dial is just fan speed and that stays running.
I'm going to do the same thing, use a 508 with the serp setup on my 300-6, but hook up the clardy unit. I'll probably keep the fan switch intact, but switch the temperature control to just always stay on, and i can turn it off myself if i get too cold.
What are you using for an unloading valve? I'd like to see more pictures of the top of your evaporator, mine was rusted into the unloading valve and i had to cut the fittings off, and i'll have to solder new ones on there.
-
- New Member
- Posts: 111
- Joined: Mon Jun 01, 2015 6:15 pm
- Location: Ohio
Re: 1971 F250 2wd to 4wd project
Man I still cant get over what you guys scrap down there. Up here in the rust belt that 73-79 cab would be worth a lot more than what they gave you in scrap.
- hfdco4
- Blue Oval Guru
- Posts: 1314
- Joined: Mon Apr 01, 2013 1:45 pm
Re: 1971 F250 2wd to 4wd project
Any updates on the progress?
Paul
FE390PC
1970 F250 4x4
2016 F150 4x4 2.7 ECO
Gone 1997, 1999 & 2003 F150 4x4s
Gone 1988, 1989 & 1991 Broncs
FE390PC
1970 F250 4x4
2016 F150 4x4 2.7 ECO
Gone 1997, 1999 & 2003 F150 4x4s
Gone 1988, 1989 & 1991 Broncs
- Manny
- Blue Oval Guru
- Posts: 1190
- Joined: Wed Oct 04, 2006 7:15 pm
- Location: Georgia, Lake City
- Contact:
Re: 1971 F250 2wd to 4wd project
I like this one very good looking project you got coming along there, and can't wait to see it finished. Sad I am caught up now and have to wait to see more of this truck
Just another Ford fool named Dan.
The Junk that hangs around
67' F-250 highboy Camper special cross breed currently under way
http://www.fordification.com/forum/view ... 22&t=86706
1974 Bronco 302 3 speed
1984 bronco 302 c6 35's
1994 F350 7.3 5spd dually.
The Junk that hangs around
67' F-250 highboy Camper special cross breed currently under way
http://www.fordification.com/forum/view ... 22&t=86706
1974 Bronco 302 3 speed
1984 bronco 302 c6 35's
1994 F350 7.3 5spd dually.
woods wrote: The rust holes in my truck were a factory install (very rare).
- hfdco4
- Blue Oval Guru
- Posts: 1314
- Joined: Mon Apr 01, 2013 1:45 pm
Re: 1971 F250 2wd to 4wd project
Nice work.
Paul
FE390PC
1970 F250 4x4
2016 F150 4x4 2.7 ECO
Gone 1997, 1999 & 2003 F150 4x4s
Gone 1988, 1989 & 1991 Broncs
FE390PC
1970 F250 4x4
2016 F150 4x4 2.7 ECO
Gone 1997, 1999 & 2003 F150 4x4s
Gone 1988, 1989 & 1991 Broncs
- hfdco4
- Blue Oval Guru
- Posts: 1314
- Joined: Mon Apr 01, 2013 1:45 pm
Re: 1971 F250 2wd to 4wd project
Any new updates?
Paul
FE390PC
1970 F250 4x4
2016 F150 4x4 2.7 ECO
Gone 1997, 1999 & 2003 F150 4x4s
Gone 1988, 1989 & 1991 Broncs
FE390PC
1970 F250 4x4
2016 F150 4x4 2.7 ECO
Gone 1997, 1999 & 2003 F150 4x4s
Gone 1988, 1989 & 1991 Broncs