Project "Uncle Fester"- 9/21 Interior almost finished
Moderator: FORDification
-
LANCE65
- Preferred User

- Posts: 462
- Joined: Wed Dec 27, 2006 12:00 pm
- Location: SoCal
Re: Project "Uncle Fester"- Front clip is OFF !
Looking great. Keep up the good work.
-Lance
-Lance
2015 Camaro-2001 GMC Safari-1984 F250 6.9/T19 2wd-1974 Dodge D100 short fleetside~ 72 wife ~ late model kids, a Chocolate Lab named Coco and a white rabbit named Marshmallow...now I need a ferret named Graham and I will have S'mroes!!!..

- 72stepside
- Blue Oval Fan

- Posts: 537
- Joined: Tue May 09, 2006 10:31 pm
- Location: Florida, Milton
- Contact:
Re: Project "Uncle Fester"- Front clip is OFF !
Well, I made a decision (with help). I have decided that if I haven't made significant progress by the end of 2010, then I'm selling the entire thing. I relayed this revelation to my father who told me, "You've got alot of money and we've put alot of time into this thing so far. Let's at least get it respectable." With that, I'm back at it...
Off the the U-Pull-It yard last Saturday I went. I found a complete rocker panel trim set with NO dings, dents, or heavy scratches... $25 !!! All I have to do is polish them up!
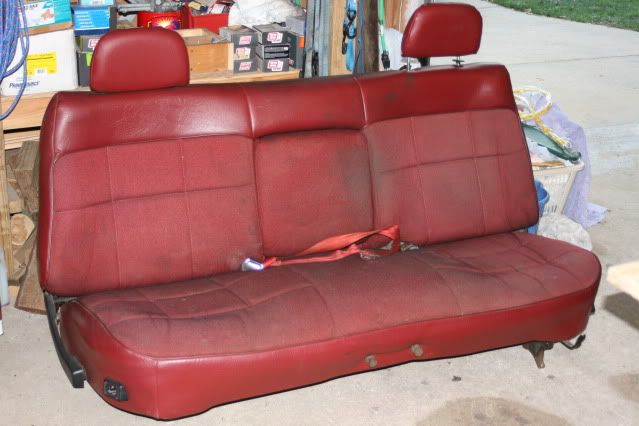
I also found a seat out of an early 90s F-150 for $25. Below are before cleaning and after cleaning pics of the seat.
Before...
After...
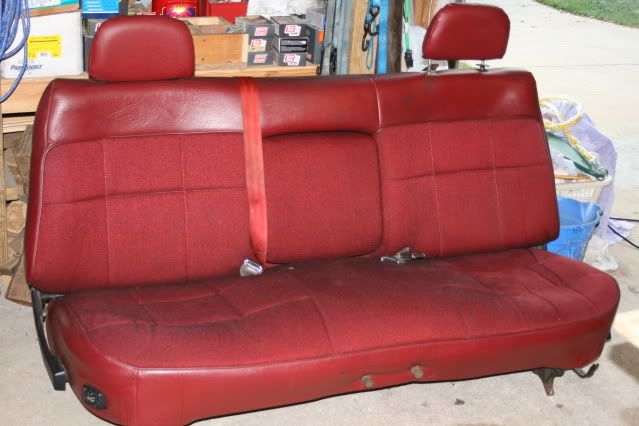
This seat has done two things...
1. It solved my issue with sitting on a 40 year old torn bench seat that was green (no hope for this truck EVER being green again)
2. It narrowed my color selection down to a two tone white/dark red.
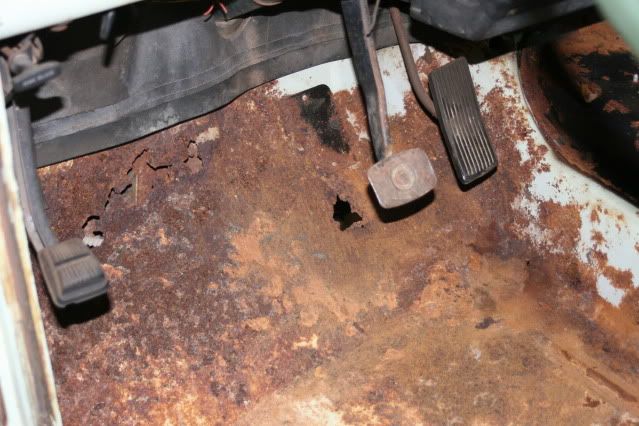
I've also been working on gutting the cab. Some owner in the life of this truck thought it would be a good idea to place paper/cardboard under the floor mat for insulation. Well, it got wet and you can see below what the end result is...
Yesterday I got the column out. Tonight I'm gonna work on getting the windshield out. Soon I should be able to get this cab off and over to my father's house for him to begin the body work.
Things I need (recently discovered)...
Floor Pans
Front Cab Supports
All in all, I ran through the items I need to get this cab right and I'm looking at around $900, not including paint. Good thing I overpaid Uncle Sam by $2k.
Stay tuned...
Off the the U-Pull-It yard last Saturday I went. I found a complete rocker panel trim set with NO dings, dents, or heavy scratches... $25 !!! All I have to do is polish them up!
I also found a seat out of an early 90s F-150 for $25. Below are before cleaning and after cleaning pics of the seat.
Before...

After...

This seat has done two things...
1. It solved my issue with sitting on a 40 year old torn bench seat that was green (no hope for this truck EVER being green again)
2. It narrowed my color selection down to a two tone white/dark red.
I've also been working on gutting the cab. Some owner in the life of this truck thought it would be a good idea to place paper/cardboard under the floor mat for insulation. Well, it got wet and you can see below what the end result is...

Yesterday I got the column out. Tonight I'm gonna work on getting the windshield out. Soon I should be able to get this cab off and over to my father's house for him to begin the body work.
Things I need (recently discovered)...
Floor Pans
Front Cab Supports
All in all, I ran through the items I need to get this cab right and I'm looking at around $900, not including paint. Good thing I overpaid Uncle Sam by $2k.
Stay tuned...
Chris
72 F100 Stepside w/ 78 300 CID
Hedman Headers
Disc Brakes
Power Steering with 3 STILL on the tree
Comfy Crown Vic Seats
71 F250 PS, PB, AC, Auto, 390
Loooong way to go on this one!


72 F100 Stepside w/ 78 300 CID
Hedman Headers
Disc Brakes
Power Steering with 3 STILL on the tree
Comfy Crown Vic Seats
71 F250 PS, PB, AC, Auto, 390
Loooong way to go on this one!


- 72stepside
- Blue Oval Fan

- Posts: 537
- Joined: Tue May 09, 2006 10:31 pm
- Location: Florida, Milton
- Contact:
Re: Project "Uncle Fester"- Holy floorpans Batman!
Got the chrome trim off the windshield gasket. That took about 5 minutes thanks to a search I did on here. I started cutting on the gasket to get the windshield out. About 2/3 of the top portion of the gasket pulled completely out. I think the windshield was just resting in the hole.
The rear window was even easier. I cut the two sides and the top pulled right out. The window is barely hanging in there now, just to keep the birds out.
Should get alot done tomorrow!
The rear window was even easier. I cut the two sides and the top pulled right out. The window is barely hanging in there now, just to keep the birds out.
Should get alot done tomorrow!
Chris
72 F100 Stepside w/ 78 300 CID
Hedman Headers
Disc Brakes
Power Steering with 3 STILL on the tree
Comfy Crown Vic Seats
71 F250 PS, PB, AC, Auto, 390
Loooong way to go on this one!


72 F100 Stepside w/ 78 300 CID
Hedman Headers
Disc Brakes
Power Steering with 3 STILL on the tree
Comfy Crown Vic Seats
71 F250 PS, PB, AC, Auto, 390
Loooong way to go on this one!


- 1971ford
- 100% FORDified!

- Posts: 5565
- Joined: Wed Jul 04, 2007 1:05 pm
- Location: Placerville CA
Re: Project "Uncle Fester"- Holy floorpans Batman!
Ah man i was winning in our super intense race until i decided to put a highboy chassis under the '69 now i am behind you 
I can't wait to see this thing go together
I can't wait to see this thing go together
-Ryan
- 72stepside
- Blue Oval Fan

- Posts: 537
- Joined: Tue May 09, 2006 10:31 pm
- Location: Florida, Milton
- Contact:
Re: Project "Uncle Fester"- Holy floorpans Batman!
Ha! I was looking through your thread for the first time in forever and lost track of which truck was which!!!!1971ford wrote:Ah man i was winning in our super intense race until i decided to put a highboy chassis under the '69 now i am behind you
I can't wait to see this thing go together
Chris
72 F100 Stepside w/ 78 300 CID
Hedman Headers
Disc Brakes
Power Steering with 3 STILL on the tree
Comfy Crown Vic Seats
71 F250 PS, PB, AC, Auto, 390
Loooong way to go on this one!


72 F100 Stepside w/ 78 300 CID
Hedman Headers
Disc Brakes
Power Steering with 3 STILL on the tree
Comfy Crown Vic Seats
71 F250 PS, PB, AC, Auto, 390
Loooong way to go on this one!


- 72stepside
- Blue Oval Fan

- Posts: 537
- Joined: Tue May 09, 2006 10:31 pm
- Location: Florida, Milton
- Contact:
Re: Project "Uncle Fester"- Holy floorpans Batman!
Cab is gutted and loose except for the E-brake cable. There is nothing left in there... heater, AC, everyting... gone.
What a mess the wiring was. God only knows what the PO had 'hooked up' in there once upon a time. What I figured to be the power wire for the AC unit was just jamed behind a fuse. I can't believe that would be right!?!?!?
Monday is the day it gets loaded and taken over to my folks house. Not sure how we gonna lift it, but we'll find a way.
Chris
72 F100 Stepside w/ 78 300 CID
Hedman Headers
Disc Brakes
Power Steering with 3 STILL on the tree
Comfy Crown Vic Seats
71 F250 PS, PB, AC, Auto, 390
Loooong way to go on this one!


72 F100 Stepside w/ 78 300 CID
Hedman Headers
Disc Brakes
Power Steering with 3 STILL on the tree
Comfy Crown Vic Seats
71 F250 PS, PB, AC, Auto, 390
Loooong way to go on this one!


- basketcase0302
- 100% FORDified!

- Posts: 6805
- Joined: Thu Jan 26, 2006 7:11 am
- Location: Hawthorne, Florida
Re: Project "Uncle Fester"- Holy floorpans Batman!
Chris,
Looking good man!
My back started hurting just reading about your hood adventure.
What color you gonna make it? Match the new seat?
Looking good man!
My back started hurting just reading about your hood adventure.
What color you gonna make it? Match the new seat?
Jeff
http://www.fordification.com/forum/view ... 22&t=46251
SOLD-71 F-350 dually flatbed, 302 / .030 over V-8 with a "baby"C-6, B & M truckshifter, Dana70/4.11 ratio, intermittent wipers, tilt steering, full LED lighting on the flat bed, and no stereo yet (this way I can hear the rattles to diagnose)! SOLD!
Many Ford bumps / one 76' EB / and several dents through the years.
A lot of "oddball" Ford parts collected from working on them for 34 years now!
2008 Ford Escape 4 x 4
- 72stepside
- Blue Oval Fan

- Posts: 537
- Joined: Tue May 09, 2006 10:31 pm
- Location: Florida, Milton
- Contact:
Re: Project "Uncle Fester"- Holy floorpans Batman!
basketcase0302 wrote:Chris,
Looking good man!
My back started hurting just reading about your hood adventure.
What color you gonna make it? Match the new seat?
It's gonna be a 'dark red' and white, if that makes sense? That seat is darker in reality than it appears in pictures.
- 72stepside
- Blue Oval Fan

- Posts: 537
- Joined: Tue May 09, 2006 10:31 pm
- Location: Florida, Milton
- Contact:
Re: Project "Uncle Fester"- Holy floorpans Batman!
Well, I worked really hard the weekend of April 17th to get the cab ready for removal.
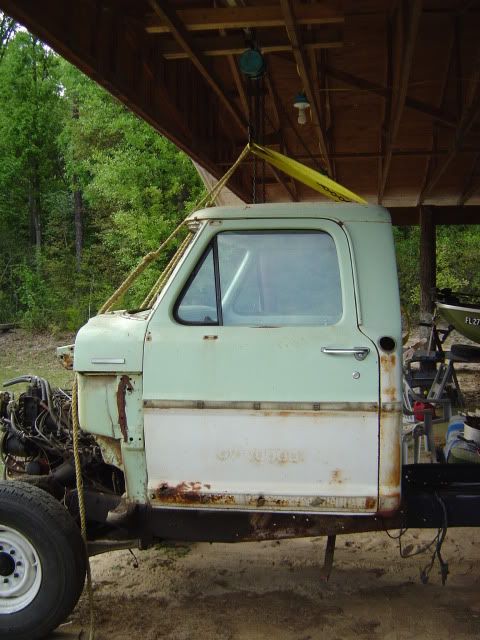
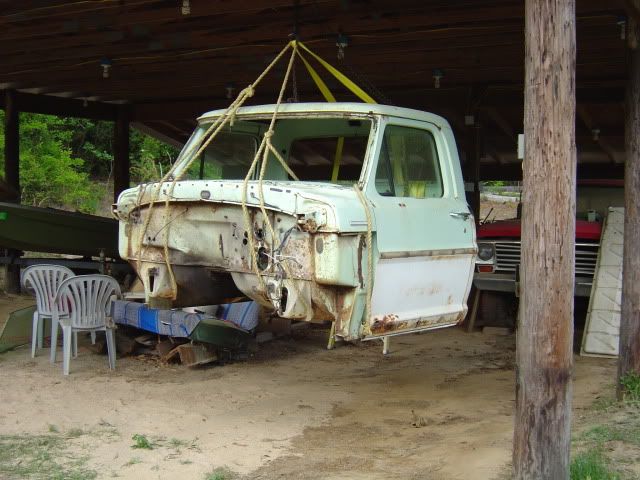
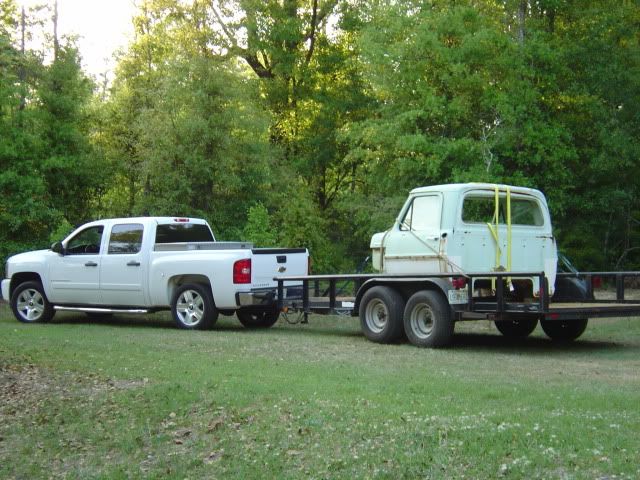
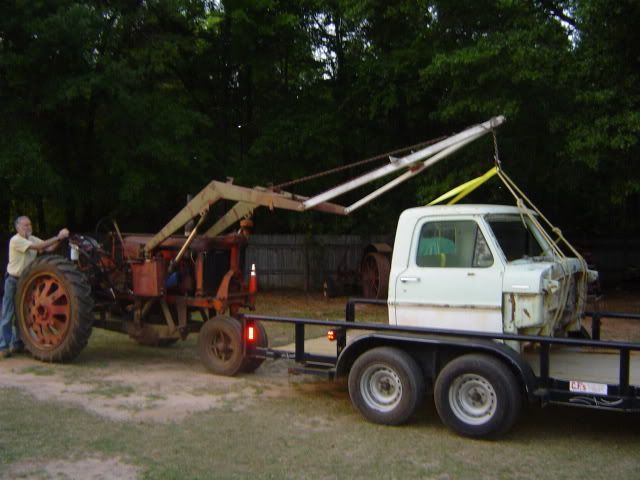
Got it removed and hauled to Dad's on Monday the 19th...
How do you lift your cab? We use a chain hoist, ropes, and a strap...
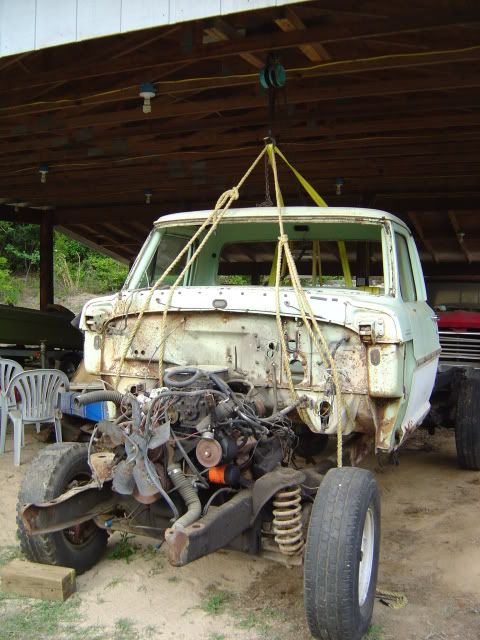
Slid the frame out from under it...
Got it loaded...
Then, used a different method to get it off the trailer...
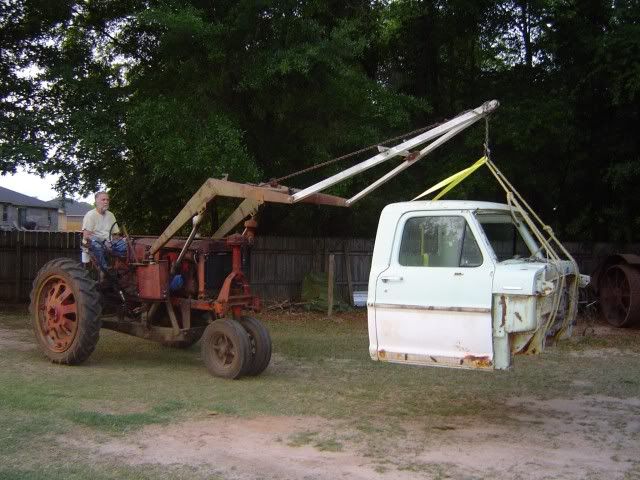
I ordered floor pans and cab supports from Carpenter on Wednesday, April 21st. Then I headed for TN/NC on my motorcycle for the weekend (love it there). The parts came in today. Cutting, fitting, and welding will start tomorrow.
More pics to follow...
Got it removed and hauled to Dad's on Monday the 19th...
How do you lift your cab? We use a chain hoist, ropes, and a strap...


Slid the frame out from under it...

Got it loaded...

Then, used a different method to get it off the trailer...


I ordered floor pans and cab supports from Carpenter on Wednesday, April 21st. Then I headed for TN/NC on my motorcycle for the weekend (love it there). The parts came in today. Cutting, fitting, and welding will start tomorrow.
More pics to follow...
Chris
72 F100 Stepside w/ 78 300 CID
Hedman Headers
Disc Brakes
Power Steering with 3 STILL on the tree
Comfy Crown Vic Seats
71 F250 PS, PB, AC, Auto, 390
Loooong way to go on this one!


72 F100 Stepside w/ 78 300 CID
Hedman Headers
Disc Brakes
Power Steering with 3 STILL on the tree
Comfy Crown Vic Seats
71 F250 PS, PB, AC, Auto, 390
Loooong way to go on this one!


- 72stepside
- Blue Oval Fan

- Posts: 537
- Joined: Tue May 09, 2006 10:31 pm
- Location: Florida, Milton
- Contact:
Re: Project "Uncle Fester"- Cab off, parts delivered, fun begins
Alright...
Things are going along swimingly thanks to the time my Father can spend on the truck during the day and thanks to the wife for letting my go over every evening and work on it.
So, we started with the driver floorboard. We took good measurements and used two boards, each bolted to the holes in the rear of the cab, then bolted to the front cab mount. With one on top of the other, we traced with pencil where they should go, and also measured the distance from the upper seam on the cowl and side to side with the other cab mount. Armed with all this info, we started cutting. We used an air cut-off tool in the curves and a jig saw in the straights. There were several spot welds near the door opening that had to come out as well as spot welds on the upper flange of the cab support that attached it to the cowl seam.
Driver floor gone...
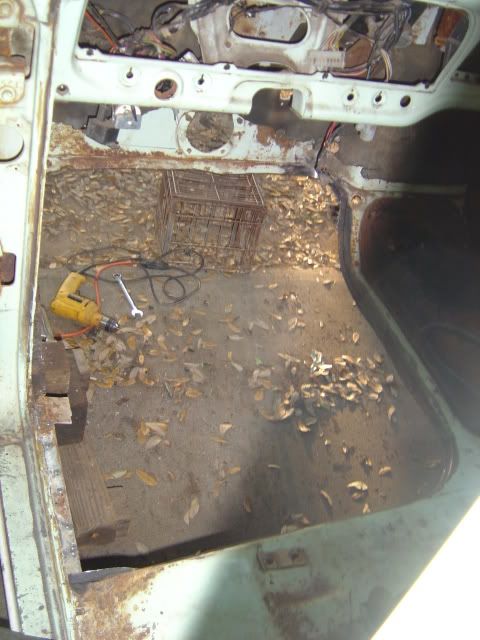
We spent alot of time fitting the new floor in the hole that was left. I chose the Dennis Carpenter pans because I heard they were the heaviest guage metal available. They had DC labels and Black Oval labels too? I guess they fit OK. I was hoping for better but we made it work.
New driver floor (crappy picture)...
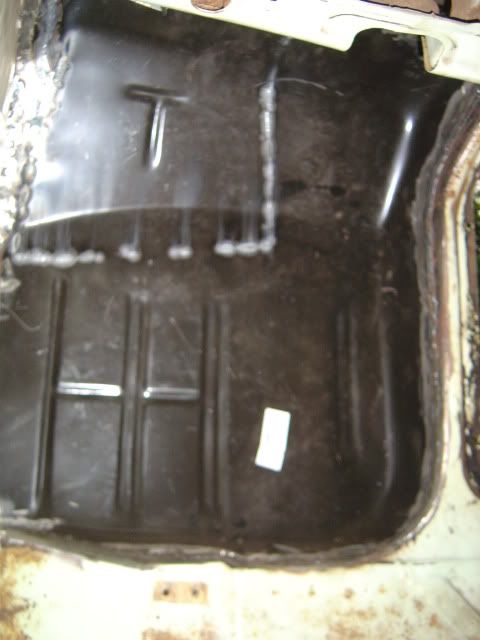
Now, it was time to put on the cab mount. I was a little more disappointed in their fitment. Yeah, they are definitely heavy guage material, but they just don't fit very well. The holes to fasten the rubber support for the inner fender isn't even in the right place on the passenger support.
Some pics of fitment issues... common to both sides but these are of the passenger side.
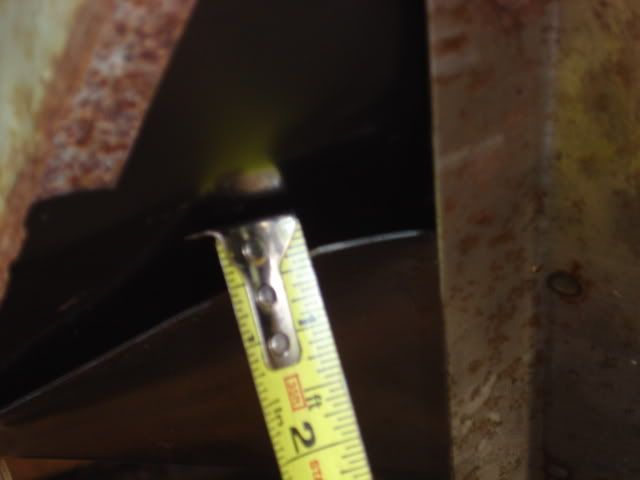
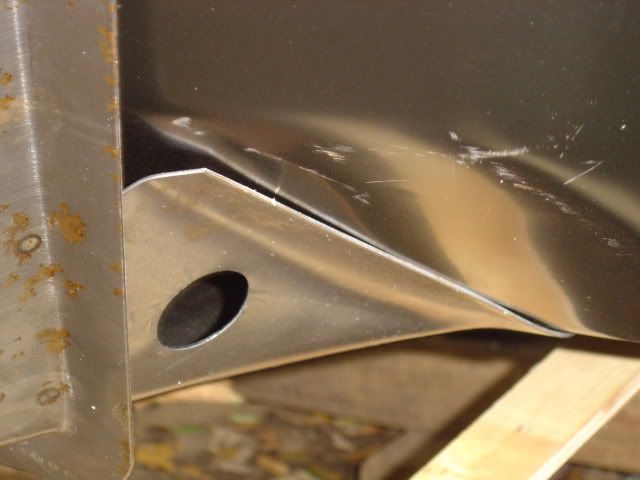
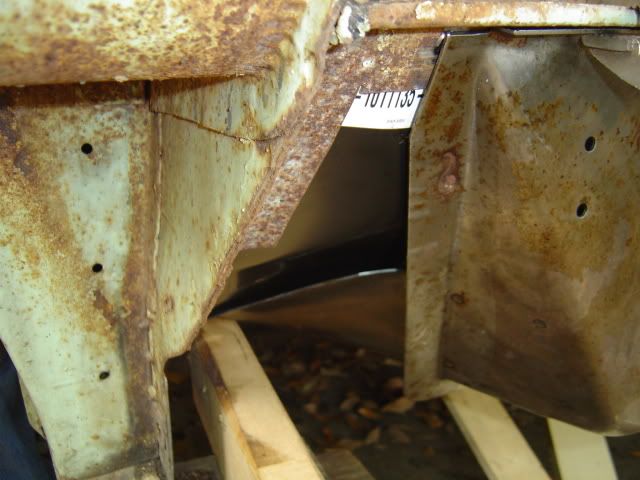
Here's one of how we clamped in the driver cab support. Deep throated vice grip type welding clamps RULE THE WORLD for doing this particular job. You can see our measurement boards underneath.
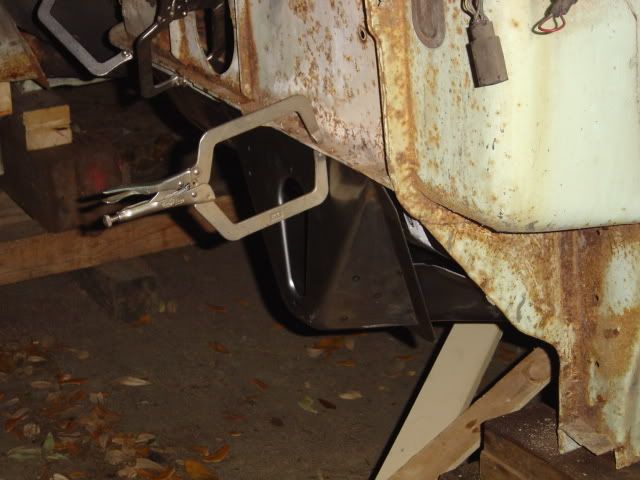
We finally got everything fitted. I coated the cab supports with POR-15 and Dad welded them on. He was able to work on some of the flanges to get them closer to the new floor pans to weld. In some cases, there was just no hope. Again, I'm a bit disappointed.
Here's a shot of the underside of the cab after we used the Farmall F-20 to roll it over (forgot my cameral that day )
)
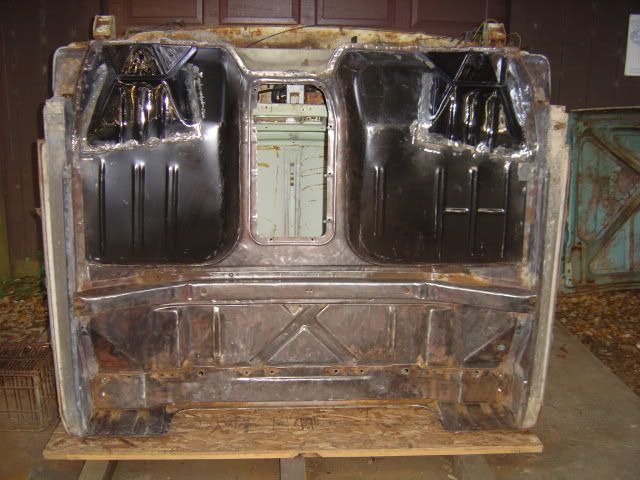
Here's a close up of the driver cab support after I spent some time in the area with the wire wheel. See, it doesn't fit tight against the floor pan like the originals, but we edge welded most of it instead of spot welding it so I think it'll be fine.
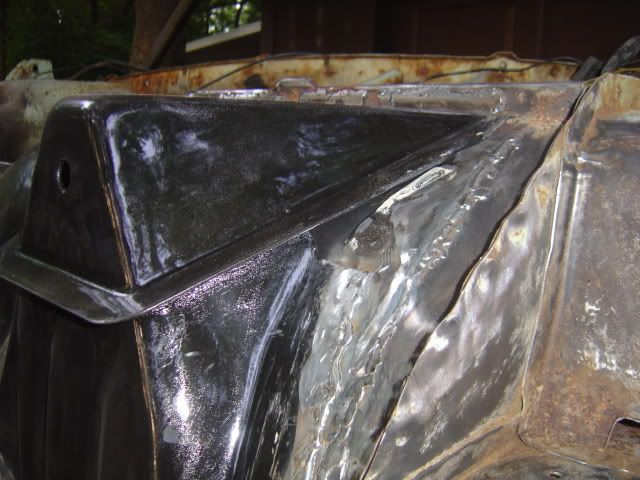
This weekend, weather permitting, I should be able to get the underside coated with POR-15.
Stay tuned...
Things are going along swimingly thanks to the time my Father can spend on the truck during the day and thanks to the wife for letting my go over every evening and work on it.
So, we started with the driver floorboard. We took good measurements and used two boards, each bolted to the holes in the rear of the cab, then bolted to the front cab mount. With one on top of the other, we traced with pencil where they should go, and also measured the distance from the upper seam on the cowl and side to side with the other cab mount. Armed with all this info, we started cutting. We used an air cut-off tool in the curves and a jig saw in the straights. There were several spot welds near the door opening that had to come out as well as spot welds on the upper flange of the cab support that attached it to the cowl seam.
Driver floor gone...

We spent alot of time fitting the new floor in the hole that was left. I chose the Dennis Carpenter pans because I heard they were the heaviest guage metal available. They had DC labels and Black Oval labels too? I guess they fit OK. I was hoping for better but we made it work.
New driver floor (crappy picture)...

Now, it was time to put on the cab mount. I was a little more disappointed in their fitment. Yeah, they are definitely heavy guage material, but they just don't fit very well. The holes to fasten the rubber support for the inner fender isn't even in the right place on the passenger support.
Some pics of fitment issues... common to both sides but these are of the passenger side.


Here's one of how we clamped in the driver cab support. Deep throated vice grip type welding clamps RULE THE WORLD for doing this particular job. You can see our measurement boards underneath.

We finally got everything fitted. I coated the cab supports with POR-15 and Dad welded them on. He was able to work on some of the flanges to get them closer to the new floor pans to weld. In some cases, there was just no hope. Again, I'm a bit disappointed.
Here's a shot of the underside of the cab after we used the Farmall F-20 to roll it over (forgot my cameral that day

Here's a close up of the driver cab support after I spent some time in the area with the wire wheel. See, it doesn't fit tight against the floor pan like the originals, but we edge welded most of it instead of spot welding it so I think it'll be fine.

This weekend, weather permitting, I should be able to get the underside coated with POR-15.
Stay tuned...
Chris
72 F100 Stepside w/ 78 300 CID
Hedman Headers
Disc Brakes
Power Steering with 3 STILL on the tree
Comfy Crown Vic Seats
71 F250 PS, PB, AC, Auto, 390
Loooong way to go on this one!


72 F100 Stepside w/ 78 300 CID
Hedman Headers
Disc Brakes
Power Steering with 3 STILL on the tree
Comfy Crown Vic Seats
71 F250 PS, PB, AC, Auto, 390
Loooong way to go on this one!


- 72stepside
- Blue Oval Fan

- Posts: 537
- Joined: Tue May 09, 2006 10:31 pm
- Location: Florida, Milton
- Contact:
Re: Project "Uncle Fester"- 5/13 New floors/supports
Here's the plan with the color scheme...
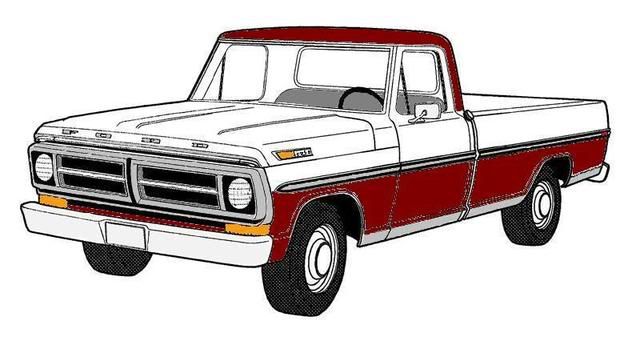
This will match my new seat.

This will match my new seat.
Chris
72 F100 Stepside w/ 78 300 CID
Hedman Headers
Disc Brakes
Power Steering with 3 STILL on the tree
Comfy Crown Vic Seats
71 F250 PS, PB, AC, Auto, 390
Loooong way to go on this one!


72 F100 Stepside w/ 78 300 CID
Hedman Headers
Disc Brakes
Power Steering with 3 STILL on the tree
Comfy Crown Vic Seats
71 F250 PS, PB, AC, Auto, 390
Loooong way to go on this one!


-
waynaferd
- New Member

- Posts: 122
- Joined: Fri Sep 22, 2006 8:43 pm
- Location: Stinkin Lincoln Maine!
Re: Project "Uncle Fester"- 5/13 New floors/supports
I totally F'd up my drivers side floor pan from LMC, and need to cut it all back out and start over. Your's look pretty good I must say.
I do like that color scheme as well. I wanna do much the same but with a blue or deep purple to go with the white. That's a lonnnnng ways away though.
Keep at it!!
I do like that color scheme as well. I wanna do much the same but with a blue or deep purple to go with the white. That's a lonnnnng ways away though.
Keep at it!!
A 72 F-250 Hi-Boy "project" ( that means sitting untouched for 3 or so years)
And a little 94 F-150 Flareside, 7" higher and 35's...
And a little 94 F-150 Flareside, 7" higher and 35's...
- 72stepside
- Blue Oval Fan

- Posts: 537
- Joined: Tue May 09, 2006 10:31 pm
- Location: Florida, Milton
- Contact:
Re: Project "Uncle Fester"- 5/13 New floors/supports
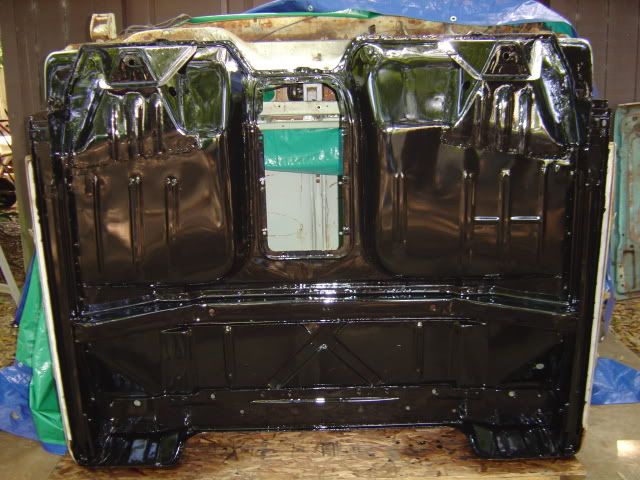
All I got left under there is to fill all the seams with seam sealer, then we'll be ready to flip that puppy back right side up and get started on a few things inside the cab.
Stay tuned...
Chris
72 F100 Stepside w/ 78 300 CID
Hedman Headers
Disc Brakes
Power Steering with 3 STILL on the tree
Comfy Crown Vic Seats
71 F250 PS, PB, AC, Auto, 390
Loooong way to go on this one!


72 F100 Stepside w/ 78 300 CID
Hedman Headers
Disc Brakes
Power Steering with 3 STILL on the tree
Comfy Crown Vic Seats
71 F250 PS, PB, AC, Auto, 390
Loooong way to go on this one!


-
BlueOvalDave
- New Member

- Posts: 231
- Joined: Wed Oct 29, 2008 10:34 pm
Re: Project "Uncle Fester"- 5/16 Under cab coated w/ POR-15
That looks great! Dont be too hard on yourself about the fitment, we just got done with our 67 and aftermarket will never be as it came off the assembly line, we had some of the same issues that you did. We were gonna hold off on a bottom blast and total paint but after seeing you cab I'm really tempted to do it now. Good work all the way around 
- stephen44
- Blue Oval Fan

- Posts: 655
- Joined: Thu Jun 11, 2009 3:28 pm
- Location: Danville, VA
Re: Project "Uncle Fester"- Cab off, parts delivered, fun begins
Yours looks great !
i fitted My NPD mounts at the weekend - they look totally different (I really hope I didn't get sent the wrong ones as teh fit was terrible
you can see my poor attempt at http://www.fordification.com/forum/view ... 9&start=15
Also as my mounts had totally gone - do you happen to have the measurements for where the hand/foot emergency brake cable goes through ?
- Stephen
You do not have the required permissions to view the files attached to this post.
thanks
Stephen
(1967 F100, FE352, 2wd, 3 on the tree, flareside)
Stephen
(1967 F100, FE352, 2wd, 3 on the tree, flareside)