1969 Ranger - Project Glory Days!
Moderator: FORDification
-
67nukeford

- Blue Oval Fan

- Posts: 589
- Joined: Tue Aug 19, 2008 3:20 pm
- Location: Nebraska, Omaha/Elkhorn
Re: 1969 Ranger - Project Glory Days!
How easy was that system to use? Did you just use a regular oven?
-
67mann

- 100% FORDified!

- Posts: 1706
- Joined: Thu Feb 07, 2008 7:19 am
- Location: NY..Mt.Morris 3rdgen. homestead
Re: 1969 Ranger - Project Glory Days!
I see alot of PS parts...looks like ya got your pully off....I would have been posting that same Q had it not been for my buddy doing the same thing on his Mustang.  If ya take the back nut of the PS can...you can pop the pump with air and PC that too if ya want. Put your thumb over filler tube and air chuck the return nozzel in the back.
  sounds familar...Oh yeah I just did this
I've had enough and I'm not alone
http://s267.photobucket.com/albums/ii304/67mann/
http://s267.photobucket.com/albums/ii304/67mann/
-
tylerb43

- Preferred User

- Posts: 492
- Joined: Fri Nov 14, 2008 2:54 pm
- Location: Union, MO
Re: 1969 Ranger - Project Glory Days!
Randy, the short answer is "no, not at all". But is your question relative to the mil thickness of the coating, or a worry about material failure? I did test fit the dipstick beforehand to make sure it wasn't a press fit. I've already re-installed the dipstick with o-ring and lube, and it's perfect. The pulley in the picture is the water pump pulley (although the crank pulley got coated too - and they're both installed now. Powder is tough stuff, go for it man!!sargentrs wrote:Looks great! I appreciate you painting all my parts for meAll kidding aside though, any concerns with the powder coating causing issues with the o-ring seat on the dipstick or the belt grooves in the crank pulley? I've got a powder coat line at work and thought about hanging a few parts but wasn't sure about those. One of our customer's uses a beautiful high gloss black and we happen to have about 110 lbs laying around wasting
Pat, This system is extremely simple if you follow just a few rules, like make sure the part is extremely clean and gets to the right temperature (IR gun, 400F) for the right time(20 min). Yes, I'm just using an older standard oven I got from my wife's Grandma when she upgraded. I've got Eastwood's base model gun and I use their powders. I've been coating stuff for about 5-6 years. The dual voltage gun they're selling now is better than the one I've got, but mine's still working well.67nukeford wrote:How easy was that system to use? Did you just use a regular oven?
Hey Jerry! The pulley there is for the water pump, but I plan to coat the PS pulley as well. That's a great tip for removing the reservoir off the new PS pump, but on the new pump, it's plastic! I guess I'm okay with that, it's black of course and looks decent. Should I be worried about it? Maybe think about switching the reservoir's before I turn in the old pump for the core charge??67mann wrote:I see alot of PS parts...looks like ya got your pully off....I would have been posting that same Q had it not been for my buddy doing the same thing on his Mustang.
-
67mann
- 100% FORDified!
- Posts: 1706
- Joined: Thu Feb 07, 2008 7:19 am
- Location: NY..Mt.Morris 3rdgen. homestead
Re: 1969 Ranger - Project Glory Days!
Hey Jerry! The pulley there is for the water pump, but I plan to coat the PS pulley as well. That's a great tip for removing the reservoir off the new PS pump, but on the new pump, it's plastic! I guess I'm okay with that, it's black of course and looks decent. Should I be worried about it? Maybe think about switching the reservoir's before I turn in the old pump for the core charge?? [/quote]
And we never "assume" why with all the other parts I never even looked
Do you have to turn in the resevoir or just the pump?....guess it would be a matter of preference,metal or plastic. I didn't even look into getting a new one and did not know they are now plastic....my buddy has a shelf full of them,so if this one fails..I'll try again
And we never "assume" why
Do you have to turn in the resevoir or just the pump?....guess it would be a matter of preference,metal or plastic.
I've had enough and I'm not alone
http://s267.photobucket.com/albums/ii304/67mann/
http://s267.photobucket.com/albums/ii304/67mann/
-
sargentrs

- 100% FORDified!
- Posts: 9866
- Joined: Fri Jun 22, 2007 9:30 am
- Location: Georgia, Jasper
Re: 1969 Ranger - Project Glory Days!
Tyler, my concern was with the how well the o-ring seated due to the extra mils of paint on the stick and with the belt having the right amount of friction on the pulley. I was going to go for it anyway but you make me feel better about it. I like "living on the edge".  Thanks for the input!
Randy
1970 F100 Sport Custom Limited LWB, 302cid, 3 on the tree. NO A/C, NO P/S, NO P/B. Currently in 1000 pcs while rebuilding. Project thread: http://www.fordification.com/forum/view ... 22&t=59995 Plan: 351w, C4, LSD, pwr front disc, p/s, a/c, bucket seats, new interior and paint.
1987 F-150 XLT Lariat, 5.0/C6 auto.
-
tylerb43
- Preferred User
- Posts: 492
- Joined: Fri Nov 14, 2008 2:54 pm
- Location: Union, MO
Re: 1969 Ranger - Project Glory Days!
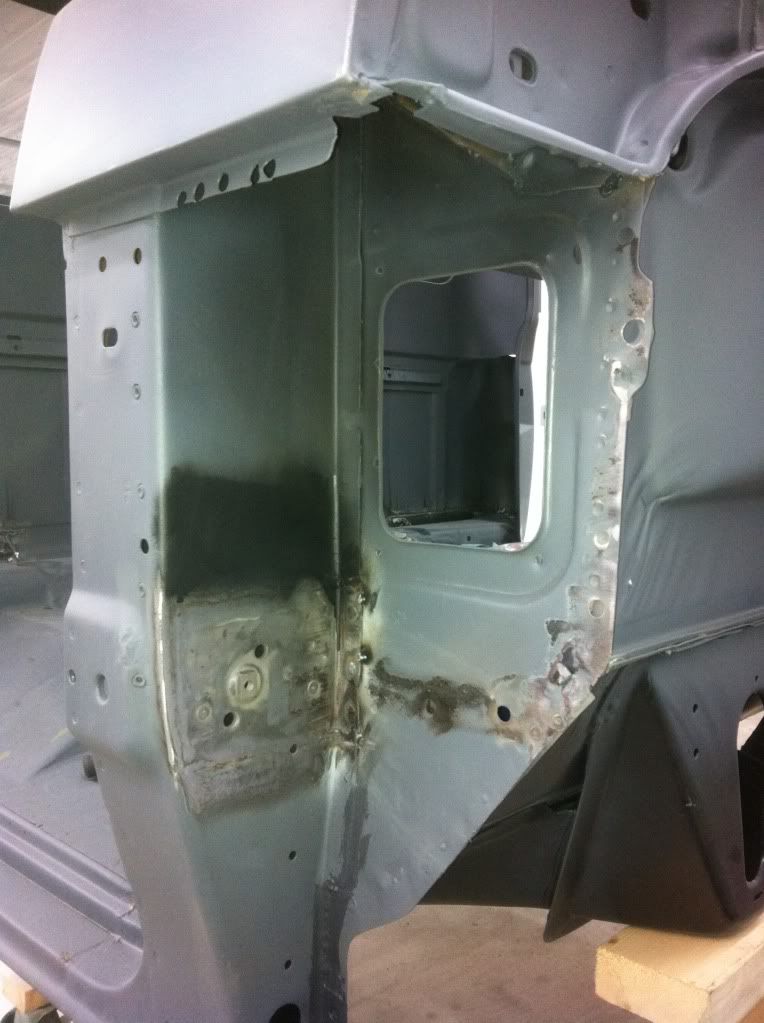
BTW - I finally got that patch piece for the PS A-pillar I was looking for awhile back. The same member that helped me out with the inner cab corners sent me this piece of the puzzle. I blasted it, trimmed it, and welded it in place. I was a little worried about locating it correctly, but I couldn't be more satisfied with how it turned out. Now I can reattach the cowl bucket, and that will be the last bit of welding on the cab!! Could it really be?? 
-
sargentrs
- 100% FORDified!
- Posts: 9866
- Joined: Fri Jun 22, 2007 9:30 am
- Location: Georgia, Jasper
Re: 1969 Ranger - Project Glory Days!
Randy
1970 F100 Sport Custom Limited LWB, 302cid, 3 on the tree. NO A/C, NO P/S, NO P/B. Currently in 1000 pcs while rebuilding. Project thread: http://www.fordification.com/forum/view ... 22&t=59995 Plan: 351w, C4, LSD, pwr front disc, p/s, a/c, bucket seats, new interior and paint.
1987 F-150 XLT Lariat, 5.0/C6 auto.
1970 F100 Sport Custom Limited LWB, 302cid, 3 on the tree. NO A/C, NO P/S, NO P/B. Currently in 1000 pcs while rebuilding. Project thread: http://www.fordification.com/forum/view ... 22&t=59995 Plan: 351w, C4, LSD, pwr front disc, p/s, a/c, bucket seats, new interior and paint.
1987 F-150 XLT Lariat, 5.0/C6 auto.
-
67nukeford
- Blue Oval Fan
- Posts: 589
- Joined: Tue Aug 19, 2008 3:20 pm
- Location: Nebraska, Omaha/Elkhorn
Re: 1969 Ranger - Project Glory Days!
Nice, man! That guy really hooked you up!
-
tylerb43
- Preferred User
- Posts: 492
- Joined: Fri Nov 14, 2008 2:54 pm
- Location: Union, MO
Re: 1969 Ranger - Project Glory Days!
Thanks guys! 
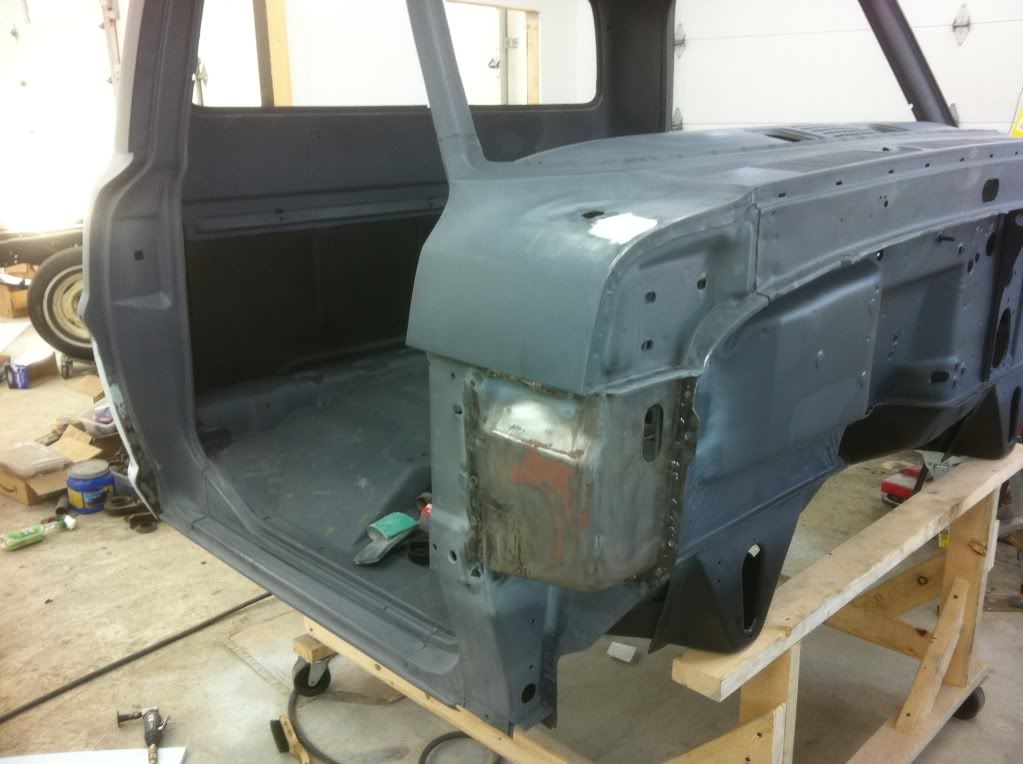
Update time - this is what I've gotten done this week:
Repaired and replaced cowl mounting nut and retainer (for inner fender)
Welded on cowl bucket
Completed bodywork on cab corners and rest of cab
Shot repaired spots with epoxy primer
Applied seam sealer to all interior and exterior joints (3M Ultrapro 08300)
Started on patch panel for DS fender
And the photo proof...
-
sargentrs
- 100% FORDified!
- Posts: 9866
- Joined: Fri Jun 22, 2007 9:30 am
- Location: Georgia, Jasper
Re: 1969 Ranger - Project Glory Days!
Good work, tyler! I'm watching every move you make so keep it coming. I've got a lot of similar things to do to mine and you're my mentor.
Randy
1970 F100 Sport Custom Limited LWB, 302cid, 3 on the tree. NO A/C, NO P/S, NO P/B. Currently in 1000 pcs while rebuilding. Project thread: http://www.fordification.com/forum/view ... 22&t=59995 Plan: 351w, C4, LSD, pwr front disc, p/s, a/c, bucket seats, new interior and paint.
1987 F-150 XLT Lariat, 5.0/C6 auto.
1970 F100 Sport Custom Limited LWB, 302cid, 3 on the tree. NO A/C, NO P/S, NO P/B. Currently in 1000 pcs while rebuilding. Project thread: http://www.fordification.com/forum/view ... 22&t=59995 Plan: 351w, C4, LSD, pwr front disc, p/s, a/c, bucket seats, new interior and paint.
1987 F-150 XLT Lariat, 5.0/C6 auto.
-
Bob

- Preferred User
- Posts: 275
- Joined: Thu Jan 04, 2007 2:47 pm
- Location: WESTERN PENNSYLVANIA
Re: 1969 Ranger - Project Glory Days!
Just tossing this out there...
Have you ever tried using a pair of the offsetting pliers for your patches instead of butt welding them? When you can't see the backside of the panel being repaired... or in my case when you don't care if the back side of the patch can be seen... it makes for a much easier fix. The pliers put a slight offset either in your patch or on your part and allow the two surfaces to sit flush while overlapped. then all you need to do is fill in the gap but you have the advantage of metal behind the gap.
This is a shot of a John Deere R fender I had to patch several years ago. The dark line around the patch panel is where I marked it and offset it. They also make air offsetters.
You do not have the required permissions to view the files attached to this post.
-
67nukeford
- Blue Oval Fan
- Posts: 589
- Joined: Tue Aug 19, 2008 3:20 pm
- Location: Nebraska, Omaha/Elkhorn
Re: 1969 Ranger - Project Glory Days!
Tyler, looking good man!
-
tylerb43
- Preferred User
- Posts: 492
- Joined: Fri Nov 14, 2008 2:54 pm
- Location: Union, MO
Re: 1969 Ranger - Project Glory Days!
Me? Mentor?!? Randy my friend, you are in trouble!sargentrs wrote:Good work, tyler! I'm watching every move you make so keep it coming. I've got a lot of similar things to do to mine and you're my mentor.
Thanks Pat, just a couple more steps forward!67nukeford wrote:Tyler, looking good man!
-
tylerb43
- Preferred User
- Posts: 492
- Joined: Fri Nov 14, 2008 2:54 pm
- Location: Union, MO
Re: 1969 Ranger - Project Glory Days!
Bob, thank you very much for the input. I am familiar with the flange method, and have used it in the past, (I even have an air flange/punch tool) However, I do prefer the butt weld seam over the flange. I do realize it may be a little tougher to pull off, but I feel like it's the superior joint in regards to strength and corrosion resistance.Bob wrote:Just tossing this out there...
Have you ever tried using a pair of the offsetting pliers for your patches instead of butt welding them? When you can't see the backside of the panel being repaired... or in my case when you don't care if the back side of the patch can be seen... it makes for a much easier fix. The pliers put a slight offset either in your patch or on your part and allow the two surfaces to sit flush while overlapped. then all you need to do is fill in the gap but you have the advantage of metal behind the gap.
This is a shot of a John Deere R fender I had to patch several years ago. The dark line around the patch panel is where I marked it and offset it. They also make air offsetters.
-
tylerb43
- Preferred User
- Posts: 492
- Joined: Fri Nov 14, 2008 2:54 pm
- Location: Union, MO
Re: 1969 Ranger - Project Glory Days!
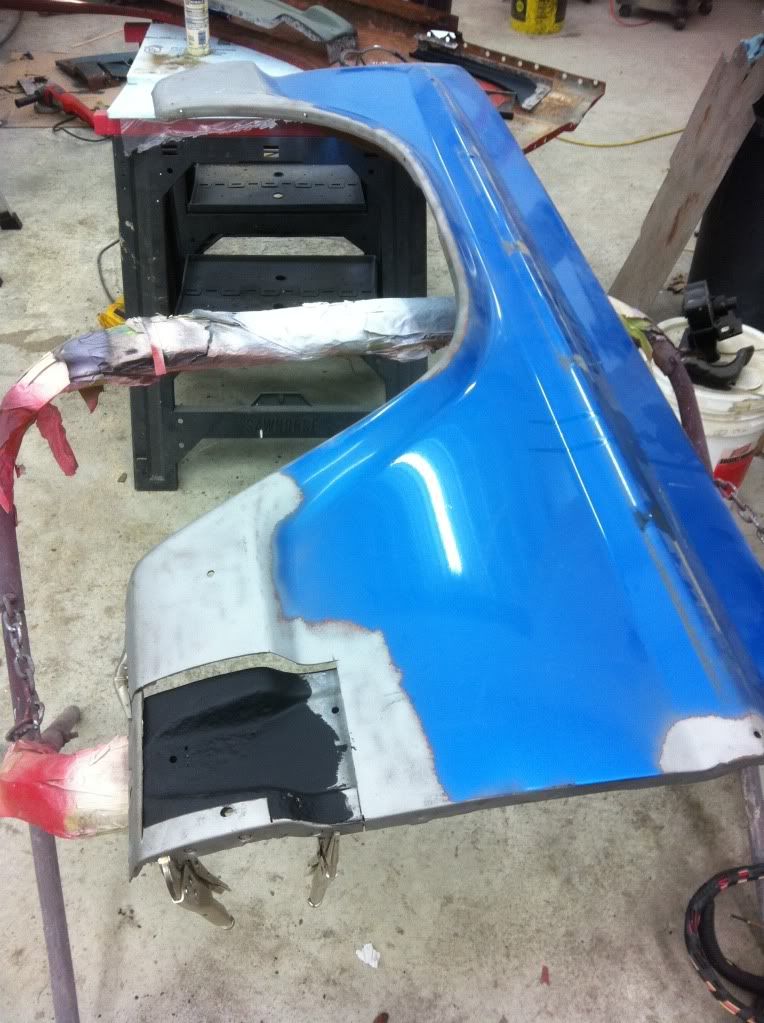
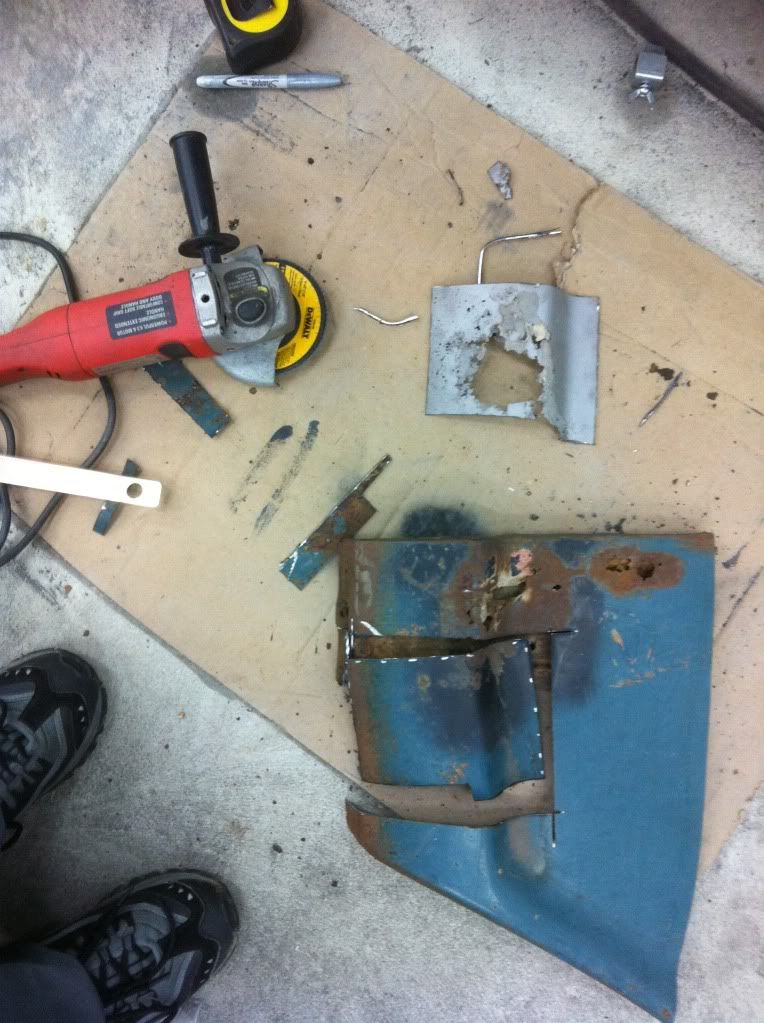
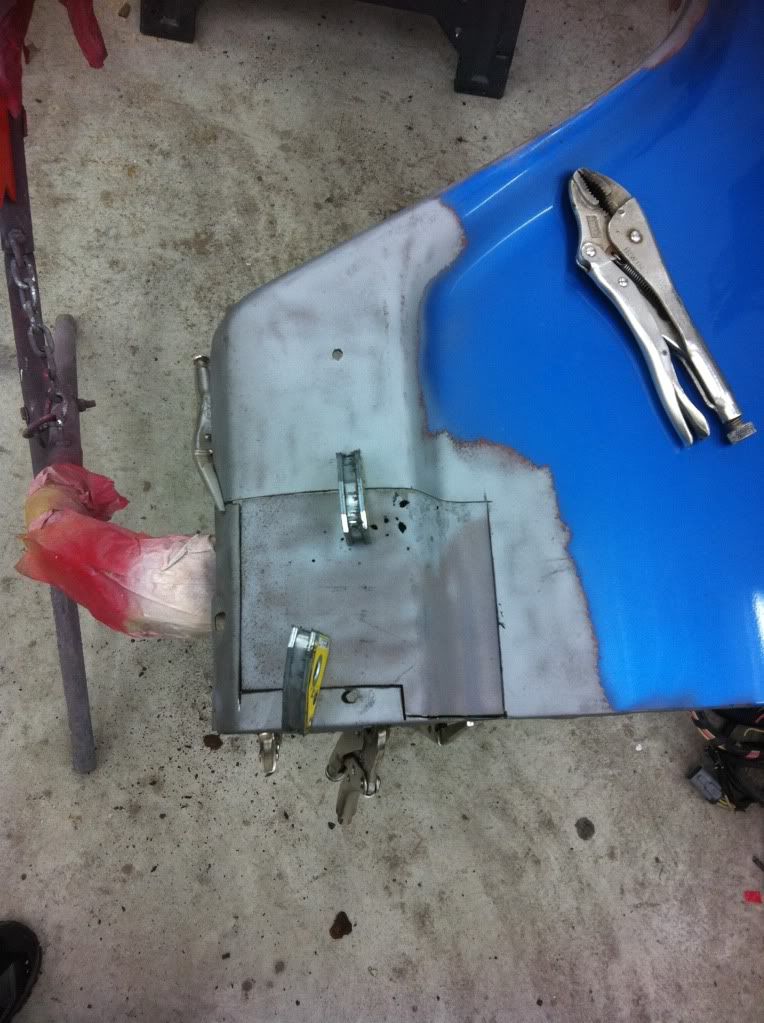
So I showed you guys what I'm doing to save the DS fender, but here's the PS fender. It's pretty solid, but it had some surface rust under the top lip and behind the support structure, so I got out the spot weld cutter and "unmated" the 3 pieces that make up the fender. Turns out, it wasn't as bad as I thought, and Ford gave this area a galvanized treatment prior to welding them together! I've got a small patch to do on the upper lip, then I'm going to lightly blast the fender and treat the back side with rust encapsulator before I put everything back together.

I got a little side tracked and blasted and powder coated my Taurus 3G alternator. This is EW's "Cast Aluminum" color. Came out pretty sweet I thought.
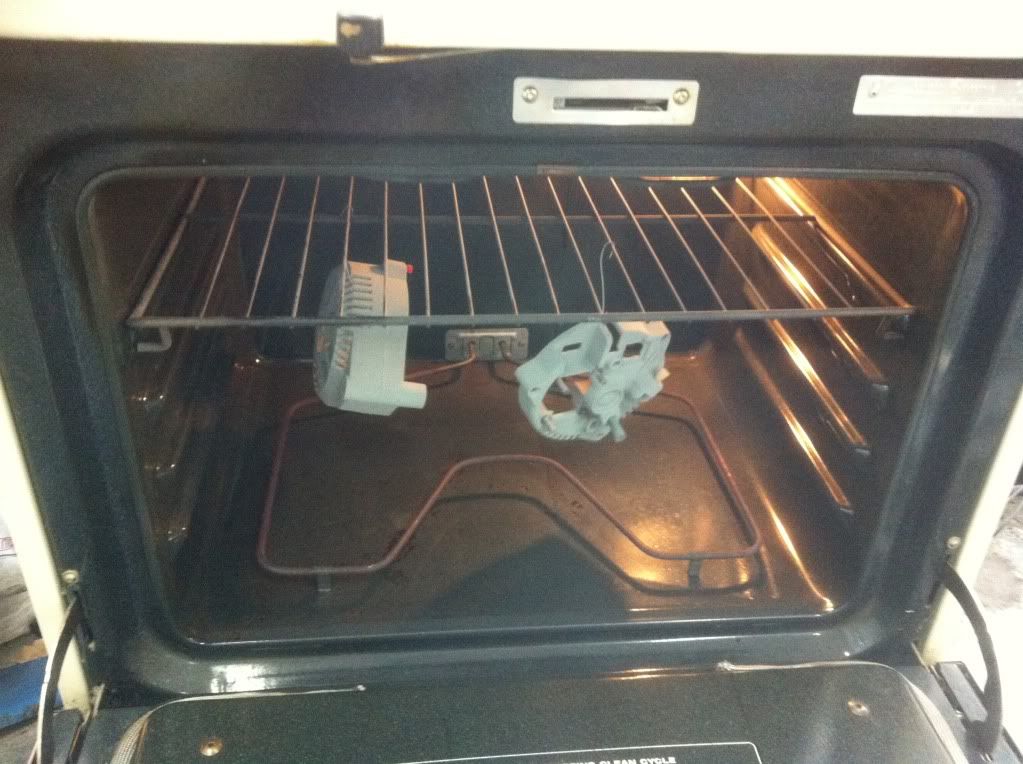
I got a little side tracked and blasted and powder coated my Taurus 3G alternator. This is EW's "Cast Aluminum" color. Came out pretty sweet I thought.