Project "Uncle Fester"- 9/21 Interior almost finished
Moderator: FORDification
- trukcrazy
- Blue Oval Fanatic

- Posts: 905
- Joined: Sat Apr 02, 2005 8:55 am
- Location: Gulf Breeze, Florida, USA
Re: Project "Uncle Fester"- 10/8 - Powertrain done & back home!
Chris, the build looks great. Would you be interested in doing 2 crews next? I am just a stones throw from you in the south end of the county. 
John, #424
1967 F250 crewcab x 2.
2010 Dodge Ram 1500 Sport Quadcab
2008 Challenger SRT8

1967 F250 crewcab x 2.
2010 Dodge Ram 1500 Sport Quadcab
2008 Challenger SRT8

- 72stepside
- Blue Oval Fan

- Posts: 537
- Joined: Tue May 09, 2006 10:31 pm
- Location: Florida, Milton
- Contact:
Re: Project "Uncle Fester"- 10/8 - Powertrain done & back home!
My wife would leave me! Better not...trukcrazy wrote:Chris, the build looks great. Would you be interested in doing 2 crews next? I am just a stones throw from you in the south end of the county.
We do need to get together one day.
Chris
72 F100 Stepside w/ 78 300 CID
Hedman Headers
Disc Brakes
Power Steering with 3 STILL on the tree
Comfy Crown Vic Seats
71 F250 PS, PB, AC, Auto, 390
Loooong way to go on this one!


72 F100 Stepside w/ 78 300 CID
Hedman Headers
Disc Brakes
Power Steering with 3 STILL on the tree
Comfy Crown Vic Seats
71 F250 PS, PB, AC, Auto, 390
Loooong way to go on this one!


- JWW
- Blue Oval Fanatic

- Posts: 793
- Joined: Wed Apr 11, 2007 7:57 pm
- Location: Tennessee
Re: Project "Uncle Fester"- 10/8 - Powertrain done & back home!
Nice job Chris!
JWW
1967 F100 Ranger, Auto, 240ci
2004 F150 Crew Cab
My project: http://www.fordification.com/forum/view ... &sk=t&sd=a
1967 F100 Ranger, Auto, 240ci
2004 F150 Crew Cab
My project: http://www.fordification.com/forum/view ... &sk=t&sd=a
-
1968C10
- New Member

- Posts: 1
- Joined: Sat Feb 18, 2012 5:22 pm
- 72stepside
- Blue Oval Fan

- Posts: 537
- Joined: Tue May 09, 2006 10:31 pm
- Location: Florida, Milton
- Contact:
Re: Project "Uncle Fester"- 2/25 Cab and Frame are Mating !
Whoa has it been a long time since I posted. I only wish I had 16 months worth of work to show for it!
I have done some things...
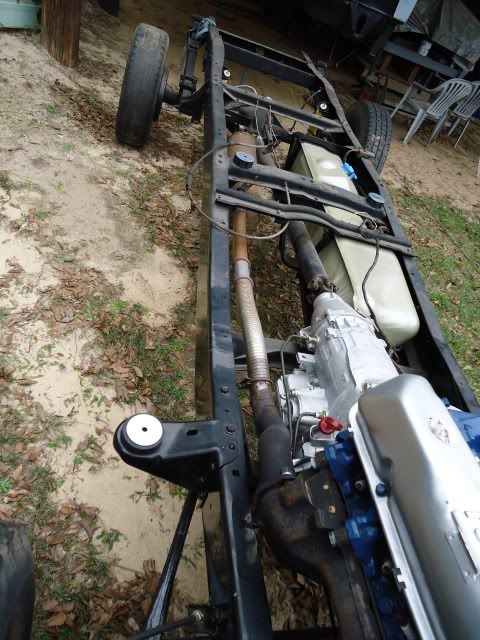
I got the aux tank cleaned up and installed, along with a temp exhaust system. Yeah, my exhaust manifolds are rusting. I guess the high temp paint and the baking I did before was a waste of time. Oh well You can see my tranny cooler lines in there too that I bent to fit.
Today we painted the firewall black and set the cab back on the truck.
Prepare for docking...
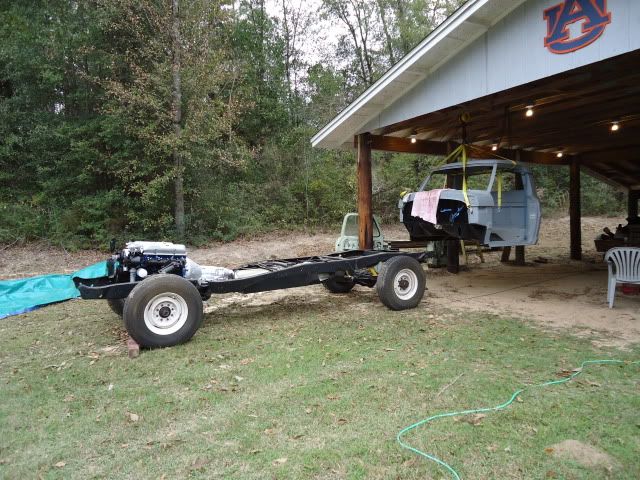
We have contact and all is good!
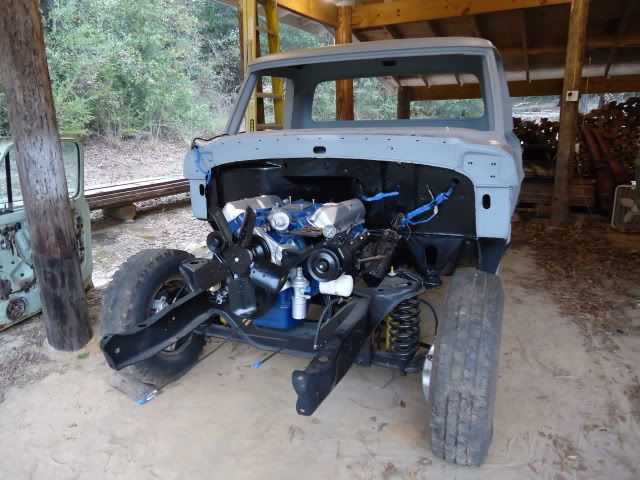
I am so pleased the front cab mounts lined up with the frame just as they should. My Father did a lot of careful measuring to make sure they would. It has been so long since that cab has been on the frame that I forgot what it looked like. It made the frame look like is shrunk to half size!
More later...
I have done some things...
I got the aux tank cleaned up and installed, along with a temp exhaust system. Yeah, my exhaust manifolds are rusting. I guess the high temp paint and the baking I did before was a waste of time. Oh well

Today we painted the firewall black and set the cab back on the truck.
Prepare for docking...

We have contact and all is good!

I am so pleased the front cab mounts lined up with the frame just as they should. My Father did a lot of careful measuring to make sure they would. It has been so long since that cab has been on the frame that I forgot what it looked like. It made the frame look like is shrunk to half size!
More later...
Chris
72 F100 Stepside w/ 78 300 CID
Hedman Headers
Disc Brakes
Power Steering with 3 STILL on the tree
Comfy Crown Vic Seats
71 F250 PS, PB, AC, Auto, 390
Loooong way to go on this one!


72 F100 Stepside w/ 78 300 CID
Hedman Headers
Disc Brakes
Power Steering with 3 STILL on the tree
Comfy Crown Vic Seats
71 F250 PS, PB, AC, Auto, 390
Loooong way to go on this one!


- 72stepside
- Blue Oval Fan

- Posts: 537
- Joined: Tue May 09, 2006 10:31 pm
- Location: Florida, Milton
- Contact:
Re: Project "Uncle Fester"- 2/25 Cab and Frame are Mating!
What started as a 20 minute project turned into a 3 hour project... just to tighten the cab to the frame!!!!
I bought the Dennis Carpenter cab bushing kit. You've all heard the story... the directions suck, the hardware is wrong or incomplete, and customer service is clueless.
Here's what I did...
The bolts provided were all the same size and were 7/16 fine thread with self locking nuts. The front ones too long (not enough threads to tighten up to the stop sleeve) and the back ones too short (waaaaay too short). So, I found the old back bolts and used them. I had to go buy some 7/16 nylock nuts. Worked like a champ and had enough threads to tighted up like they should. I bought some 3 inch 7/16 grade 5 bolts and nylock nuts to do the front. This provided the right amount of threads to tighted up like they should.
Did I mention this took 3 hours??? Didn't sound like 3 hours worth of work but...
I had to drop the aux tank and skid plate to get to the driver rear cab bolt. It seemed like a real good idea to install that tank with the cab off since everything was SOOOO easy to get to. Well, there is no hope of installing the cab bolt and rubber bushing that goes under the frame with that tank in place. Oh, and I did all of this BY MYSELF!!!!!
Oh, and that 'thank you' bolt that Ford put in to hold the E-brake cable to the corner of the tank is just a big a pain to install as it was to take out!!!!
I know, no pics but there wasn't really anything camera worthy today. Just needed to vent a little about my stupidity.
Chris
72 F100 Stepside w/ 78 300 CID
Hedman Headers
Disc Brakes
Power Steering with 3 STILL on the tree
Comfy Crown Vic Seats
71 F250 PS, PB, AC, Auto, 390
Loooong way to go on this one!


72 F100 Stepside w/ 78 300 CID
Hedman Headers
Disc Brakes
Power Steering with 3 STILL on the tree
Comfy Crown Vic Seats
71 F250 PS, PB, AC, Auto, 390
Loooong way to go on this one!


- 72stepside
- Blue Oval Fan

- Posts: 537
- Joined: Tue May 09, 2006 10:31 pm
- Location: Florida, Milton
- Contact:
Re: Project "Uncle Fester"- 3/19 Polish, polish, polish
Lately all it seems I have done is polish trim!!!!
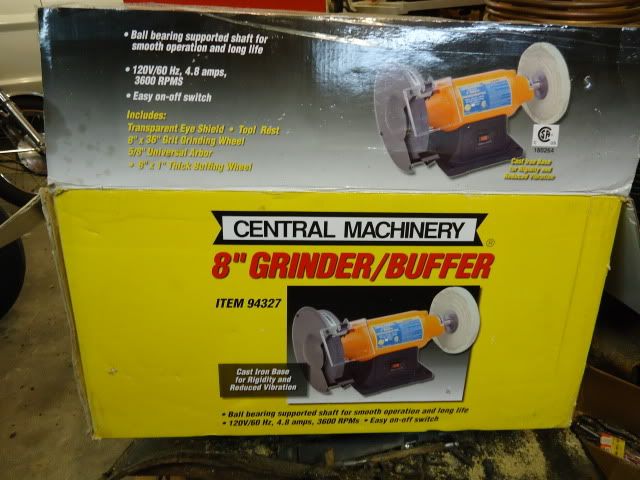
My Father-in-Law got me this grinder/polisher from Harbor Freight several years ago and I finally got it out and got it all set up. I replaced the grinder wheel with another buffing pad. It works pretty good.
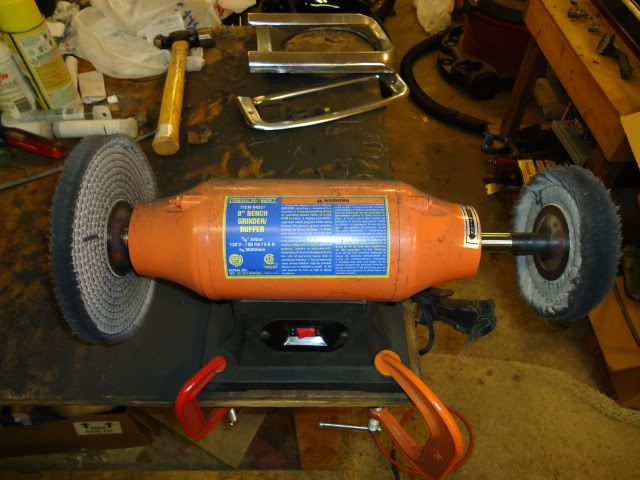
I had never done any buffing before so I found an old headlight bucket to use for a test piece. I found Easy-Off oven cleaner works pretty good for stripping down the annodizing. The Dollar General brand of oven cleaner is not very effective. After messing around with the headlight bucket, I found I could get it pretty shiny. I started with the fender opening trim that I had on hand. I stripped the annodizing and got them pretty shiny, but found I still had to wet sand with 400, 600, 800, 1000, then 1500 to get them to shine cause they had really taken a beating over the years. I also found that isn't really the look I want with most of the trim. It was too shiny.
Here are the two compounds I used for the side trim... a black cutting compound and a green polish.
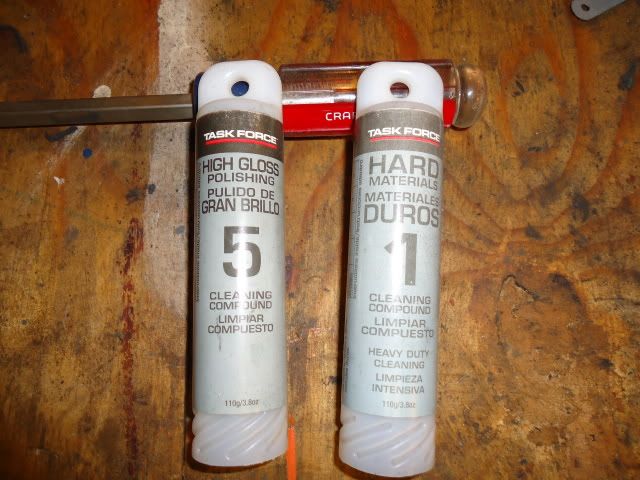
The black is used on the larger, spiral wheel on the left while the green is used on a looser smaller wheel on the right.
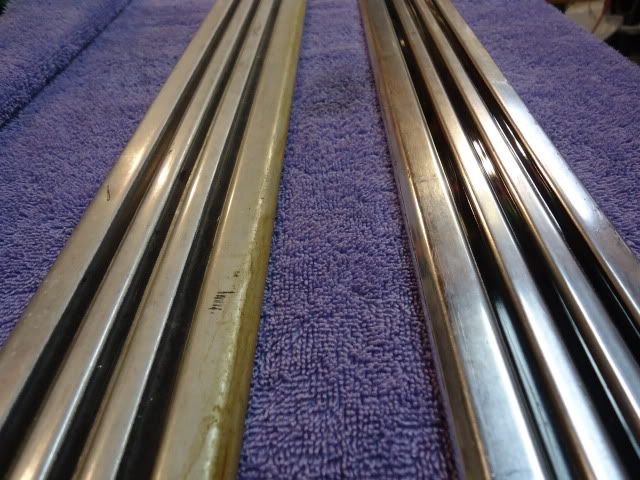
On the side trim (both beltline and rocker), I decided to leave the annodizing. These pics are of a piece I finished and one I haven't done yet. I don't know how well you can tell from the pictures, but the untouched version is milky white and has really no shine. After buffing with the number 1 black and number 5 green, you can see what I get. They look like clean aluminum trim, but not chrome. This is what I was looking for.
Here's another pic showing the beltline or 'bump' trim. A before and after. You can see the difference where I started in the middle on the one just to see how it would polish up.
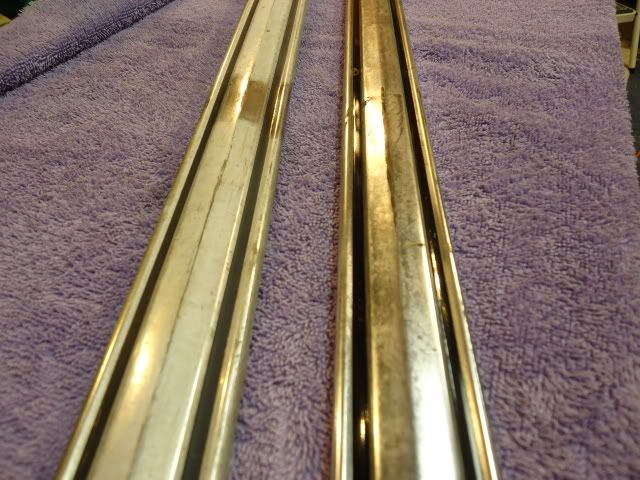
At some point I may buy some re-pop trim for a consistent new trim look. For right now what I'm getting from this polishing technique will suffice.
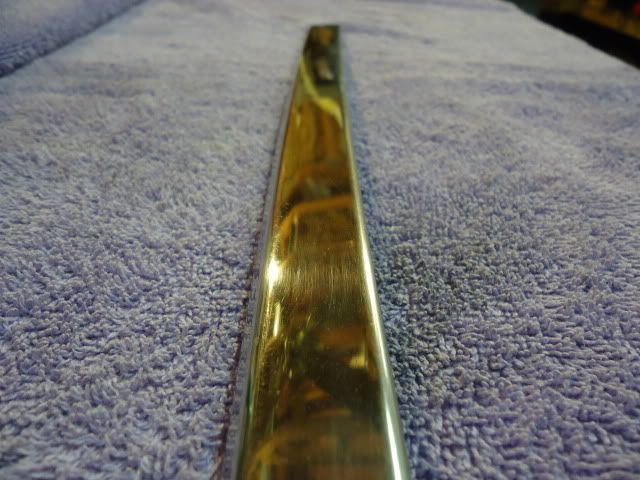
This would be a piece of my windshield trim. Only the green compound on this one after a light rubbing with plain ole Turtle Wax Chrome Polish...
I've also painted some small pieces like the from cab bolt covers, steering column, steering column mounting plates, brake pedal assembly, E-brake assembly, etc. Nothing but the seat slides were in a position for a picture:
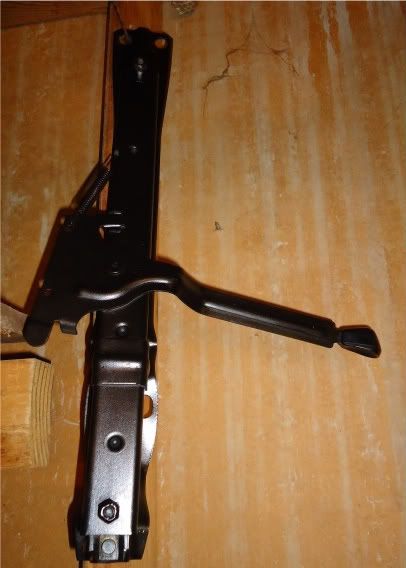
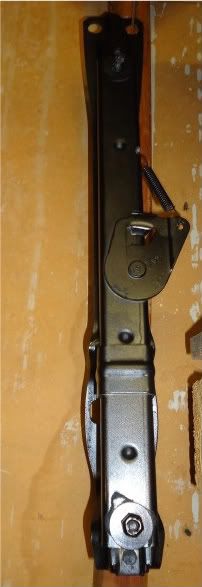
I've gotten to a point to where, once I finish up the polishing, I'm gonna have to start again on body panels for painting because there is nothing really that I can put in the cab that can go in prior to painting, unless I want to take it out.
More later...
My Father-in-Law got me this grinder/polisher from Harbor Freight several years ago and I finally got it out and got it all set up. I replaced the grinder wheel with another buffing pad. It works pretty good.


I had never done any buffing before so I found an old headlight bucket to use for a test piece. I found Easy-Off oven cleaner works pretty good for stripping down the annodizing. The Dollar General brand of oven cleaner is not very effective. After messing around with the headlight bucket, I found I could get it pretty shiny. I started with the fender opening trim that I had on hand. I stripped the annodizing and got them pretty shiny, but found I still had to wet sand with 400, 600, 800, 1000, then 1500 to get them to shine cause they had really taken a beating over the years. I also found that isn't really the look I want with most of the trim. It was too shiny.
Here are the two compounds I used for the side trim... a black cutting compound and a green polish.

The black is used on the larger, spiral wheel on the left while the green is used on a looser smaller wheel on the right.
On the side trim (both beltline and rocker), I decided to leave the annodizing. These pics are of a piece I finished and one I haven't done yet. I don't know how well you can tell from the pictures, but the untouched version is milky white and has really no shine. After buffing with the number 1 black and number 5 green, you can see what I get. They look like clean aluminum trim, but not chrome. This is what I was looking for.

Here's another pic showing the beltline or 'bump' trim. A before and after. You can see the difference where I started in the middle on the one just to see how it would polish up.

At some point I may buy some re-pop trim for a consistent new trim look. For right now what I'm getting from this polishing technique will suffice.
This would be a piece of my windshield trim. Only the green compound on this one after a light rubbing with plain ole Turtle Wax Chrome Polish...

I've also painted some small pieces like the from cab bolt covers, steering column, steering column mounting plates, brake pedal assembly, E-brake assembly, etc. Nothing but the seat slides were in a position for a picture:


I've gotten to a point to where, once I finish up the polishing, I'm gonna have to start again on body panels for painting because there is nothing really that I can put in the cab that can go in prior to painting, unless I want to take it out.
More later...
Chris
72 F100 Stepside w/ 78 300 CID
Hedman Headers
Disc Brakes
Power Steering with 3 STILL on the tree
Comfy Crown Vic Seats
71 F250 PS, PB, AC, Auto, 390
Loooong way to go on this one!


72 F100 Stepside w/ 78 300 CID
Hedman Headers
Disc Brakes
Power Steering with 3 STILL on the tree
Comfy Crown Vic Seats
71 F250 PS, PB, AC, Auto, 390
Loooong way to go on this one!


- 72stepside
- Blue Oval Fan

- Posts: 537
- Joined: Tue May 09, 2006 10:31 pm
- Location: Florida, Milton
- Contact:
Re: Project "Uncle Fester"- 3/19 Polish, polish, polish
Wow,it's been a long time (again) since I've posted, but I have been busy with the truck. Since my last post, I got a whole lot of items installed gearing up for a test run. I got the radiator installed and filled up just to find a leak. I saved the anti-freeze because it is like gold now. Have you priced it lately?!?!?! Took it to the local radiator shop where she (yes, my radiator man is a woman) was able to get a rotten corner of the core patched up. Holds great now.
Finally...
THE BEAST CAME ALIVE!!!! We finally fired it up. The first test run inlcuded just a very basic ignition system wired up by my Father with hand held switches. Oil pressure was good. I'm using an Autolite 4100 carb used on 60's full size cars. Dad had an extra so he rebuilt it so I could use it. We struggled with getting it to idle. It sounded like the engine was missing.
 I thought I had all the vacuum ports sealed but still heard a loud vacuum noise. I couldn't believe that carb should sound like it was sucking that much air. I didn't realize the vacuum block on the intake had 3 ports, not just two. We taped up the largest one in the back of the vacuum block (for power brakes) and it levelled out... idled great.
  Throttle response had a hesitation. I found out the 4100 doesn't like a single, open adapter plate... it requires the '4 holed' kind. I've ordered on on ebay to solve that problem.
Next up was to make a test run. Remember, we rebuilt the C-6 with NO experience... just 2 different manuals and a digital camera. I was very nervous about this part. The first order of business was to install a seat so I could drive the truck 'safely'. I got the sliders changed over on the seat I have from a 1990's F-150 and went to bolt it in. All of the holes don't line up with those in the floor. Not sure why that is the case so an adjustment will have to made later. Enough holes lined up to get a secure install for what we're doing now. So, no better time than the present so I put it in R and NOTHING!!!!
 I had missed reverse and went right into Neutral. Figured that out when I slid the selector back up a notch. It engaged in reverse!!!
  Relief!!!!!! I then put in in D... engaged again. So, I then let up on the brake and moved it forward, then back, then forward... good to go. I added more gas to the "inner fender gas tank" then set off down the street. It shifted so smoothly and nice. You could hardly tell it shifted at all. Oh, this test drive was conducted without doors, windshield, hood, fenders, or a back window!!! The first ride was done without power steering. We put on the belt and filled up the resevoir. Once the air evacuated, the pump got really quiet and smoothe. You can turn the wheel with one finger now which better be the case as the pump and gear box are brand new. Those old type pumps are so stinkin quiet, much better than the later ones like I have on my F-100.
You can see the makeshift fuel system in this pic and the oil pressure gauge tied to the cowl so we could keep a close eye on it during the drive...
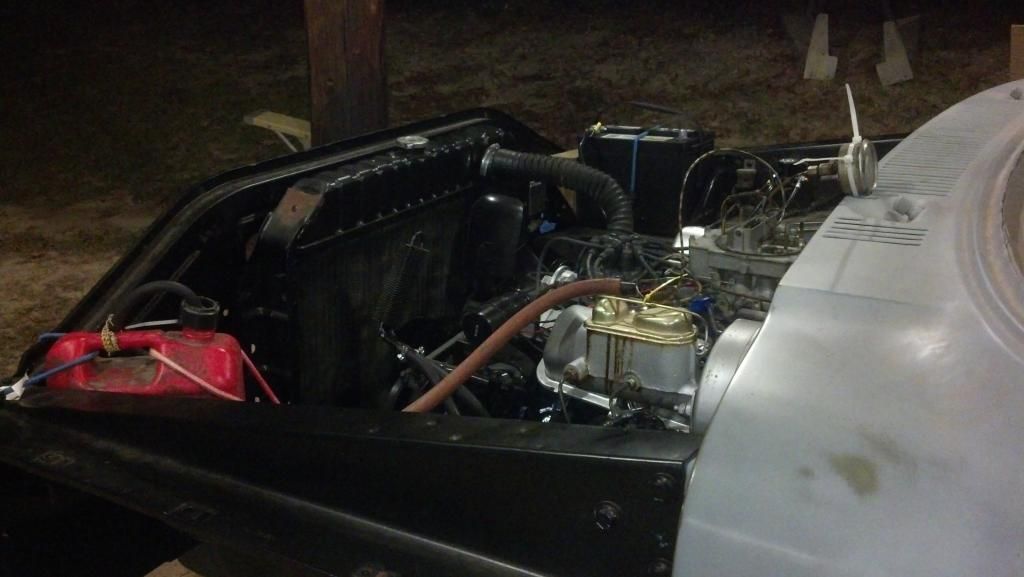
I am so irritated with the master cylinder gasket. It leaks and lets fluid run down the side of the master cylinder. We all know what brake fluid does to paint so I get to do that part over.
I ordered a new sending unit and filler hose for the aux tank so I can do away with the gallon can in the engine compartment. I'm not gonna use the in cab tank to give me a little more room with the seat and for obvious safety issues.
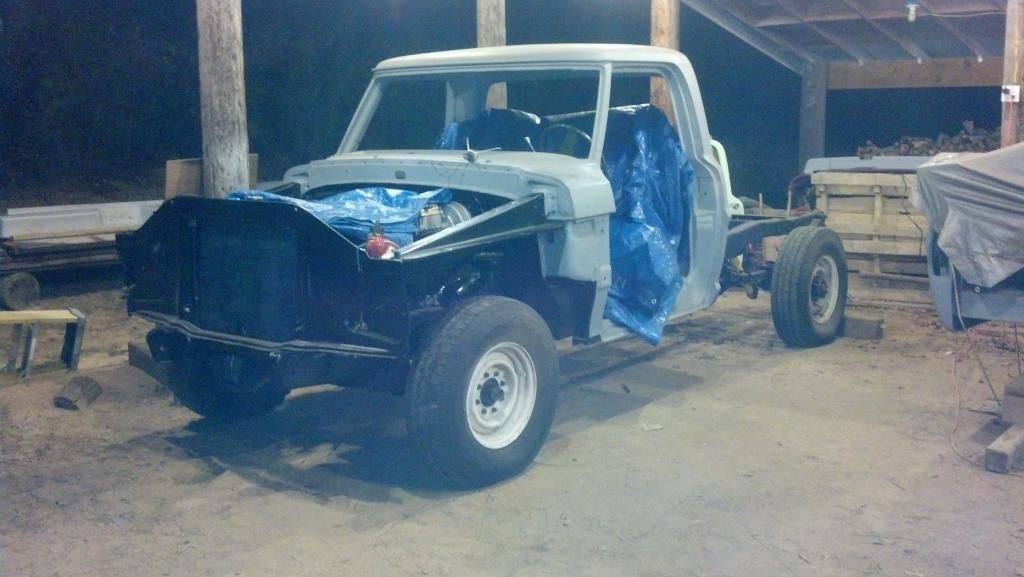
After we got through driving it around, we decided to fit the front of the truck together to make sure we could get nice straight body lines. Doors, hood, and stone guard all line up pretty good. I have to drill out some of the mounting holes for the passenger inner fender to the core support because they don't line up. Remember, Dad had to graft two together to make one.
Here's how it sits now...
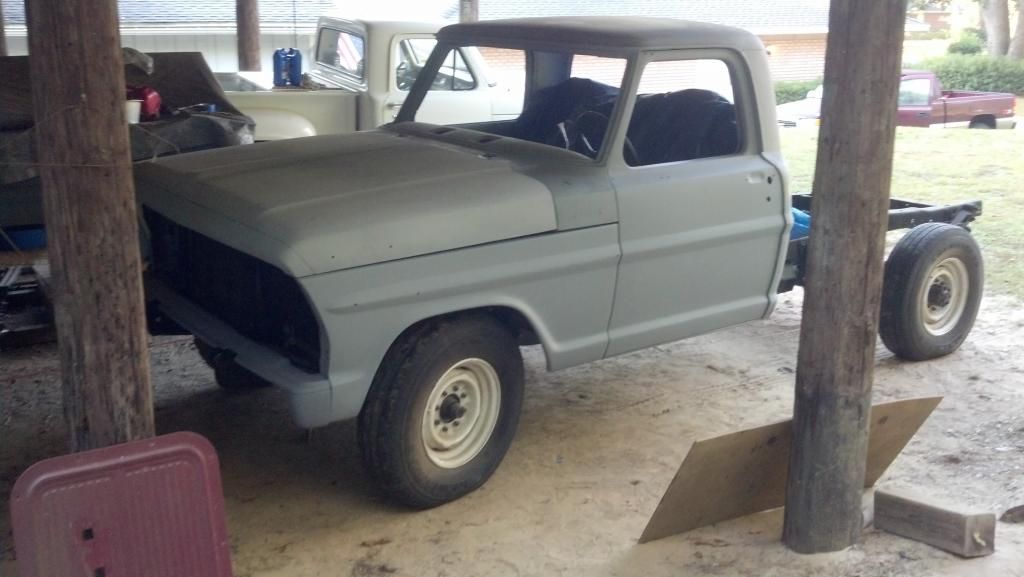
I've done away with the oil pressure gauge on the cowl in favor of the factory sender and gauge in the instrument cluster. Installing the oil pressure sending unit on a power steering / AC equipped truck is not fun, but doable.
The only pieces that are left to clean up and prime are the support trim for the headliner and the door panels. I'll get those done tomorrow.
My paint was delivered yesterday. I'm going with Kirker Single Stage Urethane in Wimbledon White for the top half and interior and Inferno Red Metallic for the bottom half and door panels. The customer support at Kirker is very good. Thanks Kyle for all the help. I hope it doesn't come out looking like an Alabama Crimson Tide truck. If so, I can put some Auburn stickers in strategic locations and an International Harvester license plate on the front!!!!
I went through a catalog and documented all the parts I'd need to finish up. I compared prices on a spreadsheet between Carpenter, National Parts Depot, and Mac's Antique Parts. I made a big order made the other night. Along with the fuel sending unit, I got all the underside rubber parts and several other odds and ends that could only be sourced through National Parts Depot (as far as I could find). These should be delivered early next week.
Gonna get some more pics up tomorrow so come back and take a look. I can finally see a glimmer of light at the end of the tunnel.
Finally...
THE BEAST CAME ALIVE!!!! We finally fired it up. The first test run inlcuded just a very basic ignition system wired up by my Father with hand held switches. Oil pressure was good. I'm using an Autolite 4100 carb used on 60's full size cars. Dad had an extra so he rebuilt it so I could use it. We struggled with getting it to idle. It sounded like the engine was missing.
Next up was to make a test run. Remember, we rebuilt the C-6 with NO experience... just 2 different manuals and a digital camera. I was very nervous about this part. The first order of business was to install a seat so I could drive the truck 'safely'. I got the sliders changed over on the seat I have from a 1990's F-150 and went to bolt it in. All of the holes don't line up with those in the floor. Not sure why that is the case so an adjustment will have to made later. Enough holes lined up to get a secure install for what we're doing now. So, no better time than the present so I put it in R and NOTHING!!!!

You can see the makeshift fuel system in this pic and the oil pressure gauge tied to the cowl so we could keep a close eye on it during the drive...

I am so irritated with the master cylinder gasket.
I ordered a new sending unit and filler hose for the aux tank so I can do away with the gallon can in the engine compartment. I'm not gonna use the in cab tank to give me a little more room with the seat and for obvious safety issues.
After we got through driving it around, we decided to fit the front of the truck together to make sure we could get nice straight body lines. Doors, hood, and stone guard all line up pretty good. I have to drill out some of the mounting holes for the passenger inner fender to the core support because they don't line up. Remember, Dad had to graft two together to make one.
Here's how it sits now...

I've done away with the oil pressure gauge on the cowl in favor of the factory sender and gauge in the instrument cluster. Installing the oil pressure sending unit on a power steering / AC equipped truck is not fun, but doable.
The only pieces that are left to clean up and prime are the support trim for the headliner and the door panels. I'll get those done tomorrow.
My paint was delivered yesterday. I'm going with Kirker Single Stage Urethane in Wimbledon White for the top half and interior and Inferno Red Metallic for the bottom half and door panels. The customer support at Kirker is very good. Thanks Kyle for all the help. I hope it doesn't come out looking like an Alabama Crimson Tide truck. If so, I can put some Auburn stickers in strategic locations and an International Harvester license plate on the front!!!!
I went through a catalog and documented all the parts I'd need to finish up. I compared prices on a spreadsheet between Carpenter, National Parts Depot, and Mac's Antique Parts. I made a big order made the other night. Along with the fuel sending unit, I got all the underside rubber parts and several other odds and ends that could only be sourced through National Parts Depot (as far as I could find). These should be delivered early next week.
Gonna get some more pics up tomorrow so come back and take a look. I can finally see a glimmer of light at the end of the tunnel.
Chris
72 F100 Stepside w/ 78 300 CID
Hedman Headers
Disc Brakes
Power Steering with 3 STILL on the tree
Comfy Crown Vic Seats
71 F250 PS, PB, AC, Auto, 390
Loooong way to go on this one!


72 F100 Stepside w/ 78 300 CID
Hedman Headers
Disc Brakes
Power Steering with 3 STILL on the tree
Comfy Crown Vic Seats
71 F250 PS, PB, AC, Auto, 390
Loooong way to go on this one!


- 72stepside
- Blue Oval Fan

- Posts: 537
- Joined: Tue May 09, 2006 10:31 pm
- Location: Florida, Milton
- Contact:
Re: Project "Uncle Fester"- 11/13 Fuel Tank / Kickdown
Made some more progress lately.
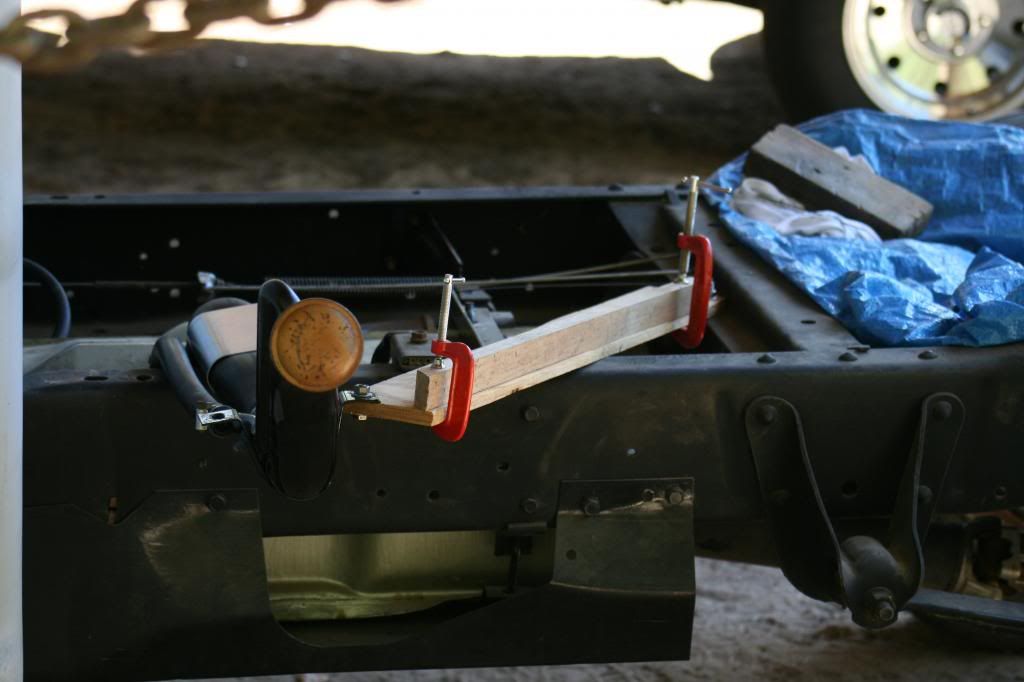
Due to using a Autolite 4100 carb from an automatic car, we had to get inventive with activating the kickdown feature on the transmission. In the 64 Galaxie, the kickdown was activated by additional linkage on the back of the intake, not at the carb. Behold, what you see in the pictures is a homemade version of that setup. The only thing missing is an additional spring that well help keep the kickdown in the normal position. The taller vertical piece will strike the head of the carriage bolt (that is the adjustment) that will in turn push down/back on the kickdown. It all works through testing but we haven't made a practice run yet.
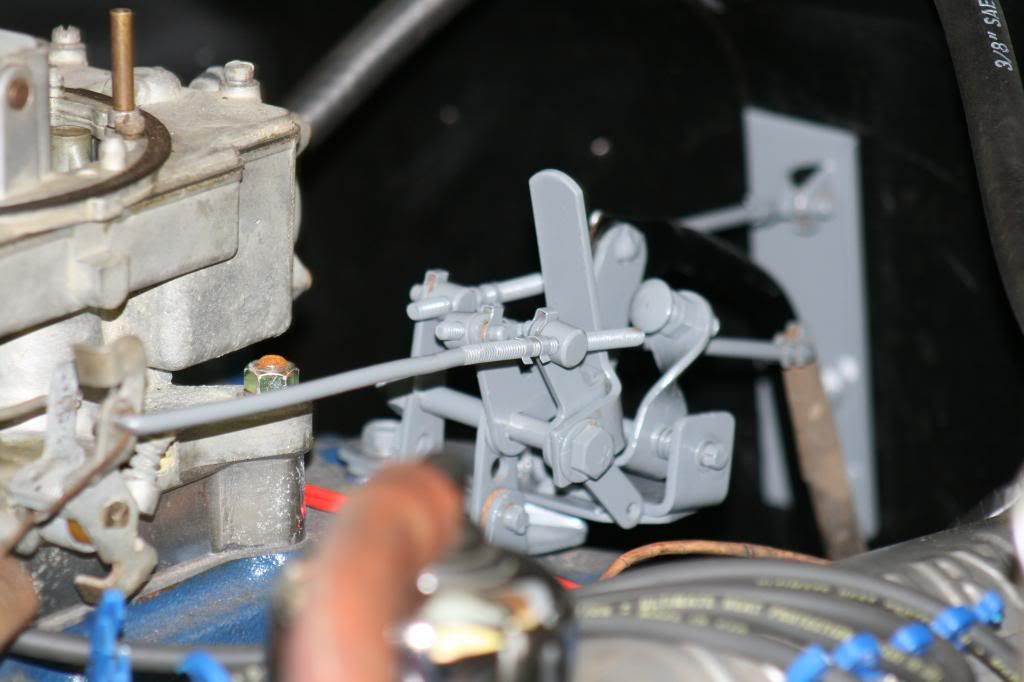
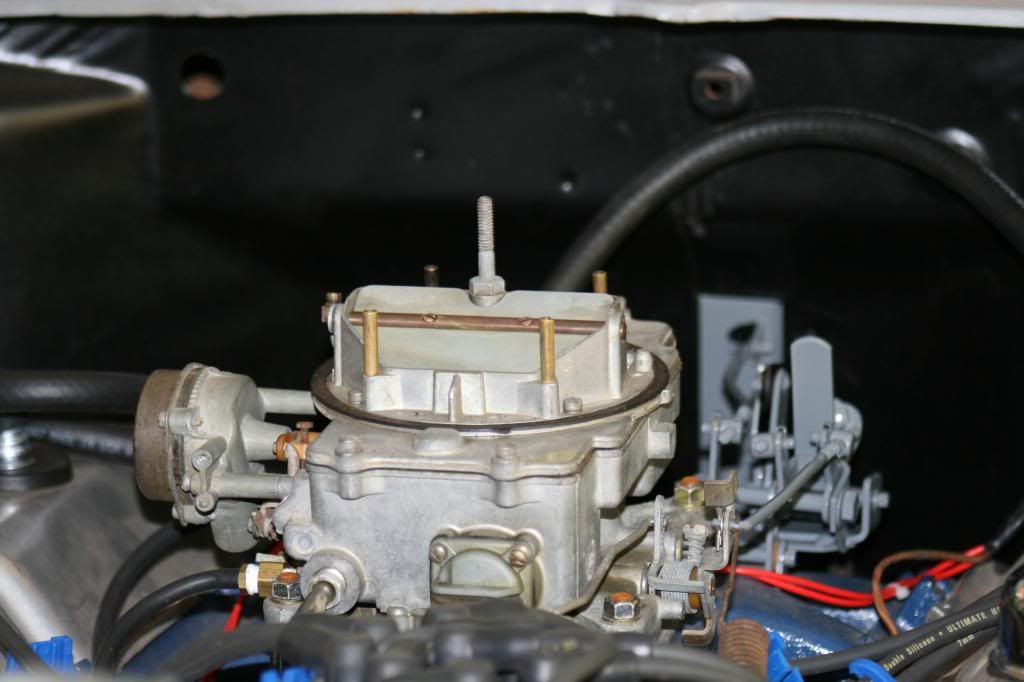
I also recieved my shipment from NPD yesterday. Most of the items I ordered are packaged in Carpenter baggies, but they are cheaper than what Carpenter listed them for in their catalog. Makes you wonder just how much of a markup all of these vendors have.
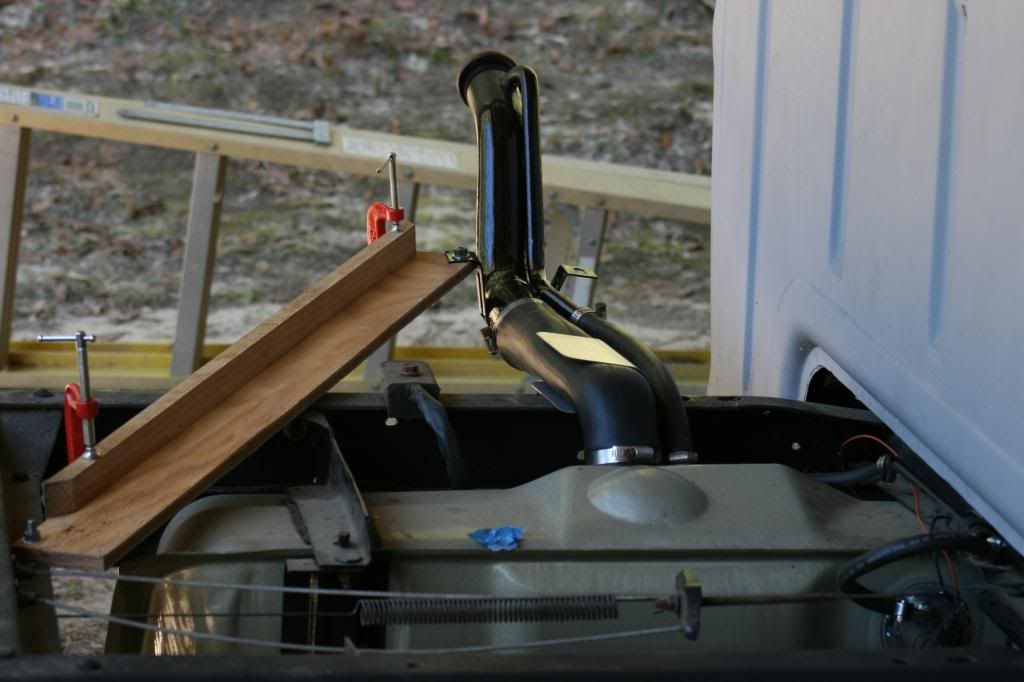
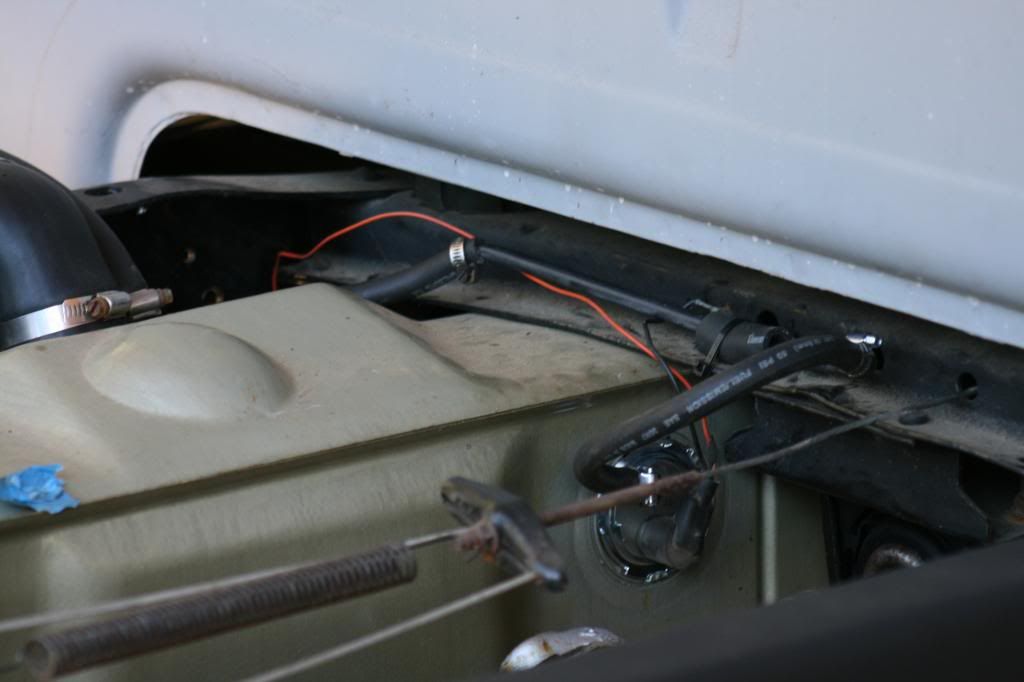
In that shipment I got my sending unit and aux tank filler hoses. I got them all installed last night. You can see that I have a temporary set up for the filler neck just to keep it from flopping around.
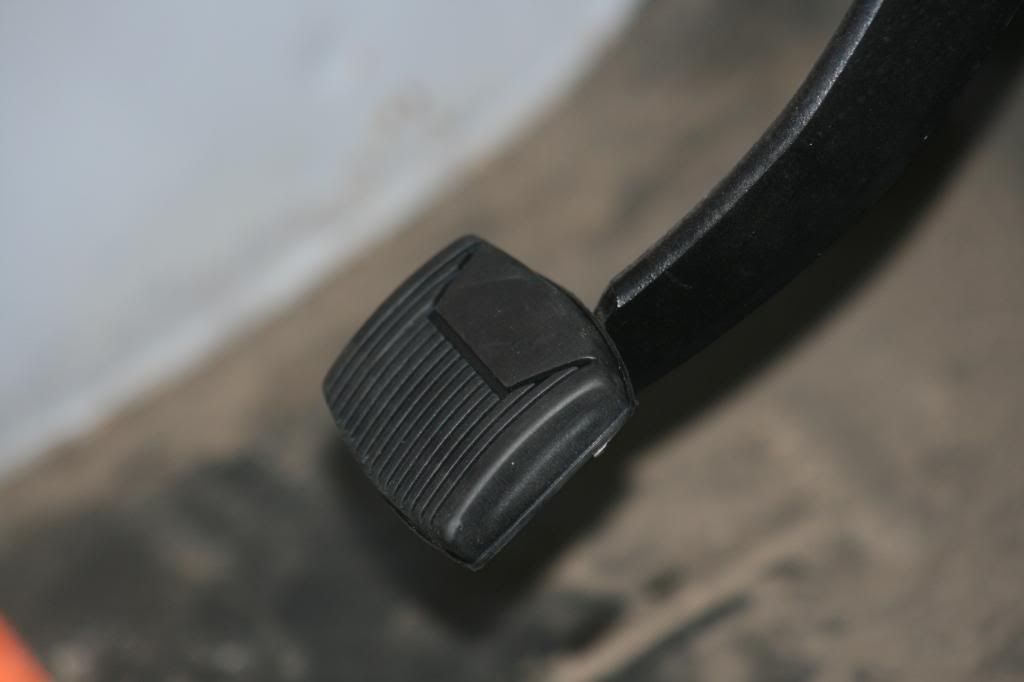
And just for grins, I put on the brake pedal pad...
I've also set off on a mission to make sure I have good grounds throughout so I got a bunch of these braided grounding straps to put between the body and frame to make sure everything is tied together...
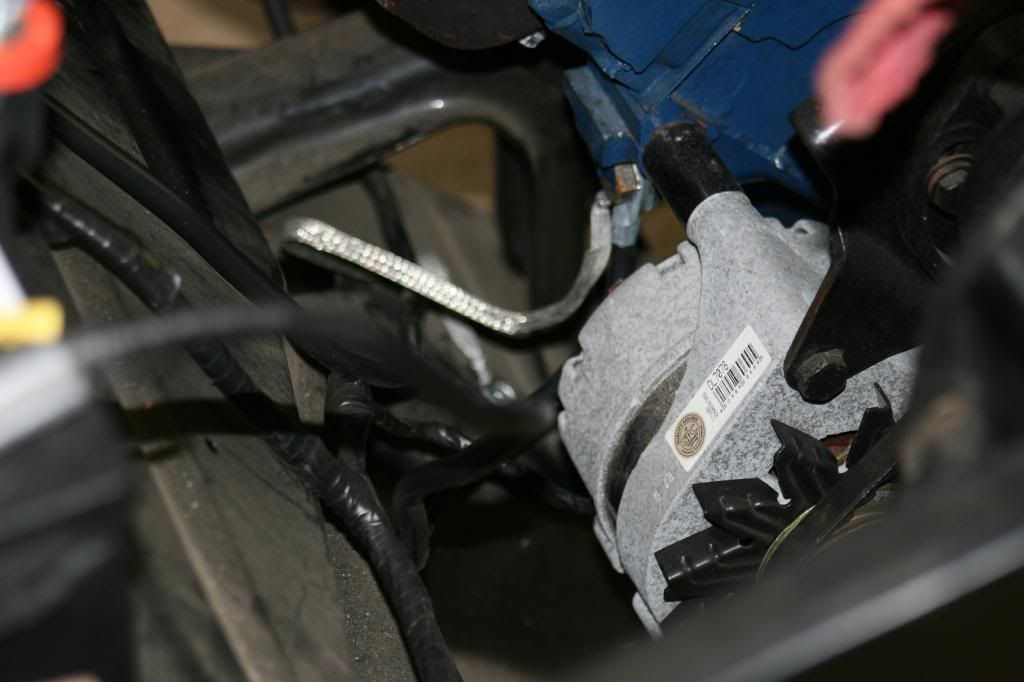
Next up is putting in the wiper pivot gaskets that I got in the order and that should get everything uder the cowl ready so maybe we can start putting on some paint if we can get some decent weather. More later...
Due to using a Autolite 4100 carb from an automatic car, we had to get inventive with activating the kickdown feature on the transmission. In the 64 Galaxie, the kickdown was activated by additional linkage on the back of the intake, not at the carb. Behold, what you see in the pictures is a homemade version of that setup. The only thing missing is an additional spring that well help keep the kickdown in the normal position. The taller vertical piece will strike the head of the carriage bolt (that is the adjustment) that will in turn push down/back on the kickdown. It all works through testing but we haven't made a practice run yet.


I also recieved my shipment from NPD yesterday. Most of the items I ordered are packaged in Carpenter baggies, but they are cheaper than what Carpenter listed them for in their catalog.
In that shipment I got my sending unit and aux tank filler hoses. I got them all installed last night. You can see that I have a temporary set up for the filler neck just to keep it from flopping around.


And just for grins, I put on the brake pedal pad...

I've also set off on a mission to make sure I have good grounds throughout so I got a bunch of these braided grounding straps to put between the body and frame to make sure everything is tied together...

Next up is putting in the wiper pivot gaskets that I got in the order and that should get everything uder the cowl ready so maybe we can start putting on some paint if we can get some decent weather. More later...
Chris
72 F100 Stepside w/ 78 300 CID
Hedman Headers
Disc Brakes
Power Steering with 3 STILL on the tree
Comfy Crown Vic Seats
71 F250 PS, PB, AC, Auto, 390
Loooong way to go on this one!


72 F100 Stepside w/ 78 300 CID
Hedman Headers
Disc Brakes
Power Steering with 3 STILL on the tree
Comfy Crown Vic Seats
71 F250 PS, PB, AC, Auto, 390
Loooong way to go on this one!


- 72stepside
- Blue Oval Fan

- Posts: 537
- Joined: Tue May 09, 2006 10:31 pm
- Location: Florida, Milton
- Contact:
Re: Project "Uncle Fester"- 11/13 Fuel Tank & Kickdown
WOW ALOT HAS BEEN HAPPENING....
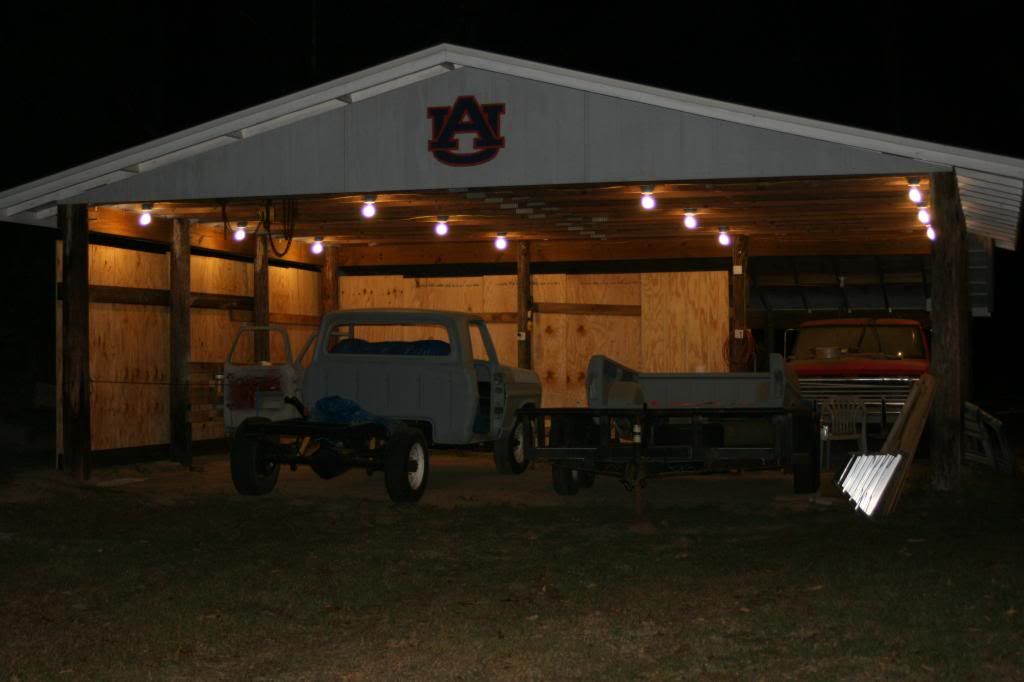
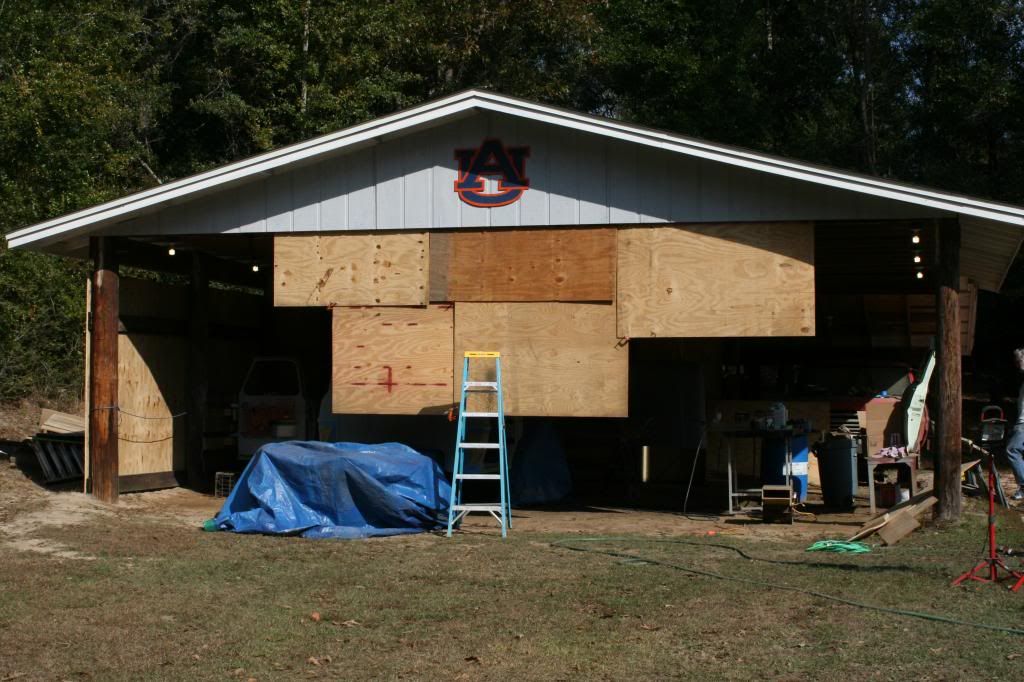
On Saturday, we put together a temporary paint booth. I have been stockpiling siding for the pole barn so we decided to temporarily put up some of it to keep windborne debris down to a minimum.
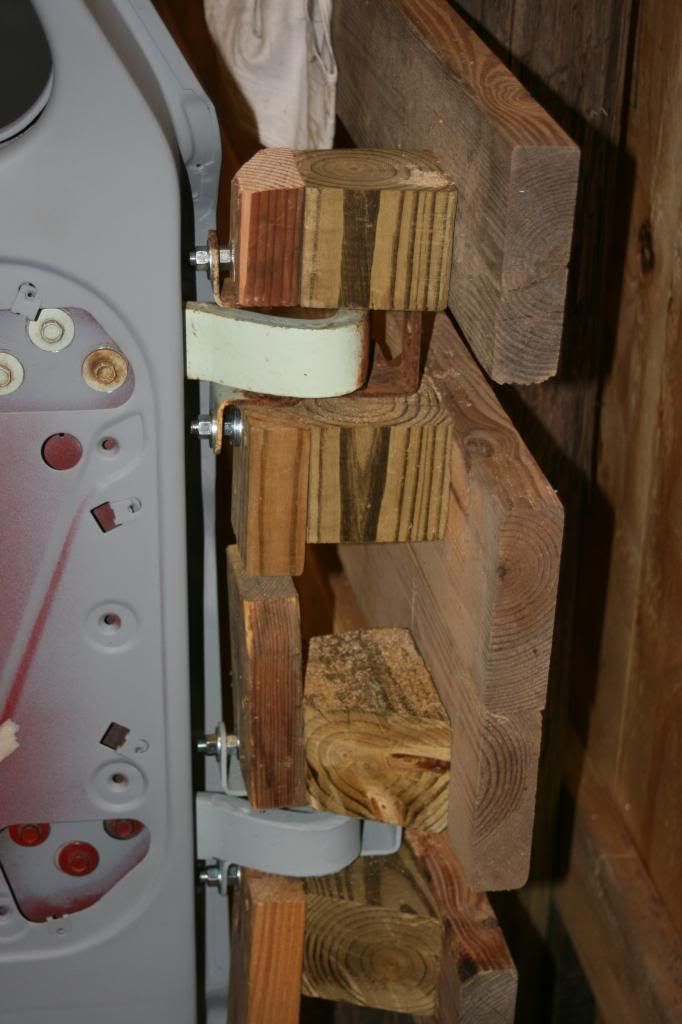
We also set up a system to hold the doors in place so they could be painted completely in one shot. We used several 2x6's , spacers, and long bolts to hang the doors to allow for movement. Without the spacers, they couldn't open.
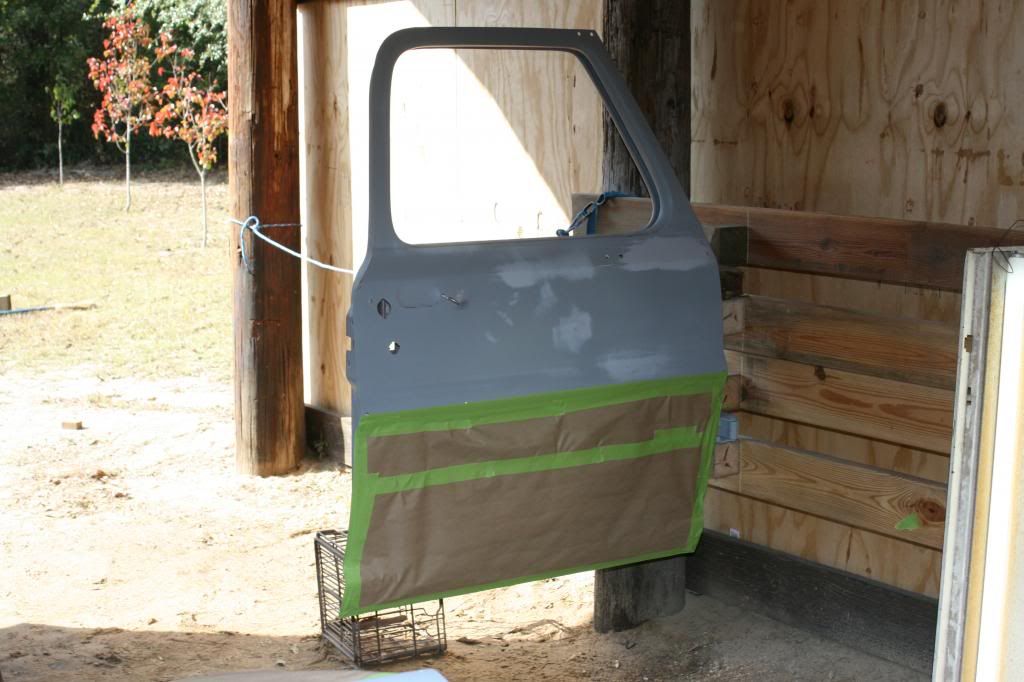
For the next few days, we spent time getting all of the pieces to be painted layed out in an orderly fashion so we could just move station to station to keep things moving. We also spent alot of time rubbing down each part and filling little blemishes as necessary. Dad did alot of work on the top of the cab because of a few areas that he wasn't really satisfied with a couple of years ago when we prepped the cab initially.
Here's how things laid out. We decided to hang the hood from the trusses so it would be easier to paint both sides without having to handle the hood.
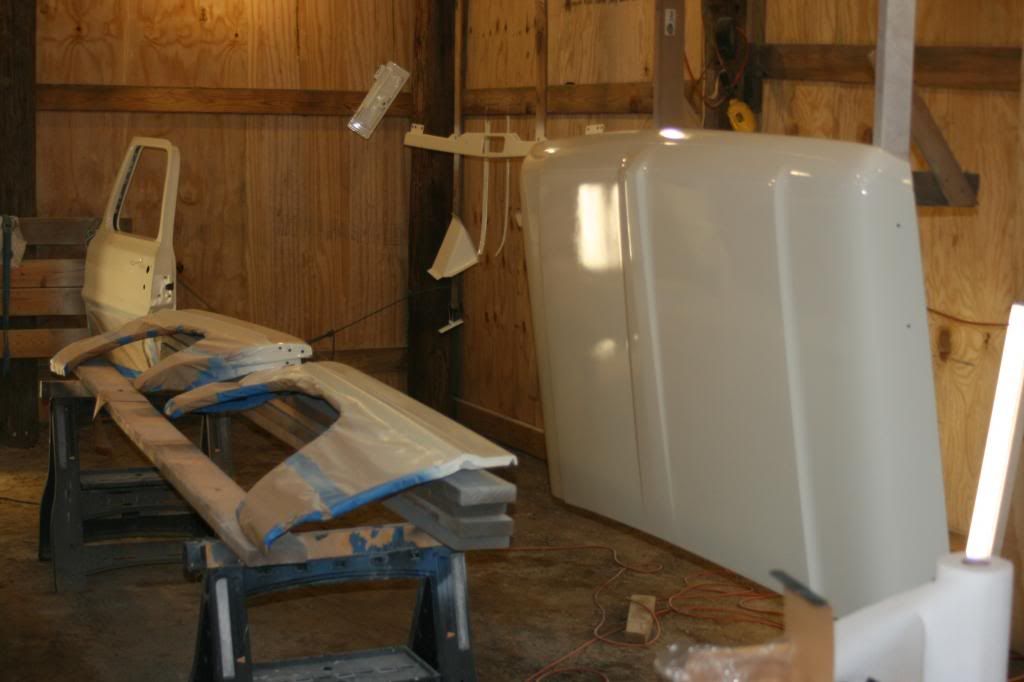
Before we spent a whole lot of time getting ready for painting, on Monday we fitted a carb spacer I got on ebay. The spacer I was using with just one big open hole did not work well with the Autolite 4100 carb. The OEM spacer that had 4 individual hole worked like a champ. This engine was pretty gutless but NOT ANYMORE!!!
This was also the first time I actually put gas in the aux tank (which is the only tank I'll have on this truck). Initially, we were getting no flow. I thought we had blown out the line a while back so I was leary of the new sending unit I installed. I pulled the rubber line off at the fuel pump and Dad blew air through it. He said, "Watch yourself, here it comes." Well, I got mud, dirt, and gas blown in my face. Got my face all washed off and thankfully didn't lose any eyes in the process!!! Hooked everything back up and got good flow the the carb... gas tank install and rebuild is a success. Oh yeah, my fuel guage works too!!!
In all this test driving down the end of my neighborhood road, I had an opportunity to check out the kickdown linkage. Works great!!!!
So, finally getting prepared to paint. We got everything masked off today. We added a few sheets of plywood to the front of the building to keep the sunlight down as it got later in the day. These are screwed to the bottom chord of the truss with the 'second tier' of boards clamped to the upper tier with C clamp. Very redneck but quite effective!
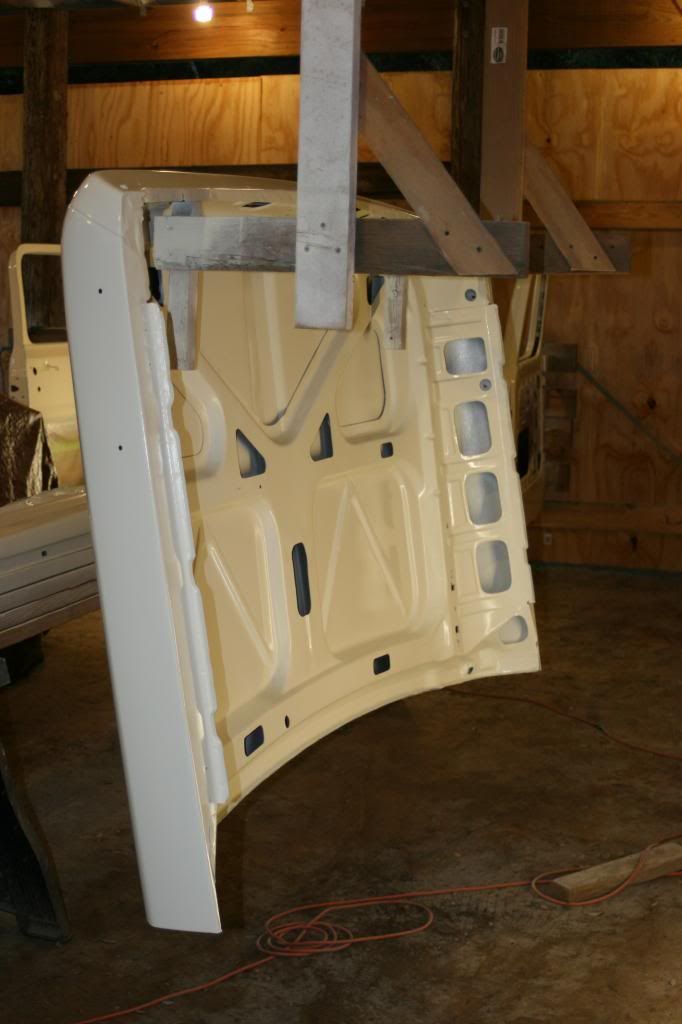
Underside of the hood painted. You can see how it hangs from our rack we fabricated.
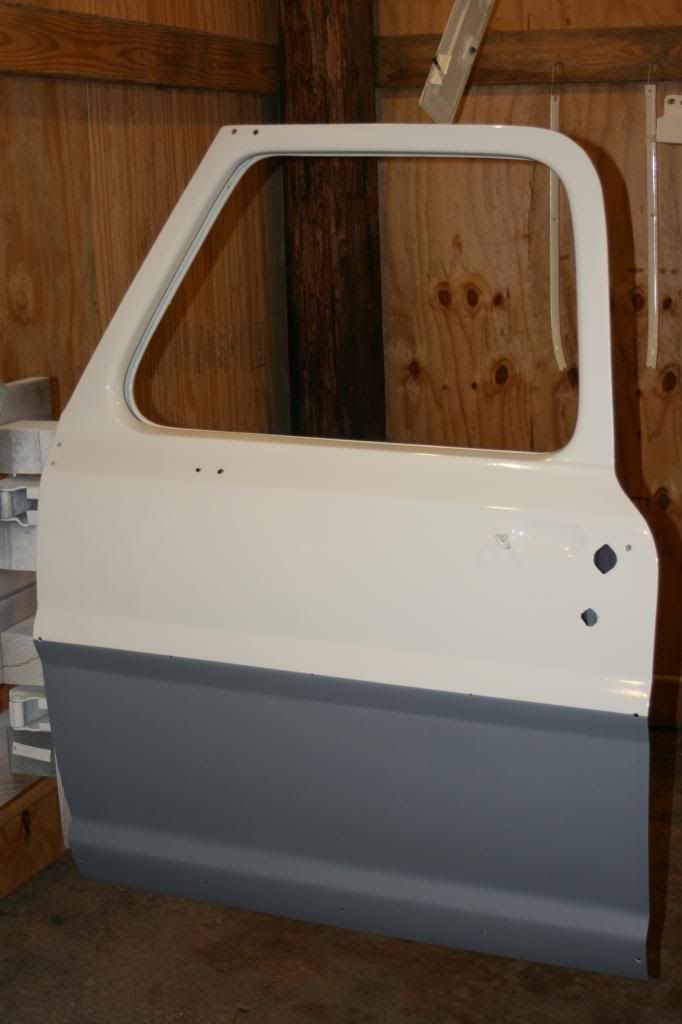
And heres how it turned out so far. The primer grey you see will be Inferno Red Metallic in a couple of days. Word to the wise... Paint the 'secondary' color first on your cab then you will have a whole lot less to mask off. We kinda did that part backwards but it'll be alright.
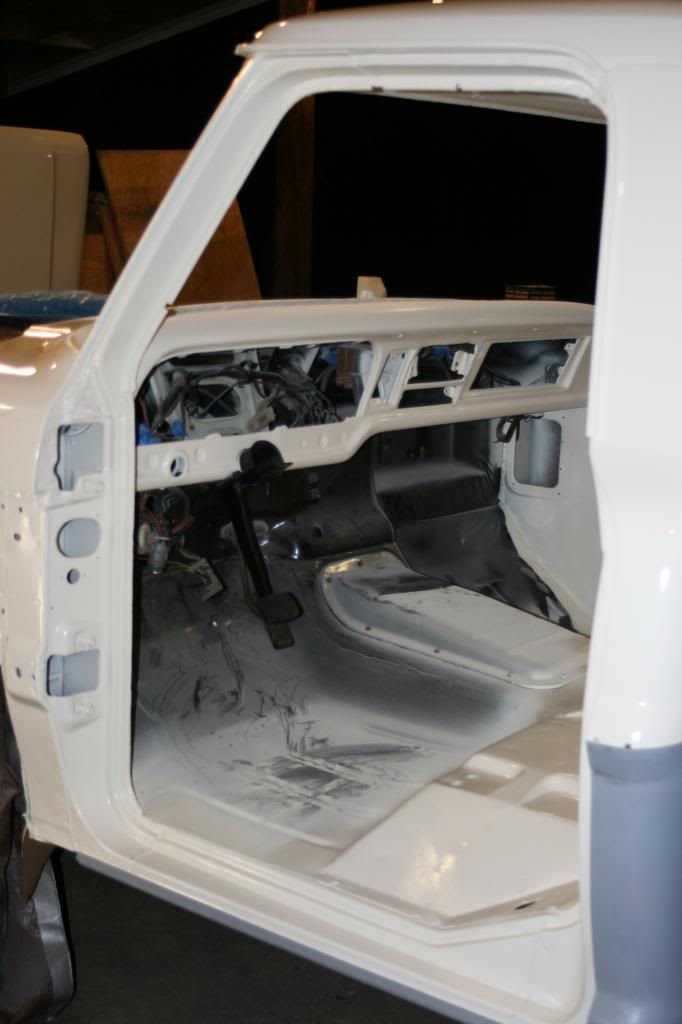
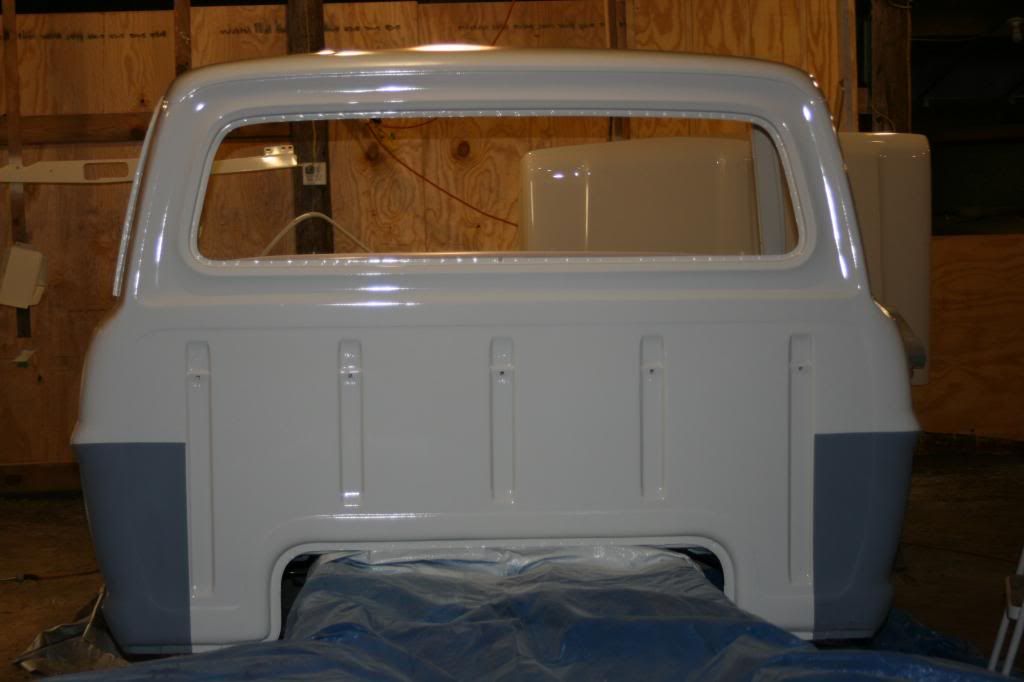
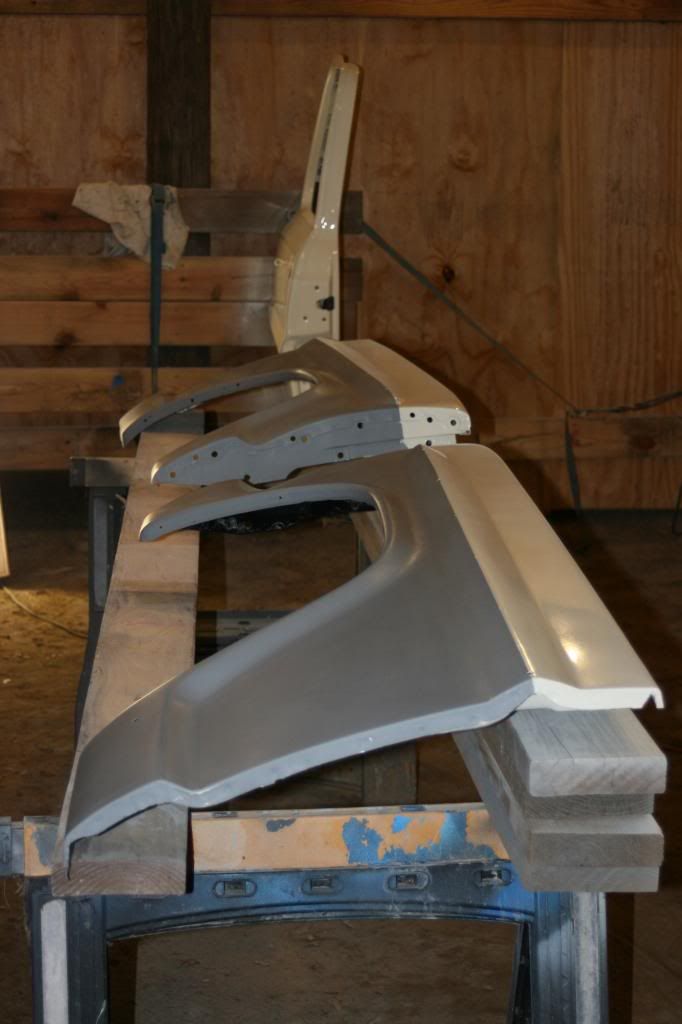
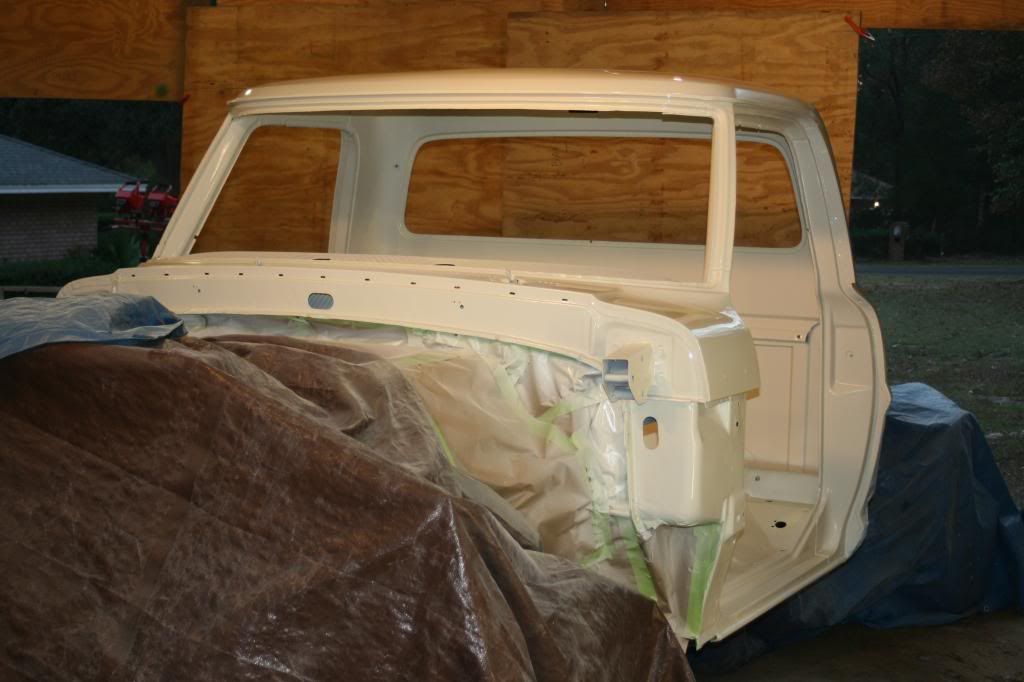
We used Kirker Urethane Single Stage. It laid down really nice. Gotta a few areas that will need to be buffed out but I'm really pleased with how it turned out. Today was an absolute perfect day to paint. One bug meandered into the 'booth' but I was able to extricate him from the hood with a toothpic. You can barely see where he landed. The temp was around 70 degrees with enough of a breeze to keep the fumes from accumulating in the area. Good day overall!!!
Pics of some red metallic in a few days. Stay tuned.
On Saturday, we put together a temporary paint booth. I have been stockpiling siding for the pole barn so we decided to temporarily put up some of it to keep windborne debris down to a minimum.

We also set up a system to hold the doors in place so they could be painted completely in one shot. We used several 2x6's , spacers, and long bolts to hang the doors to allow for movement. Without the spacers, they couldn't open.


For the next few days, we spent time getting all of the pieces to be painted layed out in an orderly fashion so we could just move station to station to keep things moving. We also spent alot of time rubbing down each part and filling little blemishes as necessary. Dad did alot of work on the top of the cab because of a few areas that he wasn't really satisfied with a couple of years ago when we prepped the cab initially.
Here's how things laid out. We decided to hang the hood from the trusses so it would be easier to paint both sides without having to handle the hood.

Before we spent a whole lot of time getting ready for painting, on Monday we fitted a carb spacer I got on ebay. The spacer I was using with just one big open hole did not work well with the Autolite 4100 carb. The OEM spacer that had 4 individual hole worked like a champ. This engine was pretty gutless but NOT ANYMORE!!!
This was also the first time I actually put gas in the aux tank (which is the only tank I'll have on this truck). Initially, we were getting no flow. I thought we had blown out the line a while back so I was leary of the new sending unit I installed. I pulled the rubber line off at the fuel pump and Dad blew air through it. He said, "Watch yourself, here it comes." Well, I got mud, dirt, and gas blown in my face. Got my face all washed off and thankfully didn't lose any eyes in the process!!! Hooked everything back up and got good flow the the carb... gas tank install and rebuild is a success. Oh yeah, my fuel guage works too!!!
In all this test driving down the end of my neighborhood road, I had an opportunity to check out the kickdown linkage. Works great!!!!
So, finally getting prepared to paint. We got everything masked off today. We added a few sheets of plywood to the front of the building to keep the sunlight down as it got later in the day. These are screwed to the bottom chord of the truss with the 'second tier' of boards clamped to the upper tier with C clamp. Very redneck but quite effective!

Underside of the hood painted. You can see how it hangs from our rack we fabricated.

And heres how it turned out so far. The primer grey you see will be Inferno Red Metallic in a couple of days. Word to the wise... Paint the 'secondary' color first on your cab then you will have a whole lot less to mask off. We kinda did that part backwards but it'll be alright.


We used Kirker Urethane Single Stage. It laid down really nice. Gotta a few areas that will need to be buffed out but I'm really pleased with how it turned out. Today was an absolute perfect day to paint. One bug meandered into the 'booth' but I was able to extricate him from the hood with a toothpic. You can barely see where he landed. The temp was around 70 degrees with enough of a breeze to keep the fumes from accumulating in the area. Good day overall!!!
Pics of some red metallic in a few days. Stay tuned.
Chris
72 F100 Stepside w/ 78 300 CID
Hedman Headers
Disc Brakes
Power Steering with 3 STILL on the tree
Comfy Crown Vic Seats
71 F250 PS, PB, AC, Auto, 390
Loooong way to go on this one!


72 F100 Stepside w/ 78 300 CID
Hedman Headers
Disc Brakes
Power Steering with 3 STILL on the tree
Comfy Crown Vic Seats
71 F250 PS, PB, AC, Auto, 390
Loooong way to go on this one!


- 72stepside
- Blue Oval Fan

- Posts: 537
- Joined: Tue May 09, 2006 10:31 pm
- Location: Florida, Milton
- Contact:
Re: Project "Uncle Fester"- 11/21 Thankful for Wimbledon White
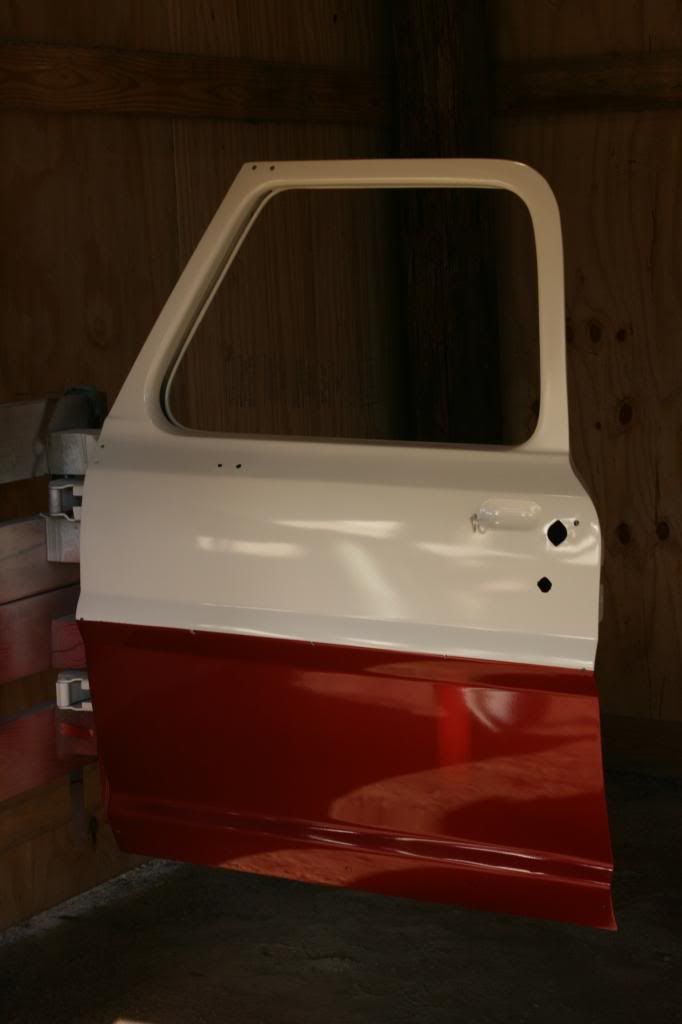
Behold... Inferno Red Metallic Paint!!!!! This paint actually went on better than the Wimbledon White.
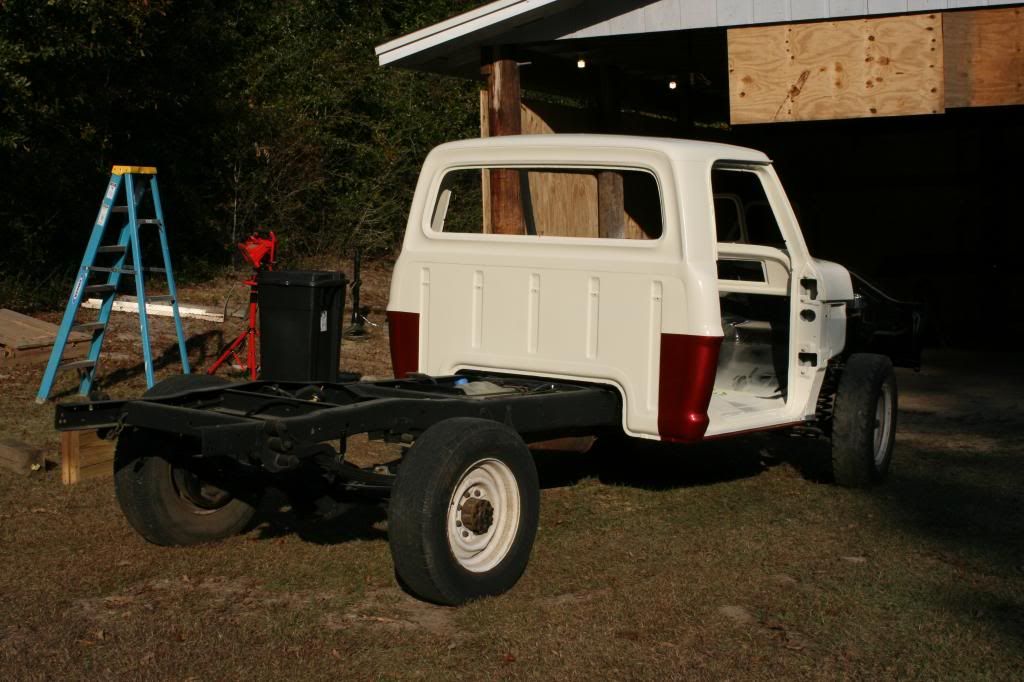
Masking the white lower hinge while in our mounting jig was NOT FUN!!!! I had to use lots of little pieces of tape to keep out the red.
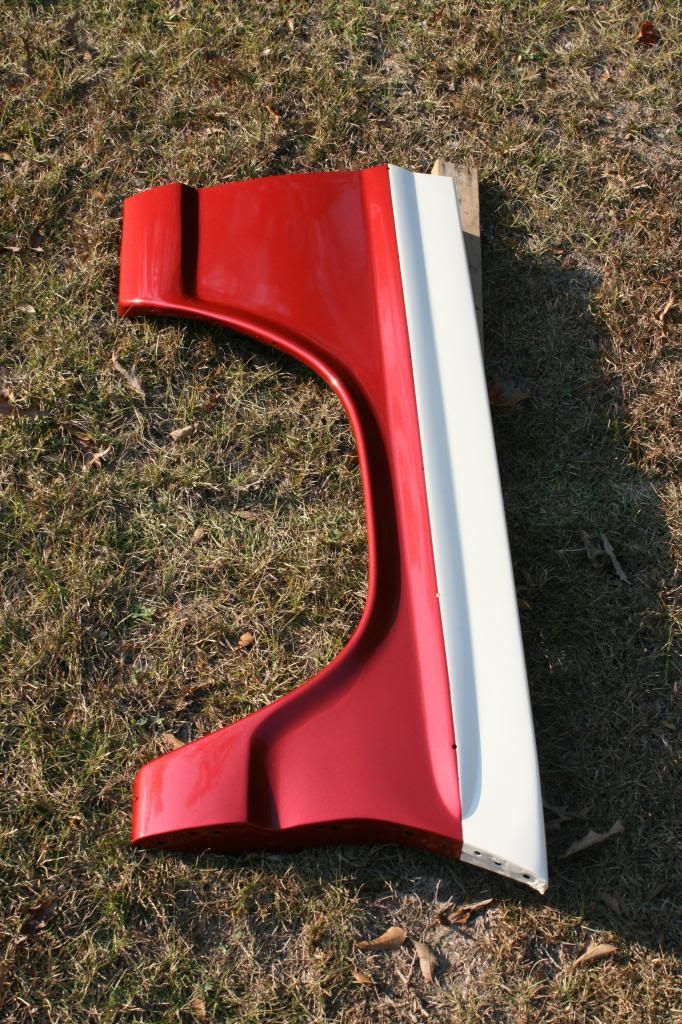
Here's a picture of a painted fender in the bright sun.
Also red are the metal door panels and the stone guard between the grille and front bumper. SPEC-FREAKIN-TACULAR is the only way to describe how they turned out. The red paint laid out so nice and even. I was concerned about the metallic streaking but it didn't at all.
Other odds and ends that I've worked on include painting the plastic grille inserts. I used Rustoleum Matte Nickel spray paint that I could only find at Lowes. I read about it on that 'other' Ford Truck website after doing a Google search. It looks just like the Ford Argent paint and covers really well. One can did both inserts. I'm gonna paint those on the F-100 soon. I still have to hit the mounting points with some flat black, then I'll get some pictures posted.
I also got an air cleaner housing from an early 60's Galaxie to go on my Autolite 4100 carb. I had to trim off some of the vertical portion of the kickdown linkage and work the air cleaner with a ball peen hammer just a bit to get it all to work out correctly. The air cleaner came to me in Ford Blue but I think I'm gonna go silver mainly because I have some POR-15 silver engine enamel left over and I think it will complement my silver rocker arm covers as well.
The stud that was on the carb wasn't quite long enough to accomodate the filter housing so I went to Autozone and got their air cleaner stud kit $4.99 and essentially lengthened the one on the carb to make it work.
I had a problem with the master cylinder cap leaking as was shown in some of the recent pics. It really made the master cylinder look like crap. I looked and I believe the top of the master cylinder wasn't machined really very smoothe so I got a long file and worked on it a bit. I cleaned up the gasket and put it all back on. We'll see what happens. Hope it works.
I forgot to mention the other day that the seat from the 90's truck that I'm gonna use didn't bolt right up like I had hoped. I got the 70's seat track put on the seat frame and found they came out to be a half inch narrower than the holes on the floor. I took the track off again and made the bolt holes in the track where it attaches to the seat into oval shapes (using Dremel tool) to allow for a little bit of adjustment. It didn't take much to get it right. We did all of this before painting the cab last Wednesday.
I wasn't happy with the way the black paint on the steering columnn turned out because I didn't sand it as much as I should have. That black paint really showed the areas where the old green paint had chipped and/or rusted. I spent some time tonight getting that right.
It's time to order up all of the weather stripping for the doors/windown/vent windows/windshield/back window. I also need a new instrument cluster bezel, glove box liner and other interior items to wrap it all up. That'll be a sizeable order.
I've decided to go with carpet throughout and saw where another memeber got a carpet set off ebay that they were really happy with. I figured that would be best to help with in-cab noise and since I don't plan on having 'muddy feet activities' associated with this truck, the carpet will be fine in leiu of a rubber mat.
Still lots to do but I am so happy to be making some progress. It is really turning out well. More later...

Masking the white lower hinge while in our mounting jig was NOT FUN!!!! I had to use lots of little pieces of tape to keep out the red.

Here's a picture of a painted fender in the bright sun.

Also red are the metal door panels and the stone guard between the grille and front bumper. SPEC-FREAKIN-TACULAR is the only way to describe how they turned out. The red paint laid out so nice and even. I was concerned about the metallic streaking but it didn't at all.
Other odds and ends that I've worked on include painting the plastic grille inserts. I used Rustoleum Matte Nickel spray paint that I could only find at Lowes. I read about it on that 'other' Ford Truck website after doing a Google search. It looks just like the Ford Argent paint and covers really well. One can did both inserts. I'm gonna paint those on the F-100 soon. I still have to hit the mounting points with some flat black, then I'll get some pictures posted.
I also got an air cleaner housing from an early 60's Galaxie to go on my Autolite 4100 carb. I had to trim off some of the vertical portion of the kickdown linkage and work the air cleaner with a ball peen hammer just a bit to get it all to work out correctly. The air cleaner came to me in Ford Blue but I think I'm gonna go silver mainly because I have some POR-15 silver engine enamel left over and I think it will complement my silver rocker arm covers as well.
The stud that was on the carb wasn't quite long enough to accomodate the filter housing so I went to Autozone and got their air cleaner stud kit $4.99 and essentially lengthened the one on the carb to make it work.
I had a problem with the master cylinder cap leaking as was shown in some of the recent pics. It really made the master cylinder look like crap. I looked and I believe the top of the master cylinder wasn't machined really very smoothe so I got a long file and worked on it a bit. I cleaned up the gasket and put it all back on. We'll see what happens. Hope it works.
I forgot to mention the other day that the seat from the 90's truck that I'm gonna use didn't bolt right up like I had hoped. I got the 70's seat track put on the seat frame and found they came out to be a half inch narrower than the holes on the floor. I took the track off again and made the bolt holes in the track where it attaches to the seat into oval shapes (using Dremel tool) to allow for a little bit of adjustment. It didn't take much to get it right. We did all of this before painting the cab last Wednesday.
I wasn't happy with the way the black paint on the steering columnn turned out because I didn't sand it as much as I should have. That black paint really showed the areas where the old green paint had chipped and/or rusted. I spent some time tonight getting that right.
It's time to order up all of the weather stripping for the doors/windown/vent windows/windshield/back window. I also need a new instrument cluster bezel, glove box liner and other interior items to wrap it all up. That'll be a sizeable order.
I've decided to go with carpet throughout and saw where another memeber got a carpet set off ebay that they were really happy with. I figured that would be best to help with in-cab noise and since I don't plan on having 'muddy feet activities' associated with this truck, the carpet will be fine in leiu of a rubber mat.
Still lots to do but I am so happy to be making some progress. It is really turning out well. More later...
Chris
72 F100 Stepside w/ 78 300 CID
Hedman Headers
Disc Brakes
Power Steering with 3 STILL on the tree
Comfy Crown Vic Seats
71 F250 PS, PB, AC, Auto, 390
Loooong way to go on this one!


72 F100 Stepside w/ 78 300 CID
Hedman Headers
Disc Brakes
Power Steering with 3 STILL on the tree
Comfy Crown Vic Seats
71 F250 PS, PB, AC, Auto, 390
Loooong way to go on this one!


-
caseyj10
- Preferred User

- Posts: 449
- Joined: Sun Nov 27, 2011 6:24 pm
- Location: Garland, TX
Re: Project "Uncle Fester"- 11/25 How about some Red Metallic!
Paint looks awesome! Your gunna have a beautiful bump. 
- 72stepside
- Blue Oval Fan

- Posts: 537
- Joined: Tue May 09, 2006 10:31 pm
- Location: Florida, Milton
- Contact:
Re: Project "Uncle Fester"- 11/25 How about some Red Metallic!
Been working this week to get a couple of items squared away before what will hopefully turn out to be another painting weekend for the bed.
I cleaned up my tailgate trim, masked it off, then painted it. I buffed all of the silver paint off of the letters so they'd shine. I used a semi-gloss black engine paint for the filler. I didn't want to go with a straight flat back because I was afraid it would fade even more and not look right in a few months. We'll see how it turns out. Not the best picture but you get the idea...

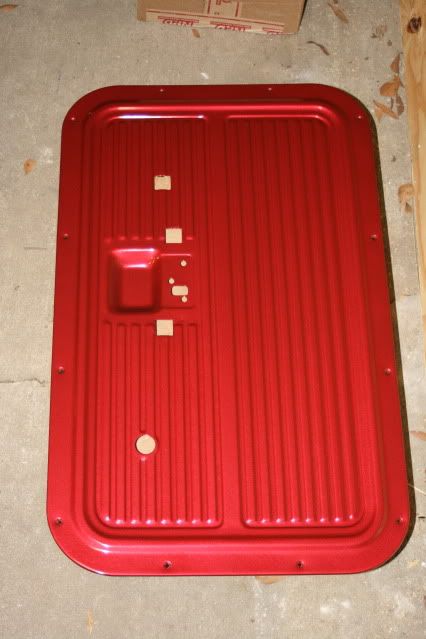
I forgot to post a photo of my painted door panels on my last entry. The flash really changes the appearance of the paint, but here ya go anyway...
While my grille inserts turned out really nice, it is difficult to take a good picture of them at night because the flash doesn't play well with the silver and the chrome strip so you'll just have to wait a bit
Placed a big order with MAC's the other night. They had 10% off all items, which essentially made the shipping free. My order has shipped so I should be getting it soon.
I did some checking today and found I could get a brand new windshield for $111 and get it and the rear window (already have a good one of them) installed for $75 labor by an installer that I know. That's over $100 less than the cheapest if I buy the windshield through a glass company and have them install it too.
More later...
I cleaned up my tailgate trim, masked it off, then painted it. I buffed all of the silver paint off of the letters so they'd shine. I used a semi-gloss black engine paint for the filler. I didn't want to go with a straight flat back because I was afraid it would fade even more and not look right in a few months. We'll see how it turns out. Not the best picture but you get the idea...

I forgot to post a photo of my painted door panels on my last entry. The flash really changes the appearance of the paint, but here ya go anyway...

While my grille inserts turned out really nice, it is difficult to take a good picture of them at night because the flash doesn't play well with the silver and the chrome strip so you'll just have to wait a bit
Placed a big order with MAC's the other night. They had 10% off all items, which essentially made the shipping free. My order has shipped so I should be getting it soon.
I did some checking today and found I could get a brand new windshield for $111 and get it and the rear window (already have a good one of them) installed for $75 labor by an installer that I know. That's over $100 less than the cheapest if I buy the windshield through a glass company and have them install it too.
More later...
Chris
72 F100 Stepside w/ 78 300 CID
Hedman Headers
Disc Brakes
Power Steering with 3 STILL on the tree
Comfy Crown Vic Seats
71 F250 PS, PB, AC, Auto, 390
Loooong way to go on this one!


72 F100 Stepside w/ 78 300 CID
Hedman Headers
Disc Brakes
Power Steering with 3 STILL on the tree
Comfy Crown Vic Seats
71 F250 PS, PB, AC, Auto, 390
Loooong way to go on this one!


- 72stepside
- Blue Oval Fan

- Posts: 537
- Joined: Tue May 09, 2006 10:31 pm
- Location: Florida, Milton
- Contact:
Re: Project "Uncle Fester"- 11/28 Little Update...
Everything that is supposed to be red is finally RED!!!!
Got the bed moved back to my house yesterday. Dad takes full advantage of his old iron to move the not so old iron around!!!
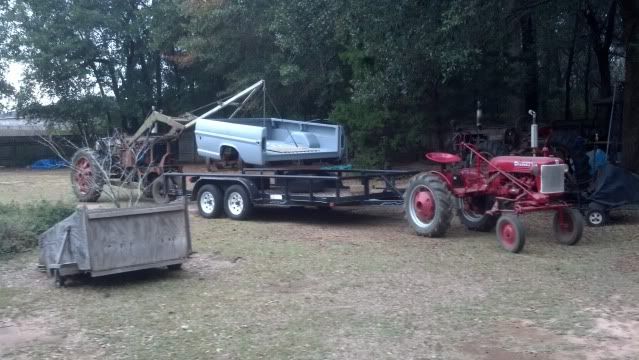
Once back at my house, we got everything squared away to get started painting this morning. We have been so fortunate to have good weather on painting days. December 1st and it was clear and in the mid-70's today.
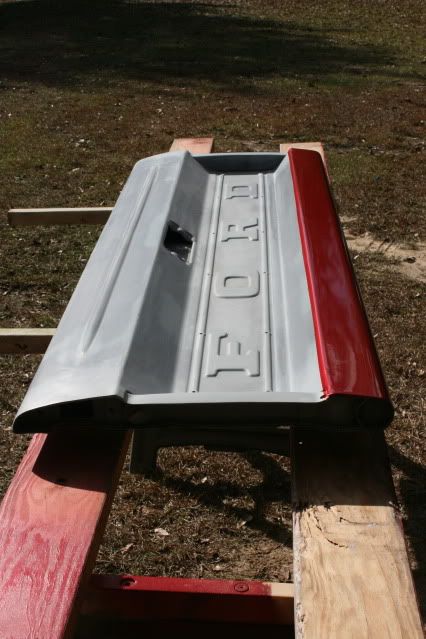
Here's the bed and tailgate all masked off and ready to go. Real masking paper is sooooo much better to use than newspaper!!!
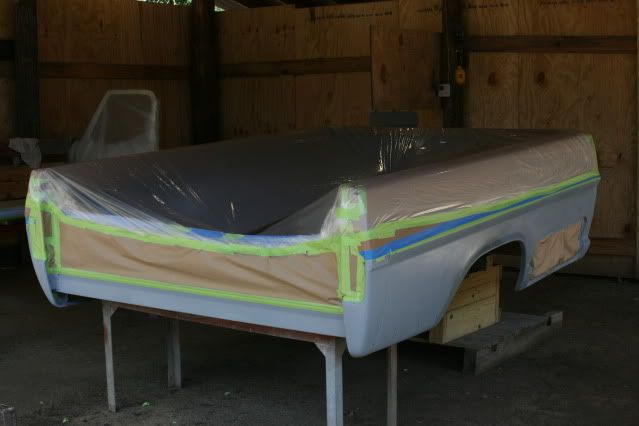
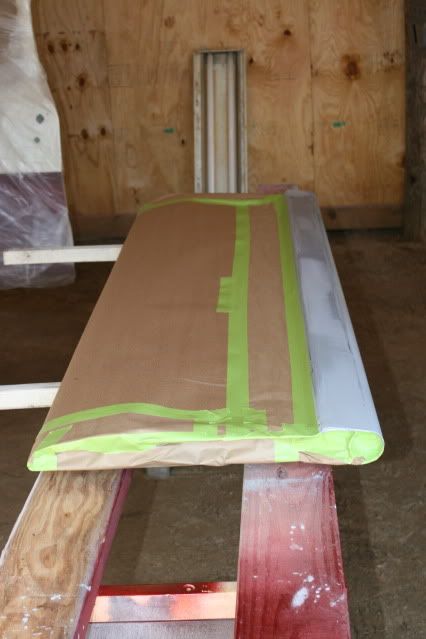
And here they are after some color!
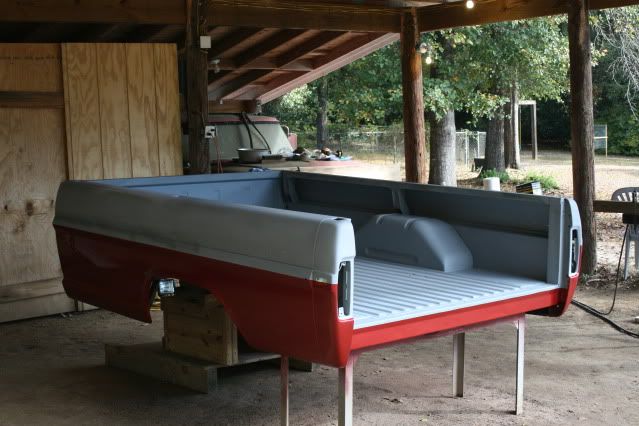
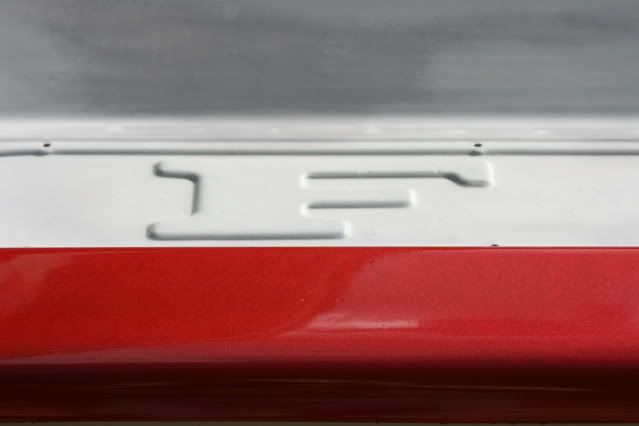
Tried to get a close up here so you could see that sparkling red paint.
We made the decision to wet sand the orange peel off the hood and try again. The hood was one of the first things painted and it really didn't come out very well. We got it all sanded down so we'll give it a go tomorrow after church, this time laid flat instead of hanging up. Stay tuned...
Got the bed moved back to my house yesterday. Dad takes full advantage of his old iron to move the not so old iron around!!!

Once back at my house, we got everything squared away to get started painting this morning. We have been so fortunate to have good weather on painting days. December 1st and it was clear and in the mid-70's today.
Here's the bed and tailgate all masked off and ready to go. Real masking paper is sooooo much better to use than newspaper!!!


And here they are after some color!


Tried to get a close up here so you could see that sparkling red paint.

We made the decision to wet sand the orange peel off the hood and try again. The hood was one of the first things painted and it really didn't come out very well. We got it all sanded down so we'll give it a go tomorrow after church, this time laid flat instead of hanging up. Stay tuned...
Chris
72 F100 Stepside w/ 78 300 CID
Hedman Headers
Disc Brakes
Power Steering with 3 STILL on the tree
Comfy Crown Vic Seats
71 F250 PS, PB, AC, Auto, 390
Loooong way to go on this one!


72 F100 Stepside w/ 78 300 CID
Hedman Headers
Disc Brakes
Power Steering with 3 STILL on the tree
Comfy Crown Vic Seats
71 F250 PS, PB, AC, Auto, 390
Loooong way to go on this one!


-
Zorm
- Blue Oval Fan

- Posts: 554
- Joined: Tue Apr 14, 2009 1:28 pm
- Location: Pensacola, Florida
Re: Project "Uncle Fester"- 12/1 All the Red is on!
looks real good, ton of work, got questions about your paint. I bought a few parts from your Dad about a year or 2 ago, I need to swing by and chat with both of you guys.
Just starting my build/restore on my Dad's ole 71 F250 camper special, been in the family since 72. I just moved her into the covered area my kids and I just completed. Half of my backyard is concrete so I covered a little less than half of that, 20x24 space. My 66 mustang and the 71 F250 fit nicely. I plan on building a "roll up paint booth" hanging from the rafters once I get to that stage. Funny, my youngest, my daughter, wants to help with and drive the truck when its done and my middle son, wants the stang, right now welding in one of the floor pans on the car.
will keep watching this one though
1971 F250 Camper Special, family owned since 1972
1983 Cherokee, last of the big ones, bought in Italy, family owned since 1998
1965 Corvair Corsa Convertible, 140 engine, 4 speed.
HE guides my path, forgives me when I stray and lights my life
1983 Cherokee, last of the big ones, bought in Italy, family owned since 1998
1965 Corvair Corsa Convertible, 140 engine, 4 speed.
HE guides my path, forgives me when I stray and lights my life